You’ve read and heard about SQL Server Integration Services and now have a use for the technology. But every time you try to learn more about SSIS you hit an obstacle. “Why can’t someone write a practical tutorial;” you wonder, “one that gets me started quickly and then explains the more advanced concepts?”
You’ve come to the right place! I am here to help.
You can use SSIS to:
- Perform ETL (Extract, Transform, and Load) operations
- Transfer data
- Copy database objects
- Perform FTP operations
- Work with files
“I’ve Never Used SSIS Before…”
Are you sure about that? Do you recognize this screen?
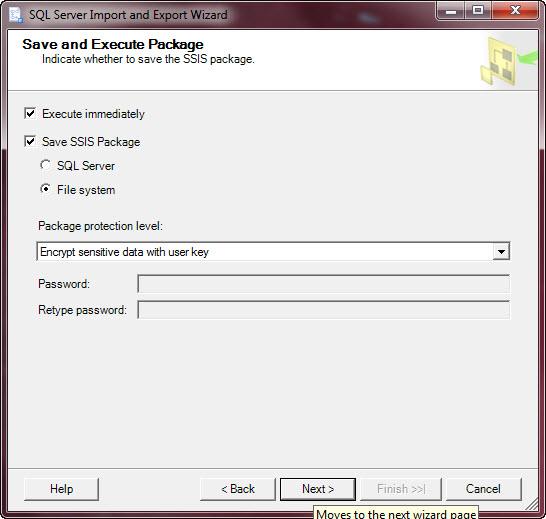
This is a screenshot from the SQL Server Import and Export Wizard. If you’ve used this wizard, you’ve used SSIS. One clue is the “Save SSIS Package” checkbox. It’s unchecked by default and most people just breeze on to the next step. But if you check it as shown here you can save the SSIS package and examine it later.
How about this screen?
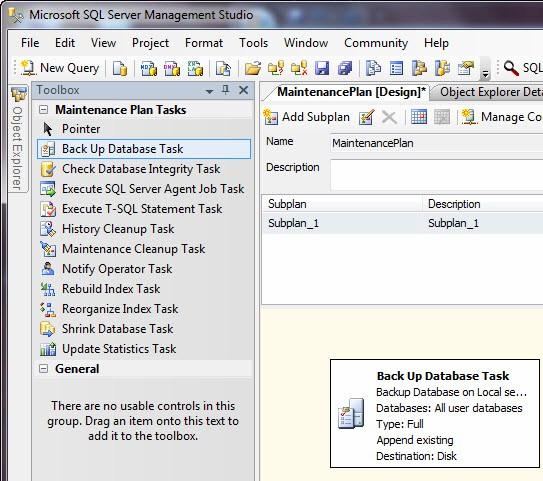
This is the Maintenance Plan designer built into SQL Server Management Studio. Guess what? Maintenance plans are SSIS packages. You can do an awful lot with SSIS but first, a brief history lesson.
Is SQL Server Integration Services Merely Data Transformation Services 2.0?
SSIS is not the new version of Data Transformation Services (DTS); it’s a replacement for DTS. It is a brand new application – built, not ported or migrated, from the ground up. That means upgrading DTS packages to SSIS is harder than it looks.
What’s SSIS For?
SSIS is built to perform data integration, assist with database administration, and facilitate business intelligence. Data integration consists primarily of moving data from Point A to Point B; or from some source to some destination. The sources and destinations can be databases, but they do not have to be databases. SSIS ships with the ability to connect to many data sources and destinations including:
- OLE DB
- ADO
- ADO.Net
- Excel
- Flat File
In addition to the built-in connections, SSIS exposes classes that allow developers to create custom Connection Managers.
Database Administration
Sometimes you just need to transfer data. The Import and Export Wizard can be used to migrate data between Excel and SQL Server tables, Flat Files and ODBC connections, and more. It allows data transfer at the table or query level, giving DBAs the expanded ability to aggregate or otherwise transform data as it is migrated.
A good example is creating or refreshing a test database. Production data (or a sample of production data) is often used to validate changes. The SQL Server Import and Export Wizard uses SQL Server Integration Services to move data between data sources and destinations.
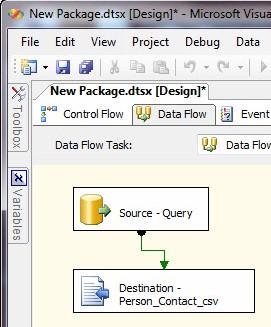
If you check the “Save SSIS Package” checkbox, you can save – and later view the SSIS package created by the Import and Export Wizard:
Business Intelligence
The primary use of data integration tools in Business Intelligence (BI) is for Extract, Transform, and Load (ETL) operations. SQL Server Integration Services is built to perform ETL. At the heart of SSIS we find the Data Flow Task, with a design philosophy aptly described as “pipeline architecture,” the Data Flow Task is a powerful and flexible data pump.
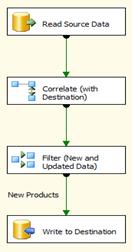
SSIS lends itself to design patterns. One popular design pattern for SSIS loads is the Incremental Load, where only new or updated data is moved from the source to the destination table. One method of achieving an incremental load is diagrammed below:
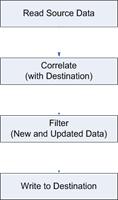
In an SQL Server Integration Services Data Flow, this pattern may be implemented thus:
Separation of Duties
Unlike Data Transformation Services and other data integration products, SQL Server Integration Services separates workflow and data flow operations. The Control Flow manages workflow in a synchronous manner; completing each task in order before moving to the next:
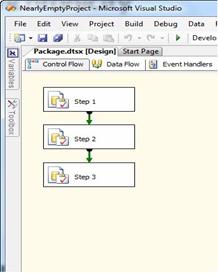
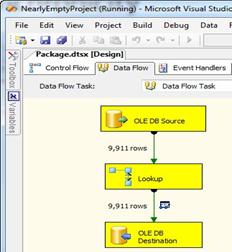
Concurrency is accomplished in the Control Flow by creating multiple execution paths. The Data Flow acquires, transforms, and then loads “chunks” of data; one buffer at a time. At any time during Data Flow operation there can be rows not read into the data flow pipeline, rows in the process of being transformed by Data Flow components, and rows already processed and loaded into the destination:
Play Along at Home!
Open Business Intelligence Development Studio – or BIDS – by clicking StartàAll ProgramsàMicrosoft SQL Server 2008 R2 (or the version of Microsoft SQL Server you currently have installed)àSQL Server Business Intelligence Development Studio:
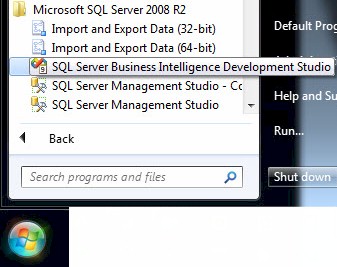
BIDS is a version of Microsoft Visual Studio, which is Microsoft’s Integrated Development Environment, or IDE. Many development platforms and languages share the Visual Studio IDE. Examples include Microsoft Visual C# and Microsoft Visual Basic. BIDS, the version of the VS IDE that ships with SQL Server, supports development in the SQL Server Business Intelligence stack.
Once BIDS is open, create a SSIS project by clicking File-->New-->Project:

When the New Project window displays, select "Business Intelligence Projects" from the "Project types" list located in the upper left portion of the New Project window:

As mentioned earlier, Visual Studio (and BIDS) support many languages and development platforms. Project Types contains a list of installed languages and platforms from which you may choose. If you install other platforms and languages, they will be added to this list.
Once you select a project type, the available project type templates appear in the Templates list. Select "Integration Services Project" from the upper right side of the New Project window:

In the lower section of the New Project window, enter "My_First_SSIS_Project" as the project name in the Name textbox. You can accept the default location of projects in the Documents folder or click the Browse button to select another location for this SSIS project:

As you enter the Project Name, your typing is duplicated in the Solution Name textbox. You can alter the Solution Name text to give the solution a different name. Once you type in the Solution Name textbox, the "link" between what you type in the Project Name textbox and Solution Name textbox is severed.
When Visual Studio or BIDS builds a solution, it creates a three-tiered structure of Solution, Project, and Project Artifacts:
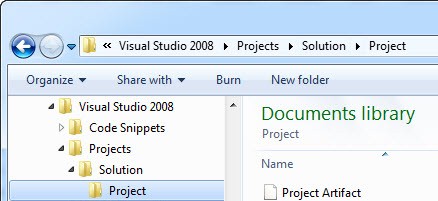
Solutions contain one or more Projects; Projects contain one of more Project Artifacts.
The "Create directory for solution" checkbox in the New Project window adds a folder above the project folder in the file system to contain Visual Studio artifacts related to the Visual Studio solution; the solution file, for example, contains information about the projects in the solution.
If you have a source control (or version control) client installed and configured, you can opt to add the solution to source control when you create it by checking the "Add to Source Control" checkbox.
When you click the OK button, your solution containing the My_First_SSIS_Project project is created!
Conclusion
In this article we’ve provided an introduction to SQL Server Integration Services, and an overview of its architecture. In upcoming articles, we’ll dive into details of how SSIS works. We’re going to start with the basics and build your skills as we go. It’s going to be fun!


