Azure Data Lakes support the creation of database objects, in a manner very similar to SQL Server. Objects such as databases, tables, stored procedures and functions can all be created using the U-SQL language. In this article, we’ll look at how to create databases, schemas and tables.
Before You Start
In our previous tutorial, we were introduced to the Visual Studio Data Lake Tools (we’d been using the Azure Portal until this point). We will be making heavy use of Visual Studio for the rest of this series, so refer back if you haven’t installed this yet. Once you’ve done that, download the files we’ll be using for the rest of the series, contained in a ZIP file. Unzip it to a location on your computer (e.g. c:\temp). All done? Cool, let’s go!
A Brief Word About the Files
The files we are using represent postcode data from the United Kingdom. A postcode represents a street or road, and can be broken down into multiple parts. The UK’s Office of National Statistics regularly releases data sets that can be downloaded for use in your own projects. Some of these data sets involve postcode data, allowing you to see the number of households per postcode, motor vehicle accidents and so on. Two of the files allow us to match postcodes to districts and counties (you can think of a county as the UK equivalent of a state in North America). The big postcode file contains all (or most) UK postcodes with associated information, whilst the postcode estimate files contain information about the estimated number of people living in particular postcodes.
What We’re Going to Do
We’re going to create a database to hold our postcode data. In this database, we’ll create a schema and a few tables. We’ll briefly take a look at indexes, although this is something we’ll delve into properly in the next article of the series. The aim of this tutorial is to introduce you to the idea of structured data (data in tables, as opposed to unstructured data, which is data held in files).
Creating a New Project
We’ll start by creating a new U-SQL project. We’ll run everything locally initially, and will execute our scripts in Azure as a final step. Open up Visual Studio and create a new U-SQL Project (File > New > Project). Once the project dialog has appeared, select U-SQL from the installed templates on the left. Then select the U-SQL Project in the main window.
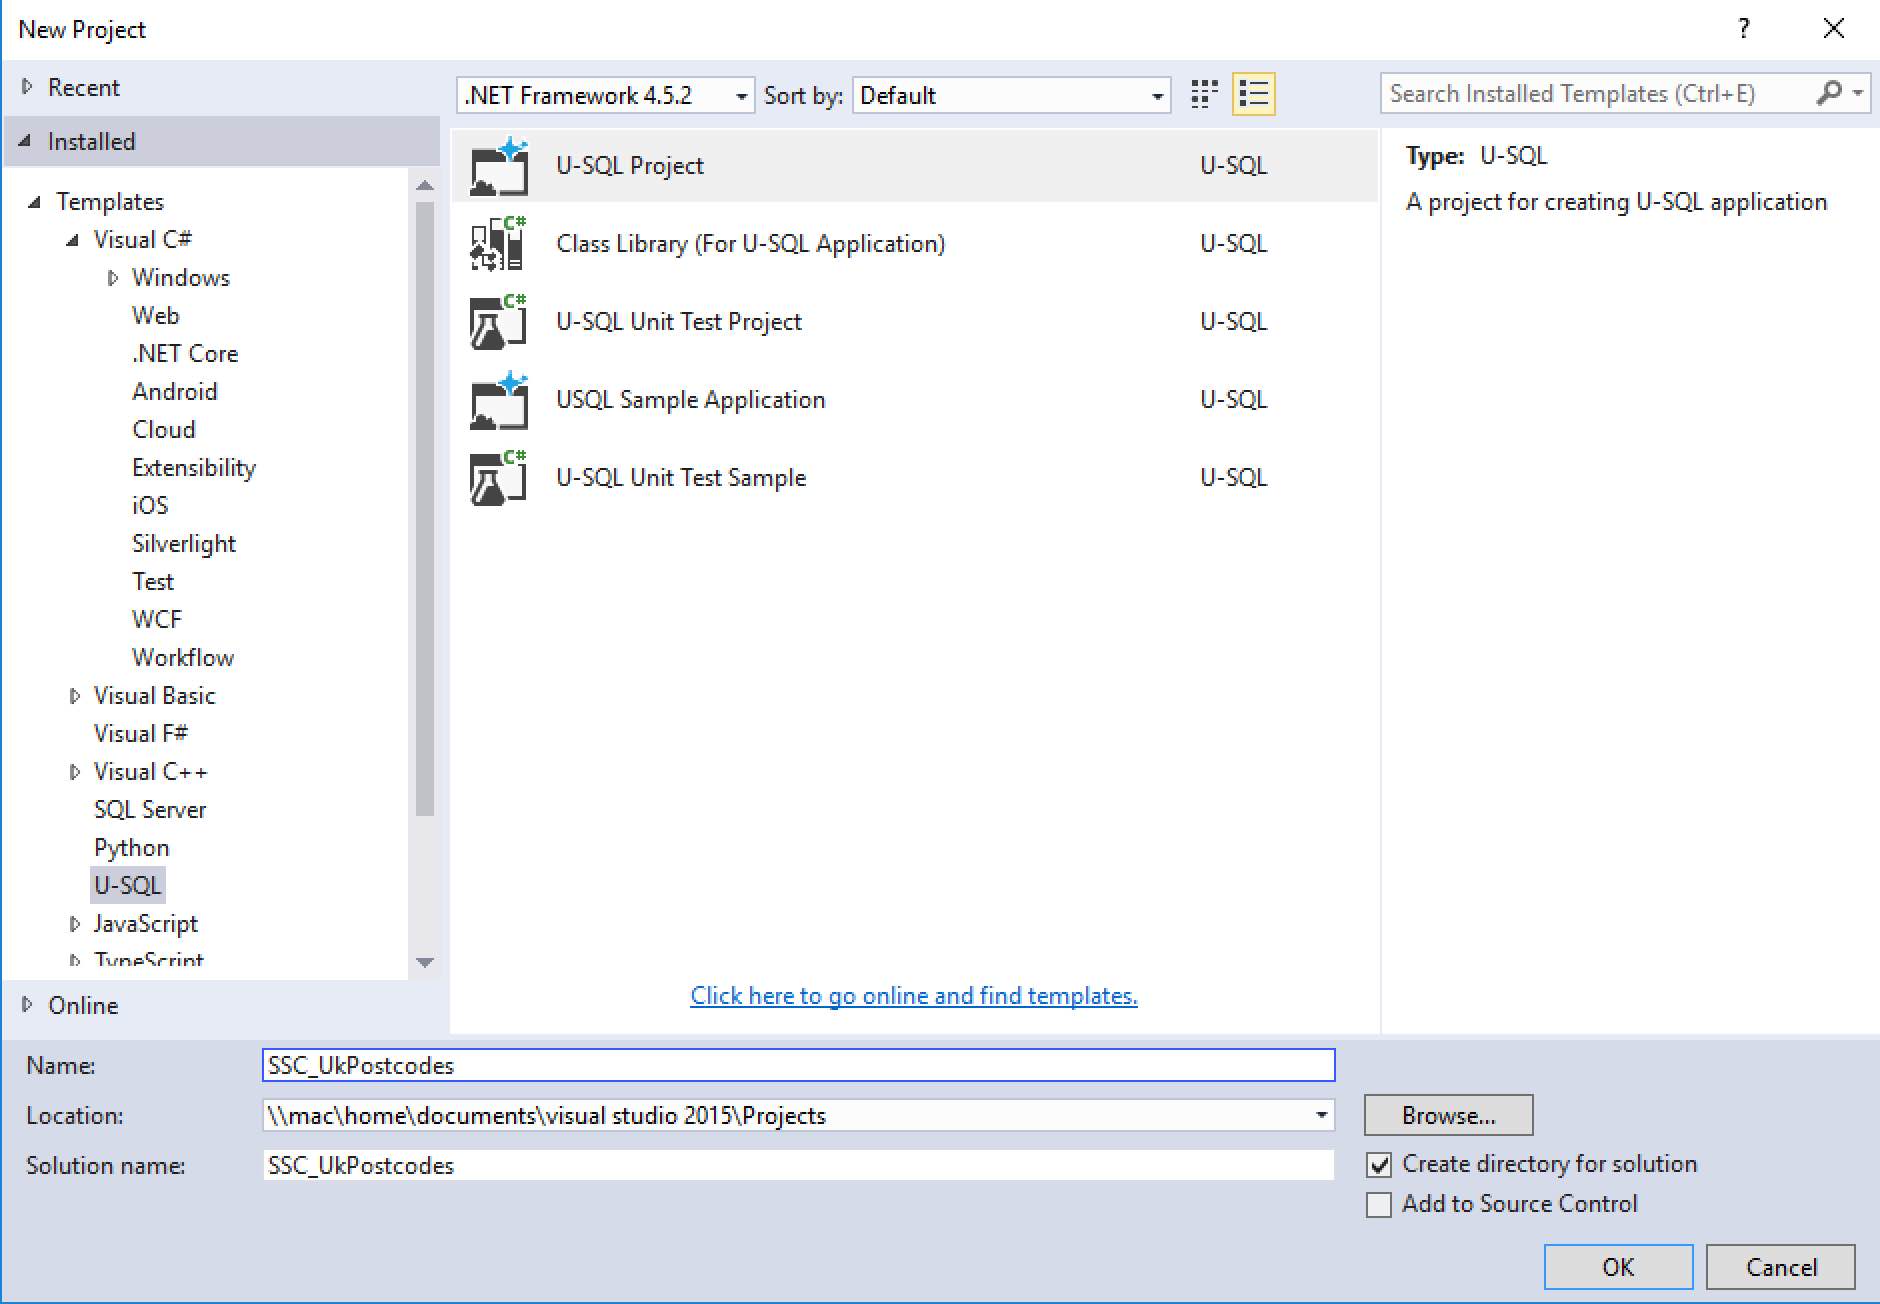
Click in the Name box and call the project SSC_UkPostcodes, and click OK to create the project. Once the project has opened up in Visual Studio, it will have one default script file included with it (you can see this in the Solution Explorer on the right-hand side of the screen – it’s called Script.usql). Rename this script to 010 Create UkPostcodes Database.usql.
Adding Files to the Project
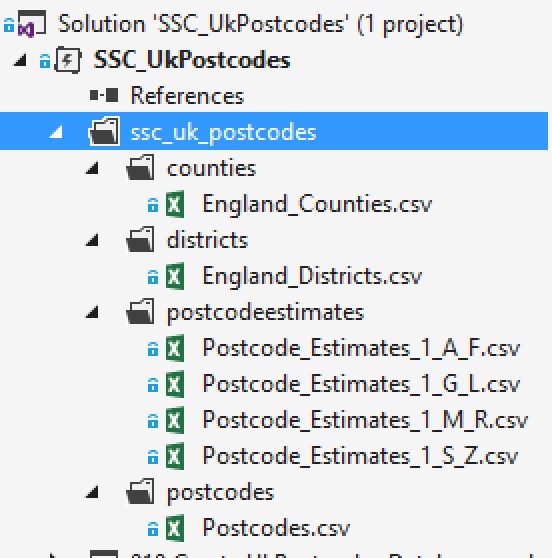
Remember those files we downloaded at the start of this article? We need to add them to the Visual Studio project. In Solution Explorer, right-click on the project name SSC_UkPostcodes (there will be two items with this name – you want the second one, the top one represents the solution file). On the context menu that appears, go to Add and click New Folder. Call the folder ssc_uk_postcodes. Within this folder, create four more folders – counties, districts, postcodeestimates and postcodes.
With the folders created, we can add files to them. Right-click on the counties folder, go to Add and select Add Existing Item. Browse to the location where you saved the downloaded files (e.g. c:\temp) and add the file England_Counties.csv. By the time you’ve finished, the folder in Visual Studio should look like this:
Now we’re ready to start building.
Creating a Database
It might shock you to learn that we are going to type a CREATE DATABASE statement into this script. Open it up and type in the following:
CREATE DATABASE IF NOT EXISTS UkPostcodes;
That’s it. Honestly (don’t forget the semi-colon though - every statement must be terminated with it). That’s all you need to create a database in U-SQL (actually, it’s pretty much all you need to create a database in SQL Server, but that’s another story). Apart from the IF NOT EXISTS clause, this looks exactly the same as T-SQL. The difference is, CREATE DATABASE in T-SQL has loads of options – you can create multiple files, create logs, specify different options and so on. There are only two options here. You give the database a name, and you optionally specify IF NOT EXISTS. That’s your lot!
If you do not specify the existence clause, the statement will still succeed, but will not affect the database in any way.
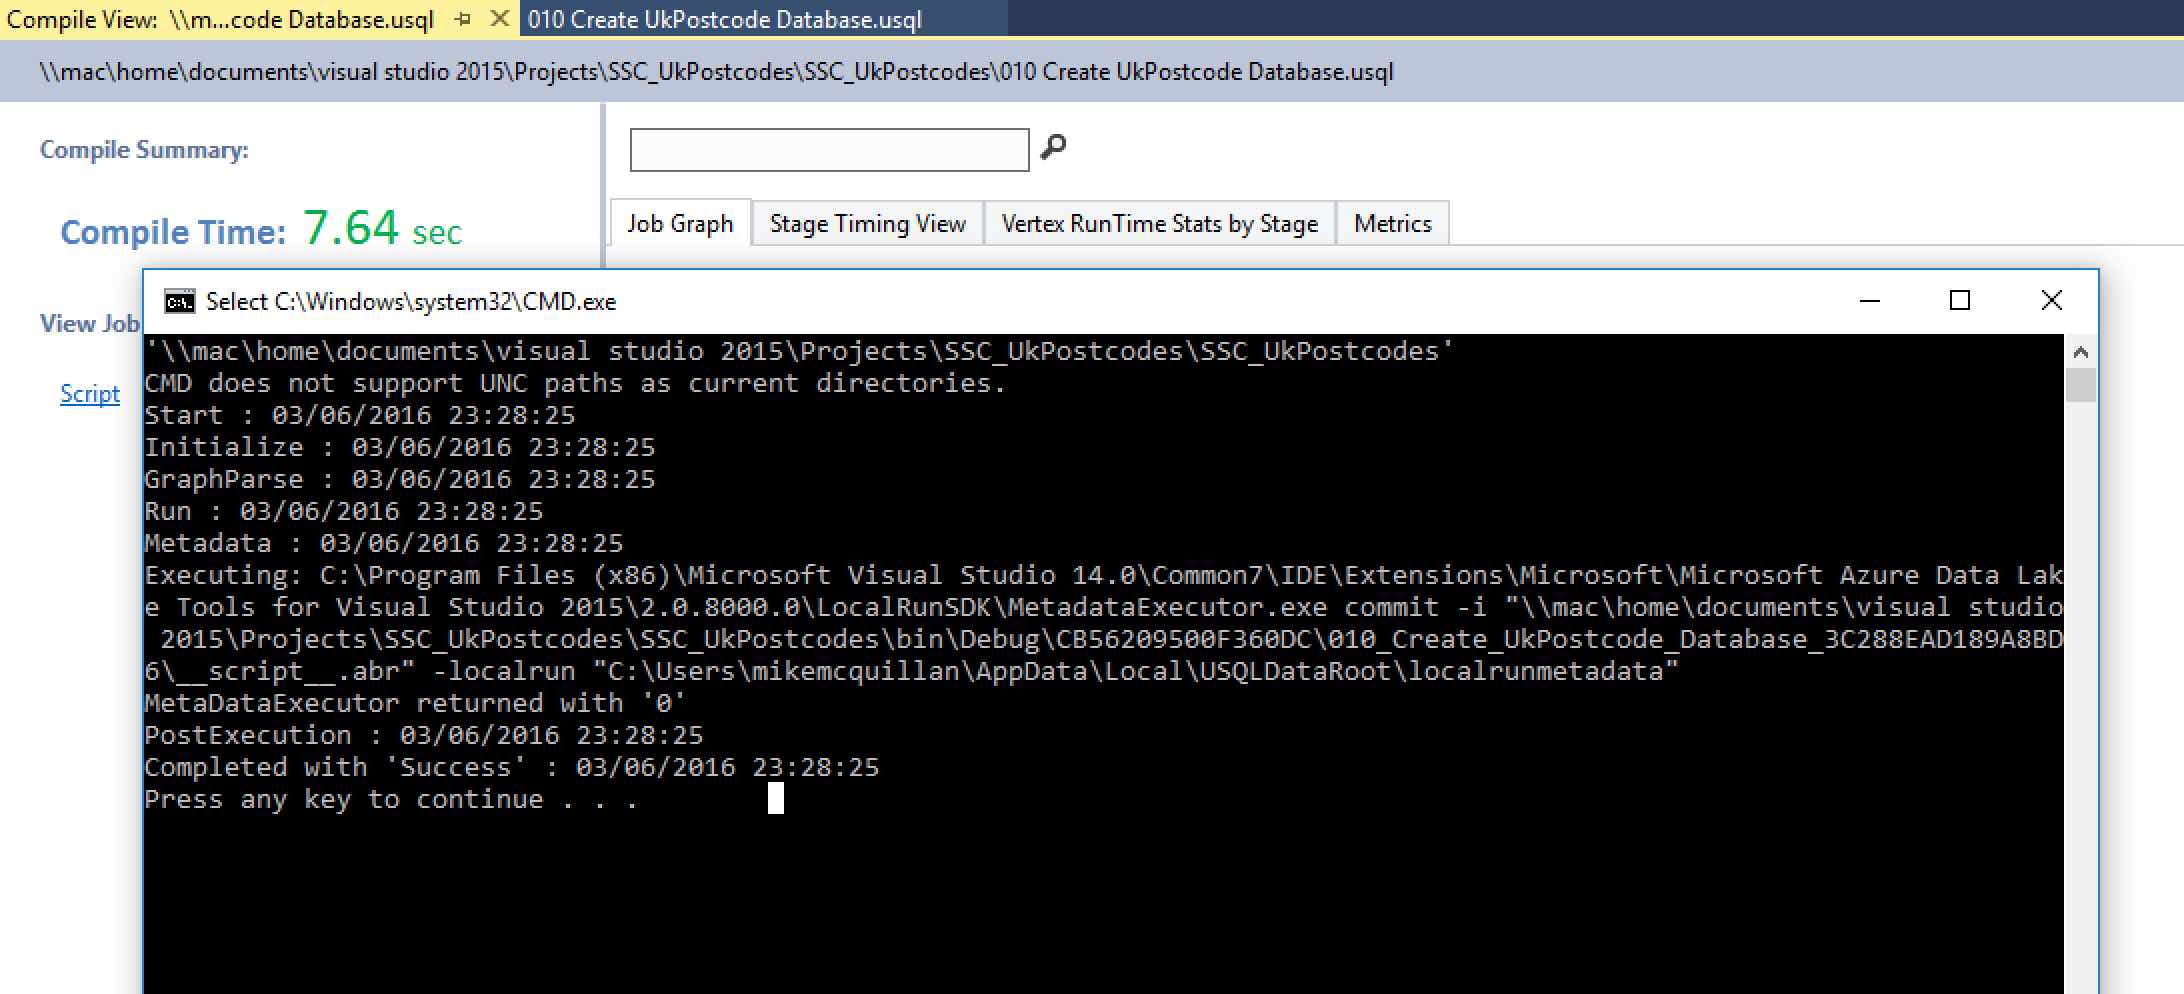
Run this script by clicking the Submit button on the toolbar (this is shown immediately above the code in your script – more on the toolbar in a moment). After a short delay you’ll see a success message pop up in a command window, with the Compile View (this gives you, depending upon the type of script, an execution plan-type view) displayed behind it.
So, we’ve created a database. Where? How do we prove it? Slow down, your questions will be answered! When we introduced Visual Studio into this series, we took a look at the U-SQL toolbar, which you can see at the top of each script:

See the first drop-down box that contains (Local)? That’s the Azure Data Lake Analytics account you’re currently running against (this is actually your local machine). The next drop-down box is the database context you’re using (master, which is built into every Analytics account). The last drop-down box showing dbo shows the schema context you’re running against.
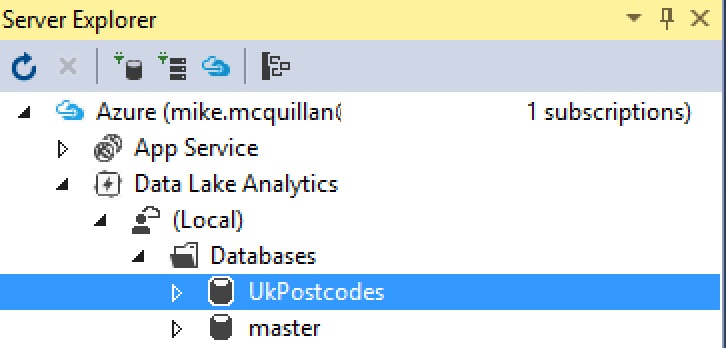
So, the database should have been created under our local account. Let’s prove that. On the left-hand side of the screen should be the Server Explorer (View > Server Explorer if you can’t see it). Once you can see this, you should see Azure at the top of the list (if you cannot see this, refer to article 4 for instructions on connecting Visual Studio to Azure). Expand Data Lake Analytics, then (Local), then Databases. You should now see your UkPostcodes database alongside master. Hurrah!
What is the Database, and What’s in it?
Well, to answer the first question…the database isn’t really a database. It’s a nice, snug term to make all of us database folks feel safe and warm. Other systems like Hive and Google BigQuery use similar terminology. We’re safe to think of it as a database though. It’s really a context, that allows us to group related objects together in a meaningful way.
The second question asked what’s in the database? Erm, not a lot at the moment. But if you expand it in the Server Explorer you’ll see a tantalising hint of the types of object we can create.
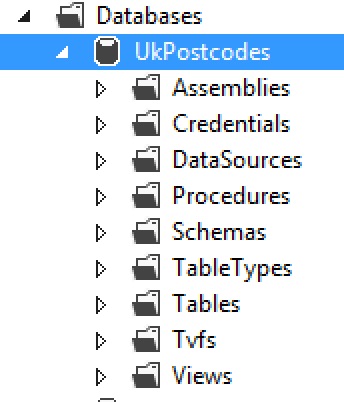
If you’re coming to this from the SQL Server world, many of these words will look familiar. Schemas, Procedures, Tables, Views, Tvfs…we’ll delve into many of these areas as the series progresses.
Dropping the Database
If necessary, we can drop the database. Again, this looks very similar to T-SQL (SQL Server 2016 introduces the DROP IF EXISTS clause):
DROP DATABASE IF EXISTS UkPostcodes;
There are no options other than the database name and the existence check. If the IF EXISTS clause is not specified and the database name is not provided, the script will raise an error.
Don’t drop the database! Or, at least, if you do please recreate it. You need it for the rest of this tutorial!
Schemas
Not only does U-SQL support the concept of databases, it also supports the concept of schemas. Schemas allow you to group similar objects together within the database. As with SQL Server, dbo is provided as a default schema. Creating a schema is very similar to creating a database. Add a new script to the project by right-clicking on the SSC_UkPostcodes project name in the Solution Explorer. Then click Add > New Item and U-SQL Script will be displayed within the Add New Item dialog box. Call the new script 020 Create Postcodes Schema.usql. Once done, type in the script below.
USE UkPostcodes;

CREATE SCHEMA IF NOT EXISTS Postcodes;
You’ve no doubt noticed the USE statement – yes, U-SQL supports this, allowing you to set the context. It’s slightly different to the T-SQL version, as we’ll see imminently.
Run the script by clicking the Submit button on the toolbar. The schema will be created and can be seen by expanding the Schemas node under the UkPostcodes database in the Server Explorer. You may need to refresh your Server Explorer to see this by right-clicking the database node and then click Refresh.
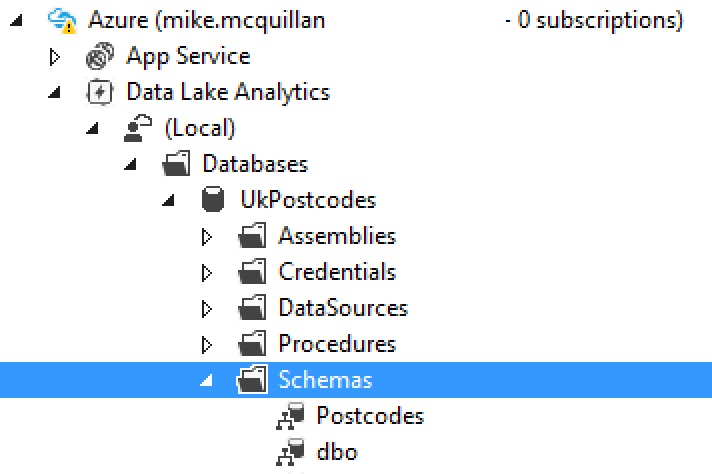
The code for dropping a schema looks very similar to the T-SQL version:
USE UkPostcodes;

DROP SCHEMA IF EXISTS Postcodes;
As with the CREATE DATABASE statements, there are no options other than the IF NOT EXISTS/IF EXISTS statements.
WARNING!: DROP SCHEMA works in a very different manner to its T-SQL equivalent. If you drop the schema, any objects contained within that schema will also be dropped, including tables. You won’t see an error and you won’t be warned – everything will be gone. Use with care!
Tables
U-SQL supports two types of table – managed tables and external tables. We’ll look at managed tables in this article, which act in a similar way to good old SQL Server tables. External tables have their schema defined within your database, but their data lives somewhere else in Azure (in an Azure SQL Database, for example). We'll look at those later in the series. For now, when we refer to tables we’re talking about managed tables.
U-SQL tables appear to be superficially similar to a SQL Server table, but work a bit differently behind the scenes. A U-SQL table consists of four things:
- A name
- Columns
- A clustered index
- A partitioning scheme
You can create a table without an index, but you cannot insert data into it until the index is created. Furthermore, you cannot create an index without a partitioning scheme. With that in mind, let’s look at a simple CREATE TABLE statement. As we did with the schema, add a new script to your Visual Studio project, calling it 030 Create Counties Table.usql.
U-SQL supports three-part table names, in the format: Database.Schema.TableName
If you don’t want to use this, utilise the USE statement instead. You can specify the USE statement for both databases and schemas. Type this script (or paste it) into your empty script file (if you disagree with me using the plural “Counties”, feel free to use the singular “County”). This script also shows how comments can be added to U-SQL code.
USE DATABASE UkPostcodes;      // DATABASE keyword is optional
USE SCHEMA Postcodes;          // SCHEMA keyword is required for schemas

CREATE TABLE IF NOT EXISTS Counties
(
CountyCode string,
CountyName string
);
DON’T RUN THIS YET! If you do, you’ll create a table you cannot add data to. Go ahead and try it if you don’t believe me. The table will be created but you’ll hit an error when you attempt to load data into the table. U-SQL needs the index and partition scheme so it can figure out a) where to put the data and b) how to retrieve the data.
What we have done so far is fulfil two of the four table creation criteria – we’ve given it a name, and a set of columns. Speaking of the columns, take a closer look. The C# data types we were introduced to in Level 2 are back! Here’s a question for you. Do you think the data types above will allow NULL values?
NULL Values
Nullability in U-SQL is different to T-SQL. When creating a T-SQL table, a flag on the column determines whether it allows NULL values or not. With U-SQL, the data type determines the nullability. So the answer to the question is yes, at the moment the data types used will allow NULL values. This is because strings in C# inherently support NULL values. Other data types don’t though – an integer, for example. If your files contain NULL integer values, they will fail to load (you can work around this). To solve the issue, we have to specify the data type with the C# null operator. For example, if we had a column defined as:
Total int
NULL values would not be accepted. But if we use the nullable integer type instead, they will:
Total int?
That’s right, the ? defines whether a data type is nullable or not in C#. You should understand that in C#, int is a different data type to int?, which is very different to how data types work in SQL Server. VARCHAR(10), for example, can allow NULL values depending upon whether you specify the appropriate clause. But no matter whether NULL values are allowed or not, it’s still a VARCHAR. In C#, a nullable int is a nullable int, not an int.
In short – specify a question mark if you want to support NULL values, otherwise leave it out. You’ll see this in use in a moment.
The Table Index and Partition
We’ll take an in-depth look at indexes and partitions in our next article, so don’t worry about understanding this bit too much at the moment. Just be aware that if we don’t have these two final parts of the CREATE TABLE puzzle, we can’t load data into our table. We can choose to add the index as part of the CREATE TABLE statement or as a separate CREATE INDEX statement. To keep things easy, we’ll add it as part of the CREATE TABLE statement. Here’s the full script for the Counties table.
USE DATABASE UkPostcodes;   // DATABASE keyword is optional
USE SCHEMA Postcodes;       // SCHEMA keyword is required for schemas

CREATE TABLE IF NOT EXISTS Counties
(
CountyCode string,
CountyName string,
INDEX idx_Counties CLUSTERED (CountyCode)
DISTRIBUTED BY HASH (CountyCode)
);
Click the Submit button to create the table. Now we can create our other tables – we’ll have four in total. We’ve created the Counties lookup table, now we’ll create the Districts table.
Creating the Remaining Tables
Create a new script call 040 Create Districts Table.usql and type or paste in the code below.
USE DATABASE UkPostcodes;

CREATE TABLE IF NOT EXISTS Postcodes.Districts
(
DistrictCode string,
DistrictName string
);
CREATE CLUSTERED INDEX idx_Districts ON Postcodes.Districts (DistrictCode)
DISTRIBUTED BY HASH (DistrictCode);
This is slightly different from our first script; we’ve used a two-part name instead of invoking USE SCHEMA, and we’ve also created the index separately. Fundamentally it does the same thing as the first script – whichever way you prefer is perfectly fine. Just make sure you’re consistent.
Run the script to create the table and move on to table number three, the postcode estimates table. Add another new script, this time called 050 Create PostcodeEstimates Table.usql, and pop this code into it.
USE DATABASE UkPostcodes;
USE SCHEMA Postcodes;

CREATE TABLE IF NOT EXISTS PostcodeEstimates
(
Postcode string,
Total int?,
Males int?,
Females int?,
OccupiedHouseholds int?,
INDEX idx_PostcodeEstimates CLUSTERED (Postcode)
DISTRIBUTED BY HASH (Postcode)
);
Hey, we have some nullable columns! The question mark has made an appearance. Run this to create the table and then, for the last time, create a new script. This one will hold the postcodes table script, so it’s crazily called 060 Create Postcodes Table.usql (OK, maybe not so crazy). And the script goes like this:
USE DATABASE UkPostcodes;
USE SCHEMA Postcodes;

CREATE TABLE IF NOT EXISTS Postcodes
(
Postcode string,
CountyCode string,
DistrictCode string,
CountryCode string,
Latitude decimal?,
Longitude decimal?,
INDEX idx_Postcodes CLUSTERED (Postcode)
DISTRIBUTED BY HASH (CountyCode, DistrictCode)
);
Nothing new to see here, other than a two-field partition. Hit Submit to create it and all of our tables are in place. You’ve no doubt noticed the relationships between the tables – Counties and Districts can be linked to Postcodes via their respective codes, whilst PostcodeEstimates can link to Postcodes via the Postcode column. We’ll bring all this into play in future articles.
Proving the Tables Exist
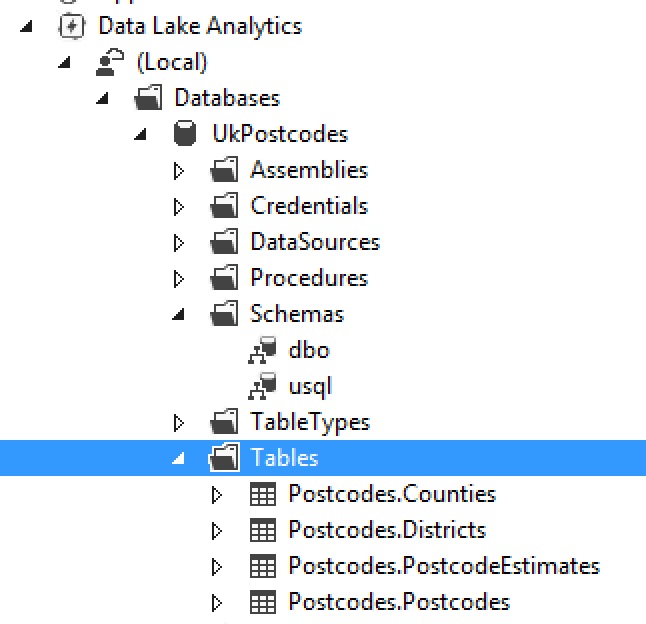
To ensure the tables exist, go back to the Server Explorer. Under Azure, expand Data Lake Analytics > (Local) > Databases > UkPostcodes > Tables. If Tables is not expandable, right-click on it and click the Refresh option. Then you should see the four tables:
Creating the Database in Azure
We’re almost done here, we just need to run our scripts directly against Azure, which will create our database. Make sure you’re connected to Azure in Visual Studio via the Server Explorer and open up script 010 Create UkPostcode Database.usql. Remember the toolbar at the top of the script? In the second box (the one that reads (local)), choose your online Azure Data Analytics account. Mine is called sqlservercentral. If you haven’t created this, refer back to the first Level in the series for instructions on how to do it.

Click Submit to run this script. After a short delay the execution screen will appear, and the job should run to successful completion. Just as shown in the figure below.
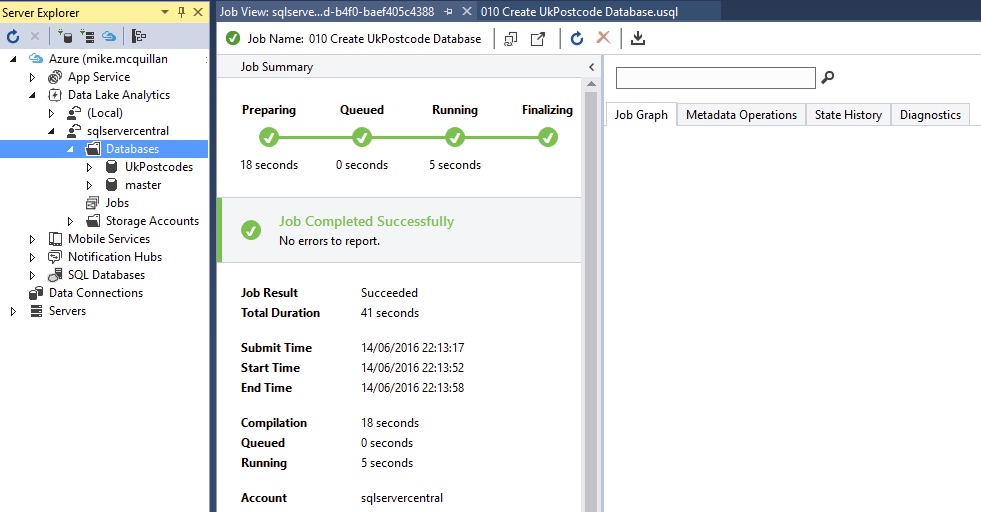
I’ve refreshed my Server Explorer in the image above, so you can see the database was created successfully. To create the rest of the database (the schema and the tables), run scripts 020 to 060. It’s a bit of a pain running each script individually, but we’ll see how we can work around that in future articles.
Now that the scripts have been executed, let’s prove we’ve created our database. Log on to the Azure Portal and open up your Data Lake Analytics account (to find this click on the search icon at the top of the screen and type in the name of your Data Lake Analytics account). Once that appears, click on the Data Explorer button near the top of the screen.
IMPORTANT: You need to access the databases via the Analytics account, NOT the Store account. The Store account’s Data Explorer will display the internal representations of your database objects. This means they’ll be displayed as files and folders, and you can’t use them as you would a standard database object.

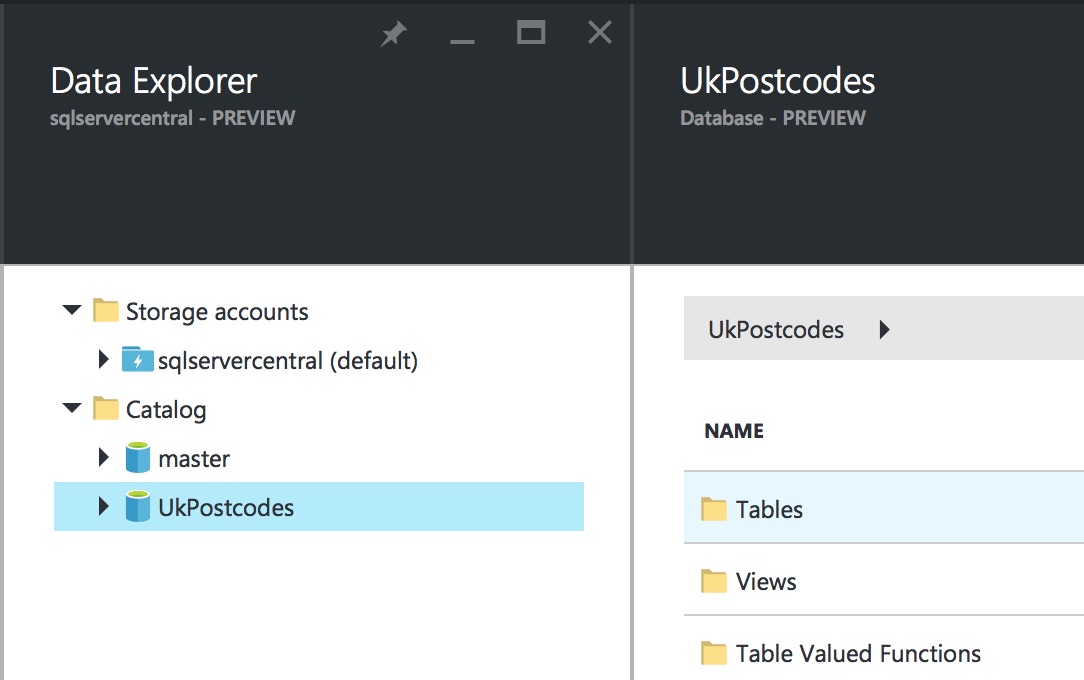
Once the contents of your Analytics account are displayed, you’ll see the catalog folder has been automatically expanded for you. This should contain two items – the standard master database, and the new UkPostcodes database we created. Clicking on the UkPostcodes database will display the types of item available in the database:
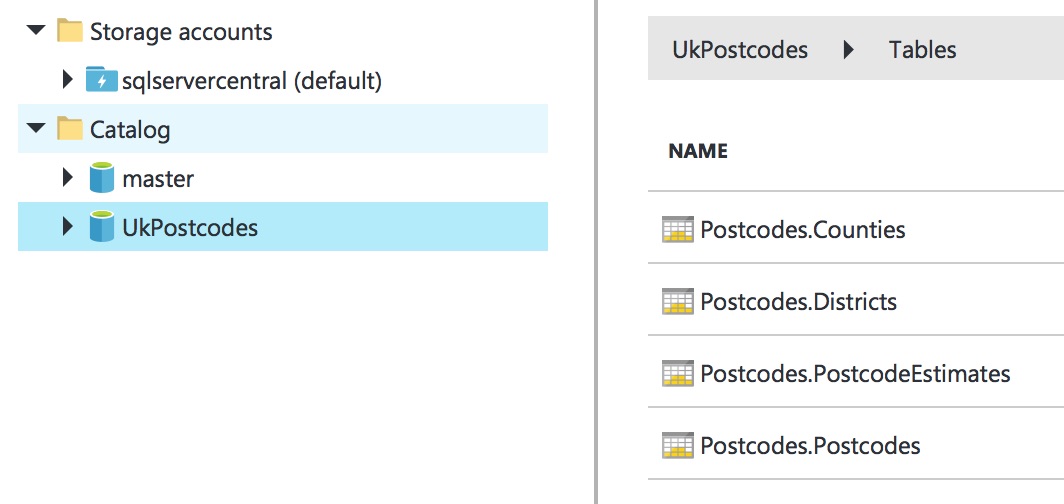
Clicking on Tables will display the tables in the database. You can run queries against them from here too. Pretty groovy stuff.
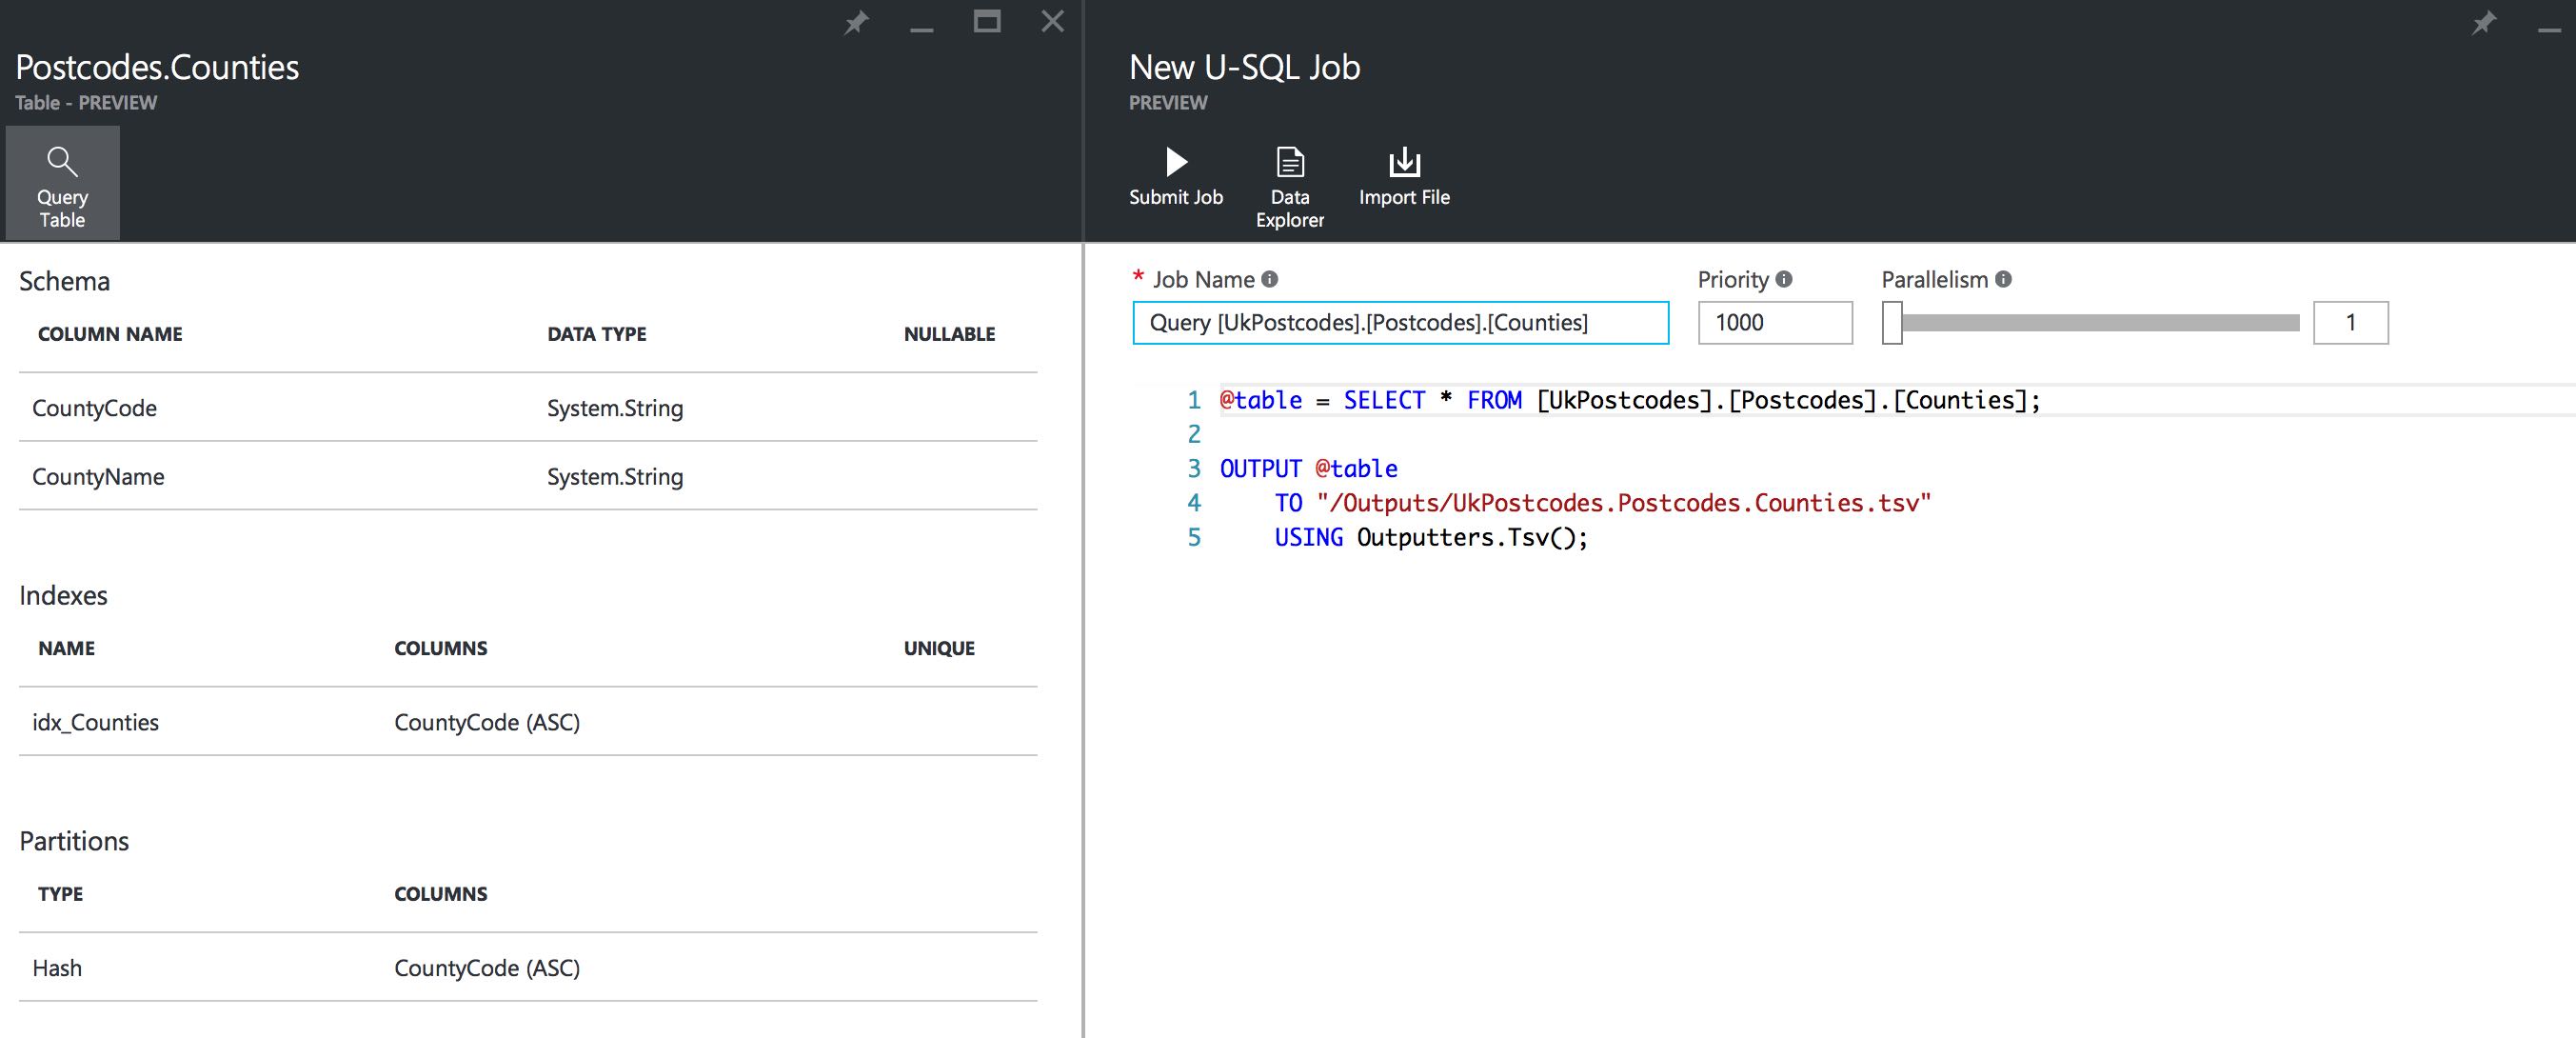
Click on, say, the Postcode.Counties table and the metadata for that table will be shown. There’s also a Query Table button above the metadata, which will give you a generated export script for the table’s data should you care to use it (you can customise this, of course). All very useful, I’m sure you’ll agree. You can also view the database and its objects through Visual Studio’s Server Explorer if that’s your preference.
Summary
This is a fairly big article, but it has set us up for the rest of the series. We now have a solid table structure in place to continue our U-SQL learning journey. We’ve seen that U-SQL databases support many of the same objects found in SQL Server, such as databases, schemas, tables and stored procedures. We were briefly introduced to indexes and partitions in this article too. We’ll focus on them in more detail in the next article. See you then!

