Microsoft is aggressively pushing its Azure platform, especially when it comes to Big Data. Azure offers a number of Big Data platforms including Hadoop, HDInsight and now, Data Lakes. In this introductory tutorial we’re going to find out what a Data Lake is, how we put data into it, and how we extract data out of it using the U-SQL language introduced by Microsoft in late 2015.
The Current Data Warehouse Approach
If you’ve worked with Business Intelligence before, you’ve probably heard of a Data Warehouse. A Data Warehouse is a database that is structured to provide fast results to reporting queries. The process to build a Data Warehouse usually follows this path:
- Based on your data and expected user questions, build a database to support answering those questions.
- Write an ETL (Extract, Transform, Load) process to bring the data from your system databases into the Data Warehouse database.
- Write queries and reports to answer the user questions.
In the classic SQL Server stack, Analysis Services (SSAS) would be used to house the Data Warehouse, Integration Services (SSIS) would supply the ETL process, and user reports would be obtained via Reporting Services (SSRS). The challenge this approach doesn’t resolve is: what happens if the questions the users are asking change? If the questions being asked change, the Data Warehouse has to be restructured to handle those new questions. Preventing the need for such restructuring is the problem Data Lakes were invented to solve.
The New Data Lake Approach
“Data Lake” is nothing more than a fancy term for a large storage repository. The key difference between a Data Lake and a Data Warehouse is how they store data. A Data Lake stores data in its original, native form; a Data Warehouse stores data in a transformed form (the “T” in ETL). The idea behind a Data Lake is to store the data in its original form inside a Big Data system such as Hadoop (the Azure Data Lake is built on top of the Hadoop File System, HDFS). The data can then be queried using a compatible language like Hive or Microsoft’s new U-SQL language.
There are a number of ways to implement a Data Lake. You could try to roll your own using SQL Server and a file system; use Hadoop; or use a cloud provider’s offering, such as Microsoft Azure or Amazon Web Services. We’re going to see how a Data Lake can be built using Microsoft Azure.
Preparing to Create a Data Lake
Before you can create a Data Lake, you must have an Azure account – go to https://portal.azure.com/ and sign up if you don’t have one already. Once you have an account, use the same address to sign in to Azure.
Once you’re in, you need two things:
- Some Azure credit
- Access to Azure Data Lake Analytics and Storage
If you don’t have a paid Azure account, you can obtain free Azure credit by trying one of the following:
- Sign up for a free trial
- Use the free credit provided with a MSDN subscription, if you have one
- Sign up for Visual Studio Dev Essentials. This is free and gives you $25 Azure credit per month for one year (about £15 for UK users)
At the time of writing, Azure Data Lake is in preview, so you’ll need to request access. Follow the instructions to do this and then wait! We’ll wait here for you, I promise. My access request took about 36 hours to process, hopefully yours will be a bit quicker.
Creating a Data Lake in Azure
With your free credit assigned and your Data Lake access request approved, log on to Azure. Azure Data Lakes offers two components – Data Lake Stores and Data Lake Analytics. We only need to create a Data Lake Store to have a usable Data Lake (i.e. somewhere to store unstructured data). Click on the New button, choose Data + Storage, then Data Lake Store.
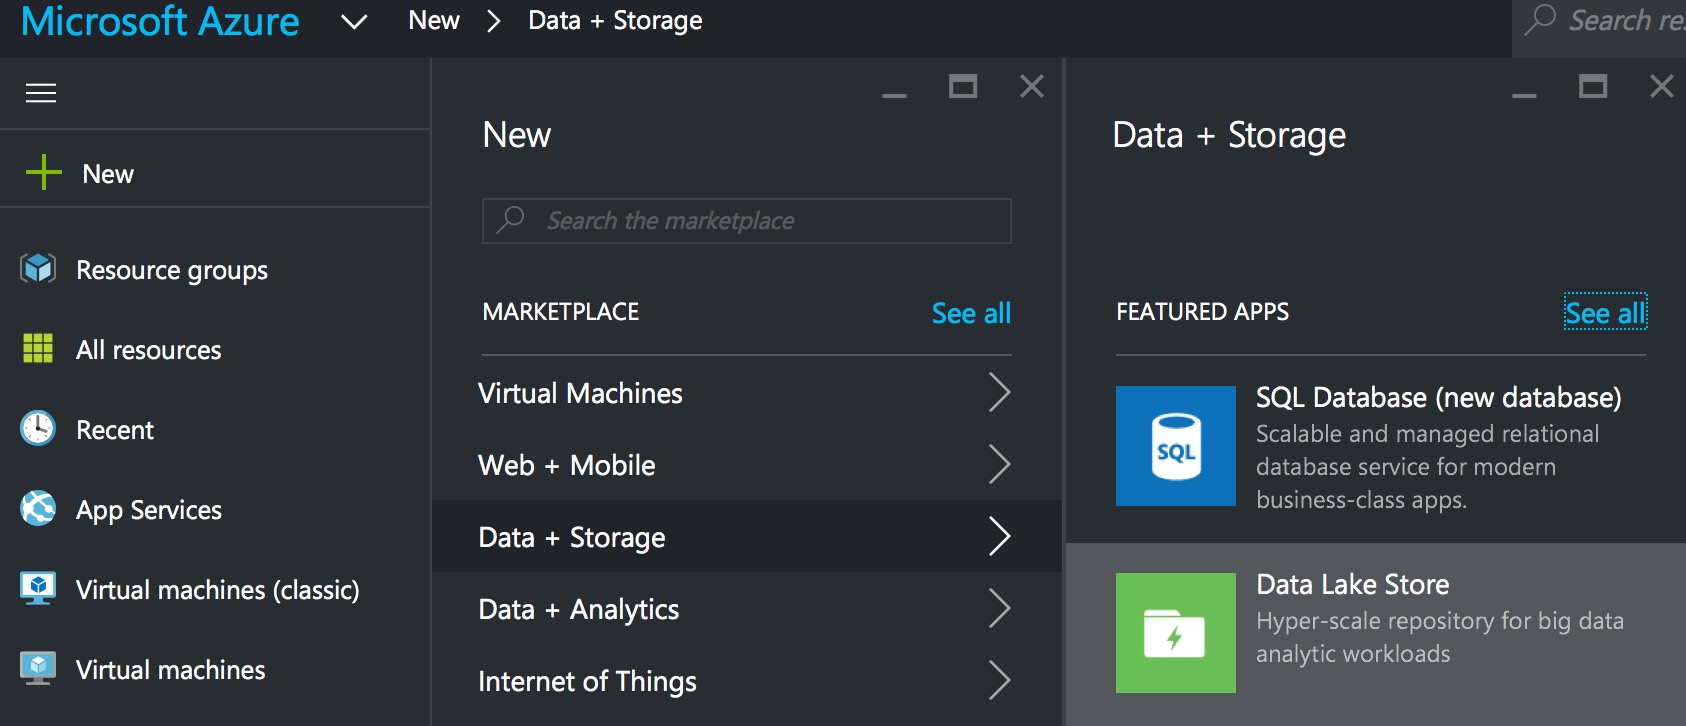
A dialog will appear, into which you need to enter:
- Name – this must be lower-case letters and numbers
- Resource Group – holds related resources for the application (see here for an overview of Resource Groups)
- Location (the data centre you wish to use)
Once you’ve entered the relevant information, click the Create button to create your Data Lake Store. It takes about one to two minutes to provision, then you can use it.

Adding Data to the Data Lake Store
With the store created, we can begin loading data. You will be charged for each file you have in your Data Lake, based upon the amount of storage you are using. Prices can be found on the Azure Web site.
To open the Data Lake Store, type its name into the search box at the top of the screen. Once found, click on it and the store’s home page will open. Near the top are three buttons – Settings, Delete and Data Explorer. Click on Data Explorer to access the Explorer interface.

We’re going to upload a file from the UK Office of National Statistics (ONS). The ONS provides lots of large files, containing information about various UK statistics – regions, motor vehicle accidents and so on. This gives us a lot of data we can crunch in Azure.
We’re going to use the “Headcounts and household estimates for postcodes” file for this demo. Click the link to pull down the file, then unzip it (it contains eight CSV files and a metadata file). We’ll use the Azure Portal to load the data. In a real scenario you’d build an automated process to load files into your Data Lake using PowerShell or the Azure Command Line Interface, but we’ll keep things simple for now.
IMPORTANT NOTE: Before you upload the files, open them in Excel and remove the first row (the header row). U-SQL does not recognise headers at the time of writing. (UPDATE February 2017 - U-SQL now recognises headers)
Here’s the toolbar for the Data Lake Store:
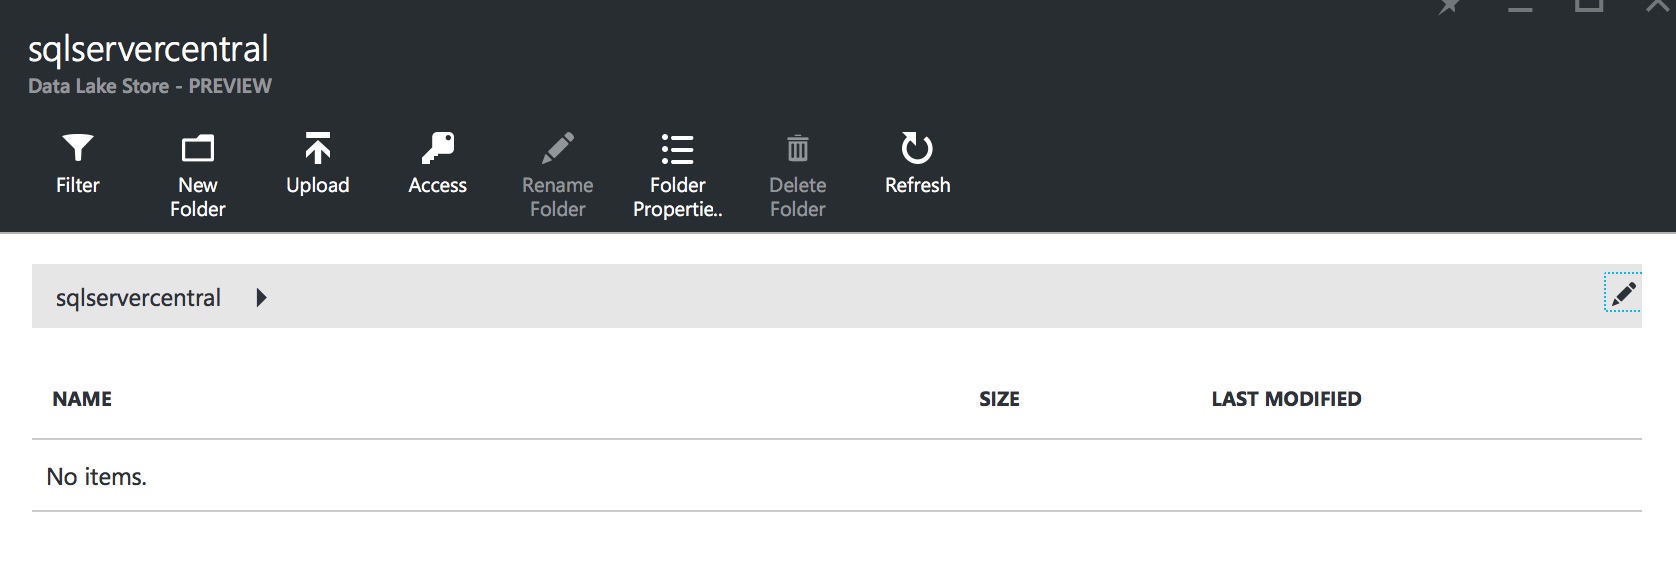
Click on the Upload button and select the files you want to upload. You can upload multiple files at the same time. The files are shown once you’ve selected them. Click the Start upload button to bring the files into the Data Lake Store. Once the upload completes, you are ready to start querying the data!
Querying the Data Using Data Lake Analytics and U-SQL
U-SQL is a Big Data language from Microsoft, developed specifically for querying Big Data. It is a hybrid of T-SQL and C#, using the C# type system. It executes jobs in batches, so if you’re querying a small recordset it won’t be the quickest system you’ve used – ten rows could take a minute or so to come back, for example. But U-SQL shines when querying large data sets – it can process billions of rows in a short timeframe. We’ll take a detailed look at U-SQL in our next article, but for now we’ll just see how it can be used to query our data file.
U-SQL doesn’t follow the ETL process – instead, it follows a LET process – Load, Extract, Transform. The data is pre-loaded into the Data Lake Store (Load), then queried by U-SQL (Extract and Transform). At its most basic, a U-SQL command consists of two statements:
- EXTRACT
- OUTPUT
Here’s a U-SQL query that loads the Postcode_Estimates_1_M_R.csv file, extracts all postcodes beginning with M12, then saves that data to a different CSV file.
@results = EXTRACT postcode string,
total int,
males int,
females int,
numberofhouseholds int
FROM "/Postcode_Estimates_1_M_R.csv"
USING Extractors.Csv();

@m12results = SELECT postcode, total, males, females
FROM @results
WHERE postcode.Substring(0, 3).ToLower() == "m12";

OUTPUT @m12results TO "/output/M12Postcodes.csv"
ORDER BY total DESC
USING Outputters.Csv();
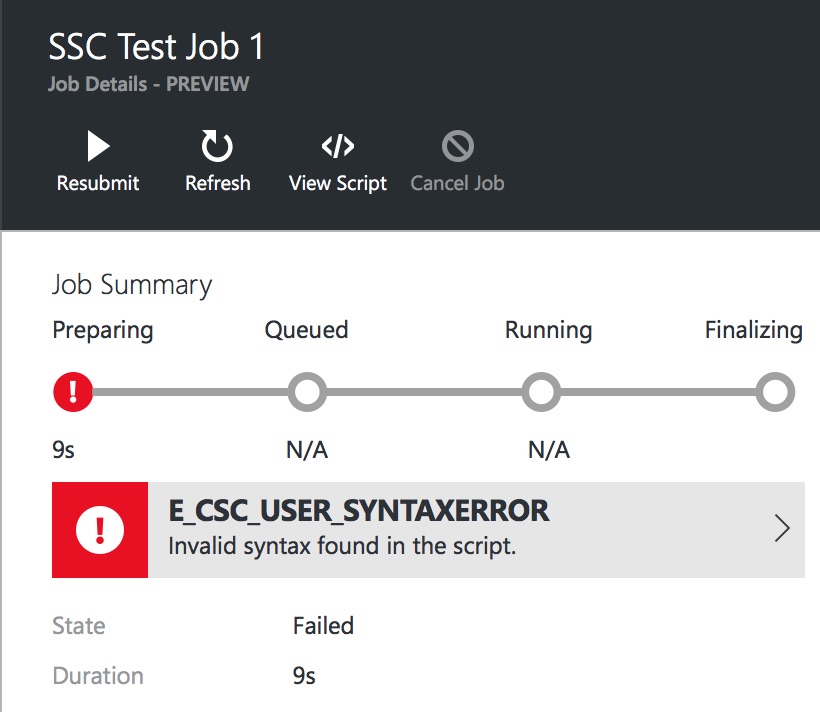
Note that the keywords that look like T-SQL commands are in upper-case. This is a requirement of U-SQL, to allow the parser to differentiate between the U-SQL and C# versions of the same keywords. If you try to use a lower-case SELECT statement, for instance, you’ll see an error message:
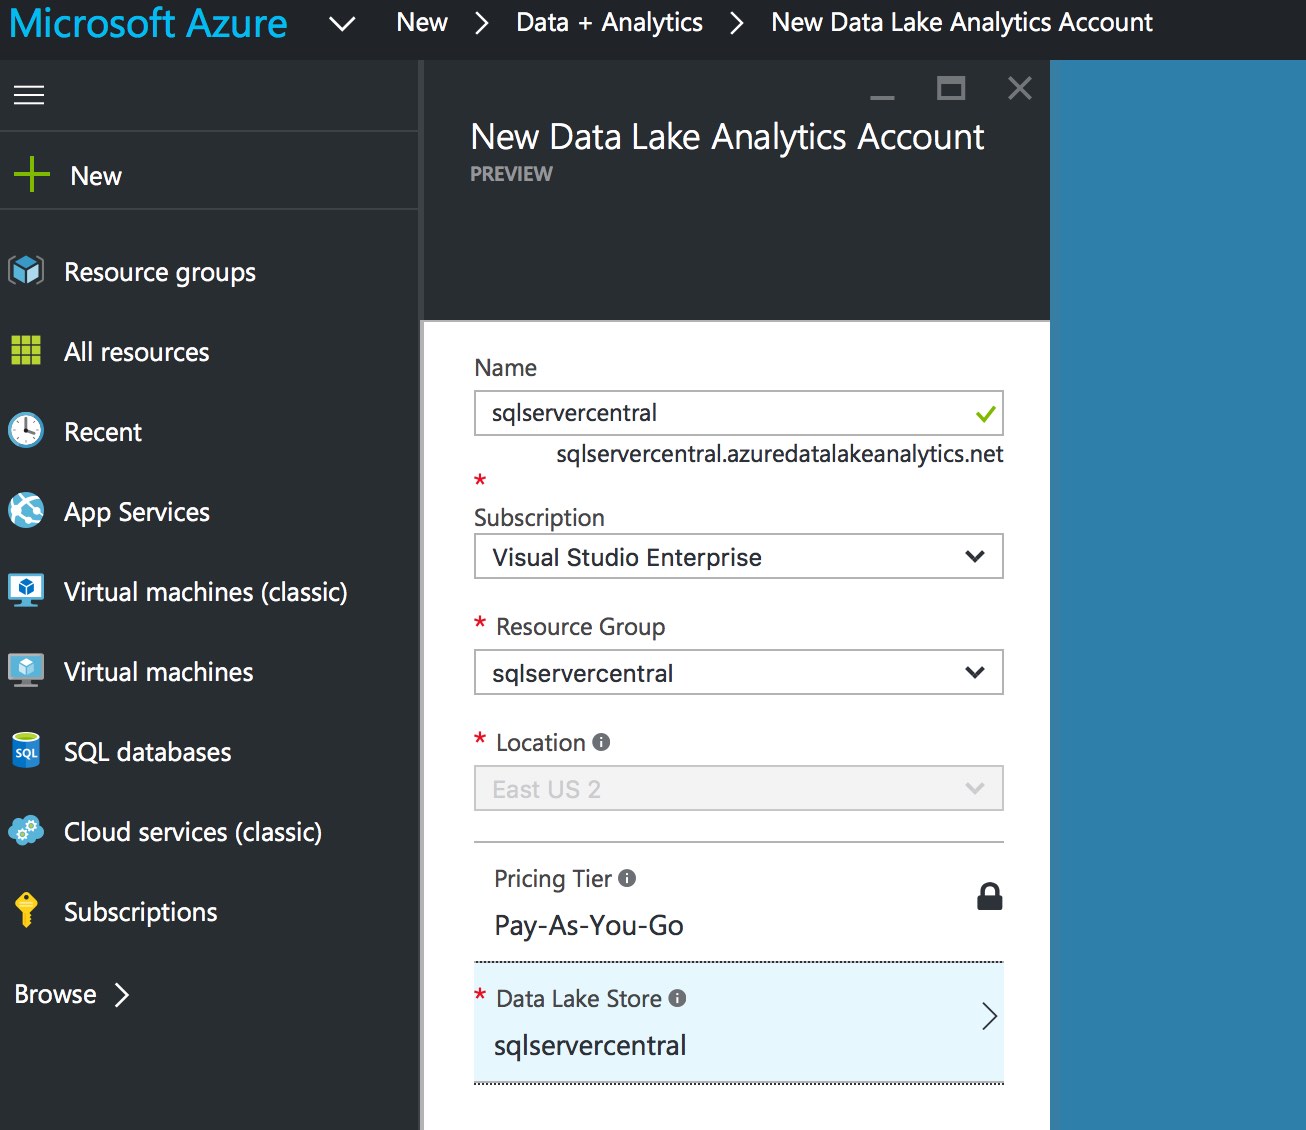
To execute this query, we need to create a Data Lake Analytics account. Click on New, then Data + Analytics, and finally Data Lake Analytics. You need to enter a Name and Resource Group again – choose the Resource Group we created when creating the Data Lake Store. With all that entered, there is one additional setting to choose – which Data Lake Store you want to associate with your Analytics account. You can choose to create a new store or to use an existing one. I’ve chosen the sqlservercentral store I created earlier.
Click Create and wait a few minutes for your Data Lake Analytics account to be created. You can then search for it in the search box at the top of the screen, like we did before. Once it opens, you’ll see lots of options – we’re not going to discuss them in this article, but feel free to take a look around. At the top of the Analytics dashboard is a set of buttons – click the New Job button to create a new U-SQL job. Give the job a name (I’ve imaginatively called mine Test Job #1) and type the U-SQL query we saw above into the query editor. Once entered, click the Submit Job button to execute.
There will be a short delay as the job is submitted. The job execution interface will then appear, showing the processing of the job. A graphical plan will appear as the job progresses.
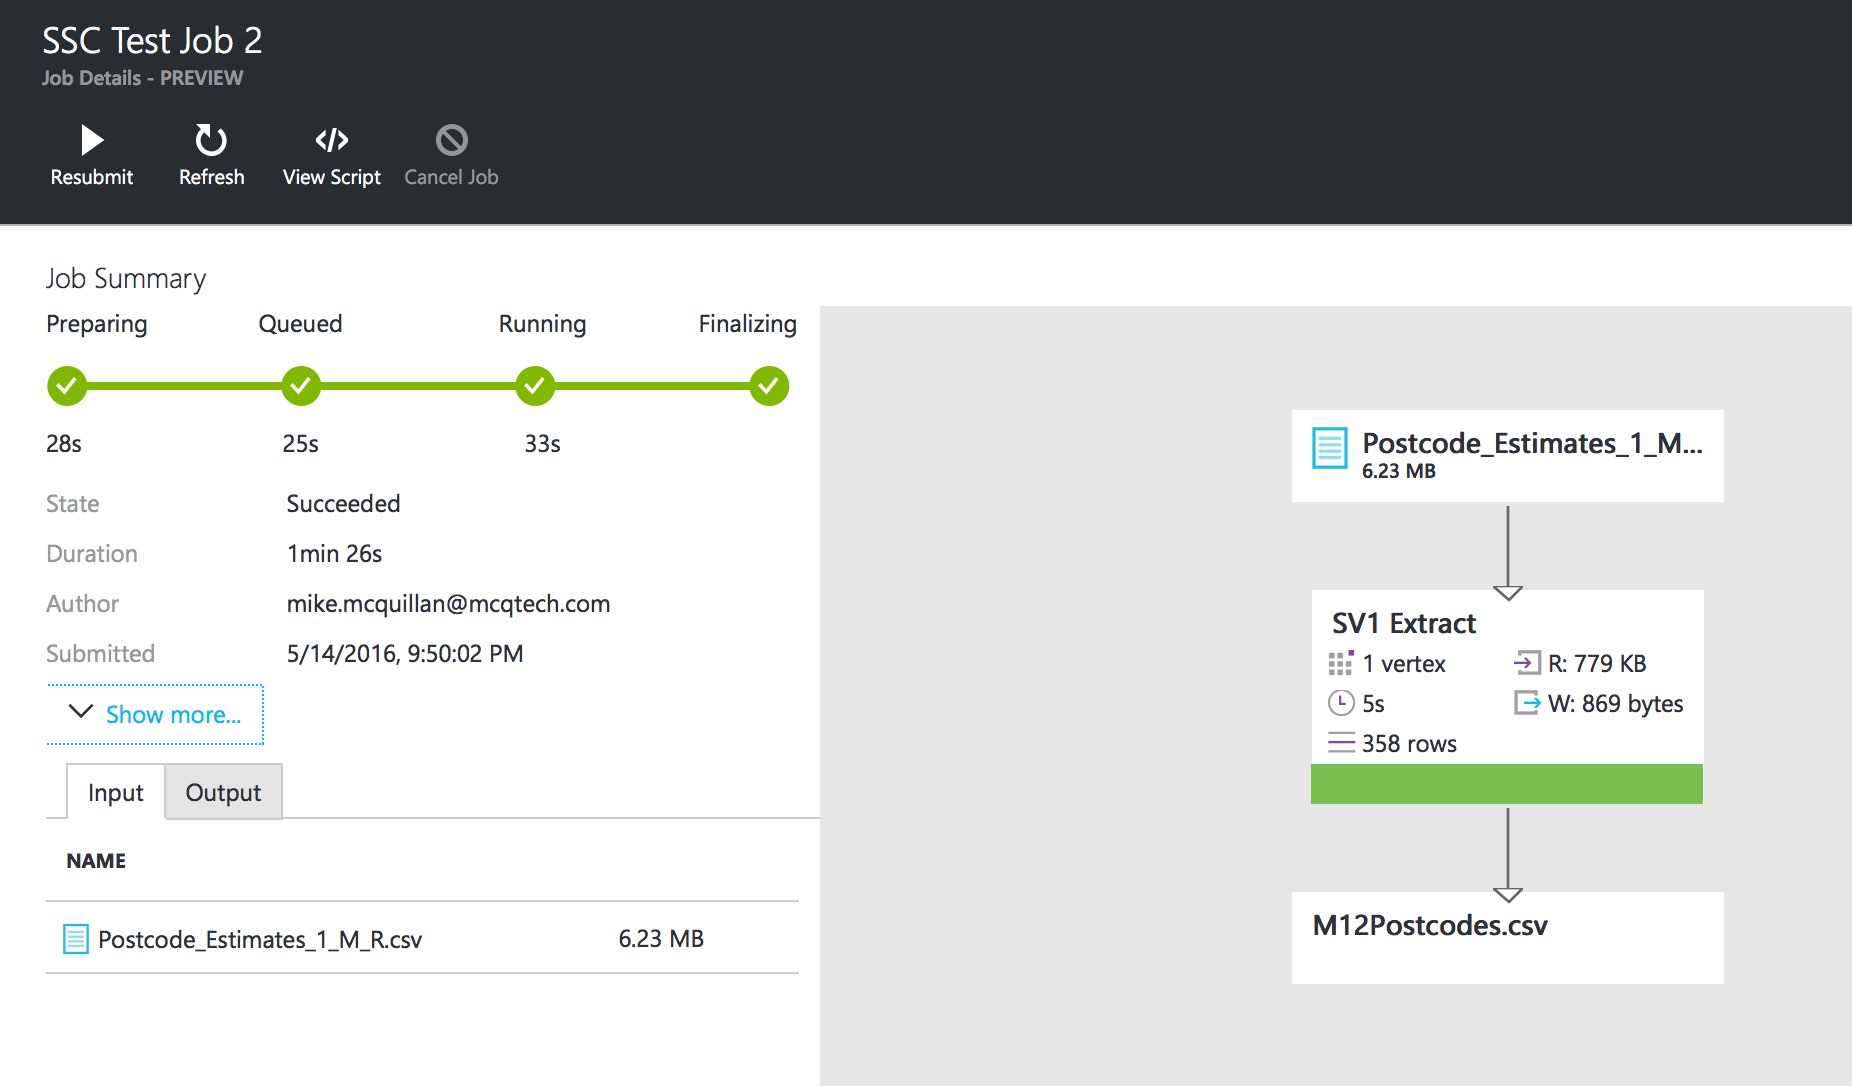
After a few minutes, the job completes. Take a look in the Outputs folder and you’ll see our new file. Open the file up and you’ll find it only contains records from the M12 postcode. If the file already existed, it was overwritten with the new file.
Congratulations, you’ve just created your first U-SQL job! There are three parts to the statement:
- Extract data from the specified CSV file.
- Select the data we are interested in.
- Output the selected data into a new file.
We executed this statement directly in Azure. Much like Data Stores, we wouldn’t normally use the Azure Portal – we’d use Visual Studio. This is something we’ll see in a later article.
Summary
We’ve had a very brief introduction to Azure Data Lakes and U-SQL. We’ve seen how to create a Data Lake Store, how to load a file into the store, and how to query that data using a basic U-SQL statement. There’s a lot more to Data Lakes and U-SQL, and we’ll take a more in-depth look at them over the next few articles in this series.
