We’ve already seen what can be done from Snowsight, the Snowflake Web UI. Now it’s time to look at more developer-centric tools – SnowSQL, Snowflake’s CLI client, and the Snowflake Visual Studio Code extension. Let’s start with SnowSQL.
Please note this article is written using the assumption you have no custom network rules or policies configured in your Snowflake instance. If you do have rules enabled, you may need to tweak your settings to allow you to connect to Snowflake via SnowSQL.
Why Should I Use SnowSQL?
SnowSQL has been around since 2019, and you should use it if:
- Web UIs are not your thing.
- You like using the command line.
- You want to interact with Snowflake directly from your machine.
- You want to execute Snowflake commands in batch mode.
- You want to schedule Snowflake tasks.
- You would like to execute Snowflake tasks as part of a workflow.
SnowSQL runs on Windows, macOS and various flavours of Linux. We’ll use Windows in the demonstrations for this article.
Downloading and Installing SnowSQL
We touched on downloading SnowSQL in the last article. Log on to Snowsight, click on your name and then click on Client Download.
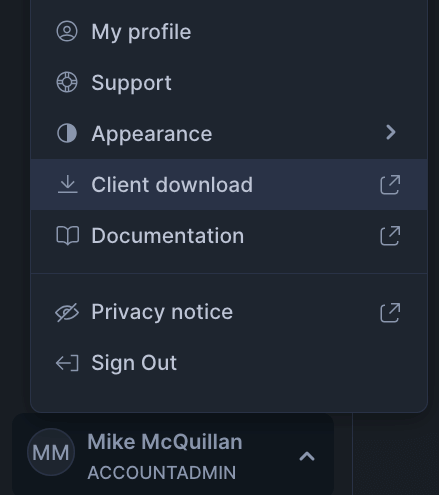
This takes you to the download overview page, where you can download SnowSQL and a variety of other tools – drivers and connectors, for instance. After clicking on the appropriate link, you make it to the actual SnowSQL download page. Click the OS you use and the installer will fly on to your machine.
I won’t bore you with the installation details – for Windows, just click Next a few times and you’ll be done! The confirmation screen does contain some interesting information though, explaining how to connect to your Snowflake instance. Let’s see if we can utilise that information!
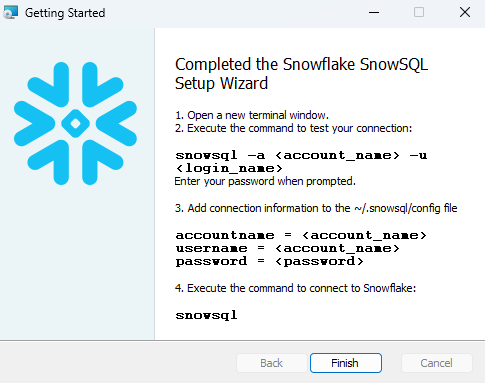
Obtaining Your Snowflake Account Identifier
Open up the command prompt (Windows) or terminal (macOS/Linux). The installer should set up the relevant paths and so on. Type snowsql and press Enter. The usage information should be displayed.
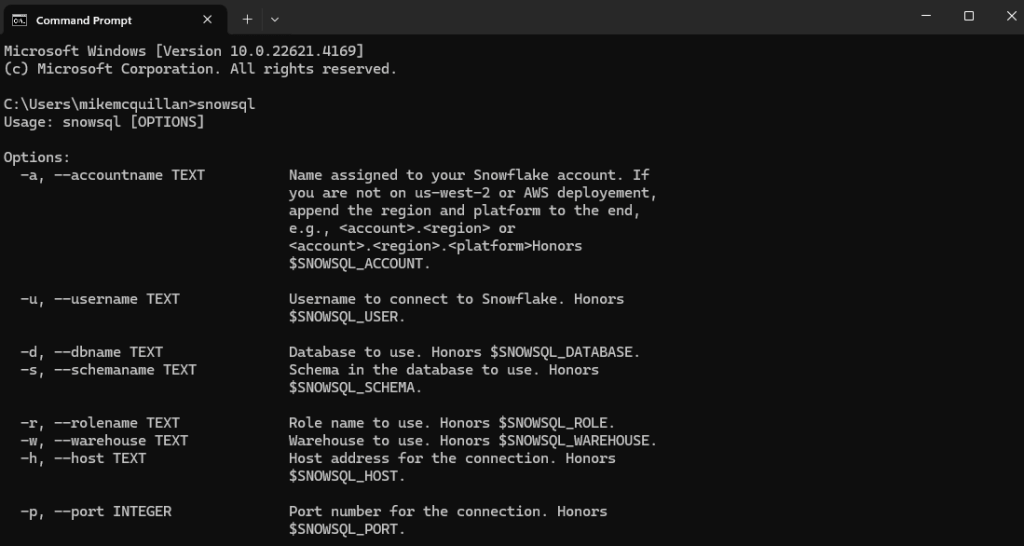
Here’s the first challenge then – actually connecting to your Snowflake instance! I freely confess I found this a little difficult at first, and Snowflake’s generally excellent documentation is a bit lacking in this regard. You need your account identifier before attempting to connect. To obtain your account identifier, check the e-mail Snowflake sent you when you registered, or log on to Snowsight. Click on your name in the bottom left-hand corner, hover over your account identifier, hover over the account identifier in the sub-menu that appears, and click on the two squares to copy the identifier. The identifier is a combination of two strings, something like ABCDEFG.ZY99822.
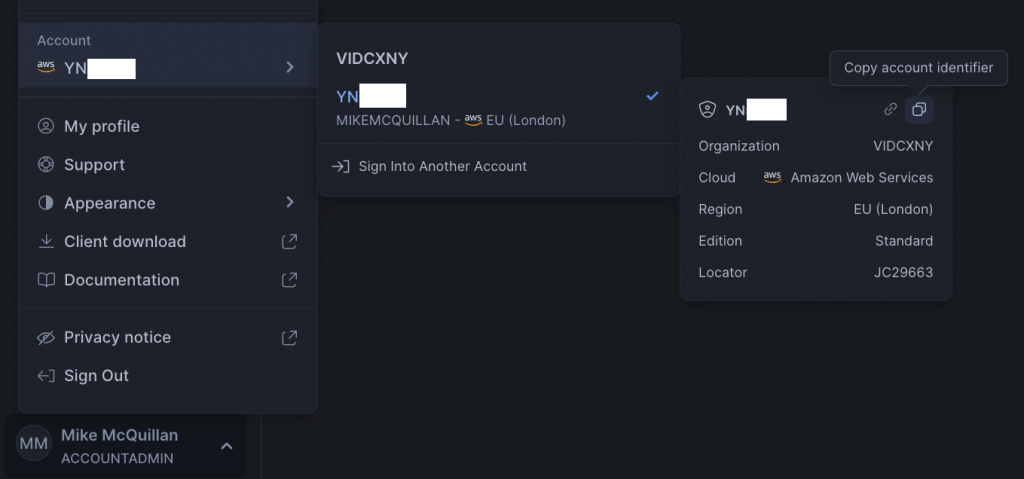
Once you have the identifier, you can attempt to connect using SnowSQL!
Initial Connection Attempt and Finding the SnowSQL Log
In theory, you should be able to just specify your account identifier to connect, using the -a parameter. However, SnowSQL – certainly at first – doesn’t like it! I first tried to connect using this one parameter, with the command:
snowsql -a VIDCXNY-YN00000
Unfortunately, SnowSQL threw a tantrum(!), as the highlighted information in the log shows.

If you have problems connecting and you want to inspect the log, you’ll find it in the following locations:
- Windows – User Account Folder/.snowsql/ - the full path will be something like C:Usersmikemcquillan.snowsql. The log file is cunningly named log
- MacOS/Linux - ~/.snowsql
You can also use DEBUG logging if you’re really having trouble, by specifying this parameter:
-o log_level=DEBUG
Successfully Connecting
To successfully connect to Snowflake from your machine, certainly for the first time, use this command (substituting your account identifier for my example):
snowsql -a VIDCXNY.YN00000 -r SYSADMIN
This will connect to Snowflake and ask you to enter your name. Type this, hit Enter and then add your password. Assuming you supply the right details, you’ll either be connected to Snowflake or, if you have enabled multi-factor authentication, you’ll see something like this:
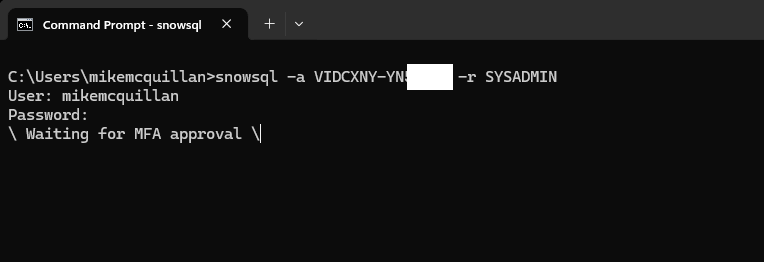
My account uses 2FA using Cisco Duo. Once the connection is approved using the Duo app on my phone, I’m in!
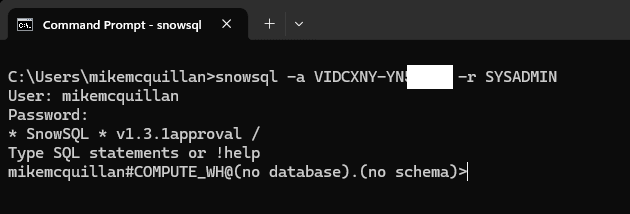
There are a plethora of parameters you can specify to make connecting via SnowSQL easier. You can specify a user name, a database name, a schema name, a warehouse, a variety of security parameters, and even a query. However, you cannot specify a password. This has to be entered manually, or as we’ll see shortly, it can be configured in a config file or in an environment variable.
Specifying Additional Parameters
To exit SnowSQL, type one of the commands below:
!exit
!quit
SnowSQL features a lot of these “bang” commands, there’s a full list in their documentation.
After you’ve disconnected, you’re back on the command line. Let’s try specifying a user name, then we’ll try to connect to a database within SnowSQL itself. Add the -u parameter to specify your user name:
Snowsql -a VIDCXNY-YN00000 -r SYSADMIN -u mikemcquillan
This time, you only need to specify your password (and maybe validate via 2FA) to access Snowflake.
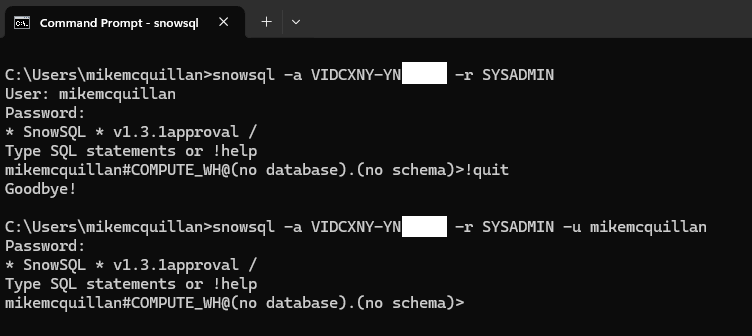
Now, take a careful look at the prompt. It shows the user name, the user’s default warehouse (COMPUTE_WH), but no database. This account does have access to the TESTDB database we created in the previous article (the code is on GitHub if you want to download it). No problem, we can just specify a USE statement to access the database:
USE DATABASE TESTDB;
Ensure you end the command with a semi-colon; this causes SnowSQL to execute the command. If you want to specify a multi-line statement, SnowSQL supports this – just make sure you only specify the semi-colon on the last line.
You might be surprised to find SnowSQL informs us it cannot find the database, even though we know it exists:

What gives here? The problem is the user has logged in using the SYSADMIN role, which doesn’t have access to TESTDB. Only the ACCOUNTADMIN role has access.

The answer here is to either disconnect from SnowSQL, and reconnect using ACCOUNTADMIN, or grant the SYSADMIN role access to the database. We’ll disconnect and specify the ACCOUNTADMIN role. Once this is done and the USE DATABASE statement is executed, you’ll see this time we’ve been successful!

The user prompt now includes the database name. And now we can even try running a query against the TESTTABLE table. As you type the SELECT statement, you’ll notice a cool little feature – SnowSQL offers limited code-completion.
SELECT * FROM TESTTABLE;

Woo-hoo! Exciting stuff eh?
The SnowSQL Configuration File
Let’s finish off our introduction to SnowSQL by looking at the configuration file. You can use this to set your default options. Where can you find this wondrous file, which is going to save you a lot of typing? It’s in the same path as the log file we looked at earlier.
- Windows - User Account Folder/.snowsql/
- MacOS and Linux - ~/.snowsql
The file is simply called config. Most of the lines are commented out when you open the file. You can specify your password in the config file, but bear in mind the password will be stored in plain text – you’ll need to add appropriate permissions to the file to protect it from prying eyes.
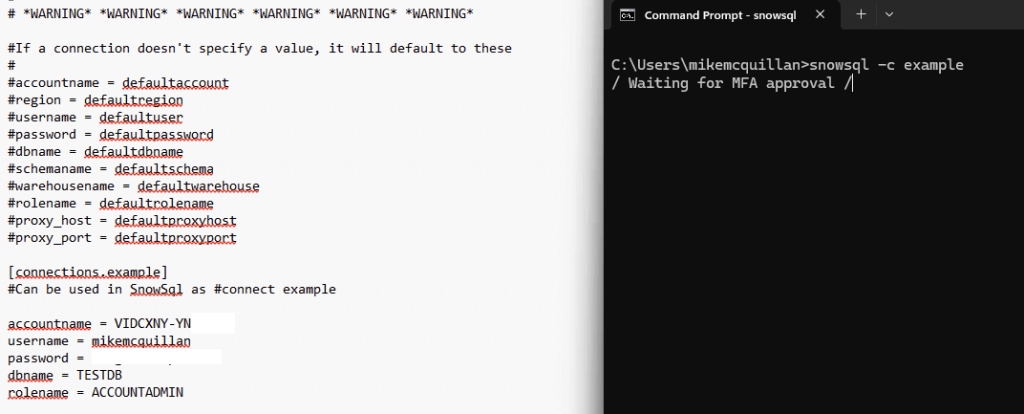
Here’s a sample config file, with the accountname, username, password, dbname and rolename all configured. Note the name in square brackets, connections.example. We’ll need that in a minute! Feel free to change the word example to something else, but under no circumstances touch the “connections.” part – SnowSQL relies on that to define the section as a named connection.

Make the appropriate changes to your own config file, and use !exit to disconnect SnowSQL if you’re connected. Then execute this command (assuming you’ve kept the example name):
snowsql -c example
That saved some typing! Once MFA is acknowledged, we’re in and we can mess around with Snowflake as much as we like!
SnowSQL Summary
Take some time to look at the SnowSQL documentation, as it’s very well featured. We’ve just touched on some of the aspects here, mainly around connectivity and configuration. Have a play, if the command line is your thing you’ll end up loving SnowSQL!
Visual Studio Code Extension
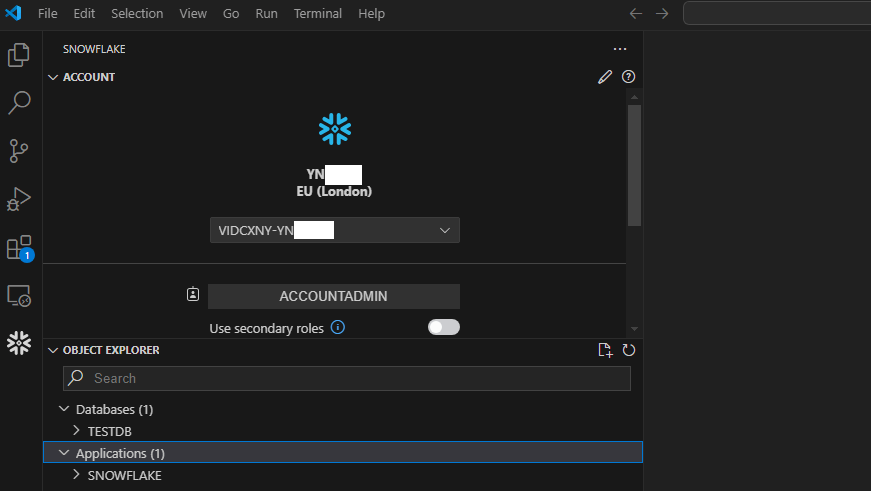
Before we finish up, let’s take a quick look at the Snowflake Visual Studio Code extension. Open up Visual Studio and click on the Extensions option in the menu side bar. Search for Snowflake and you’ll see the extension. It’s the only official extension from Snowflake – all of the others have been developed by third parties.

Click the Install button, then click Trust Workspace & Install to complete the installation. The Snowflake icon will appear in the left-hand side bar menu. Now you can specify your account details to connect.

After entering your account identifier, click Continue and then log in user your user name and password, or a key-value pair if you’ve configured that security method. You may need to connect MFA, but once you’ve done this you’ll be connected to Snowflake!
Running a Query in Visual Studio Code
In the Snowflake pane, you’ll see a small icon which allows you to create a Snowflake SQL file. It’s on the Object Explorer line, next to the Refresh icon.
![]()
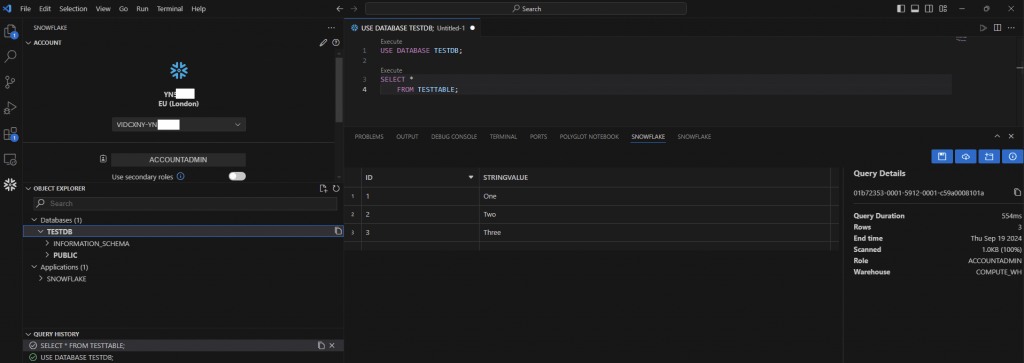
Once you’ve clicked on that, a new SQL query window will open up. Here’s the SQL we’re going to execute:
USE DATABASE TESTDB; SELECT * FROM TESTTABLE;
The Play button in the top right-hand corner will execute all statements – you can click the small Execute link above each statement to execute individual statements. After clicking the Play button, the results of the query are displayed. Congratulations, you’ve just executed your first Snowflake query in Visual Studio!
Summary
We’ve seen how to use tools installed on our own computers to connect to our Snowflake instances. If you want to use the command line, SnowSQL gives you a powerful shell to manage and develop with Snowflake. If you’re more of an IDE kind of person, try out the VS Code extension and Snowflake away to your heart’s content!
Now that we have established how to interact with Snowflake, we’ll take a look at Snowflake databases next time, including the rather splendid database cloning feature. See you next time!
