Containers are the runtime instance of an image, which is the read only template. When you start a SQL Server container, as I did in Getting Started with Database Containers, you get the contents of the image as your starting point. If you begin with the base SQL Server image from Microsoft, you get the view of a SQL Server instance just after it's been installed.
Less interesting and powerful than we'd like. After all, if I just get master, msdb, model, and tempdb, I don't have much of a SQL Server. Sure, it starts quickly, but it's not much more than that. Instead, this post looks at how we can customize images and start to use them in a more practical manner. We'll take the base image and build a new one that we can use in demos.
Decide on a Purpose
Since this will be an image we use on a more practical basis, we need to decide what customizations we want to make. In order to make this useful. For this, I decided to create an image that I can use for development purposes with a database on it that already exists. In this case, I want to use a database that I have on another SQL Server instance. The reason I want an image here is that I can use it for future development as a container. Whenever I need to do some work, I can start my container and work with the database.
This gives me a constant known starting point for my work. If I change any data, such as with a unit test, I can delete and create a new copy of my container, returning to the original state of the database schema and data. This is the equivalent of always having a backup, but without having to remember to take one before I do something in development. Certainly this image will need to be updated over time, but we'll get to that in a later article.
Customizing My Container
The first step is to customize my container. Let's do that by first starting a container. I've decided to be relatively modern here and work with SQL Server 2017. I'll start with the Microsoft image with this code:
docker run --name CustomContainer -p 1433:1433 -e "ACCEPT_EULA=Y" -e "SA_PASSWORD=Demo12#4" -d mcr.microsoft.com/mssql/server:2017-CU15-ubuntu
This starts a container as shown below (I've cut off part of the image as it's not necessary.

I can connect to this container in SSMS with the credentials and specifying the localhost. As you can see, there are no users databases on this instance.
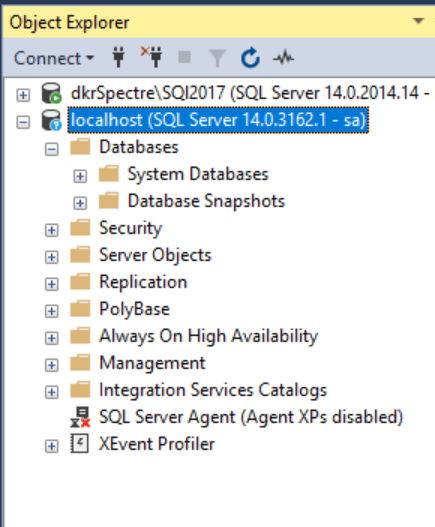
Now I want to get my database into this instance. If you know how SQL Server and SSMS work, you know I can't put a file on my laptop and put some c:\somebackup\somebackup.bak into the database restore command. The RESTORE DATABASE command runs from the server instance, not from the machine with SSMS. This is a slight challenge with containers.
Only slight. I can use the docker cp command to move a file into the container. In this case, I have a backup file in this folder, and I'll copy it into my image. I'll just drop it into the /var/opt/mssql/data folder. Not the best plan, but this works for this demo.

The command I used:
docker cp SimpleTalk_1_Dev_20190705.bak CustomContainer:/var/opt/mssql/data/SimpleTalk.bak
Now if I go through the restore dialog, I'll see this when picking a device file:
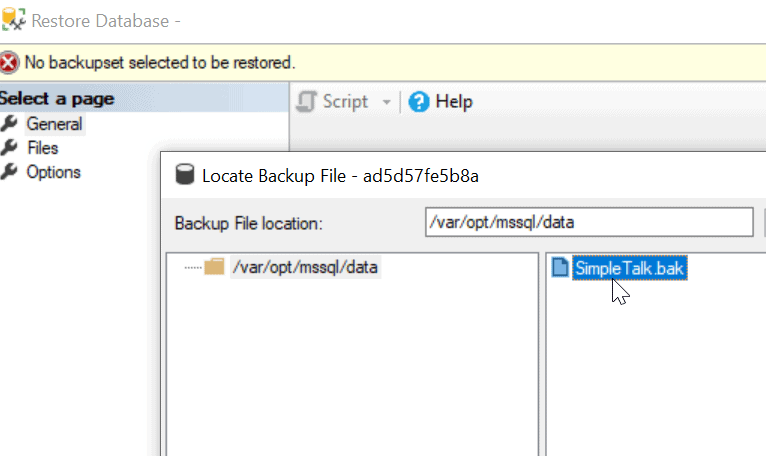
The file I copied is there. It is the SimpleTalk_1_Dev backup, as you can see in the main restore dialog. I'll let this run, checking the "move files" option on the tab and leaving other defaults.
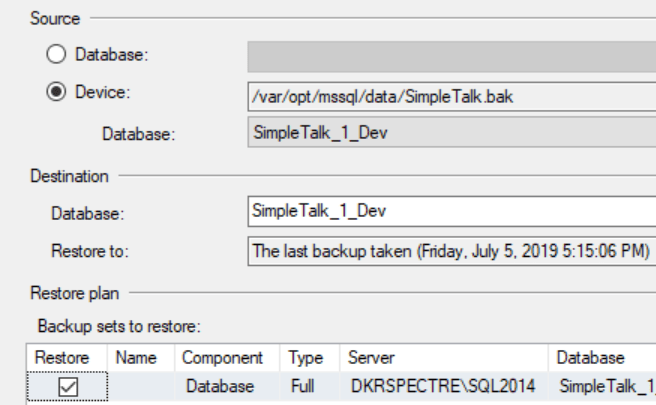
This works, and I see my objects and data from the backup. I've customized my running container. Now, on to making an image.
Creating the Custom Image
This is so simple, it's almost not worth it's own section of the article.
There is a docker commit command, which will save a running container as an image. I'll use that, giving it a parameter of the container and then the image name that I want to use. In this case, I'll just call this my SimpleTalkDev image. Here's the code:
docker commit CustomContainer simpletalkdev
And here is the results of running this and then getting a list of images.

This is good, but not good enough. While the latest tag is good, I will likely change this over time as development proceeds. Let's start things off by using docker tag to give this a better tag. I'll use 2017_1.00.
In doing this, I also want to share this out in the Docker Hub, so I'll follow the description of this from Andrew Pruski, who's written about this on his blog. I have an account at Docker, and I've created a "simpletalkdev" repository
Here's the code:
docker tag simpletalkdev way0utwest/simpletalkdev:2017_1.00
This works, and I can see the image in my list. I'll now use docker push to upload this image to a spot where I (and you) can download it. You can see the push in progress (I got impatient when writing).
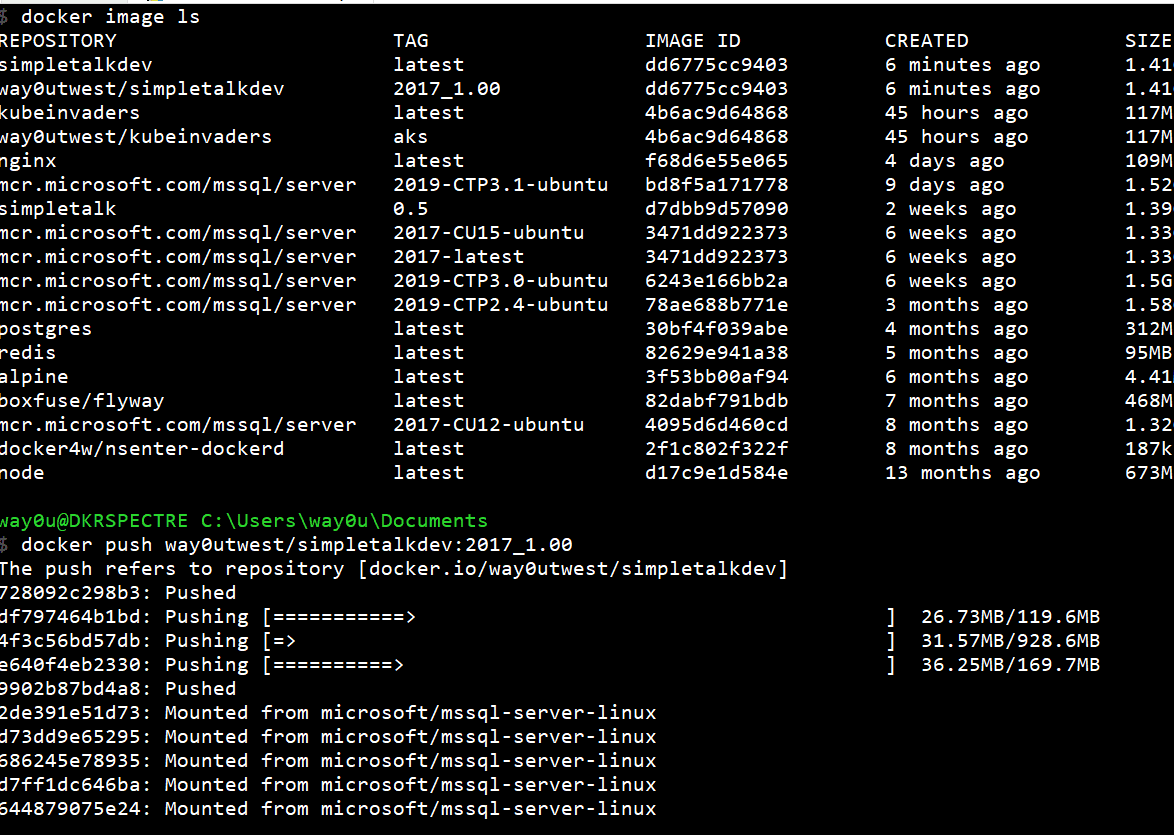
As you can see, the image uploads in layers. Future customized images will not upload layers that are already on the docker hub. They also won't download on your machine when you get updated images.
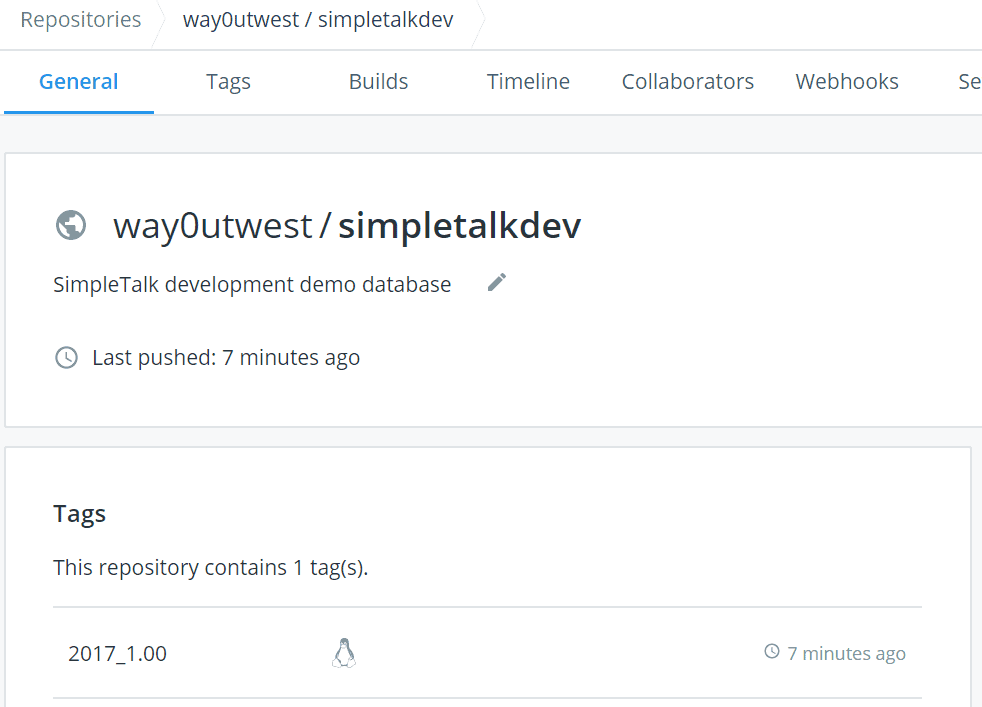
When this is complete, I see the uploaded image in the Docker Hub, under my repository:
Checking the Image
Let's now start a new container and verify this is a custom image. I'll use my original docker command, but change the port and specify my custom image.
docker run --name simpletalk -p 51433:1433 -e "ACCEPT_EULA=Y" -e "SA_PASSWORD=Demo12#4" -d way0utwest/simpletalkdev:2017_1.00
This starts:

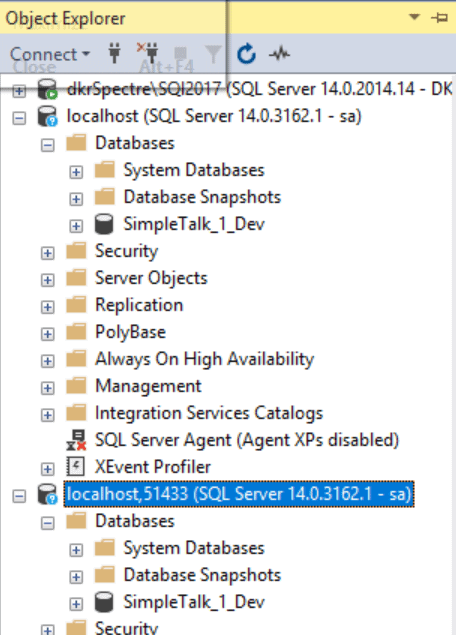
I then connect with SSMS and see my custom container with the database.
Conclusion
This is a basic way to create a custom image. It involved some manual work, but is fairly simple to follow. If you want to share a container with coworkers or experiment with the process, this is a good way to get started.
This is manual, which means a developer could potentially make mistakes, or build images that are incomplete or not worht sharing. We want a repeatable process, and in a future article, we will look at the way in which you might build custom images in a more reliable, repeatable, DevOps style process.
