THUD! You close your eyes and bang your head on your desk. THUD. THUD. THUD. You feel a presence around you and raise one eyelid. Your closest cube-mates stare wide-eyed over the divider into your cube.
"I'm okay," you mutter as you close your eye again. After all, it's not their fault that your report won't do what you want. As you stare quizzically at the screen and rub your aching head, a light bulb goes off: maybe there's some way the Stairway to Reporting Services series can help you again. Lo and behold, you can use this article, Report Customization, which covers how to create custom functions, methods, and expressions so that you can make your data do things that Reporting Services refuses to do.
Be sure to read the other articles in the series, found here: Stairway to SQL Server Reporting Services.
The Next Level
One of the nice things about Reporting Services is the ability to create customizations. Whether we want to store a little piece of business logic or create a dynamic input to the report, we have a way to handle that. Let’s look in more detail at the objects that allow us to do these customizations: expressions and custom code.
Expressions
Expressions are little snippets of code that produce some sort of output value. They are typically used at runtime to dynamically change some aspect of a report, be it a value, property, or data field. Expressions are written in Visual Basic and are comprised of building blocks to make the final result. Expressions can even be used in queries or data sources to affect what data is used a report.
Expressions can be split into two types: simple and complex. Simple expressions are comprised of one building block. When we used a field from a dataset or set a formatting property, we were already using simple expressions! On the other hand, complex expressions use more than one building block to create a more advanced and intelligent expression.
A building block contains three sections, a collection, the name of the block, and the property that is returned. This expression is preceded by an equals sign (=). In Reporting Services 2008 and higher, the display of the expression is shortened within the designer. See Table 1 for a list of the building block examples you can and the way they look in the expression editor and the designer.
| Building Block | Expression Editor Example | Designer Display Example |
| Dataset Field | =Fields!Sales.Value | [Sales] |
| Function | =SUM(Fields!Sales.Value) | [Sum(Sales)] |
| Global Variable | =Globals!PageNumber | [&PageNumber] |
| Report Parameter | =Parameters!DateParam.Value | [@DateParam] |
Table 1.
Let’s walk through an example that deals with currency conversation rates. We want to see what currencies are trading at a value greater than the dollar. If we were to highlight the background color of the days and rates that are higher than the dollar, we could easily see those currencies. The final product should look similar to Figure 1.
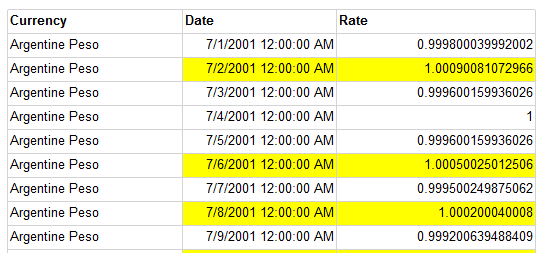
Figure 1.
To create this report, begin by using our AdventureWorksDW data source and create a simple dataset using Listing 1. This dataset includes the conversion rate of each type of currency compared to the US dollar at the end of each day.
SELECT        CurrencyName, FullDateAlternateKey, EndOfDayRate
 FROM           DimCurrency
   INNER JOIN    FactCurrencyRate
     ON DimCurrency.CurrencyKey = FactCurrencyRate.CurrencyKey
   INNER JOIN    DimTime
     ON FactCurrencyRate.TimeKey = DimTime.TimeKey
Listing 1.
Put all three fields into the details row of the table to display each row. Once that has been completed, we want to select the bottom right two cells, as shown in Figure 2.

Figure 2.
With those two textboxes selected, go to your Properties window > BackgroundColor property and click on the Expression… link. Figure 3 shows the correct location for these items.
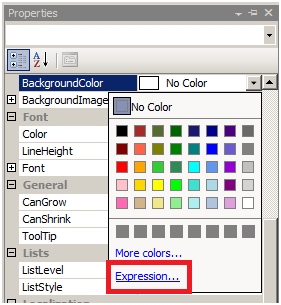
Figure 3.
Clicking the Expression… link will open the Expression Builder. The Expression Builder is your go-to place for building all things related to expressions. You can select your building block collection from the bottom left pane labeled Category and then the item desired in the bottom middle pane. If you ever have any questions on how to use the item, the bottom right pane provides the description and the syntax needed for that item. In the currency scenario, we will use the following expression in Listing 2, which can be seen in the Expression Builder in Figure 4.
=IIF(Fields!EndOfDayRate.Value > 1, "Yellow", "Transparent")
Listing 2.
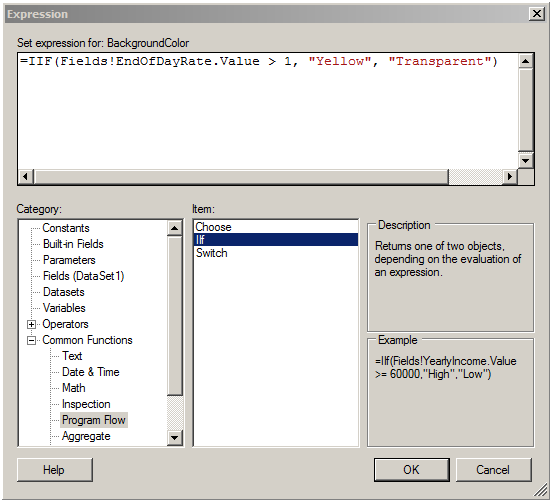
Figure 4.
| Note: To access the expression builder and set and expression on that property or value, you will either click a link called “Expression” or a button with the letters “fx” on it. |
By using just a few clicks, you can create expressions that will create dynamic values for your properties and report values. Expressions are your go-to tool for simple functions in your report.
Custom Code
But how do we handle more complex functions? What if we wanted to show a color gradient on the rows that gradually get darker as we move away from 1? Well, I’m glad you asked! We can absolutely do this using a custom code method. Any customization that can’t fit into the one-line Expression Builder will need to be added into the custom Code window instead.
The Code window is where you can type Visual Basic methods to return some sort of value to the report. You can include additional assemblies to reference or use the provided System reference that is included by default. To add a new method, you will type into the code window and access it from an expression using the Code collection.
| Note: For more information on Visual Basic programming, see: http://msdn.microsoft.com/en-us/library/2x7h1hfk(v=vs.90).aspx. |
Let’s walk through an example of using the code window to return a gradient of colors to be used on our rows. To access the Code window, go to the Report menu and click the Report Properties… option, as shown in Figure 5.
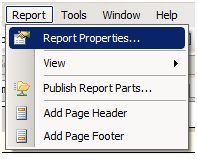
Figure 5.
Then select the Code menu on the left side of the Report Properties window. This will open up a blank screen for you to write your code. Now if the window appears empty, don’t worry; this is what it is supposed to look like. The code window isn’t actually an integrated development environment, so you don’t have the luxury of intellisense or formatting. In fact, you may want to write your code in Visual Studio or a similar application, and then copy over the code into your Code window.
In this scenario, copy the code from Listing 3 to the Code window. This code contains one function called GetColor which will return a string value of the color to be used as the background color of the textbox. The function determines what color to use by dividing the difference between the maximum value and the number one into six equal sections. Each section is then assigned a slightly darker color than the previous. If the currentNumber value falls into that section, it is assigned that color. This will result in a darker color the farther the value gets away from the number one.
Public Function GetColor(ByVal currentNumber As Decimal _
, ByVal maxNumber As Decimal)
     Dim minNumber As Decimal = 1.00
     Dim firstTier As Decimal =  _
(maxNumber - minNumber)/6.00 + minNumber
     Dim secondTier As Decimal =  _
2 * (maxNumber - minNumber)/6.00 + minNumber
     Dim thirdTier As Decimal =  _
3 * (maxNumber - minNumber)/6.00 + minNumber
     Dim fourthTier As Decimal =  _
4 * (maxNumber - minNumber)/6.00 + minNumber
     Dim fifthTier As Decimal =  _
5 * (maxNumber - minNumber)/6.00 + minNumber
     Dim color As String = "Transparent"

     Select Case currentNumber
           Case minNumber
                color = "Transparent"
           Case minNumber To firstTier
                color = "LightGoldenrodYellow"
           Case firstTier To secondTier
                color = "PaleGoldenrod"
           Case secondTier To thirdTier
                color = "Khaki"
           Case thirdTier To fourthTier
                color = "Yellow"
           Case fourthTier To fifthTier
                color = "Gold"
           Case fifthTier to maxNumber
                color = "Goldenrod"
     End Select

     Return color

End Function
Listing 3.
Once the function is created, we need to use it. Back in the Design pane of our report, change the Background Property of the bottom right two cells columns to the expression shown in Listing 4.
=Code.GetColor(Fields!EndOfDayRate.Value, MAX(Fields!EndOfDayRate.Value, "DataSet1"))
Listing 4.
If we modify our original query to limit the data to just show the Argentine Peso and the year 2001, we will see something similar to Figure 6.
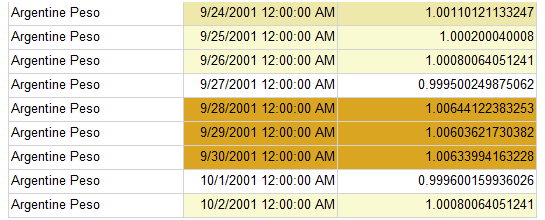
Figure 6.
No More Headaches
Although we’ve shown expression and custom code examples to modify colors, the same functionality can be used to modify values that are shown, the types of objects displayed, or even a custom header for each user. No matter what you want to do with your report, expressions and custom code functions can make it happen. At this point in our adventure, we’ve learned all about designing reports, but we need to learn what to do with the report once it is created. Administering the report is covered in the final step of the SSRS Stairway, Management.
