This is the seventeenth article in a series entitled Stairway to Integration Services. Previous articles in the series include:
- What is SSIS? Level 1 of the Stairway to Integration Services
- The SSIS Data Pump - Level 2 of the Stairway to Integration Services
- Adding Rows in Incremental Loads – Level 3 of the Stairway to Integration Services
- Updating Rows in Incremental Loads – Level 4 of the Stairway to Integration Services
- Deleting Rows in Incremental Loads – Level 5 of the Stairway to Integration Services
- Basic SSIS Workflow Management – Level 6 of the Stairway to Integration Services
- Intermediate SSIS Workflow Management – Level 7 of the Stairway to Integration Services
- Advanced SSIS Workflow Management – Level 8 of the Stairway to Integration Services
- Control Flow Task Errors – Level 9 of the Stairway to Integration Services
- Advanced Event Behavior – Level 10 of the Stairway to Integration Services
- Logging – Level 11 of the Stairway to Integration Services
- Advanced Logging – Level 12 of the Stairway to Integration Services
- An Overview of SSIS Variables - Level 13 of the Stairway to Integration Services
- An Overview of Project Conversion - Level 14 of the Stairway to Integration Services
- An Overview of SSIS Parameters - Level 15 of the Stairway to Integration Services
- Flexible Source Locations - Level 16 of the Stairway to Integration Services
Introduction
In the previous installment we used SSIS parameters, variables, and the Foreach Loop Container to load data from a dynamic number of sources. In this article we will kick this up a notch by loading data into different subject areas from multiple files.
Before we begin, please click this link (http://andyweather.com/data/WeatherData_Dec08_Aug09.zip) to download more source data collected from my weather station in Farmville. Decompress the file wherever you would like, but I like putting test data in the SSIS solution folder and I recommend unzipping the file in the same location you unzipped the last compressed file. I decompressed the file contents into a folder named “data” in the SSIS solution folder, as shown in Figure 1:
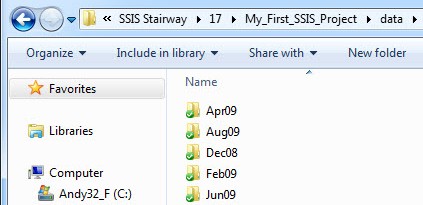
Figure 1
The data in the compressed file is stored in each MonthYear folder in the format “MMMYY.” Weather data is stored in subfolders beneath the MonthYear folders. The Dec08 and Feb09 MonthYear folders contain a single subfolder named TH. The Apr09, Jun09, and Aug09 MonthYear folders contain two subfolders: TH and WIND.
Each TH folder contains a file named sensor1-all.csv. These files represent temperature and humidity data collected between December 2008 and August 2009. The files are cumulative – the February 2009 file includes all the data from the December 2008 file plus the records added between December 2008 and February 2009, and the April 2009 file includes all the data from the December 2008 file plus the records added between December 2008 and April 2009. All three files begin with records look like those shown in Listing 1:
Date,Time,Min T,Max T,Average T,Min H,Max H,Average H,Comfort zone,Min DP,Max DP,Average DP,Min HI,Max HI,Average HI,Low Batt
2008-12-25,19:00,8.5,10.9,9.71,32,36,33,2,-6.0,-5.0,-5.71,--,--,--
2008-12-25,20:00,6.3,8.5,7.21,36,40,38,2,-6.0,-5.0,-5.95,--,--,--
2008-12-25,21:00,5.3,6.7,6.37,39,43,40,0,-6.0,-6.0,-6.00,--,--,--
Listing 1
The WIND subfolders each contain two files named 1day.csv and all.csv, as shown in Figure 2:

Figure 2
We will be adding a new SSIS package to load data from the all.csv file in each MonthYear\WIND folder.
But first, let’s take a look at the LoadWeatherData.dtsx package. I suspect the new data will not play nicely with the LoadWeatherData.dtsx package. We begin by making sure the Project Parameter named SourceFolder is aimed at the correct folder.
I am building my version of the SSIS project in separate folders so I can save the state of the project at the completion of each article. You are probably not doing this, and that’s ok.
This is Step 17 of the Stairway to Integration Services. Previously, I was working on Step 16 and I copied the entire folder from a “16” folder to a “17” folder. This impacts the value of the SourceFolder project parameter (for me, but probably not for you). You can see my path in the SourceFile project parameter contains the number “16”, as shown in Figure 3:

Figure 3
Your SourceFile project parameter value will likely remain the same. I need to update my value to reflect “17” as shown in Figure 4:

Figure 4
Again, you probably don’t have to modify the value of your SourceFolder project parameter.
If you have been following along at home, your LoadWeatherData.dtsx package Control Panel looks similar to that shown in Figure 5:
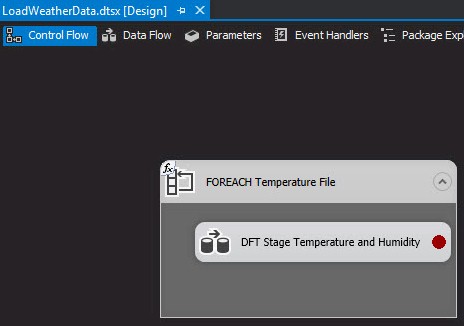
Figure 5
The brown-ish dot on the “DFT Stage Temperature and Humidity” data flow task indicates a breakpoint. If you unzipped the WeatherData_Dec08_Aug09.zip file in the location that held your previous data files – the folder specified in the SourceFolder project parameter – the “FOREACH Temperature File” Foreach loop container will find the new WIND files and this will cause the “DFT Stage Temperature and Humidity” data flow task to fail.
Why? Remember, the “FOREACH Temperature File” Foreach loop container uses the SourceFolder project parameter ($Project::SourceFolder) to dynamically set the Directory property of the Foreach File Enumerator (found on the Collection page of the Foreach loop container editor). The File Specification is set to retrieve the fully qualified file name of all comma-separated values files (“*.csv” files) found in the folder specified in the SourceFolder project parameter and any subfolders, as shown in Figure 6:
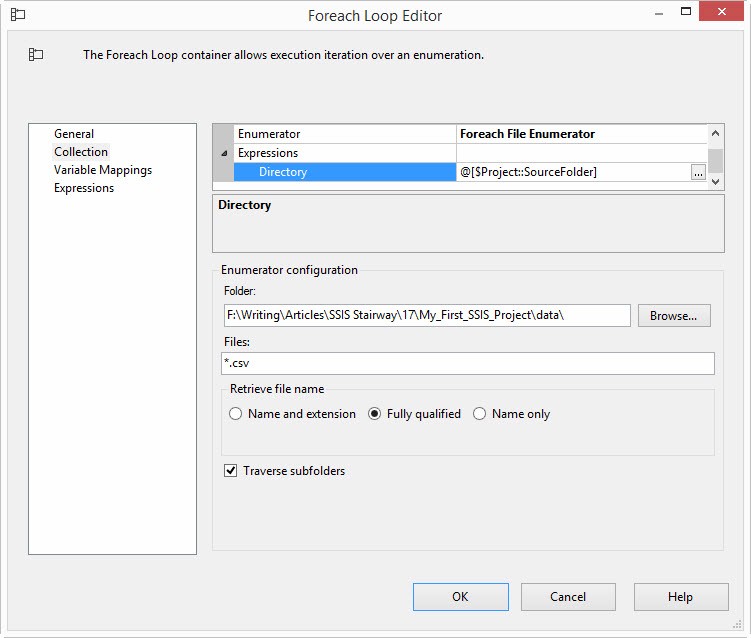
Figure 6
As it is currently configured, the “FOREACH Temperature File” Foreach loop container will return files from the WIND subfolders. That will pose a problem for the “DFT Stage Temperature and Humidity” data flow task because it is configured to only load temperature and humidity data. Let’s watch how it breaks and then walk through why it breaks.
Execute LoadWeatherData.dtsx in the SSIS debugger. When you hit the breakpoint, take a look at the Locals window (Debug -> Windows -> Locals) as you did near the end of Flexible Source Locations – Step 16 of the Stairway to Integration Services. Expand the Variables node and scroll until you can view the value of the User::SourceFileName variable.
Note package execution fails when the “FOREACH Temperature File” Foreach loop container encounters the first csv file in a WIND subfolder – pushing the full path of this file into the User::SourceFileName SSIS variable – as shown in Figure 7:
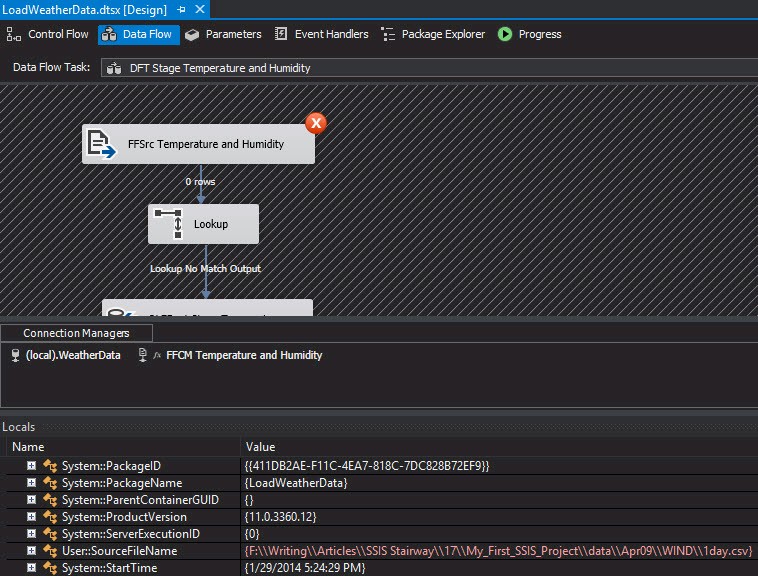
Figure 7
The first WIND file found on my system is named F:\Writing\Articles\SSIS Stairway\17\My_First_SSIS_Project\data\Apr09\WIND\1day.csv. This file has a single entry and it doesn’t match the layout of the temperature and humidity file. In the LoadWeatherData.dtsx SSIS package, the error is generated in the Flat File Source Adapter named “FFSrc Temperature and Humidity“. The error text is: “An error occurred while skipping data rows.” Your “FOREACH Temperature File” Foreach loop container may detect a different WIND file and generate a different error but, trust me, this execution will fail. The WIND data cannot be read by the “FFSrc Temperature and Humidity“ flat file source adapter. You will generate an error running the SSIS package in its current state.
Why does the load fail?
When the Flat File Connection Manager is created at design-time, the format of the flat file – its schema – is read into the flat file connection manager. This only happens at design-time, or during development. At runtime, the flat file connection manager can be described using a term familiar to object-oriented developers: immutable. Stating an object is immutable means it cannot change (for the most part… some attribute changes are allowed but let’s not get distracted…).
The Flat File Connection Manager is not the only immutable object in the data flow, though. The data flow pipeline is also immutable. As SSIS developers, we (mostly) interact with the data flow pipeline using data flow paths to connect data flow objects.
So, a question: If a different file has an equivalent format (schema), can it be loaded by the same flat file connection manager and data flow task just as a file for which the connection manager and data flow were designed? The answer is, “yes.” I can hear you thinking, “Andy, define equivalent.”
- The number of fields must be the same.
- The data types must either match those defined in the flat file connection manager or be implicitly coercible to the data types defined in the flat file connection manager.
- The data lengths must be the same length or less than those defined in the flat file connection manager.
Keep in mind that unless the data in each column means the same thing in all flat files, loading another file with the same connection manager and data flow results in a very clever way to pollute your database.
Fixing the Error
I can hear you thinking, “How do we fix the error, Andy?” That’s an excellent question! We have to change the file specification to exclude the WIND comma-separated values files and include only the temperature and humidity comma-separated values files.
If the LoadWeatherData.dtsx SSIS package is still executing in the debugger, please stop the debugger. Open the “FOREACH Temperature File” Foreach loop container editor and navigate to the Collection page. Change the Files property from “*.csv” to “sensor1-all.csv” as shown in Figure 8:
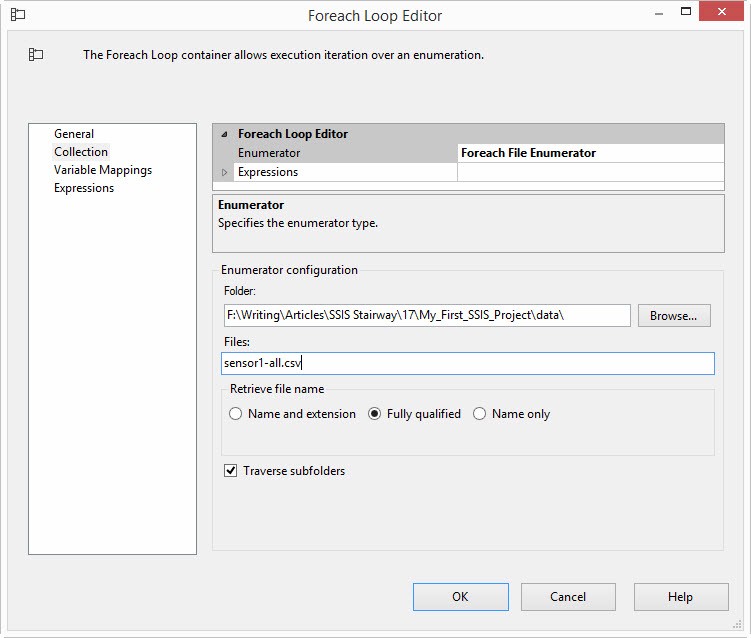
Figure 8
This change configures the “FOREACH Temperature File” Foreach loop container to only return files named “sensor1-all.csv” instead of any file with a “csv” file extension. The temperature and humidity files are named “sensor1-all.csv” and the other weather data files are named differently.
Close the editor and re-execute the LoadWeatherData.dtsx SSIS package in the SSIS debugger. The package succeeds this time. It also loads data from the two new temperature and humidity files into the database, as shown in Figure 9:
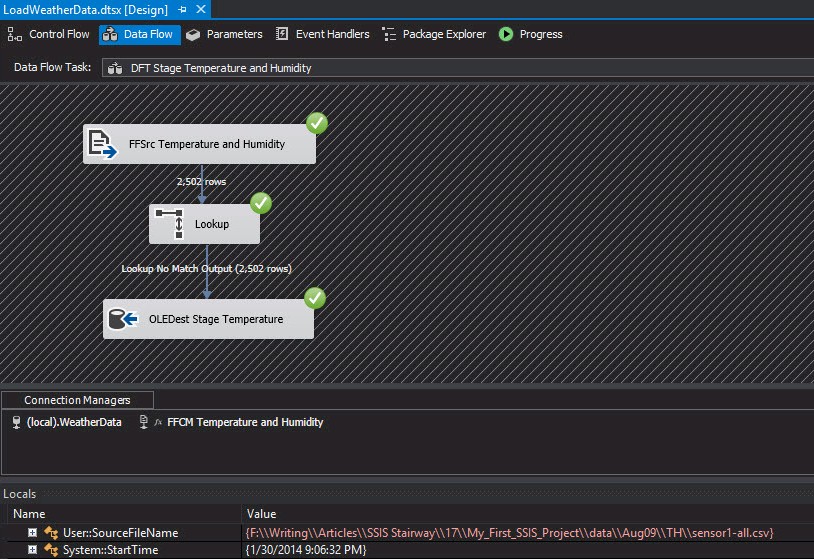
Figure 9
The LoadWeatherData.dtsx SSIS package is once again functional, but it is now improperly named. Let’s rename it LoadTemperatureData.dtsx as shown in Figure 10:
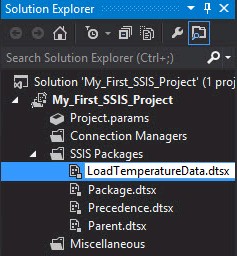
Figure 10
Before we add a package to load wind data, let’s think about the design some. I’m a fan of right-to-left design – starting at the output and working my way back to the input(s) – because it helps me identify the major steps (or blocks) in the design. Starting with the output of the new package, I find the destination database, WeatherData as shown in Figure 11:

Figure 11
I will stage the wind data in a table in in the WeatherData database. Working backwards, the staging will be accomplished by a “forward-only” incremental load data flow task in the new SSIS package, as shown in Figure 12:
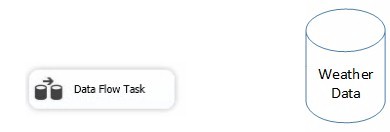
Figure 12
Taking another step back, this data flow task will be inside a Foreach loop container just like the Foreach loop container in the LoadTemperatureData.dtsx SSIS package, as shown in Figure 13:
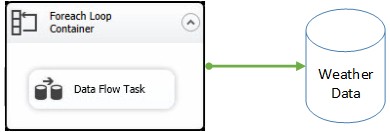
Figure 13
The diagram constructed in Figures 11-13 is not functionally accurate (most block diagrams are not functionally accurate).
Promoting a Connection Manager
The LoadTemperatureData.dtsx package contains a package connection manager aimed at the WeatherData database. SSIS 2012 offers project connection managers when developing packages in the Project Deployment Model. What’s more, it’s very easy to convert a package connection manager to a project connection manager. To promote a package connection manager to a project connection manager, simply right-click the package connection manager and click “Convert to Project Connection” as shown in Figure 14:
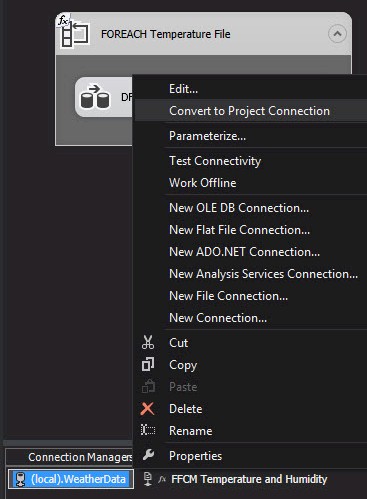
Figure 14
Once you click “Convert to Project Connection,” the connection manager is promoted to a project connection manager. The connection manager name is decorated with the prefix “(project)” as shown in Figure 15:

Figure 15
Also, the newly-promoted project connection manager is listed in Solution Explorer under the Connection Managers node, as shown in Figure 16:
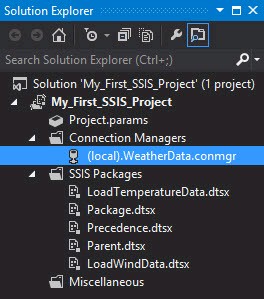
Figure 16
Cool. This saves a step in the new SSIS package. Which step? Let’s create that package and see!
Building LoadWindData.dtsx
Right-click the SSIS Packages node in Solution Explorer and click “New SSIS Package” as shown in Figure 17:
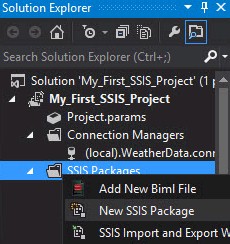
Figure 17
Rename the new package LoadWindData.dtsx as shown in Figure 18:
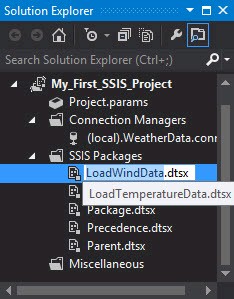
Figure 18
The renamed package will open in the SQL Server Data Tools – Business Intelligence (SSDT-BI) integrated development environment as shown in Figure 19:
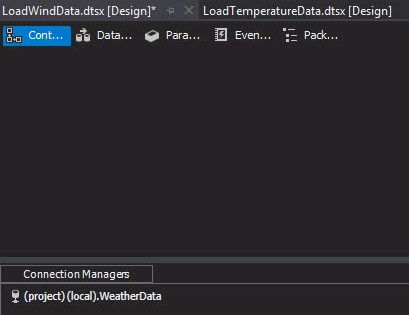
Figure 19
Note the project connection manager named “(project)(local).WeatherData” is available for use in the LoadWindData.dtsx SSIS package, and we didn’t have to do anything to make that happen. Why? All project connection managers are available in all SSIS packages in the project. How cool is that? (But wait, it gets better!)
Add a Foreach Loop Container to the Control Flow of the LoadWindData.dtsx SSIS package, and rename it to “FOREACH Wind File” as shown in Figure 20:
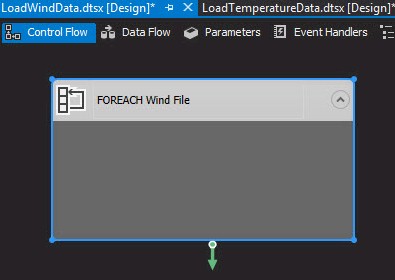
Figure 20
Open the Foreach loop container’s editor and navigate to the Collection page. Click the Enumerator Expressions property as shown in Figure 21:

Figure 21
Click the ellipsis in the value textbox of the Expressions property collection. The Property Expressions Editor opens. Select the Directory property from the Property dropdown as shown in Figure 22:
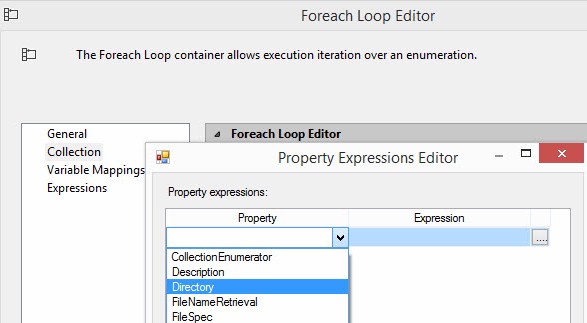
Figure 22
Next, click the ellipsis in the Expression textbox to display the Expression Builder. Expand the “Variables and Parameters” node. Click on “$Project::SourceFolder” and drag it to the Expression textbox, as shown in Figure 23:
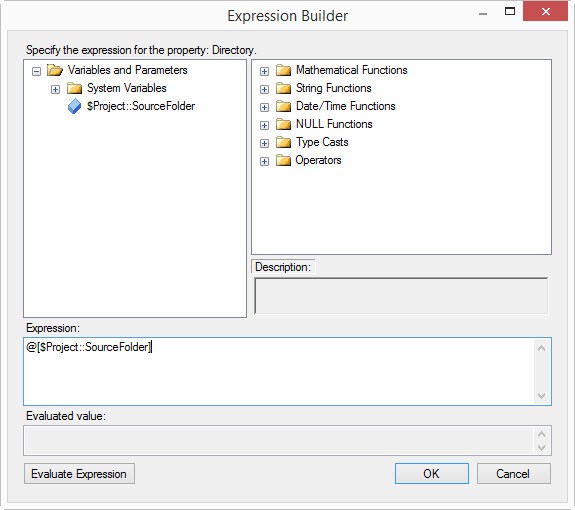
Figure 23
If you click the “Evaluate Expression” button, you will see the current design-time value of the $Project::SourceFolder project parameter, as shown in Figure 24:

Figure 24
This is yet another benefit of project-level objects in the Project Deployment Model of SSIS 2012. Similar to the project connection manager, project parameters are available for consumption by every package in an SSIS project. Even cooler!
Click the OK button to close the Expression Builder, and then click the OK button to close the Property Expressions Editor and return to the Foreach Loop Editor. The files we wish to retrieve using this Foreach loop container are files that contain Wind data for multiple days. These files are named “all.csv” and are found inside \WIND subfolders inside MonthYear folders in our weather data files, as shown in Figure 25:

Figure 25
In the Foreach Loop Editor’s Files property, let’s enter “all.csv”. Let’s also check the “Traverse subfolders” checkbox, as shown in Figure 26:
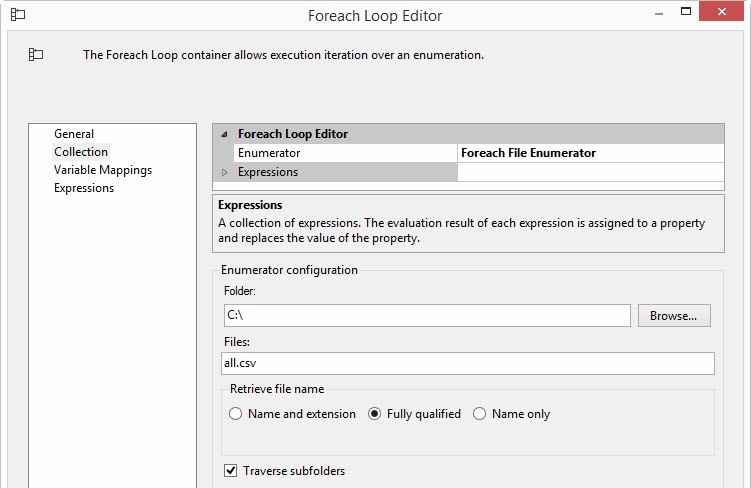
Figure 26
We have configured the Foreach loop container to search for files named all.csv in – or in a subfolder within – the path contained in the project parameter named $Project::SourceFolder. The Foreach loop will find and return these files one at a time. As it locates files named “all.csv,” we need to send the fully qualified path to these files somewhere. Let’s configure an SSIS variable to contain the path to the source file for each iteration of the Foreach loop container.
Click on the Variable Mappings page. Click the Variable dropdown and then click the “<New Variable…>” option as shown in Figure 27:

Figure 27
Make sure the Container property in the Add Variable window is set to the package container – LoadWindData.dtsx – as shown in Figure 28:
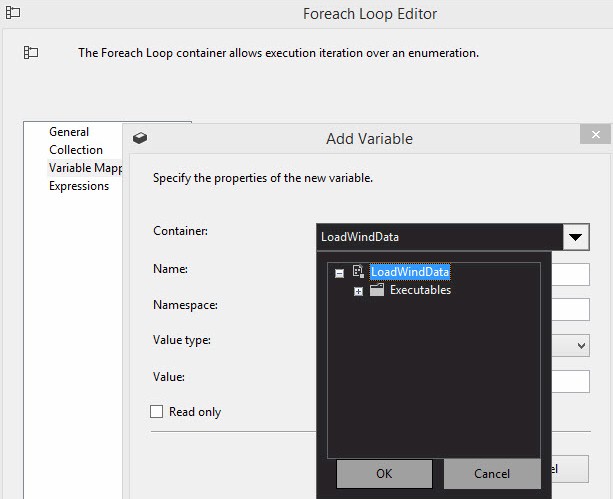
Figure 28
Enter the name of the variable – SourceFileName – as the variable name as shown in Figure 29:
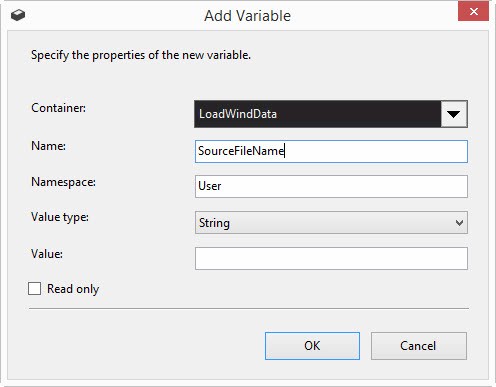
Figure 29
Click the OK button to close the Add Variable window and return to the Foreach Loop Editor as shown in Figure 30:
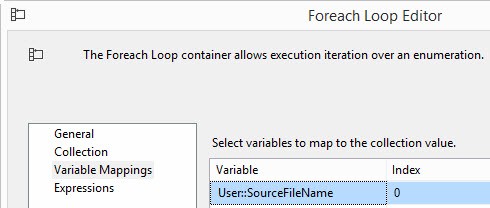
Figure 30
Click the OK button to close the Foreach Loop Editor.
Drag a Data Flow Task from the Control Flow SSIS Toolbox into the Foreach loop container. Rename the data flow task “DFT Load Wind Data” as shown in Figure 31:
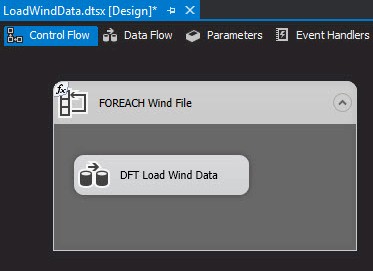
Figure 31
Double-click the “DFT Load Wind Data” data flow task to open the editor. Add a Flat File Source adapter and rename it “FFSrc Wind Data” as shown in Figure 32:
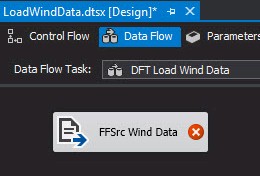
Figure 32
Double-click the “FFSrc Wind Data” flat file source adapter to open the editor.

Figure 33
Click the New button beside the “Flat file connection manager” drop down to create a new Flat File Connection Manager and open the Flat File Connection Manager Editor. Click the Browse button beside the “File name” property textbox to display the Open dialog. Change the file type filter to “*.csv”, navigate to the ..\data\Apr09\WIND folder, and select the all.csv file as shown in Figure 34:
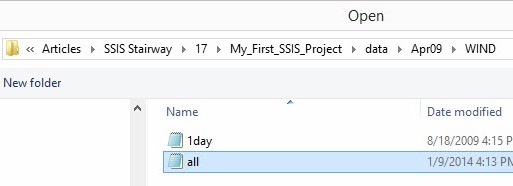
Figure 34
Change the name of the Flat File Connection Manager to “FFCM Wind Data” as shown in Figure 35:
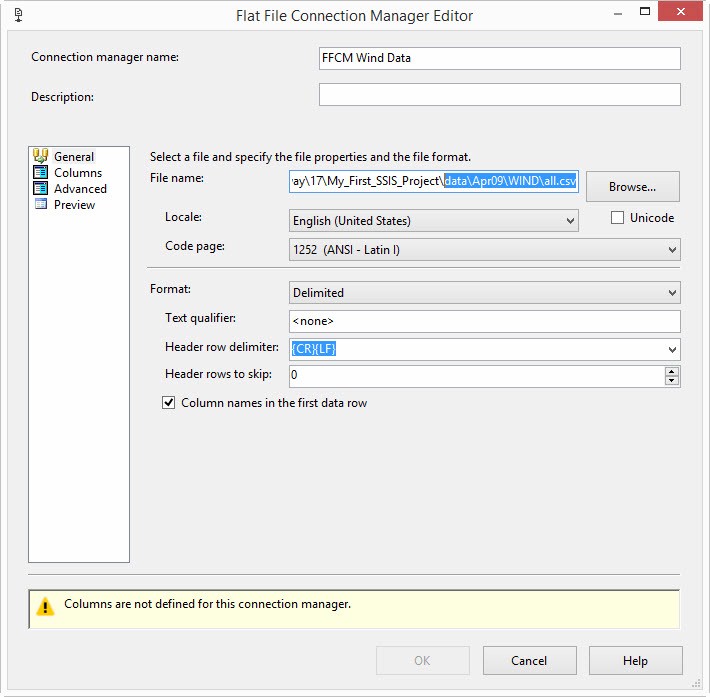
Figure 35
Click on the Columns page to preview the data in the file, as shown in Figure 36:
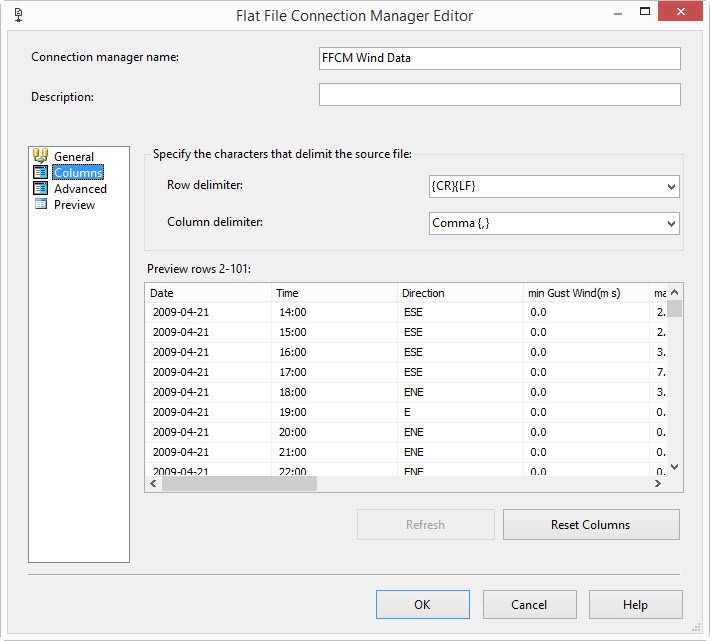
Figure 36
Click the OK button to close the Flat File Connection Manager Editor and return to the Flat File Source Adapter. Click on the Columns page to display the columns returned from the Flat File Connection Manager to the Flat File Source Adapter.
In the grid on the lower right we find External Columns and Output Columns. External Columns are supplied to the Flat File Source Adapter from the Flat File Connection Manager. We can change the names of these columns, but not here. We must change the name in the Flat File Connection Manager. We can, however, change the alias of the columns by editing the Output Column name.
I want to remove the spaces and the “(m s)” text from the column names. I can do that by changing the column name in the Output Columns column, as shown in Figure 37:
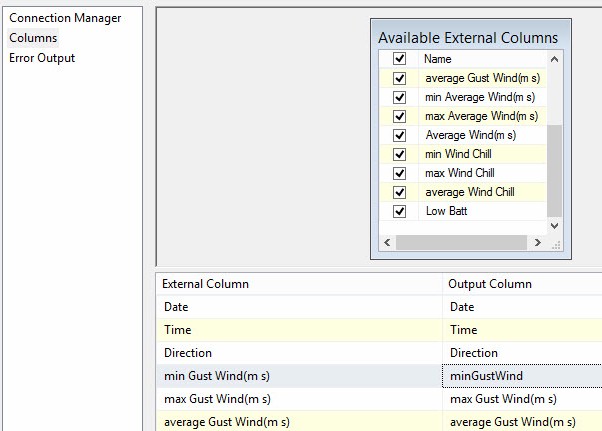
Figure 37
Once completed, the Columns grid appears as shown in Figure 38:
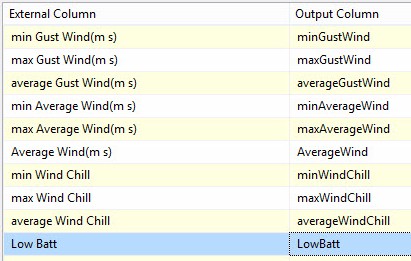
Figure 38
Click the OK button to close the Flat File Source Adapter. Your Data Flow should now appear as shown in Figure 39:
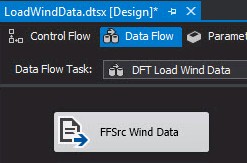
Figure 39
Drag a Lookup Transformation from the SSIS Toolbox and connect a data flow path from the “FFSrc Wind Data” flat file source adapter to the Lookup, as shown in Figure 40:
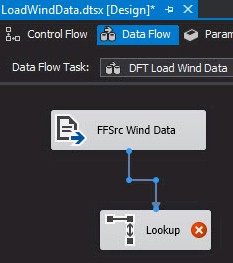
Figure 40
On the General page, change the “Specify how to handle rows with no matching entries” dropdown to “Redirect rows to no match output” as shown in Figure 41:
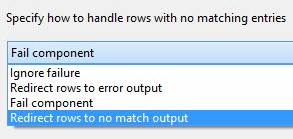
Figure 41
Click the Connection page.
Make sure the “OLE DB connection manager” dropdown is set to “(local).WeatherData.” We are going to use some functionality in the Lookup Transformation to create the destination table. Click the New button beside the “Use a table or view” dropdown, as shown in Figure 42:
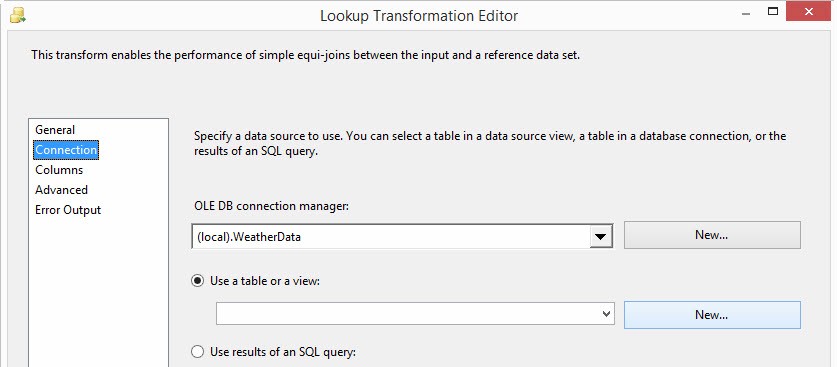
Figure 42
As when we create a table from an OLE DB Destination Adapter, the default table name displayed in the Create Table window is the name of the Lookup Transformation – “Lookup” in this case. Note the column names reflect the changes we made to the Output Column names in the Flat File Source Adapter (there are no spaces and the “(m s)” text has been removed) as shown in Figure 43:
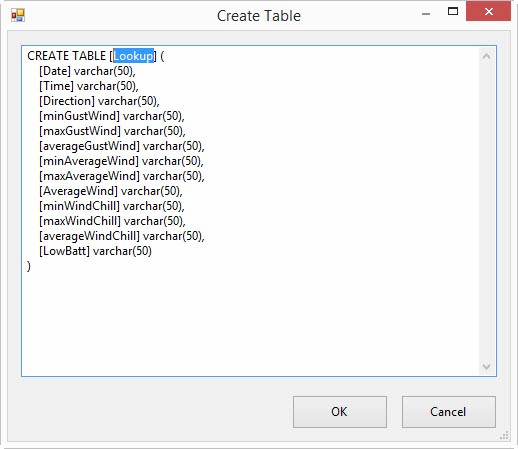
Figure 43
Edit the statement by changing the table name to StageWind as shown in Figure 44:
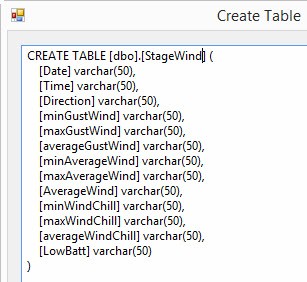
Figure 44
Click the OK button to create the table and return to the Lookup Transformation Editor.
I am not sure why this happens but when I follow the steps I just outlined, the “Use results of an SQL query” option is selected and the query reads “select * from “ and the name of the table I just created using the New button. That’s fine because I was going to select that option anyway. But let’s edit the query so that it reads (as shown in Figure 45):
Select [Date], [Time]
From [dbo].[StageWind]
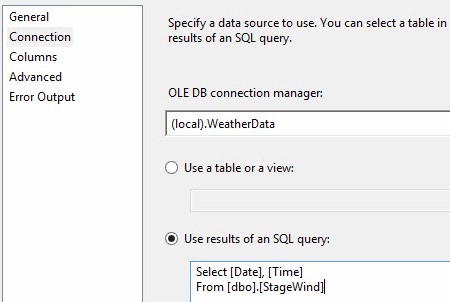
Figure 45
Remember: Our data are created once per hour and it is never updated. If a row exists in the destination table for a date / time combination, that indicates we have previously loaded that row.
If you click the Preview button, you will see no data in the Date and Time columns returned (we just created the table and it is empty), but you will be able to test your query to see if it is constructed well-enough to return an empty dataset, as shown in Figure 46:
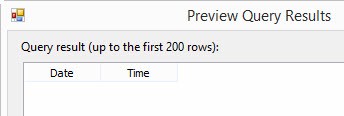
Figure 46
Since our data is never updated, we only need to check for new rows or existing rows. If we find a date / time in our destination table, it is an existing row. So we check for matches on the Date and Time columns only.
Click on the Columns page and connect the [Available Input Columns].[Date] column to the [Available Lookup Columns].[Date] column and the [Available Input Columns].[Time] column to the [Available Lookup Columns].[Time] column, as shown in Figure 47:

Figure 47
We configured non-matched date / time rows to flow out of the Lookup Transformation’s No Match output. We simply discard matching rows – the matching rows flow into the Lookup Transformation’s Match output, but we do not connect the Match output in the data flow.
Click the Ok button to close the Lookup Transformation Editor. Drag an OLE DB Destination Adapter onto the data flow and rename it “OLEDBDest Stage Wind”. Connect a data flow path from the Lookup Transformation to the “OLEDBDest Stage Wind” OLE DB destination adapter. When prompted, select the “Lookup No Match Output” from the Lookup Transformation, as shown in Figure 48:
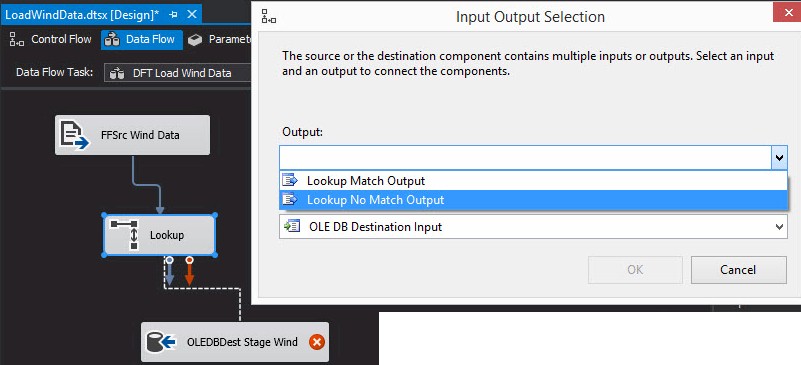
Figure 48
Open the editor for the “OLEDBDest Stage Wind” OLE DB destination adapter. Make sure the “OLE DB connection manager” dropdown is set to “(local).WeatherData” and set the “Name of the table or the view” dropdown to the StageWind table, as shown in Figure 49:
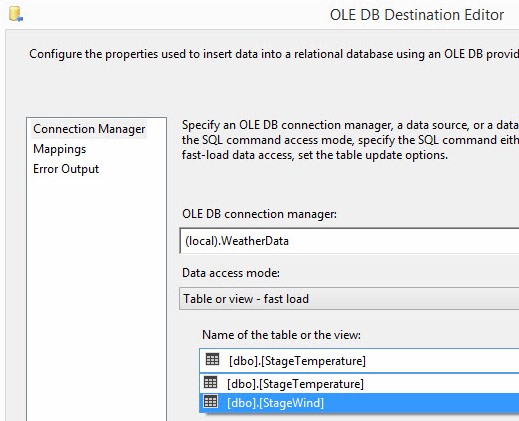
Figure 49
Click on the Mappings page to complete the auto-mapping of the Available Input Columns to the Available Destination Columns, as shown in Figure 50:
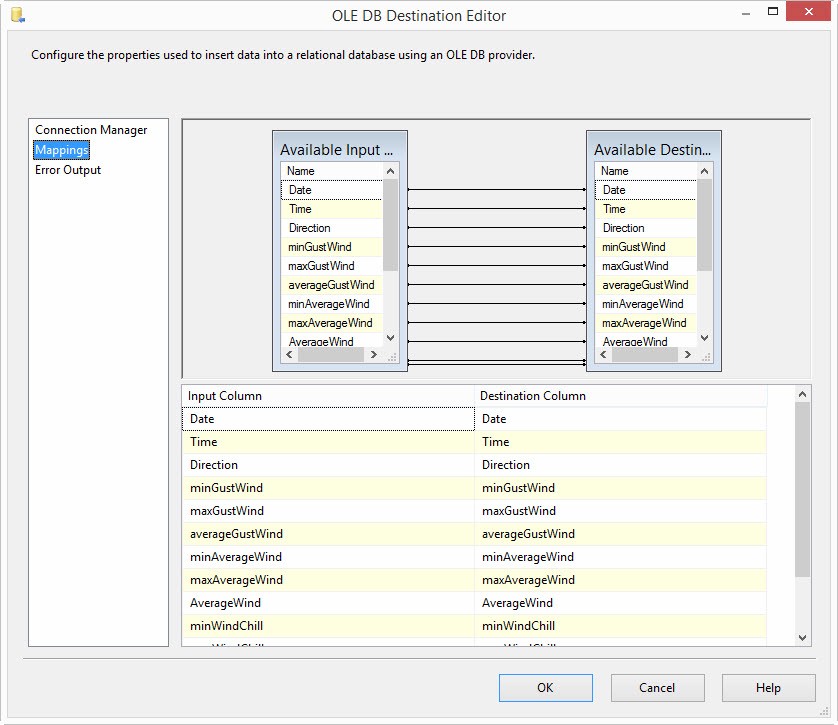
Figure 50
Click the OK button to complete the OLE DB Destination Adapter’s configuration. Your data flow should resemble that shown in Figure 51:
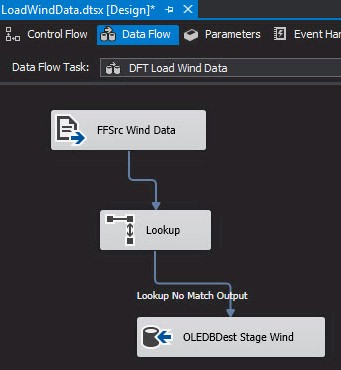
Figure 51
Time to Test
Before executing the LoadWindData.dtsx SSIS package in the SSDT-BI debugger, open SSMS, connect to the WeatherData database, and execute the following query:
Select *
From dbo.StageWind
Your results should be similar to mine, shown in Figure 52:
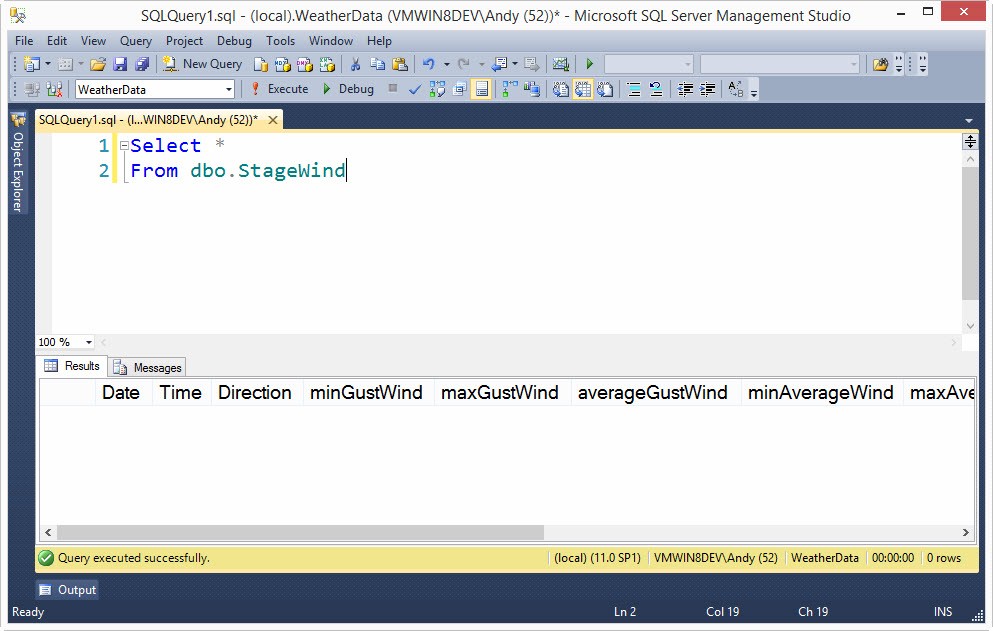
Figure 52
Execute the LoadWindData.dtsx SSIS package in the SSDT-BI debugger. Your data flow should appear similar to that shown in Figure 53, when execution completes:
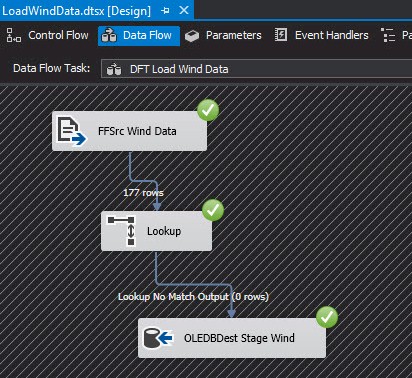
Figure 53
When the package completes execution, but while the debugger is still running, click on the Progress tab in SSDT-BI. If you scroll to the node labeled “Task DFT Load Wind Data” you will find the data flow executed (“Start”) 3 times, as shown in Figure 54:
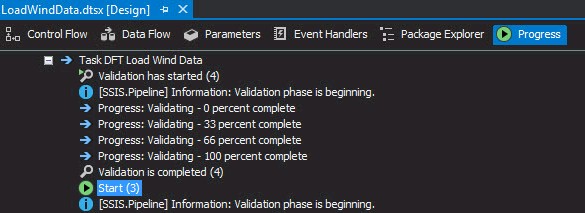
Figure 54
If you return to SSMS and re-execute the test query, you will find data in the dbo.StageWind table, as shown in Figure 55:
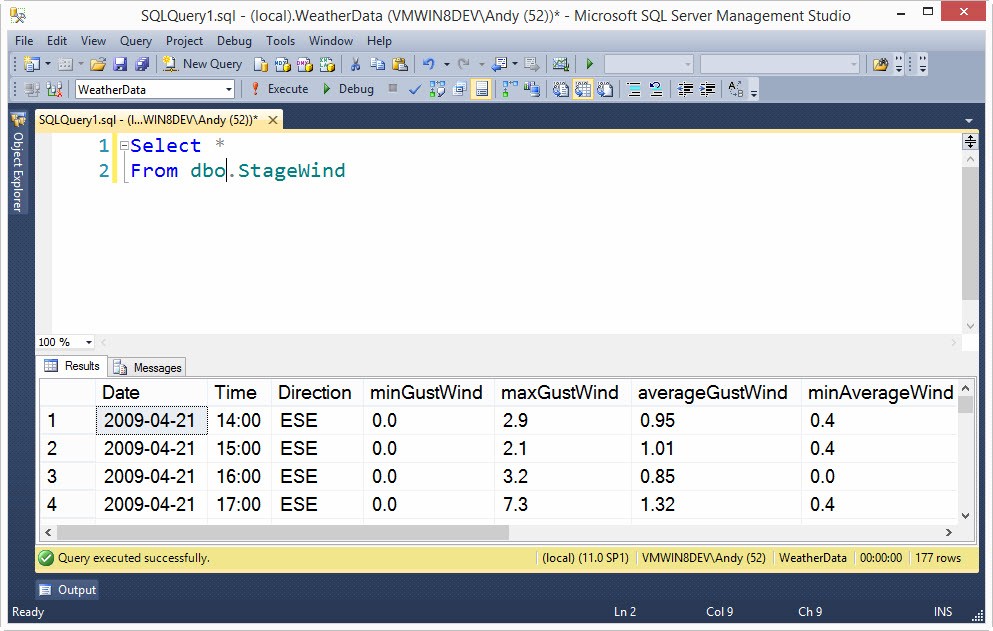
Figure 55
Conclusion
In this article, we leveraged SSIS parameters, variables, and the Foreach Loop Container to load data from a number of disparate sources. We reconfigured (and renamed) the original package to load only temperature and humidity data. The Foreach Loop in our new SSIS package (LoadWindData.dtsx) allowed us to zero in on wind data from three sources, but we could have easily loaded from 30 sources – or from an unknown or variable number of sources.


