I’ve had a goal to redo my demo environments and get them set up to work for a variety of customers in different places. I decided to do this in a way that uses new Redgate technology, with the integration of Flyway with Flyway Desktop.
This first article looks at the environment I’ve set up for my system.
This is part of a series of working through Flyway and Flyway desktop to demo database changes.
Overview
I wanted to demonstrate DevOps, as I would recommend most customers set up to get started in their environment. It doesn’t matter if they’re SQL Server or another RDBMS, the approach at a high level is the same. Obviously the setup for each technology would be different in the details.
I DO NOT recommend starting with a live database or project. This is a Proof of Concept (PoC), so use something that can fail.
For this start, I’m working with SQL Server and PostgreSQL.
SQL Server
I work with SQL Server all the time. That’s the majority of my customers, so we’ll start with a new SQL Server instance. I’ll run this code, but this is to simulate multiple environments:
CREATE DATABASE FWPoc_1_Dev
CREATE DATABASE FWPoc_2_Integration
CREATE DATABASE FWPoc_3_QA
CREATE DATABASE FWPoc_4_Staging
CREATE DATABASE FWPoc_5_Prod
GO
These environments are set up to be this model:
- 1_Dev – the place I make code changes. This should be the only place I actually touch code.
- 2_Integration – this is a place where we mix up code from multiple developers. all code ought to get pulled to each dev db at some point, but for many environments. I recommend getting some deployment here for devs to see all code.
- 3_QA – standard test environment
- 4_Staging – This is a DBA test environment, and this ought to get refreshed from production, either schema-only or full refresh, to validate the deployment
- 5_Prod – live database.
I’ll then run this code:
USE FWPoc_1_Dev
GO
CREATE TABLE dbo.Demo (DemoID INT )
GO
The idea is we get that table to the other 4 DBs without actually connecting to them directly and running this code.
PostgreSQL
My setup for PostgreSQL will be similar, but smaller. I’m experimenting here, and one large 5 environment demo is enough. Here I’ll use 3:
- fwpoc_1_dev – development environment
- fwpoc_3_qa – test environment
- fwpoc_5_prod – live environment
Again, the goal is only write code in 1 and get it to 3 and 5. I’m keeping the numbering to try and keep everything simple and similar.
I want to run PostgreSQL, but I want to use containers. I have enough server services running, so I’m starting with a container. First step, update the container:
Next, I need to run the container. I’ll do that with this command. This names my container pgdev and gives me a password to connect for the “postgres” user. I also will use a volume on my local drive.
docker run --name pgdev -e POSTGRES_PASSWORD=demo1234!@# -d -p 54320:5432 -v C:Dockerpostgresql-1-dev:/var/lib/postgresql/data postgres
Before I run this, I’m create folders on my local C: drive for the docker data to safe. This is the folder I’ll map in my containers.
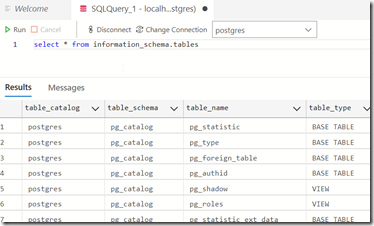
I’ll connect with Azure Data Studio (ADS) as I have the PostgreSQL extension. Once connected, I’ll query the information schema tables.
This works. Now, let’s set up a dev environment similar to SQL Server. First, we create a database with the CREATE DATABASE command.
create database fwpoc_1_dev
Once I run that, I’ll select it in the ADS connection drop down. Now I run this to create a schema and table.
create schema poc;
create table poc.Demo ( DemoID int);
insert into poc.Demo (DemoID) values (1), (2)
select * from poc.demo
This works and gets me a development environment. I’ll start another container for qa and prod, but I won’t do that now. Instead, I’m just getting the base environments set up.
Summary
That’s it. This post was about getting an environment set up and ready for development on a PoC. This is the first step, and it’s already a lot.
Future posts will look at the Flyway and Flyway Desktop settings, a repository, and a MySQL set of environments.
Follow the entire series on my blog.


