SQL Server is now compatible with different Linux distributions, and there is a lot of excitement about it.
How ever one of the main questions when ever you say SQL Server 2017 is now supported in Linux is, Have you test it? how do you install it?
By looking in the web you can find a lot of post and videos related to it, however most of them are based with Azure VM's (one great post I found is from a good friend that you can find
here) or there is also the assumption that you will have an internet connection from your server, but what if not? What if you are a financial institution that is PCI-DSS compliant and the direct connection to the web is blocked or simply your network administrator doesn't want to allow you access to the Microsoft repositories from the network your server is running or you created your VM and the connection is not shared with your host?
Well, let me tell you there is an option, you are not deemed to fight against the network engineers to enable you the access and here I'll show you the steps.
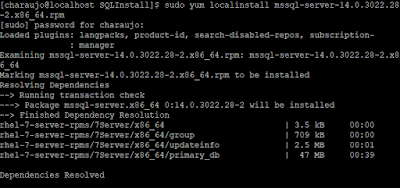
4. If you look at the bottom line, it stops at the Question if the size of the package and the size matches, if the software is the one you would like to install etc, if everything is correct you will then need to Write the letter "y" to confirm.
5. After confirming and hitting enter, the process will start to deploy the files in the system, however you will need to pay attention to the following message:
It says "complete!" but there is a remark "Please run 'sudo.... to complete the setup...' " so go and execute the command, otherwise SQL Server won't be installed as it only exported the files but didn't actually installed the engine and you will see why in the next step.
6. After executing that command, it will ask you to choose the version you would like to install
So make sure to enter the right version, In my case I choose 2, as it won't support a production environment and is only for demo purposes.
7. After selecting the version, it will ask you to agree with the license terms and you will need to write "Yes" if you accept it or "No" if you don't.
8. Then it will ask you to configure the "sa" password.
9. After configuring the password the installation will succeed. However one of the problems you will face after getting it installed, is that you can't connect from outside of the server itself, so what you need to do is to enable the port through the firewall, and you can do that by running the following commands:
sudo firewall-cmd --zone=public --add-port=1433/tcp --permanent
sudo firewall-cmd --reload
The first command opens the port 1433 and the second command restarts the firewall service (sort of speak)
10. After doing all of the above steps and rebooting the server, you should be able to connect to your SQL Server instance, Congratulations!
Hope this steps lets you get up and running and in the case you run into any issue, let me know and I'll be glad to help and learn with you.
Thanks for reading!
P.D.: If by any chance you don't know how to get Red Hat installed, I'm preparing another post with those steps.


