- Open the windows disk manager.
- Right click the new disk in Windows Disk Management and select online.
- Right click again and select initialize.
- Finally format it by right clicking the disk and selecting New Simple Volume.
- This will open Simple Volume Wizard. Provide the new drive letter(For Example U) and label for the disk.
- In the Cluster Manager ,select the storage in the left pane.
- Select the Add Disk in the Action pane and select the proposed new disk.
- In the cluster manager ,expand the services and applications
- Right click the MSDTC group and select Delete.
- Now the existing MSDTC disk (in our environment X drive) will be available under the available storage.
- Select the old disk (X drive) under the storage and click on change drive letter option available in the activity pane
- Select None as new drive letter and click Ok button
- Select the new disk ( U drive ) under the storage
and click on change drive letter option available in the activity pane
- Select X as new drive letter and click Ok button
- The last four steps are done to keep the drive letter for new disk as same as the old one. These four steps are not mandatory to perform.
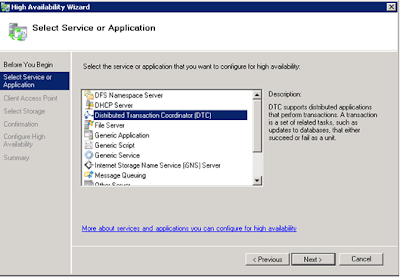
- Right click on the Services and Application and select Configure Services or Application option
- This will open the high availability wizard screen.
- Select next which will list Services or application that can be configured for the high availability.Select the Distributed Transaction Coordinator(DTC)
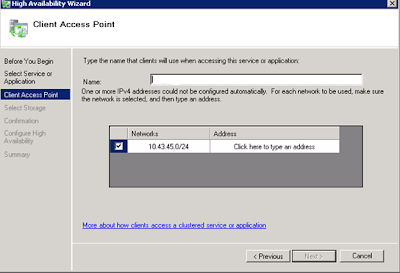
- Select Next which will open the client access point configuration screen as given below.Enter the network name and IP address which we have noted down in the first step.
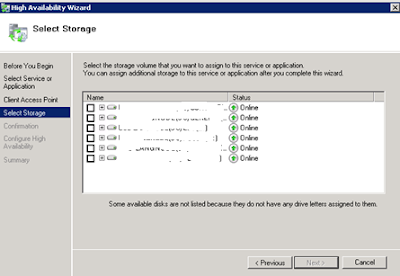
- Select Next,which will open the storage configuration screen.This will list all the disk available under the available storage group. Select the appropriate disk and click Next


