I have been working heavily with Microsoft Data Services (MDS) in SQL Server 2012 over the past few months, and really like the product. Through my use of it I have learned some tips and tricks that I will share on this blog over the next few months. My first tip concerns subscription views, which are used as a simple way to extract master data from MDS. Subscription views are simply SQL Server views that can be used by any tool that can use standard SQL Server views. You create these subscription views via the Integration Management -> Create Views page of the Master Data Manager Web User Interface (“UI”) or the ExportViewCreate operation of the Web services API.
Subscription views provide a layer over the MDM tables, denormalizing the master data and applying recognizable names to columns, making them much easier to work with. Note that direct queries against the MDS tables should be avoided because future product releases may not have the same schema objects. Once generated, subscription views appear as ordinary views within the “mdm” schema of the MDS SQL Server database.
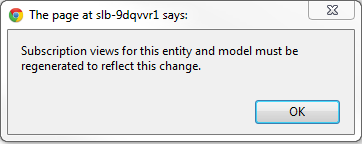
Over time, you may need to expand or otherwise revise your master data model, hence changing the MDM tables. If you already have subscription views, those views may become out of sync with the underlying model. For example, there may be a new attribute that is not included in the view. When you make a change to a model with a subscription view and click Save, you will receive this prompt:
Because subscription view changes can destabilize your processes that consume those views, MDS lets administrators selectively regenerate views (and sometimes requires deletion of views prior to a model change, such as the deletion of a attribute). As a guide, the Changed column in the list of views will show True for any views where the model has changed since view generation:
To regenerate a view against the latest model, you don’t need to delete it and add it back (which I was doing at first). Instead, go to Integration Management -> Create Views, select the view, click Edit then click Save. That is all that is too it!
More info:
Publishing Master Data with Subscription Views – Part 1: The Basics
Subscription Views – Part 2: Combining and Customizing Views


