Hello Friends,
Sometimes life is so uneasy that you didn’t get time for the work which you like the most. Now those days are gone so I am back.It’s been months I haven’t written anything . I have received lot of mails through blogs and LinkedIn which I tried to reply.
Days are gone and now the pet command “DCPROMO” which is used to install Active directory is now the thing of past. But command can go not the concept.
So, How to Install Active Directory in Windows Server 2012?. I will try to provide exact way to install and configure Active Directory in new world.
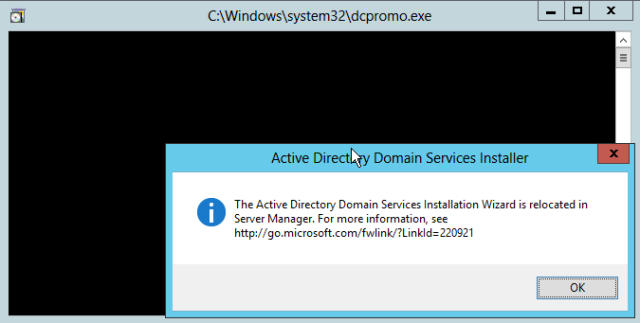
Screen which comes when we use “dcpromo” to install AD.
This means we need to go to Server Manager to Install AD.
Steps:
a) How to Install AD.
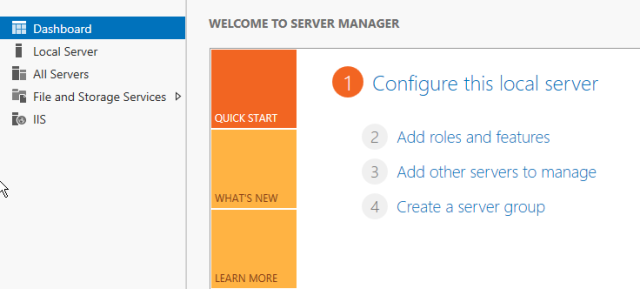
1) Go to Server Manager.
2) On the server manager page dashboard . Click on Add roles and features.
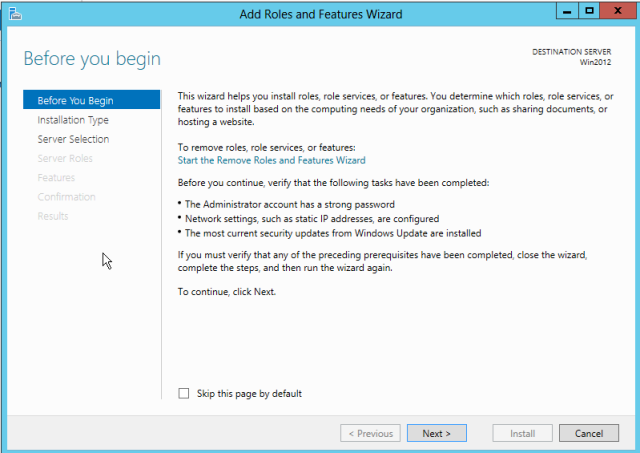
3) Roles and Features Wizard will open which will allow to add different roles and features in Window server. On the Default page , click next
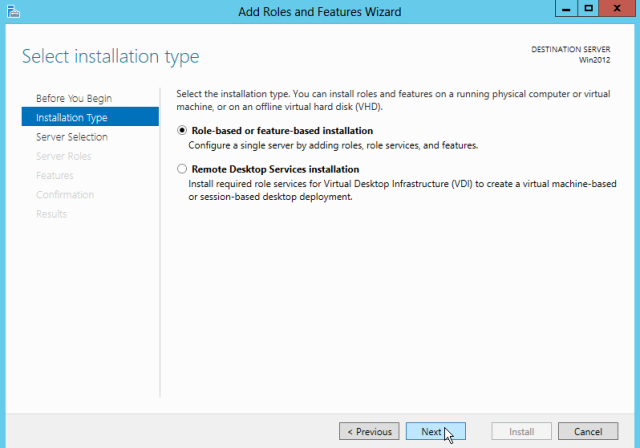
4) Select Role based or feature-based installation. As we are installing role directly on a particular server and not on any env. remotely.
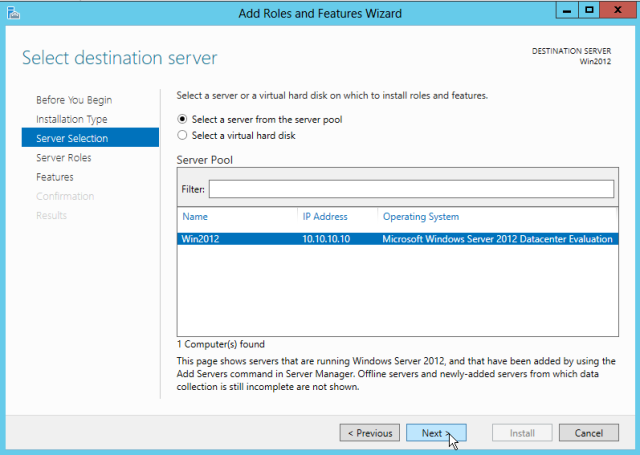
5) Current server will come by default. Select the server and click next.
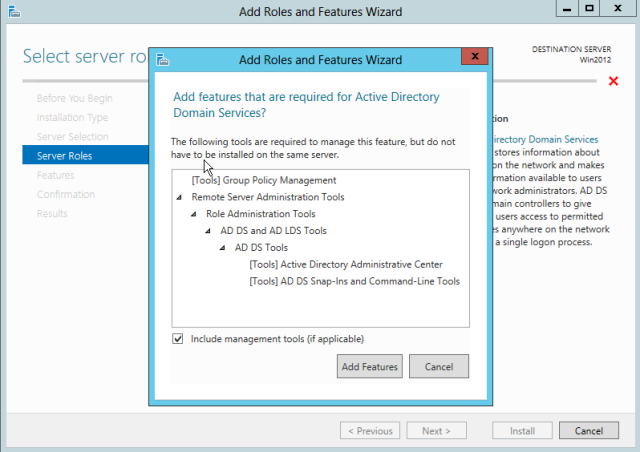
6) On the Server Role page select the Active Directory Domain Services. A list of additional things which are required with this will appear, select Add Features.
7) Select the features like .Net and Group policy Management. Scrolling down you will see the Remote server Administration tool is already selected as it is required with Active directory installation.
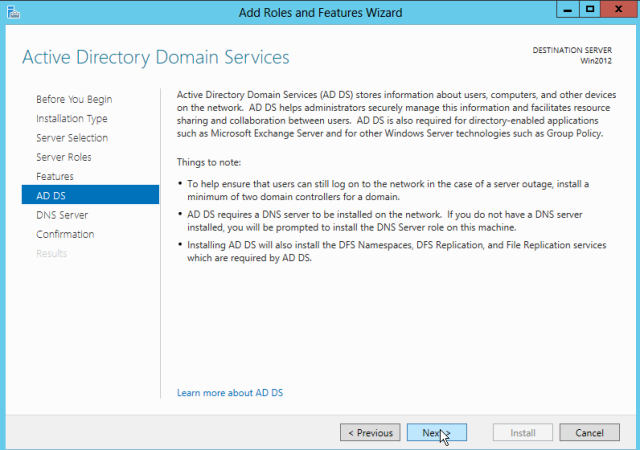
8) Read the information given in AD DS page and click Next
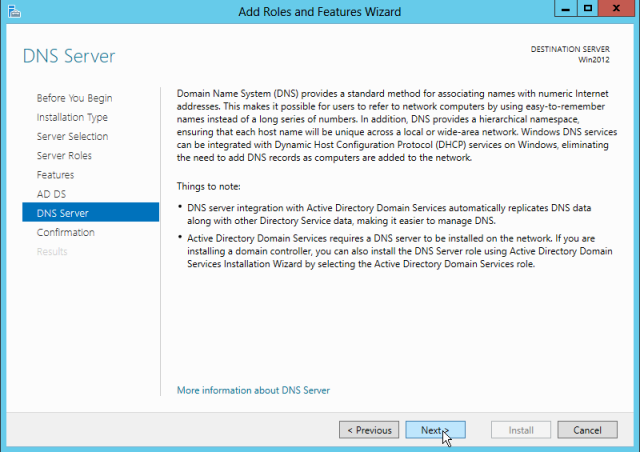
9) Read the DNS information and click next.
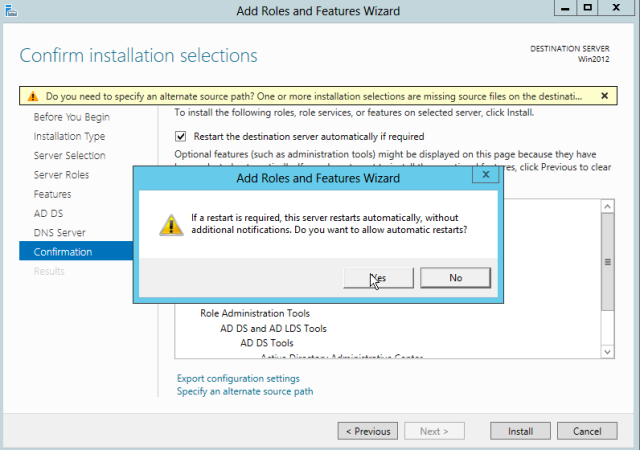
10) Select the restart the destination server check box and click Install.
11) You are also export the Configuration settings which has been defined for future use.
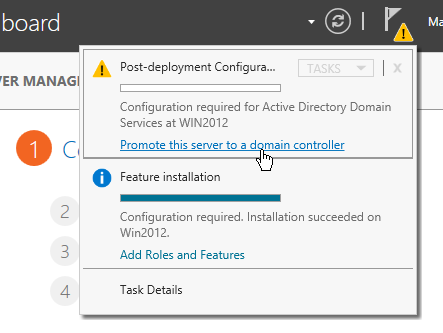
12) Once AD DS is installed you can start configuration directly from result page “ Promote this server to domain controller”. It can also be done through Server Manager page.
14) Close the wizard , once installation completes.
Steps:
b) How to Configure AD.
1) After AD DS role is installed it will be directly displayed on the ‘Server Manager’ page. For completing the configuration open the Notifications Pane by clicking on Notifications icon on the top of the Server Manager. click Promote this server to a domain controller.
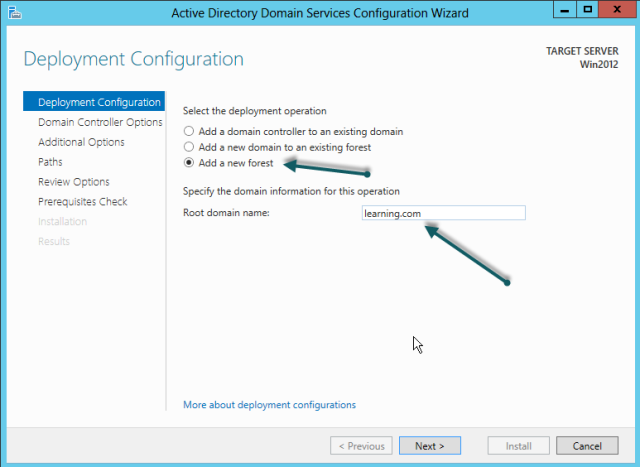
2) As we are creating a new forest . Select the option “Add New Forest” and provide the name of root domain. i.e in my case it is learning.com
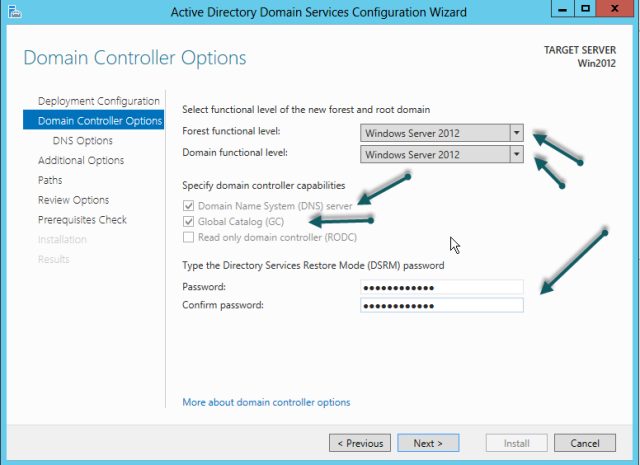
3) Select Forest functional level and Domain Functional Level. Here I am considering that all my servers are server 2012 . If there are server less than window server 2012. We should consider for backend Compatibility and level should be considered accordingly.
a) As it is the first Domain controller there is no option to check or uncheck . But for future ADC we need to check or uncheck these option as per need.
b) Kindly provide the DSRM password. It commonly known as passphrase earlier. Which is used while adding or removing any additional domain controller to have administrator authentication.
Note: Kindly note the password for future perspective.
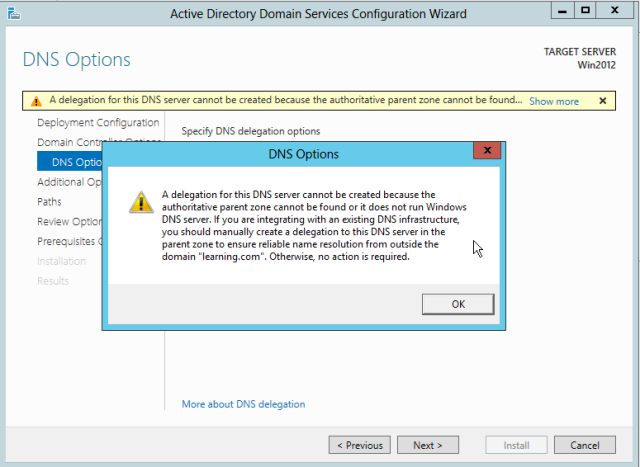
4) Read the below Warning and click Next. This warning is basically because of the Authoritative Zones which need to be created in DNS explicitly.
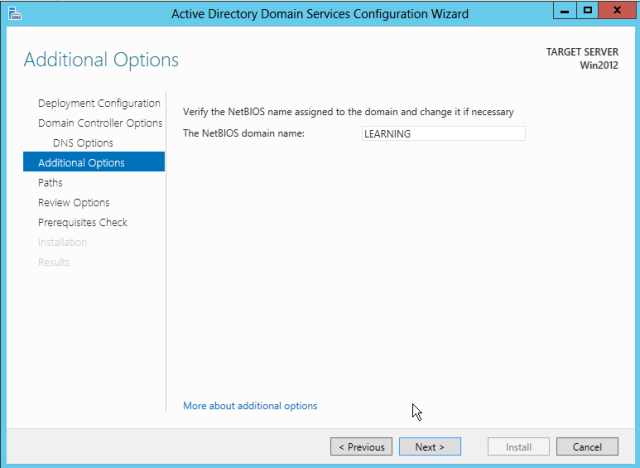
5) Provide the Netbios name of your domain in the field required. i.e Learning for our case.
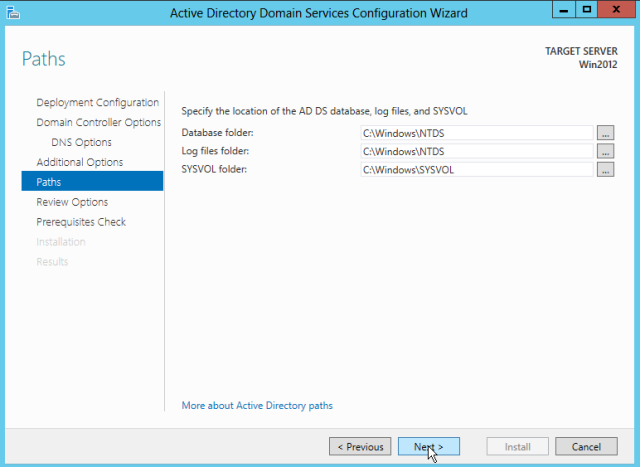
6) Specify the location of below NTDS and Sysvol file. By Default it is C: Drive.
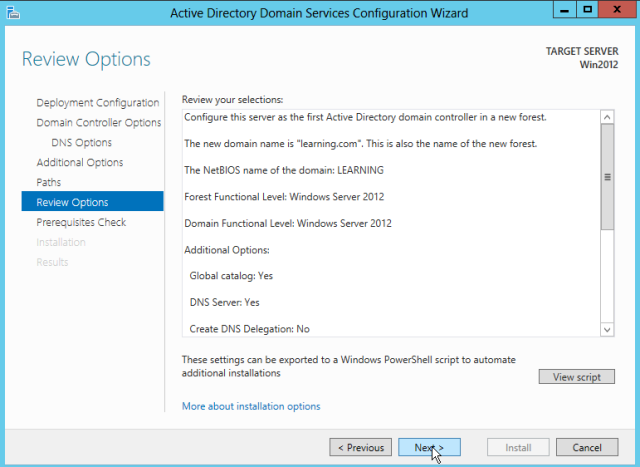
7) Read and acknowledge the below information before clicking Next.
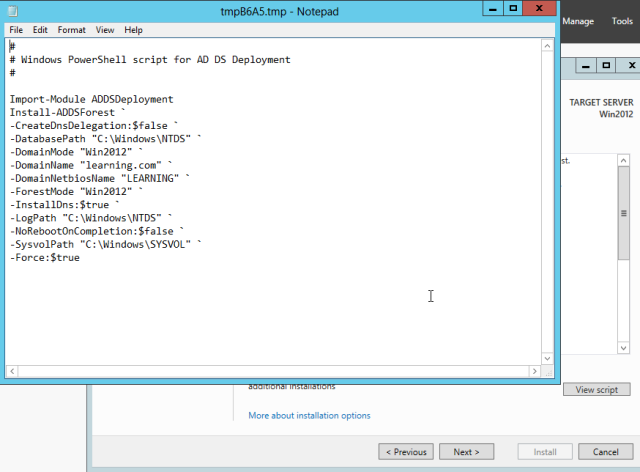
8) You can also view the script as what will be done during installation. Same can be done with power shell also.
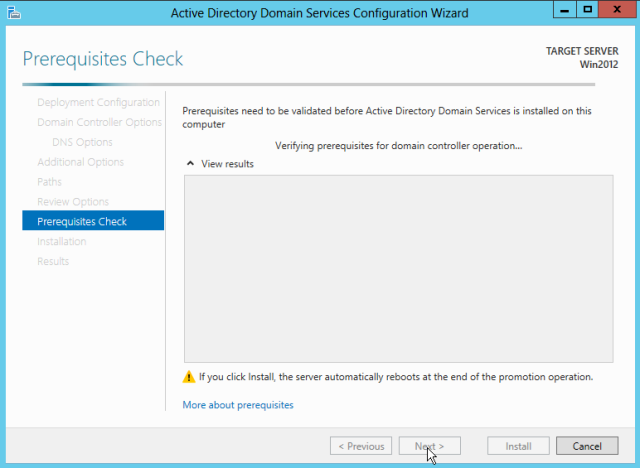
9) After the prerequisite check. Click on Install.
10) After the installation is completed Successfully. Server will be Restarted and your Active Directory Domain Services is installed and configured on Windows Server 2012.
Hope I was able to describe the content correctly based on my knowledge and learning.
If you liked this post, do like on Facebook at :https://www.facebook.com/Ashishsharepointblog
Feel free to Rate and provide feedback if you find post useful


