With the release of SQL Server vNext CTP 1.4, the SQL Server Agent support is included. It enables DBAs to schedule any task using a SQL Server Agent Job on Linux machine. In this post, I will explain how to install the SQL Server Agent package on the Ubuntu system.
Before you start installation SQL Server Agent, you need to have SQL Server vNext running on a Ubuntu System. To show the SQL Server Agent package installation process, I will be using SQL Server 2017 (CTP 2.1) instance which is running on the Ubuntu system.
In the below image, you can see that the SQL instance is running on the Ubuntu system. But, the SQL Server Agent is showing disabled because the SQL Server Agent package is not installed on the Ubuntu server.

Install SQL Server Agent
- Connect to your Ubuntu Linux Server either using PuTTY or directly login to the server by keying a valid username and password.

- Switch to root user (superuser)
Syntax: sudo su

- Run the below script to get all the latest updates from Ubuntu online servers
Syntax: sudo apt-get update

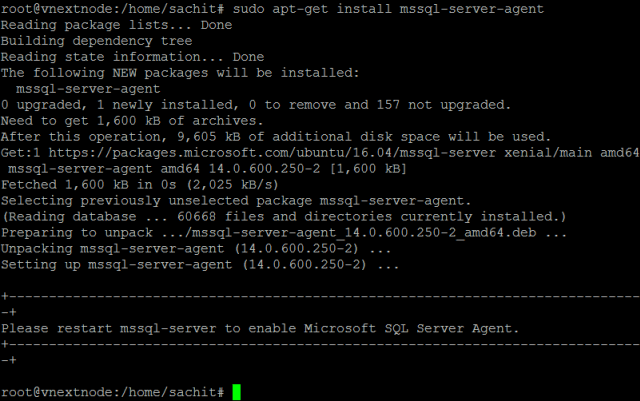
- Install the SQL Server Agent on the machine now
Syntax: sudo apt-get install mssql-server-agent

- Once you install the SQL Server Agent package successfully, you need to restart the SQL Server to enable the SQL Server Agent.
Syntax: sudo systemctl restart mssql-server

- Reconnect/Refresh the SQL Server instance to check the current status of SQL Server Agent.

You have successfully install the SQL Server Agent package on the Ubuntu System.
Note:- The following components and subsystems of SQL Agent jobs are not currently supported on Linux SQL Server 2017 (CTP 2.1):
Subsystems: CmdExec, PowerShell, Replication Distributor, Snapshot, Merge, Queue Reader, SSIS, SSAS, SSRS
Alerts
DB Mail
Log Reader Agent
Change Data Capture
Hope, you enjoyed the SQL Server Agent package installation processes!!!
The post Install SQL Server Agent on Ubuntu (Linux) appeared first on .


