Now that the Power BI Desktop is installed, let’s get some data. As of this writing, Power BI can get data from 37 different data sources and data connections – File (Excel, CSV, XML, Text), Database (SQL Server, Oracle, IBM DB2, MySQL, PostgreSQL, Terada, etc.), Azure (SQL Database, Azure Marketplace, etc.) and other data connections (Web, OData Feed, Hadoop File, Dynamic CRM Online, Salesforce Objects/Reports, Facebook, etc.).
Let’s work with a CSV file.
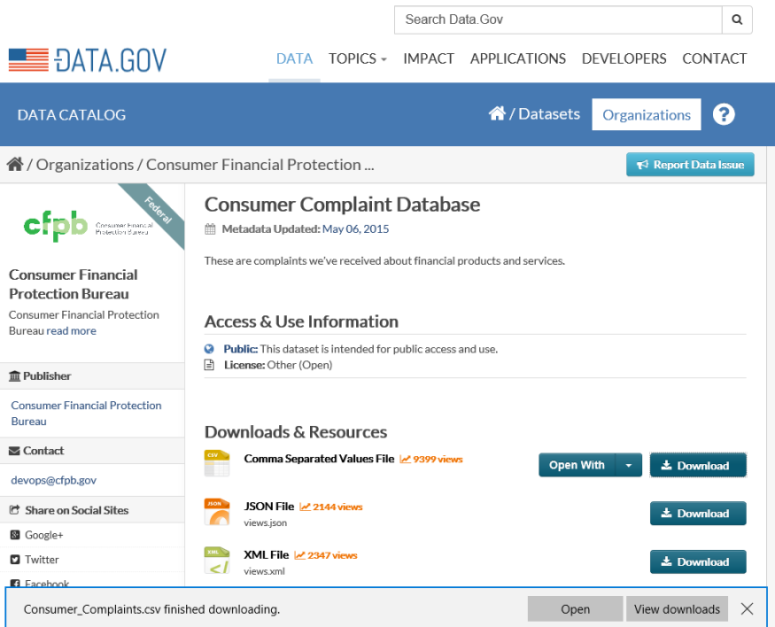
Go to Data.gov and download the Customer Complaint Database. Choose the CSV file. Here’s the link: http://catalog.data.gov/dataset/consumer-complaint-database
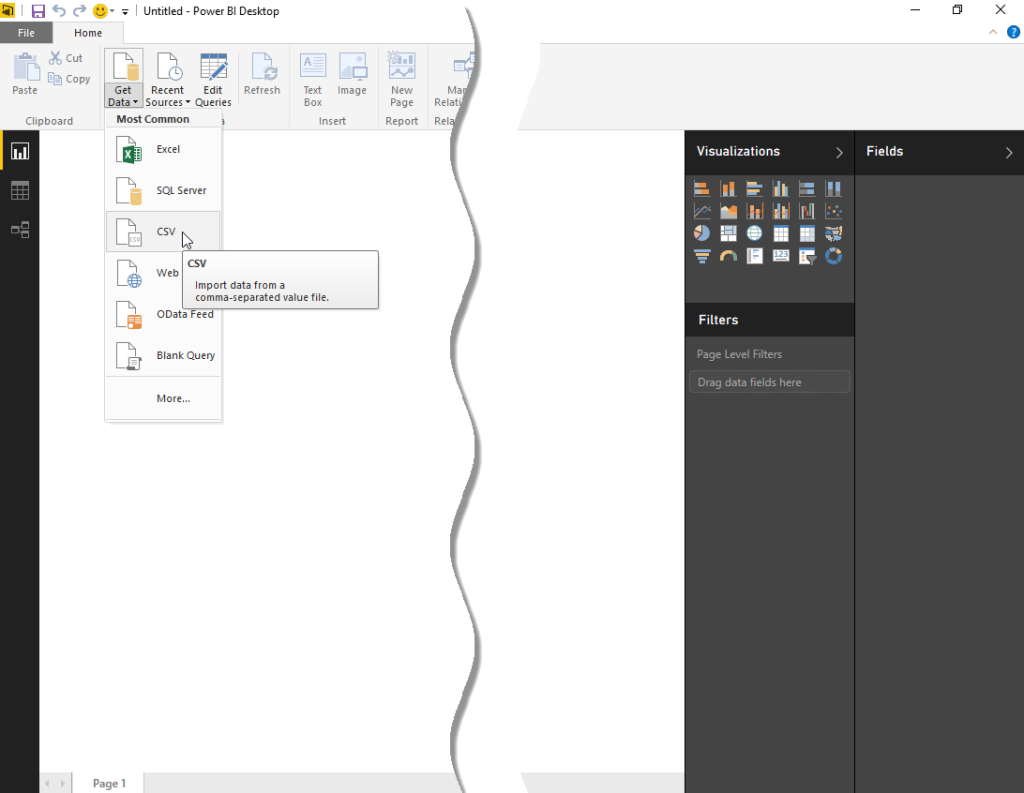
Save the file where it’s convenient to access it. Let’s fire up the Power BI Desktop app. On the Home tab (ribbon), click Get Data then select CSV.
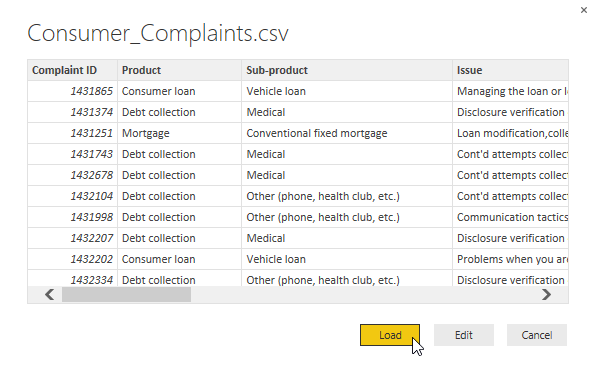
The Load dialog displays a preview of the CSV data.
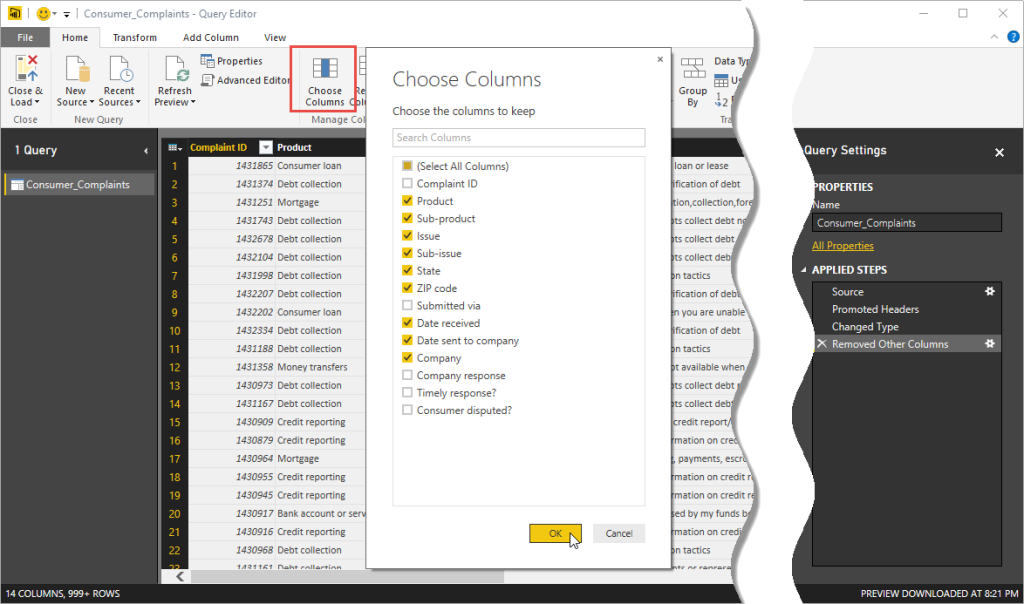
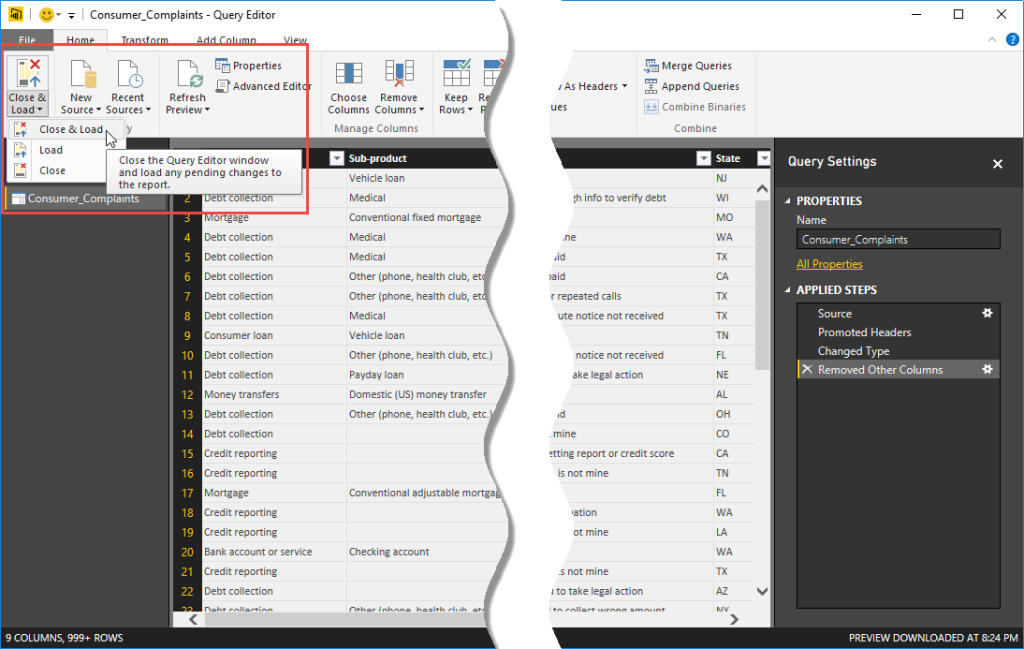
As you can see from the dialog, aside from the Load option, you can also Edit the data. To simplify this demo, let’s delete some columns (Complaint ID, Submitted via, Company Response, Timely Response?, and Consumer Disputed). Select Choose Columns from the Home ribbon. Un-check the columns that we want to exclude from our data.
Click OK. Now, were ready to load the data. Click Close & Load from the Home ribbon. Select Close & Load.
After the data load is finished, the Power BI Desktop brings us to the report designer. You can always go back to the data by clicking the table icon ![]() on the left-hand panel.
on the left-hand panel.
On the next post, we’ll create our first report.
The post Getting Started With Power BI Desktop: Getting Data appeared first on SQL, Code, Coffee, etc..


