Cosmos DB is Microsoft’s latest NoSQL database offering low latency, high scalability and geo-distribution to any Azure region. Read Microsoft documentation about Cosmos DB here or check out my blog about Introduction to Azure Cosmos DB. In its infancy, Cosmos DB was known as Document DB. Renaming was inevitable as Document DB evolved beyond just a document store.
Following is a simple note on how to export data from Cosmos DB to SQL Server. You may want a dump of data from a Cosmos DB collection to SQL Server for analysis, data integrity checks, troubleshooting a production issue or to derive insights.
There are a few methods to export data from Cosmos DB. The quickest one is to use Document DB / Cosmos DB Migration Tool. This is a tool provided by Microsoft to migrate data TO/FROM various sources such as MongoDB, JSON, csv and SQL Server to Cosmos DB.
1. Use Azure Cosmos DB Migration tool to export data to json files:
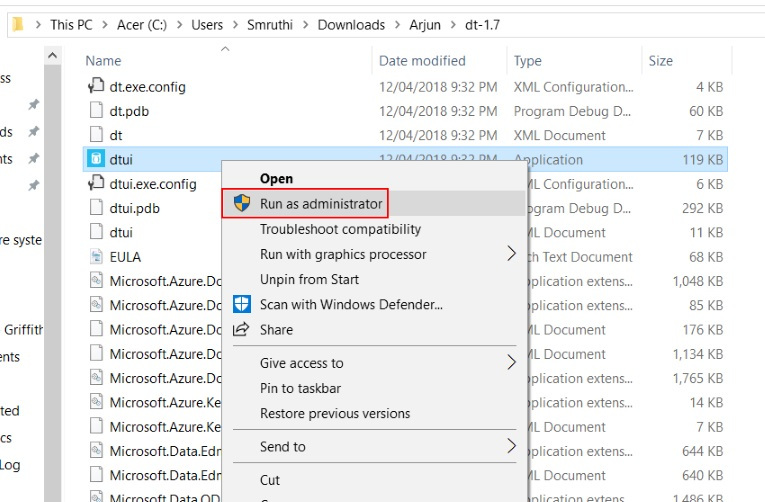
- Install the tool and launch as Administrator (use an Azure VM for best performance). Please be mindful of spike in RU costs when exporting data from your collection. To avoid throttling, scale your collection up as required just before you do the export or export in off-peak hours, if any. Leave a comment if you need any pointer on this.

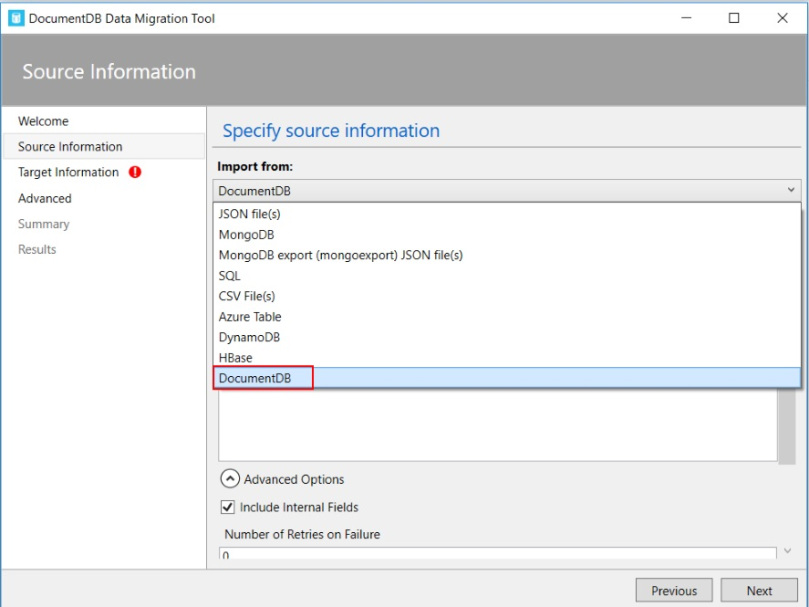
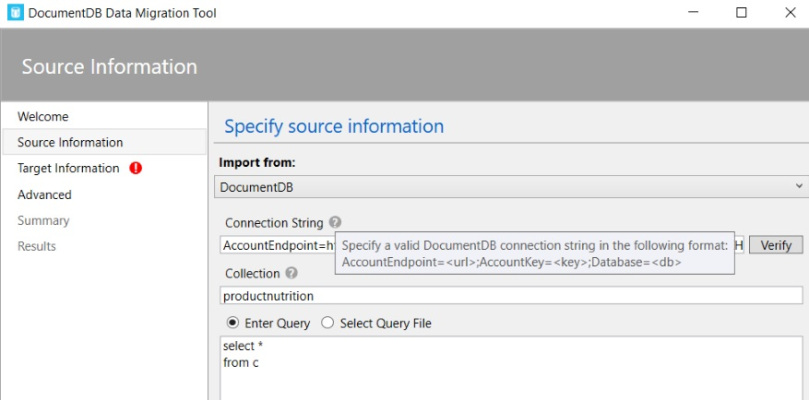
- Choose source – DocumentDB (CosmosDB aka DocumentDB)
- Specify connection string. You can find endpoint and key from Keys section of your CosmosDB account in Azure portal. Please note that CosmosDB is case-sensitive.
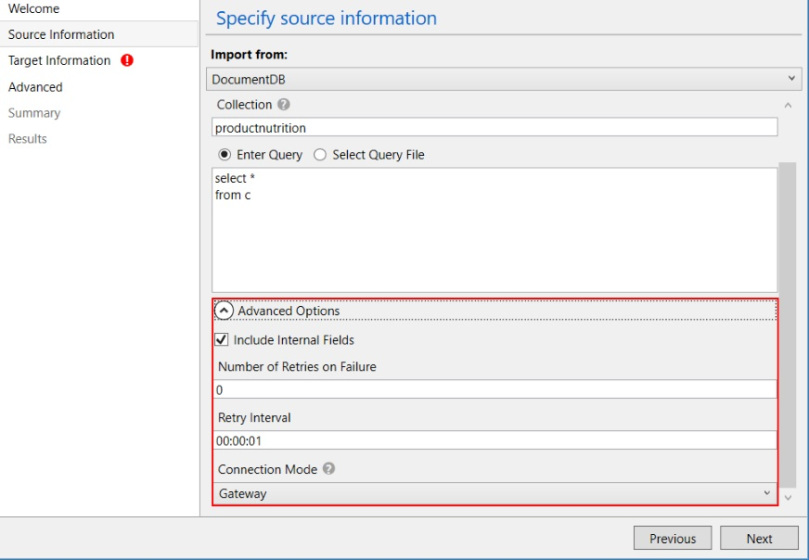
- A peek into Advanced options
- Include internal fields – for each document, Cosmos DB maintains a set of auto-generated internal/system fields such as _ts and _self. Their names start with an underscore, making it easy to differentiate them from user fields. This option lets you include internal fields in the output. This is handy, especially the _ts field, which indicates when the document was last updated.
- Number of retries on failure & Retry interval – Set a reasonable number of retries. In this case, I have used the value 1.
- Connection Mode – you want to use Gateway to get best performance and to bypass firewall rules.
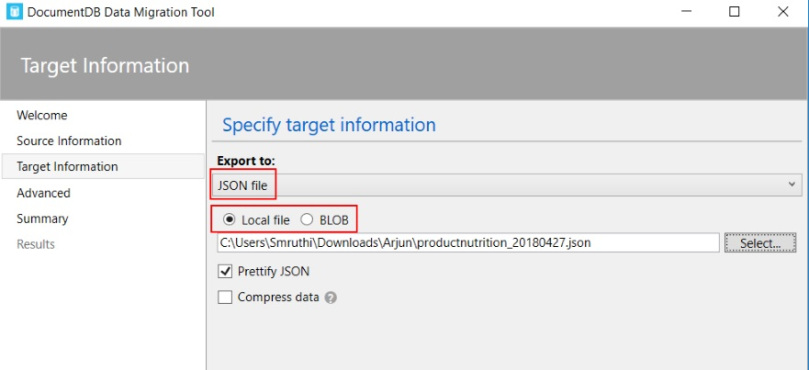
- Specify target information. In this case, we want to export to a json document. We could either output to a local file or a blob.
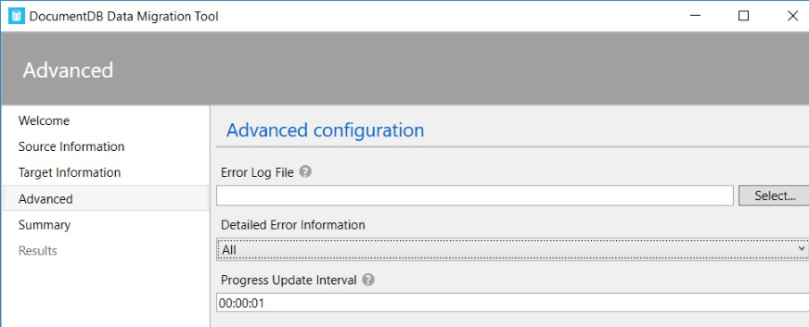
- Error Logging. Set these options to enable error logging.
Hit Import and if there are no errors, you will soon have a new json file with all the data from your collection. If you want only a subset of data, all you need to do is modify your source query.
2. Import json files to SQL Server:
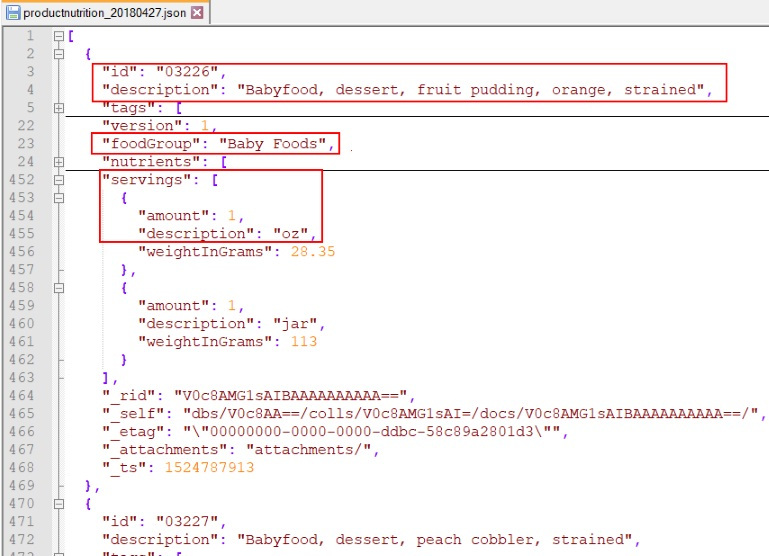
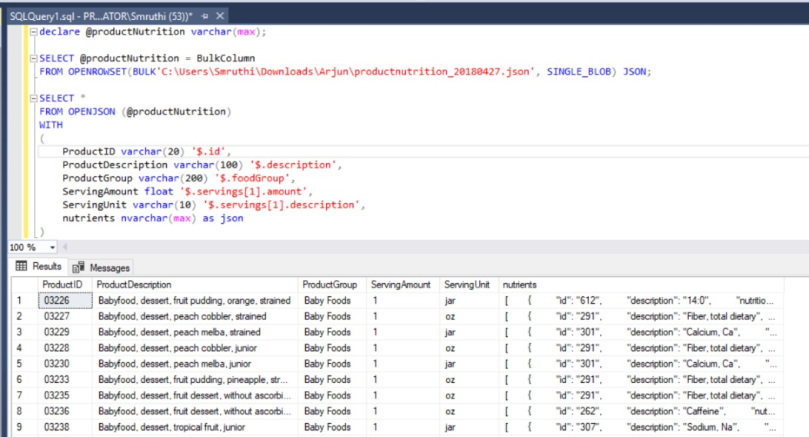
SQL Server 2016 introduced a JSON parse function called OPENJSON. If none of your user databases are upgraded to 2016 yet, but you have a 2016 engine, context-switch to a system database to use OPENJSON.
DECLARE @productNutrition varchar(max);

--Read from the json file using openrowset
SELECT @productNutrition = BulkColumn
FROM OPENROWSET(BULK'C:\Users\Smruthi\Downloads\Arjun\productnutrition_20180427.json', SINGLE_BLOB) JSON;

--Pass the variable containing json as parameter to OPENJSON function
SELECT *
FROM OPENJSON (@productNutrition)
WITH
(
ProductID varchar(20) '$.id',
ProductDescription varchar(100) '$.description',
ProductGroup varchar(200) '$.foodGroup',
ServingAmount float '$.servings[1].amount',
ServingUnit varchar(10) '$.servings[1].description',
nutrients nvarchar(max) as json --note that json is case sensitive
)
Give it a go yourself. If you have any question, leave a comment and I will be happy to assist.
If you are exploring Cosmos DB, consider reading my blog about Azure Cosmos DB – Partition and Throughput to get an overview of partitioning and scaling concepts.
