Once you have a query that is returning the data you like in SSMS you have a few options to move the result set into a format that you can use in other tools.
The simplest way is to select all results and then copy & paste them into whichever other tool you are using. This is great for smaller sets of data, and works very well when using tools such as MS Excel.
There are some cases though where the quantity of data returned does not fit into the excel spreadsheet, or you may want to be able to import data into a different tool. To do this you need to export the data from the query set to a format that can be referenced by the other tools.
There are 2 options that can be done. The first is to execute the query with the results being output to a file. The second is to configure a data export based on a query.
Execute query results to a file
Open SSMS (SQL Server Management Service) and open / create the query for the data you are looking for.
Next we have to configure the output to file options.
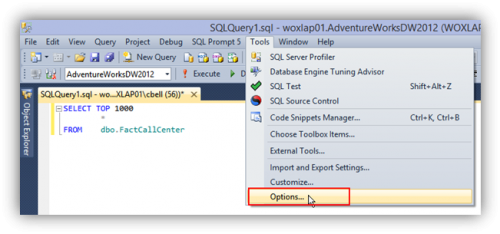
On the menu bar select: Tools then Options
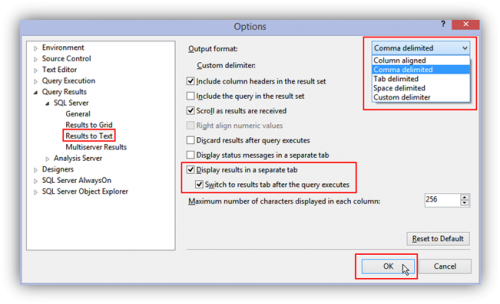
On the left select Query Results, SQL Server, Results to Text.
Set output format to CSV. You can also mark the Display Results in a separate tab and the switch to results tab after the query executes if you like. Click OK to save the changes.
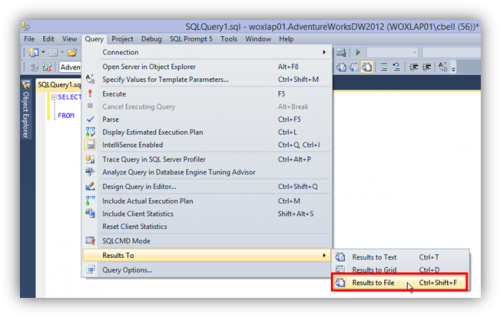
Now when you go to export your query results you have a few options to enable to results to file feature. Press Ctrl+Shift+F to set the query to file destination (Ctrl+D will revert back to the grid output). You can also select Query, Results To & Results to File. There is also a quick button located on the SSMS Standard Toolbar.
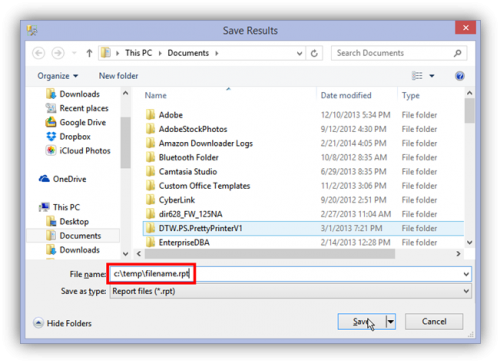
After having selected the output format, you can Execute the query. You will be prompted to enter a file name and location for the output file. The file will be created with a .rpt extension, but it is a just a plain text file.
After the export you can browse to the directory and change the extension of the output file to .CSV if you like, and then open the file to verify the contents.
Export query results to a file
Open SSMS (SQL Server management Studio) and open / create the query for the data you are looking for.
Select all of your query text and Copy it to the clipboard (Ctrl+C).
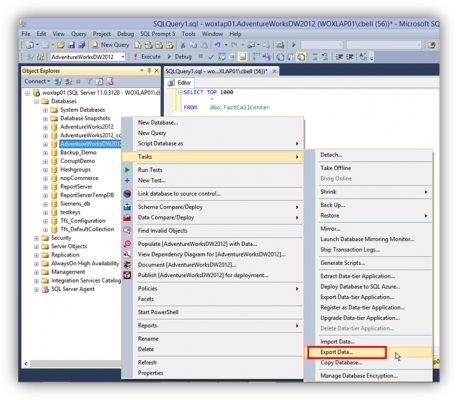
In the Object explorer, right click on the database you wish to export data from and select Tasks, Export Data
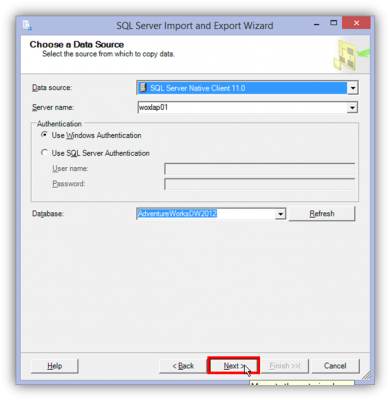
The SQL Server Import and Export Wizard will open with the data source defaulted to the database you right-clicked on. Leave this as it is and click Next.
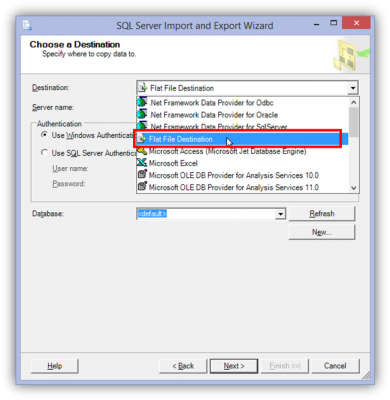
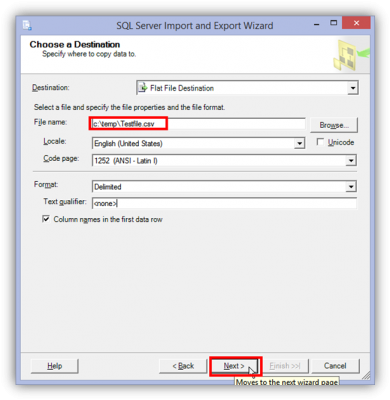
Select Flat File Destination for the destination and provide the file name and other options. Once done, click Next to continue.
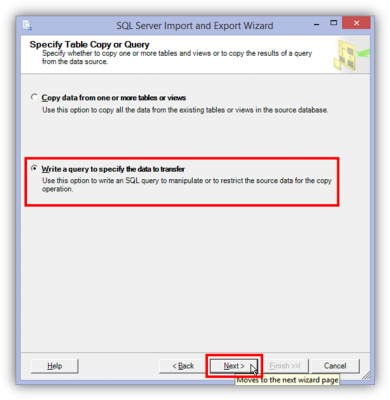
On the next screen you are asked if you want to Specify Table Copy or Query. Select the Write a query to specify the data to transfer radio button and then click Next.
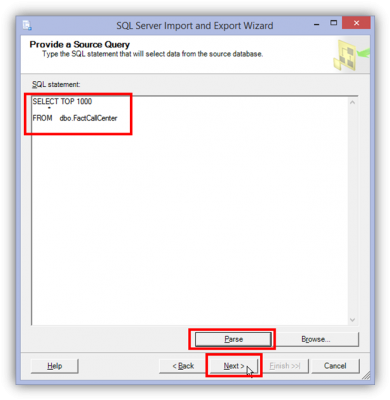
Paste your query code from step #2 into the SQL Statement box. Click Parse to ensure syntax is correct. Once it is all good, click OK to close dialog box and then click Next to continue.
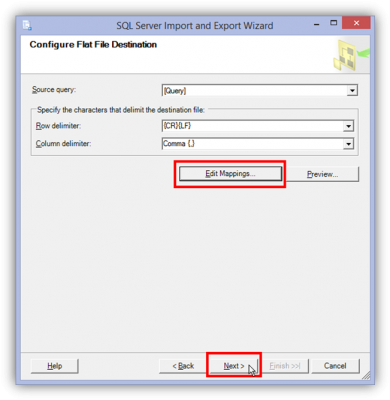
You can click Edit mappings if you like to map data types and transformations during the export for more accurate data. When ready click Next.
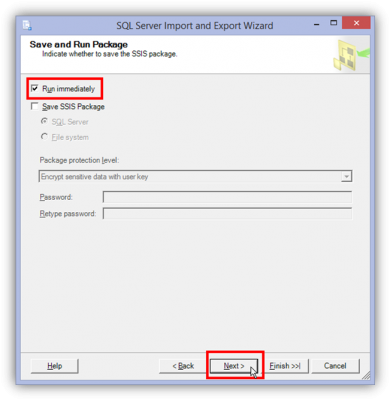
Leave Run immediately marked and click Next
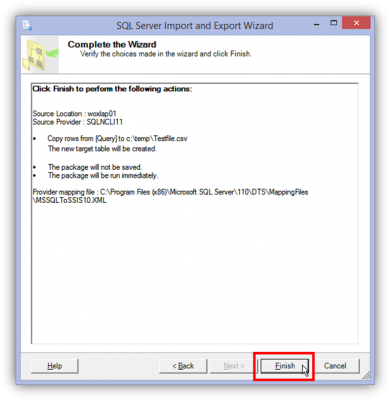
Review actions to be performed. When ready click Finish

All Done!
You will see process complete indicating success (if there are errors you will need to determine why, it may just be a lack of permissions to save files on the server, etc.). You will also see a count of records that were transferred. Click Close when done.
Now you can use the new file in whichever tool you prefer.
The post Export a SSMS Query Result Set to CSV appeared first on .


