In my last post, I attempted to write a SQL Server Integration Services (SSIS) Package programmatically.
I used the API that comes with SSIS to build a Package that sourced data from a flat file and loaded it into a Table in a SQL Server Database.
I also mentioned another API that can be used to build SSIS Packages called the EzAPI.
In this post, I intend to build an SSIS Package with the EzAPI. The Package will be functionally identical to the one I built in my last post.
The EzAPI abstracts away some of the complexities of creating SSIS Packages programmatically. It doesn’t come as part of the SQL Server Product and as such there is some additional set up work.
You can read a bit more about the API here .
Installation
The EzAPI Project has been published to CodePlex and can be downloaded from there.
The download that supports SSIS 2012 appears to be unavailable so I’ll be using the version that supports SSIS 2008.
The output would be an SSIS 2008 Package but that’s okay (I hope) because even though I built my last Package with SSIS 2012, I didn’t use any 2012 specific features, Components or Tasks.
Locate the EzAPISetUp.msi file downloaded and run the install program.
The Requirements
Seeing as we’re trying to reproduce our earlier SSIS Package but with the EzAPI, the requirements will obviously be the same.
We would like to automate the creation of SSIS Packages to load flat files into tables in a staging database.
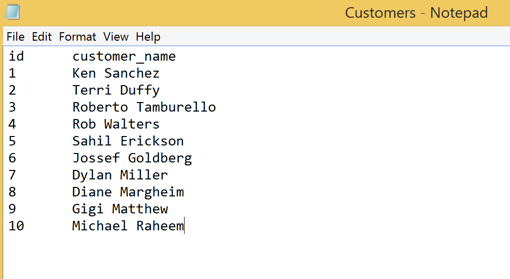
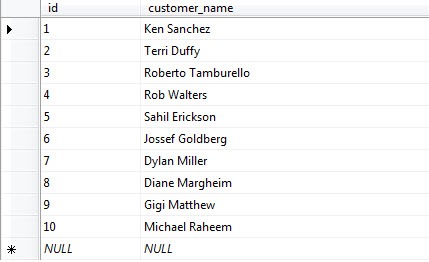
Again, I will be loading the sample flat file below with just a couple of columns and a few rows of fictional customer names.
The Implementation
Start up Visual Studio (I’m using 2012) and create a new C# Console Application Project. We’ll use the Console Application as a simple Interface to kick off the build and execution of our SSIS Package.
As always, we’ll need to add some Assembly references.
Browse to the folder you installed the EzAPI DLL’s too. In my case, C:\Program Files (x86)\Microsoft SQL Server\100\Tools\Samples\EzAPI. Add a reference to the EzAPI.dll.
Browse to the folder SQL Server is installed on your machine. Open the 100 folder, SDK and then the Assemblies folder.
Search for and add references to the following Assemblies:
Microsoft.SqlServer.DTSRuntimeWrap
Microsoft.SqlServer.ManagedDTS
Replace the code in the Program.cs file in the Console Application Project with the code below.
I have omitted any error handling code for the sake of brevity.
using System;
using System.IO;
using System.Text;
using System.Data.SqlClient;

namespace EzApiFileLoader
{
    class Program
    {
        static void Main(string[] args)
        {
            // Read input parameters
            var file = args[0];
            var server = args[1];
            var database = args[2];

            // Get the destination table column names by reading the first line of the Import File
            string[] columns = null;

            using (var stream = new StreamReader(file))
            {
                var fieldNames = stream.ReadLine();
                if (fieldNames != null) columns = fieldNames.Split("\t".ToCharArray());
            }

            // Create destination table in sql database to hold file data
            var sql = new StringBuilder();

            sql.Append("CREATE TABLE ");
            sql.Append(Path.GetFileNameWithoutExtension(file));
            sql.Append(" (");

            if (columns != null)
                foreach (var columnName in columns)
                {
                    if (columns.GetUpperBound(0) == Array.IndexOf((Array) columns, columnName))
                    {
                        sql.Append(columnName);
                        sql.Append(" NVARCHAR(255))");
                    }
                    else
                    {
                        sql.Append(columnName);
                        sql.Append(" NVARCHAR(255),");
                    }
                }
            var connection = new SqlConnection(
                string.Format("Data Source={0};Initial Catalog={1};Integrated Security=TRUE;", server, database));
            var command = new SqlCommand(sql.ToString(), connection);

            connection.Open();
            command.ExecuteNonQuery();
            connection.Close();
        }
    }
}
The code above would take the required parameters of the file we want to load and the target SQL Server and database. It then goes on to create a Table in the database that we would load the file into.
We fetch the Table Column names from the first line of the sample import file.
We’ll put the code that actually creates the SSIS Package in a separate class.
Add a new Class to the Console Application Project by right clicking on the Project name in Solution Explorer, clicking on the Add option and then select Class.
Name the Class EzFileLoaderPackage.cs.
Add the following code to the new EzFileLoaderPackage Class.
using System;
using Microsoft.SqlServer.Dts.Runtime.Wrapper;
using Microsoft.SqlServer.SSIS.EzAPI;

namespace EzApiFileLoader
{
    public class EzFileLoaderPackage : EzPackage
    {
        public EzFileLoaderPackage(string srv, string db, string table, string[] columns, string file)
        {
            // Add Flat File Connection Manager to Package
            var flatFileCm = new EzFlatFileCM(this);
            flatFileCm.ConnectionString = file;

            foreach (var column in columns)
            {
                // Add a new Column to the Flat File Connection Manager
                var flatFileColumn = flatFileCm.Columns.Add();

                flatFileColumn.DataType = DataType.DT_WSTR;
                flatFileColumn.ColumnWidth = 255;

                flatFileColumn.ColumnDelimiter = columns.GetUpperBound(0) == Array.IndexOf(columns, column) ? "\r\n" : "\t";

                flatFileColumn.ColumnType = "Delimited";

                // Use the Import File Field name to name the Column
                var columnName = flatFileColumn as IDTSName100;
                if (columnName != null) columnName.Name = column;
            }
            flatFileCm.ColumnNamesInFirstDataRow = true;

            // Add Sql Ole Db Connection manager to Package
            var oleDbCm = new EzSqlOleDbCM(this);
            oleDbCm.SetConnectionString(srv, db);

            // Add DataFlow Task to Package
            var dFlow = new EzDataFlow(this);

            // Add Flat File Source to DataFlow Task
            var flatFileSrc = new EzFlatFileSource(dFlow);
            flatFileSrc.Connection = flatFileCm;
            flatFileSrc.ReinitializeMetaData();

            // Add Ole Db Destination to DataFlow Task
            var oleDbDest = new EzOleDbDestination(dFlow);
            oleDbDest.Connection = oleDbCm;
            oleDbDest.AttachTo(flatFileSrc);

            oleDbDest.Table = table;
        }
    }
}
The above is all the code we need to create the SSIS Package with the EzAPI.
We start by adding our Connection Managers.
The Flat File Connection Manager we add and configure like this.
// Add Flat File Connection Manager to Package
 var flatFileCm = new EzFlatFileCM(this);
 flatFileCm.ConnectionString = file;

 foreach (var column in columns)
 {
    // Add a new Column to the Flat File Connection Manager
    var flatFileColumn = flatFileCm.Columns.Add();

    flatFileColumn.DataType = DataType.DT_WSTR;
    flatFileColumn.ColumnWidth = 255;

    flatFileColumn.ColumnDelimiter = columns.GetUpperBound(0) == Array.IndexOf(columns, column) ? "\r\n" : "\t";

    flatFileColumn.ColumnType = "Delimited";

    // Use the Import File Field name to name the Column
    var columnName = flatFileColumn as IDTSName100;
    if (columnName != null) columnName.Name = column;
 }
 flatFileCm.ColumnNamesInFirstDataRow = true;
We then add a SQL OLEDB Connection Manager to the Package.
// Add Sql Ole Db Connection manager to Package
 var oleDbCm = new EzSqlOleDbCM(this);
 oleDbCm.SetConnectionString(srv, db);
We go on to add a DataFlow Task.
// Add DataFlow Task to Package
 var dFlow = new EzDataFlow(this);
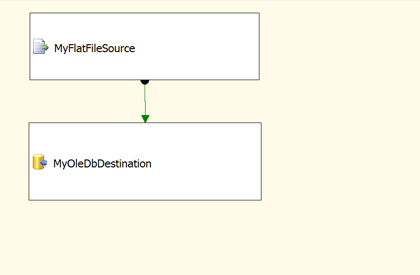
Finally, we add a Flat File Source and OLEDB Destination to the DataFlow Task we just created.
// Add Flat File Source to DataFlow Task
 var flatFileSrc = new EzFlatFileSource(dFlow);
 flatFileSrc.Connection = flatFileCm;
 flatFileSrc.ReinitializeMetaData();

 // Add Ole Db Destination to DataFlow Task
 var oleDbDest = new EzOleDbDestination(dFlow);
 oleDbDest.Connection = oleDbCm;
 oleDbDest.AttachTo(flatFileSrc);

 oleDbDest.Table = table;
All that’s left is to add code that calls our new EzAPI SSIS Package Class. To do this, return to the Program.cs file and add the following code.
Console.Title = "Ez File Loader";
 Console.ForegroundColor = ConsoleColor.Yellow;

 // Build Package
 Console.WriteLine("Building Package...");
 var pkg = new EzFileLoaderPackage(server, database, Path.GetFileNameWithoutExtension(file), columns, file);

 // Execute Package
 Console.WriteLine("Executing Package...");
 pkg.Execute();

 // Save Package
 Console.WriteLine("Saving Package...");
 pkg.SaveToFile(Path.GetDirectoryName(file) + "\\" + Path.GetFileNameWithoutExtension(file) + ".dtsx");

Console.WriteLine("Done");
Console.ReadLine()
The Test
We have done all this within the confines of a Console Application so we just need to supply the required parameters and run it to build and execute our EzAPI SSIS Package.
Copy the sample import file to a location folder of your choosing.
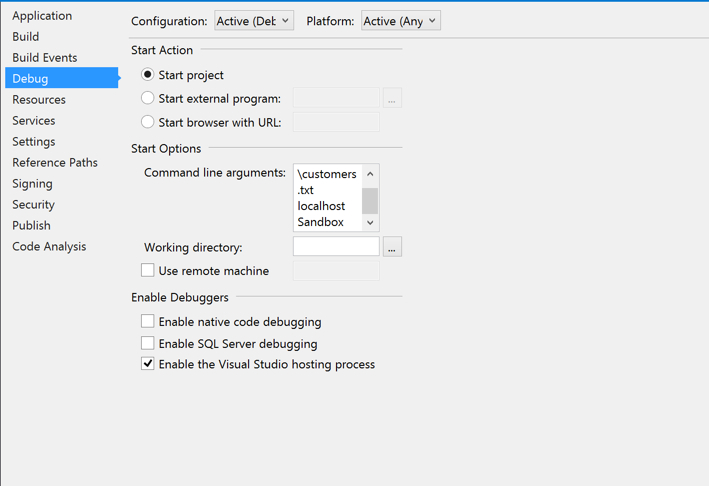
Right click on the Project node in Solution Explorer and click on Properties. Click on the Debug Tab.
Enter the three parameters required in the Command Line Arguments box separated by spaces [file location] [target server] [target database].
Run the Program.
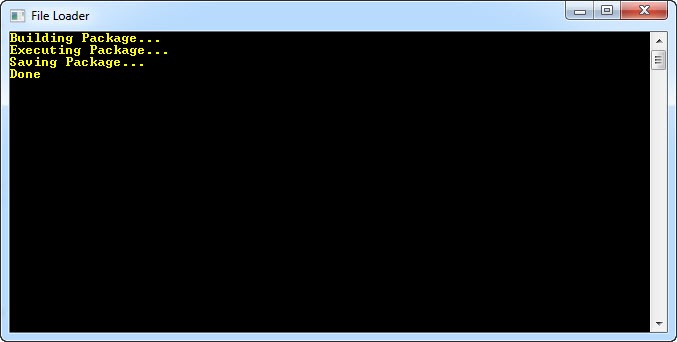
You should see a Console Window come up with a message letting you know when the SSIS Package build and execute process is complete.
We can now check the output of our program.
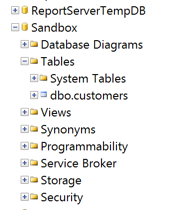
You should find a table with the name “Customers”, in the destination database containing the data from our sample file.
The Program saves a copy of the SSIS Package it created (.dtsx file) to the folder the sample import file is in.
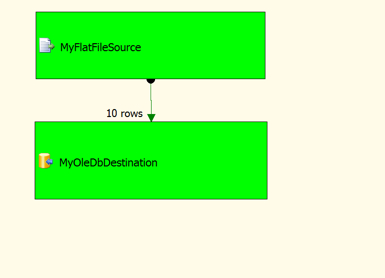
Create a new SSIS Project in Business Intelligence Development Studio (BIDS), adding the saved .dtsx file or package to the Project.
Again, notice that the package is set up pretty much the same as it would be if you had created it within BIDS.
Truncate the Import Table, “Customers”, in the target Database and execute the package from within BIDS and you should have a successful run.
Check that the destination table is, once again, populated.
A word on EzAPI Package Templates
One of the interesting features of the EzAPI is its use of Package Templates.
In other words, you can have the API provide you with a better starting point for your Package simplifying the build further.
There just happens to be a template that covers those common occurrences where you are simply moving data from Source to Destination as we are doing in our Package above.
A re-write of our Package with this template is fairly straight forward.
Add a new Class to the Console Application calling it EzFileLoaderPackageWithTemplate. Add the code below to the Class.
using System;
using Microsoft.SqlServer.Dts.Runtime.Wrapper;
using Microsoft.SqlServer.SSIS.EzAPI;

namespace EzApiFileLoader
{
    public class EzFileLoaderPackageWithTemplate : EzSrcDestPackage<EzFlatFileSource, EzFlatFileCM, EzOleDbDestination, EzSqlOleDbCM>
    {
        public EzFileLoaderPackageWithTemplate(string srv, string db, string table, string[] columns, string file)
        {
            // Configure Flat File Connection Manager
            SrcConn.ConnectionString = file;
            SrcConn.ColumnNamesInFirstDataRow = true;
            SrcConn.Name = "MyFlatFileConnectionManager";
            SrcConn.Description = "MyFlatFileConnectionManager";

            // Configure Ole Db Connection Manager
            DestConn.SetConnectionString(srv, db);
            DestConn.Name = "MyOleDbConnectionManager";

            // Configure DataFlow Task
            DataFlow.Name = "MyDataFlowTask";

            // Configure Flat File Source
            Source.Name = "MyFlatFileSource";

            foreach (var column in columns)
            {
                // Add a new Column to the Flat File Connection Manager
                var flatFileColumn = SrcConn.Columns.Add();

                flatFileColumn.DataType = DataType.DT_WSTR;
                flatFileColumn.ColumnWidth = 255;

                flatFileColumn.ColumnDelimiter = columns.GetUpperBound(0) == Array.IndexOf(columns, column) ? "\r\n" : "\t";

                flatFileColumn.ColumnType = "Delimited";

                // Use the Import File Field name to name the Column
                var columnName = flatFileColumn as IDTSName100;
                if (columnName != null) columnName.Name = column;
            }
            Source.ReinitializeMetaData();

            // Configure Ole Db Destination
            Dest.Table = table;
            Dest.Name = "MyOleDbDestination";
        }
    }
}
The code is similar to that used to generate our previous Package but with a few notable exceptions.
By inheriting from the Class below we can pre-specify that we would like a Flat File Source, Flat File Connection Manager, OleDbDestination and Sql Ole Db Connection Manager added to the Package for us.
EzSrcDestPackage<EzFlatFileSource, EzFlatFileCM, EzOleDbDestination, EzSqlOleDbCM>
All that’s left to do is to configure the components as necessary and we’re good to go.
To test it, simply change this line of code in the Program.cs file
var pkg = new EzFileLoaderPackage(server, database, Path.GetFileNameWithoutExtension(file), columns, file);
to this
var pkg = new EzFileLoaderPackageWithTemplate(server, database, Path.GetFileNameWithoutExtension(file), columns, file);
Run the program as shown above.
The results should be identical to our earlier one.


