In the previous tutorial, we went through how to setup “External Network” to access the internet on Hyper-v client machine. Now, we will explore how to create Internal and Private virtual switches and what is the use of them. A virtual switch is also bound to the host server even though it does not correspond to a physical device. This allows the host operating system to communicate with VMs across the virtual network.
Use of the Internal & Private Hyper-V Virtual Switch
Internal Virtual Switch
The Internal virtual switch allows communications only between virtual adapters connected to virtual machines and the management operating system.
Private Virtual Switch
The private virtual switch allows communications only between virtual adapters connected to virtual machines.
Create the Internal & Private Hyper-V Virtual Switch
- Go to your Windows machine’s run command dialog box and type “virtmgmt.msc” and click OK.
- Once Hyper-V manager is open, kindly right click on the host name which is coming under “Hyper-V Manager”, and click on the option “Virtual Switch Manager”

Create Internal Virtual Switch
- Select the virtual switch type “Internal” and click on “Create Virtual Switch”

- Give the name of the virtual network switch, select the connection type “Internal Network” and Click on “Apply”

Create Private Virtual Switch
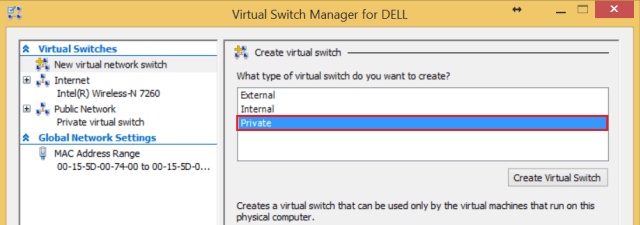
- Select the virtual switch type “Private” and click on “Create Virtual Switch”

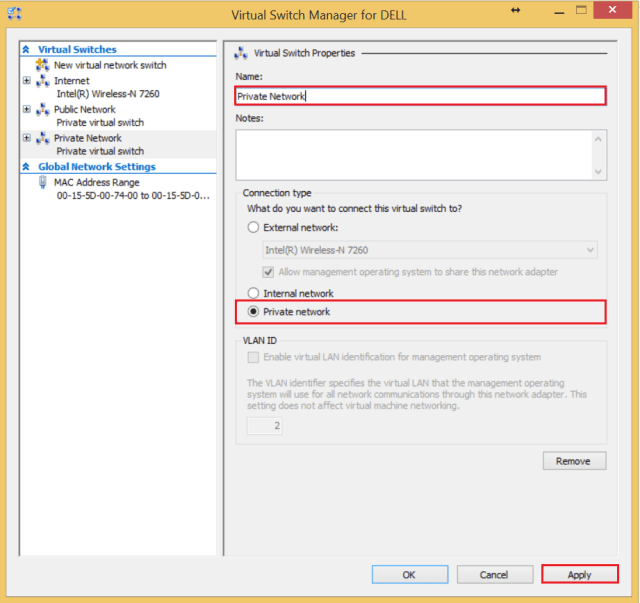
- Give the name of the virtual network switch, select the connection type “Private Network” and Click on “Apply”

After configuring the virtual switches, you are done with setting up the internal & private virtual switch setup.
The post Configure Internal and Private Networking for Hyper-V Virtual Machines appeared first on .


