First I'll amuse you already have SQL Server installed in two servers as stand alone instances, that is a requirement for this post.
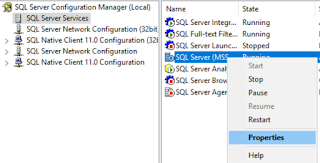
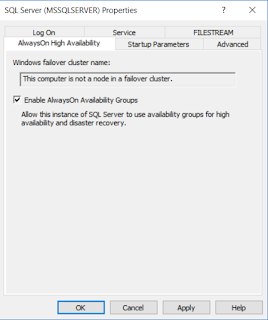
2. In the properties window, look for "AlwaysOn High Availability", if you are running with an older version, the checkbox "Enable AlwaysOn Availability Groups" won't be availabile until you make the machine where SQL Server part of a cluster but just part of the windows cluster, the SQL Server instance remains as an Stand Alone type. Once that you have the checkbox enabled, check it, and click apply and Ok. Enabling this feature requires a Service restart so take that in account. Also, you need to do this in all the SQL instances that will be part of the Availability Group.
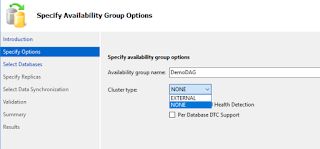
a. Cluster Type (New with SQL 2017): you have 2 options here (the official documentation shows 3), External or None, if you choose External, it means that you will joining this availability group to an external cluster, E.g. if you have a windows cluster on your primary datacenter that is on a different network or you want to add it to a Linux cluster.
b. Database health level detection (New with SQL 2017), this will enable a constant validation of the databases that are part of the availability group that if anything goes wrong with any of the databases it will trigger an automatic failover
c. Per Database DTC support (New with 2016 SP1) Allows the Distributed Transaction Coordinator through the availability group, feature that was not available in older versions of SQL (2012 and 2014)
If you don't have a cluster created and just like this scenario, choose NONE
5. Select the databases that will be part of the availability group. Requisites for a database to be considered:
a. Be on Full recovery model
b. Have a full backup
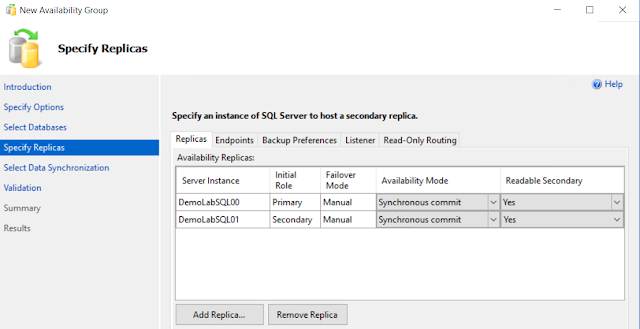
6. In here you will be choosing the replicas that you want to add to your group. Important features here:
- Initial Role: You will set the role that each replica will have once that the group becomes available
- Failover Mode: Manual or Automatic
- Availability Mode: Synchronous commit or Asynchronous commit
- Readable Secondary: No, Yes - Read Intent Only and Yes. If you choose No or Yes - Read Intent Only, you won't be available to query your replicas, the Read Intent is when you enable that feature that routes the read operations to your available replicas. With the Yes option you will be able to query the databases in your replica.
- The endpoints tab will show you the URL and ports each replica is set to.
- Backup preferences tab: in here you can configure if you want to take the backups from the primary or the secondary servers.
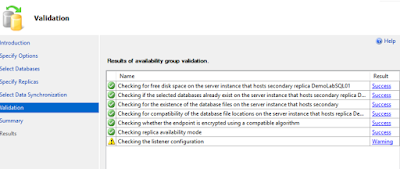
- Listener tab: In this window it lets you set the parameters to configure the availability group listener, however my advice is to do it later, configure your group first and once that is done, configure it later.
- Read-Only Routing: tab This lets you configure your read only routing for the read-intent setup, this allows you to load balance the queries so you have only the queries that will Insert, Delete or Update on the primary and all the Select queries routed to your secondary's so they don't consume resources the Primary will use (I'll explain it in another post)
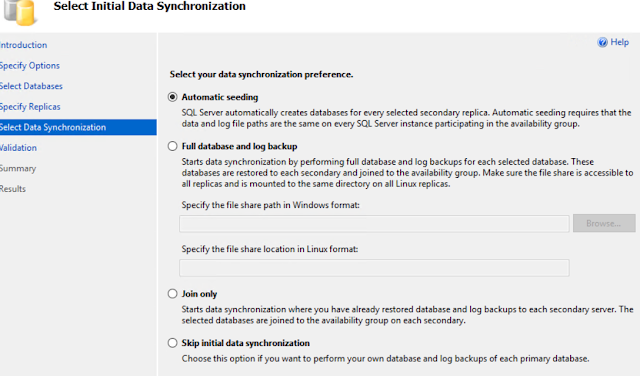
- Automatic seeding (Starting SQL 2016): With this type, SQL Server will do everything for you, it will use the default folders configured so make sure you have enough space available on it.
- Full database and log backup: Same as the Automatic seeding, however in this case it lets you choose where do you want to generate the backups
- Join Only: With this one, you do prepare everything in your replica, important notice, you do a restore with norecovery in your replica and apply at least one log backup. This option is useful with really large databases.
- Skip initial data synchronization: Same as before, however in this particular one, you need to restore everything just at the time before initializing the synchronization otherwise it will tell you that there are items pending to be restored.
- Failover Mode: Manual or Automatic
- Availability Mode: Synchronous commit or Asynchronous commit
- Readable Secondary: No, Yes - Read Intent Only and Yes. If you choose No or Yes - Read Intent Only, you won't be available to query your replicas, the Read Intent is when you enable that feature that routes the read operations to your available replicas. With the Yes option you will be able to query the databases in your replica.
- The endpoints tab will show you the URL and ports each replica is set to.
- Backup preferences tab: in here you can configure if you want to take the backups from the primary or the secondary servers.
- Listener tab: In this window it lets you set the parameters to configure the availability group listener, however my advice is to do it later, configure your group first and once that is done, configure it later.
- Read-Only Routing: tab This lets you configure your read only routing for the read-intent setup, this allows you to load balance the queries so you have only the queries that will Insert, Delete or Update on the primary and all the Select queries routed to your secondary's so they don't consume resources the Primary will use (I'll explain it in another post)
- The listener will be your single point of entry for your availability group, no matter which server is primary and which secondary, you will only need to configure your applications to use the Listener fqn or the ip and that will give you that High Availability you are looking with Always On.
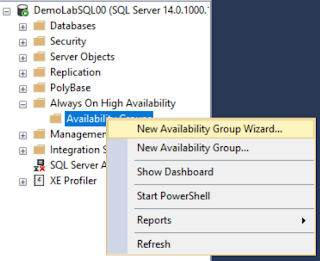
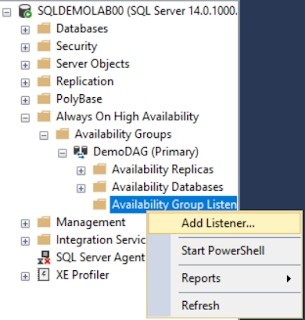
- Go to the "Always On High Availability" folder, expand your availability group and look for the "Availability group listener" and right click on it.

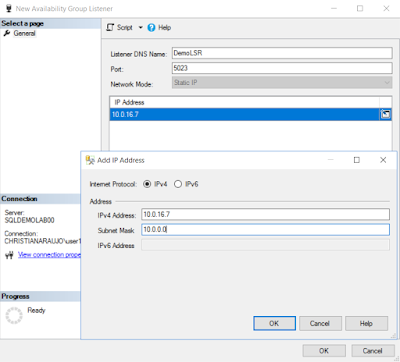
- In the Configuration screen, Configure the domain name you want your listener to respond onto, this will be like another computer in the domain, so be sure that you have permissions to create objects in the active directory, if you don't ask your domain admin to provision that name and grant you permissions over it so you can enable it.
- Configure the port you want the listener to listen to, this needs to be different than the endpoints and than the usual 1433 that the SQL instance will be listen to.
- Configure the IP: make sure that its an available IP in the domain, also make sure that you choose the ip from the same subnet that one of your replicas is running.
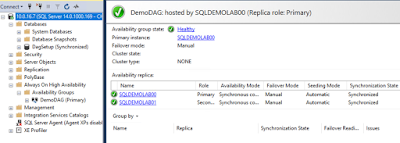
You are all set, you can start configuring your applications to the listener and taking the advantages always On provides.
- Go to the "Always On High Availability" folder, expand your availability group and look for the "Availability group listener" and right click on it.


