I introduced Azure Automation in a previous post. I’ve spent some more time exploring it.
There’s a set of documentation available as I noted before. Unfortunately, reading through the full set of documentation, I have some criticisms to offer. The layout of the documentation goes through “Common runbook tasks” actually more or less laying things out as I did, inadvertently, I assure you, in my previous blog post. The problem with that, as I found in that post is, the administration of the runbooks seems fairly straightforward from the screens. But, you can’t do a darned thing with any of it until you have a runbook . Further, you can’t have a runbook until that thing has some code in it. And, the documentation doesn’t include documentation about code. Instead, we just get a page with a list of samples, but no links to that code, nor an indication of where it might be. The scripts are located here. But man, that ought to be in the documentation. There’s also no clearly documented method for how to start doing the development. It’s not really necessary since the GUI leads you inevitably to the Draft screen we saw in my other post. But, documentation is generally supposed to let you know what to do, where to look, etc.
There is another set of documentation just on authoring runbooks. Lots and lots more meat there. I’ll go through it and follow up further.
Enough criticism, let’s play with some code.
I’m going to start with the “Hello World” code set. It’s supposed to be an introduction to how everything works. You can’t open it from the Azure Portal. Instead you have to download it to your machine and then either upload it into a new runbook or copy and paste it into the Draft editor window. Presumably this is so you can do the coding locally using the PowerShell ISE or other tools. Documentation for the script is clear. It’s description:
If you are brand new to Automation in Azure, you can use this runbook to explore testing and publishing capabilities.
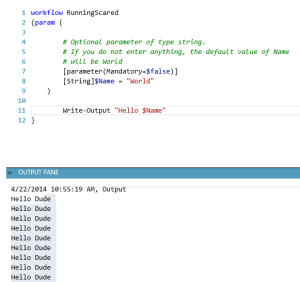
Well, let’s just say that’s a little grandiose for what is, literally, a “Hello $Name” example. But, it’ll get your feet wet. I took the script, pasted it into my “RunningScare” runbook. From there, I have the capacity to Save, Test, or Publish. Being a good paranoid type, I ran test first. It popped up a window to input the parameter and then showed the output in the Output Pane (which I hadn’t actually noticed):
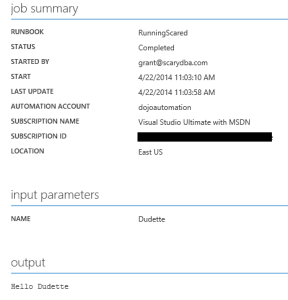
I can’t tell you why it output multiple times, but it did from one test of the script. To see the rest of the functionality, scheduling, etc., I went ahead and hit Publish. That moved it from Draft to Published where all I can see is a faded outline of the actual script and a Start button at the bottom of the screen. I went ahead and ran it from there. It actually takes a surprisingly long time for such a silly small script to complete. There’s event the ability to view the Job as it’s running:
So that works. Next up, scheduling. It’s pretty straight forward to walk through the GUI in the Portal (although, now I want to see if I can programmatically control the Automation interface, more to explore). I’m going to try to run this script once an hour. So, I’ll give the schedule the name, unique to my account, Hourly (imagination knows no bounds). And then things get weird. I can only schedule this for a “One Time” run or “Daily.” No other options available:
Nothing in the core documentation about the details of scheduling. Checking the authoring doc (which has tons of stuff in it) there is a PowerShell command for directly controlling this (oh yes, much more to explore), Set-SmaSchedule. But, it’s not clear if the command has more variables other than a day interval. I’ll have to test it out to see. The Portal recognized that parameters were necessary, so I put one in and scheduled my runbook. Worked great.
With that, I have my first run book set up, tested and scheduled. So far, this is looking really interesting.
The post Azure Automation appeared first on Home Of The Scary DBA.


