Flat Files are commonly used to transfer data from one system to the other. In most cases, it’s ideal to load the flat files into staging tables before processing them into destination tables. There are different types of flat files - one among them is a delimited flat file. In a delimited flat file, different fields are separated using a delimiter such as a comma(,), a pipe(|), etc., You can, of course, use any character you like as a delimiter.
In this article, I’ll provide a design pattern and demonstrate an SSIS package that loads delimited flat files to staging tables.
Design Pattern
The following diagram shows the design pattern used to load flat files to staging tables.
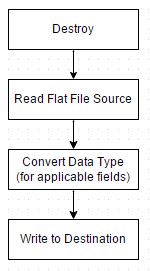
The first step is to remove any existing data from the staging table that has already been loaded in the destination. This ensures that we begin from scratch each time without the risk of reprocessing the same data and possibly duplicating it.
You then read the source flat file. Now everything in a flat file is a string, even if it’s non-string data. So, for example, if a field is a 6 character number, you’d need 8 bytes to store this numeric field as a string using VARCHAR(6) data type (one byte for each character plus 2 bytes for overhead, according to Books Online). Instead, if you convert it to an INT data type, you’d need only 4 bytes. So, it’s better to convert non-string data and use appropriate data types in the staging table. You can also consider converting between non-unicode and unicode to use VARCHAR instead of NVARCHAR in SQL Server.
Lastly, you write data to the staging table in the destination. Notice that I'm not using transactions or error handling. The reason is this: any error will cause package execution to stop. Then you fix the error data and rerun the package. The package will then truncate existing data in the first step and attempts to reload everything.
In some situations, when an error occurs, you may want to capture the error rows and process the good rows without failing the package. This can be achieved by configuring Error Output which is beyond the scope of this article.
Setup
If you’d like to follow along with this demonstration, create a flat file named MyDelimFile.txt with contents shown in the image below and save it to your local directory. This sample flat file along with the SSIS package we'll create later can be downloaded from the Resources section at the end of this article.
There are five rows in this file, excluding the first row. The first row is a header, and the pipe(|) is used as the delimiter. Sometimes, flat files will not have any header rows in them, but this one does.

Make a note of the path as you’ll need it later in the SSIS package. I saved my text file in C:\temp_store\ssis\MyDelimFlatFile.txt.
Use the following T-SQL to create a new database, SSISPatterns,and a staging table named dbo.stgMyDelimFile in that database.
USE master;
GO
IF EXISTS ( SELECT  *
            FROM    sys.sysdatabases AS s
            WHERE   s.name = 'SSISPatterns' )
    PRINT 'Database SSISPatterns already exists.';
ELSE
    BEGIN
        PRINT 'Creating SSISPatterns Database...';
        CREATE DATABASE SSISPatterns;
        PRINT 'Database SSISPatterns created successfuly.';
    END;
GO
USE SSISPatterns;
GO
IF EXISTS ( SELECT  *
            FROM    sys.tables AS t
            WHERE   t.name = 'stgMyDelimFile' )
    DROP TABLE dbo.stgMyDelimFile;
GO
CREATE TABLE dbo.stgMyDelimFile
    (
      Region VARCHAR(50) ,
      CYear INT ,
      Sales INT
    );
Notice that column names of the staging table match the field names of the flat file. This is optional, you can use column names that are different from the field names of the flat file. However, note that SSIS will automatically map source and destination columns if they have same names. Otherwise, we’ll have to manually map them, requiring additional effort. I’ve also excluded some house-keeping columns from the staging table that are typically used for logging and auditing purposes for this demonstration.
Creating the SSIS Package
Now that we have completed our setup steps, we are ready to create the SSIS package. First, open SQL Server Data Tools (SSDT-BI), and rename the package that already exists to StageMyDelimFlatFile.dtsx.
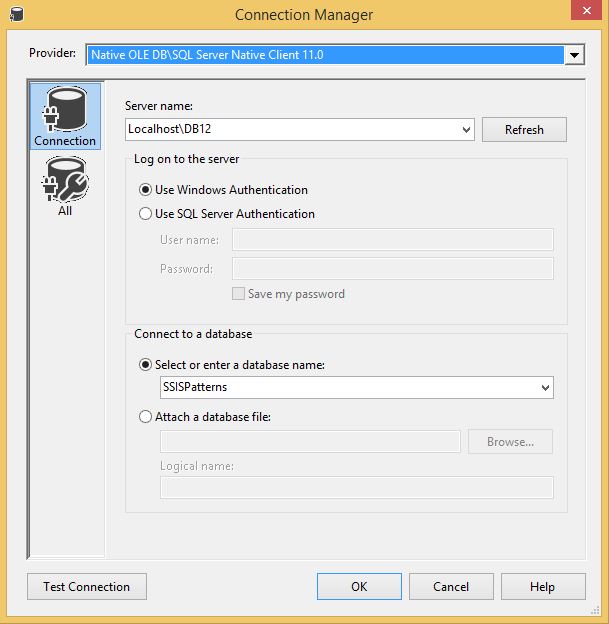
Then create two connection managers. The first one is an OLE DB Connection pointing to the SSISPatterns database we created in the setup process. To do this, right-click in the connection managers window, and select New OLE DB Connection. Then in the Configure OLE DB Connection Manager window, click New, and specify the server and database names as shown below. Lastly, rename the OLE DB Connection to OLEDST_SSISPatterns.
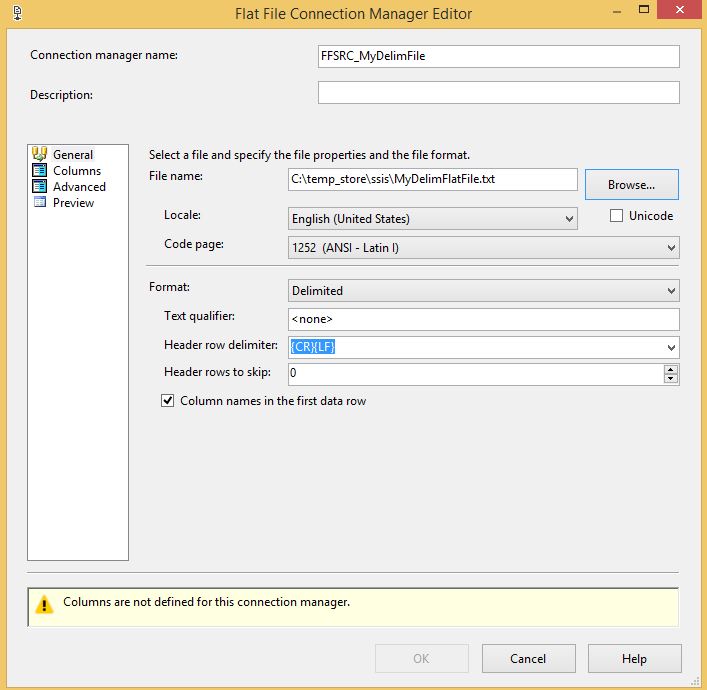
The second connection is a Flat File connection pointing to the MyDelimFile.txt we created earlier. To create the Flat File connection manager, again right click in the connection managers window, and select New Flat File Connection. This opens the Flat File Connection Manager Editor. In the general page of the editor, give a name for the connection manager, specify the file and it’s properties.
Since the source file we created is a delimited file with first row as the header, select Delimited as the Format property, and select the Columns in the first data row check box. The general tab after configuring all properties is shown below.
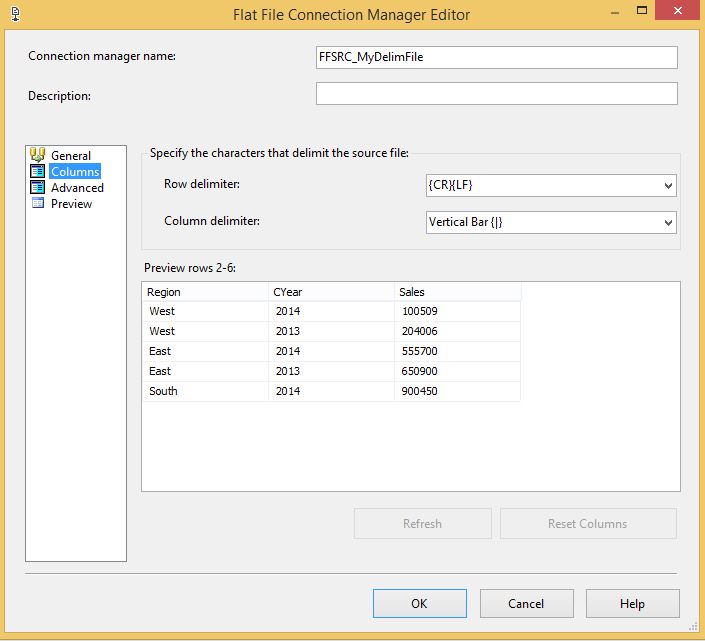
In the columns tab, ensure that Column delimiter and Columns are populated correctly as shown below.
Destroy
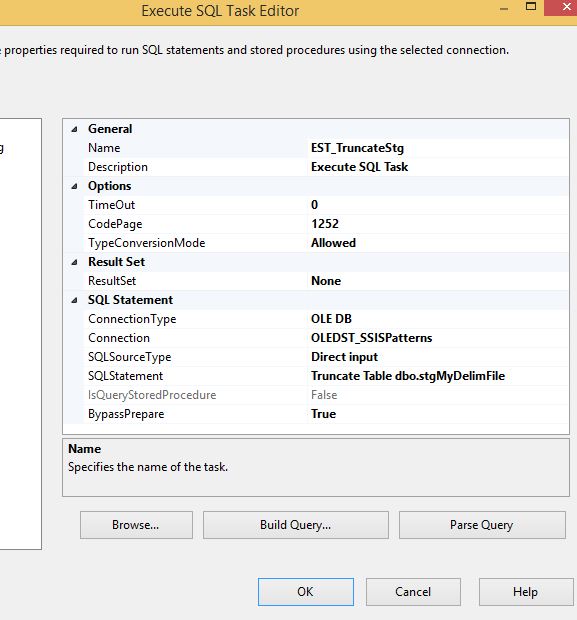
In T-SQL, we use the TRUNCATE statement to remove data from a table. In SSIS, we use an Execute SQL Task that would in turn execute a SQL statement.
Drag an Execute SQL Task to the Control Flow area. Double-click to open the editor. Leave OLE DB as connection type and Direct input as SQLSourceType respectively. Choose a connection from the drop-down. If you’re using the same names as I, it’d be OLEDST_SSISPatterns.
Add the following T-SQL in the SQLStatement property and click OK.
Truncate Table dbo.stgMyDelimFile
Your Execute SQL Task Editor should appear as shown in the image below.
Read Flat File Source
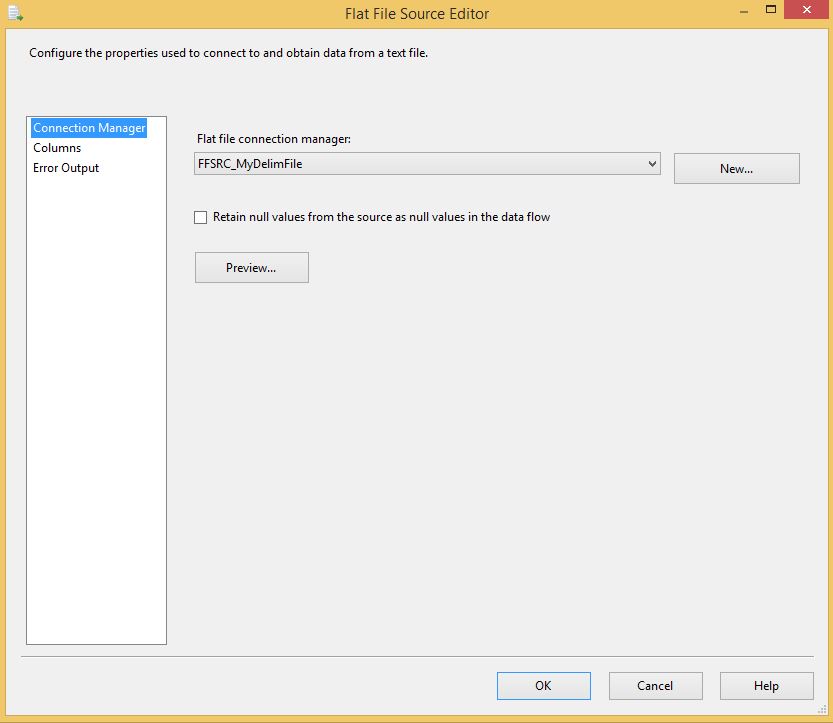
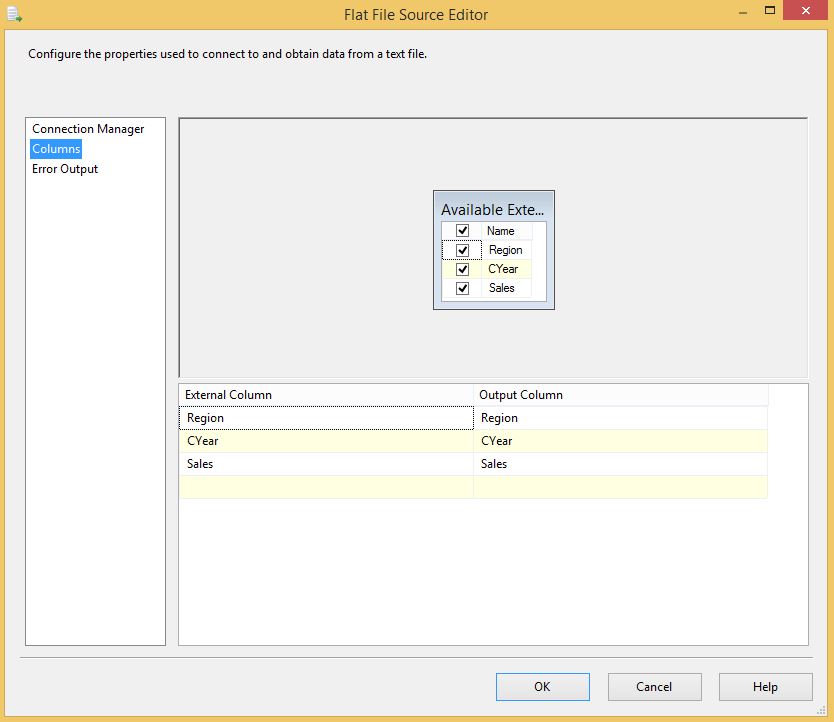
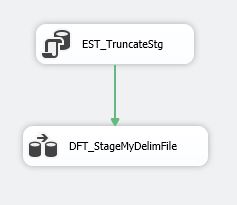
Add a Data Flow Task to the Control Flow area and connect it to the Execute SQL Task. Double-click on the Data Flow to open the editor. Drag a Flat File Source adapter to the Data Flow area and double-click to open the editor. Select the Flat File connection manager in the Connection Manager page and ensure that all columns are selected in the Columns page as shown in the below images.
Convert Data Type
If you review the output columns - by right-clicking source component and selecting Show Advance Editor - coming from the Flat File Source adapter, you’ll notice that data type for all three columns is String. But columns CYear and Sales contain numerical data. To convert the data type of these two columns from String to Int, we use Data Conversion Transformation.
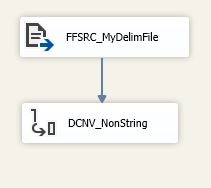
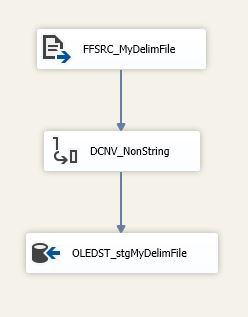
Drag a Data Conversion Transformation and connect it to the output of Flat File Source adapter as shown below.
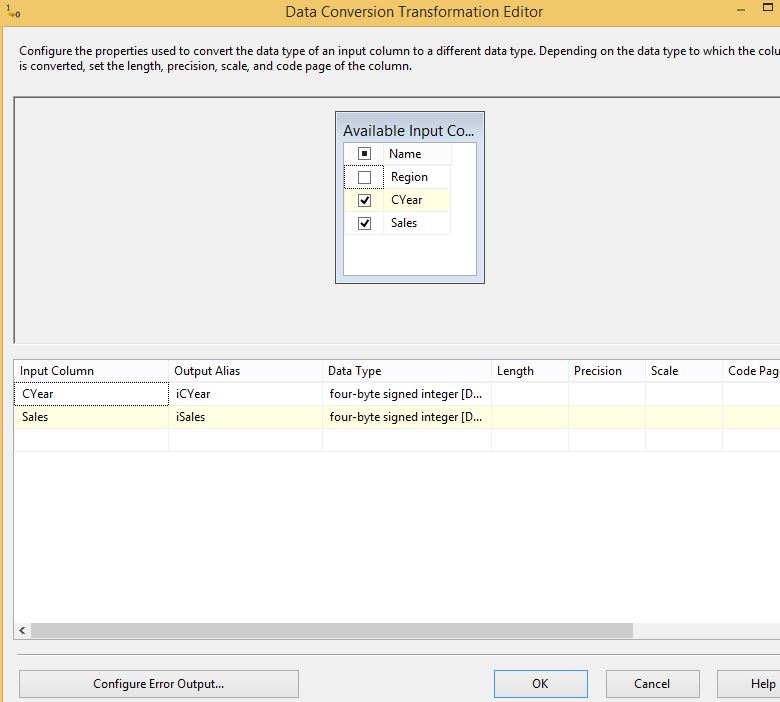
Then, double-click the Data Conversion to open the editor. Select CYear as the Input Column. Enter iCYear as the Output Alias. Select four-byte signed integer [DT_I4] as the Data Type. Repeat this step for Sales column and enter iSales as the Output Alias. Using aliases helps in distinguishing original columns from the columns that were modified in the data flow.
After configuring the properties for Data Conversion, your editor should appear as shown in the image below.
Write to Destination
We’re finally ready to write records from source file to the destination. Drag an OLE DB Destination adapter to the Data Flow area and connect it to the output of Data Conversion Transformation.
Double-click to open the editor. Notice connection manager is already populated because there is only one OLE DB connection in the package. Select the connection manager if it’s not already populated for you. Select dbo.stgMyDelimFile in the Name of the table or view property.
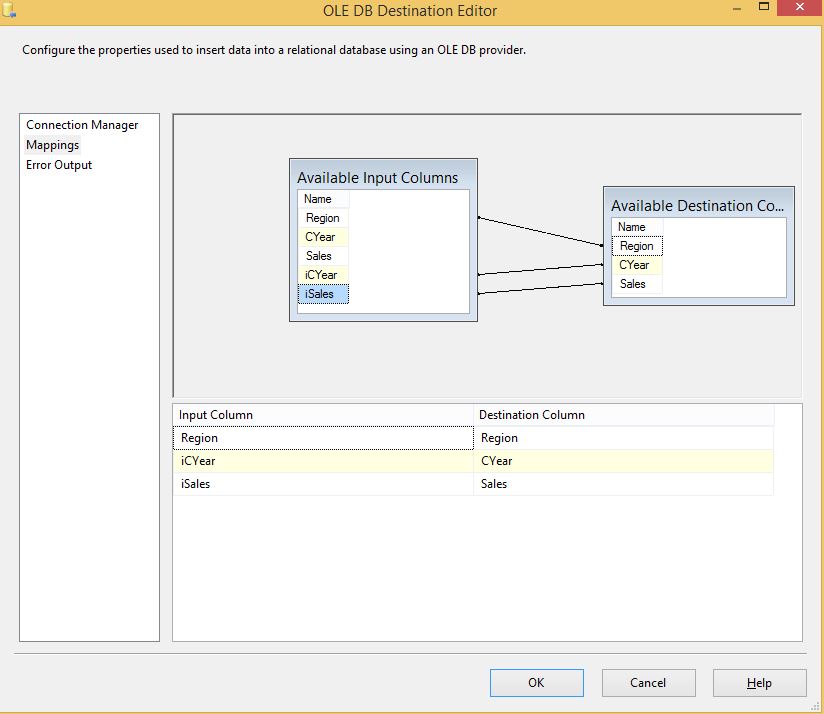
In the mappings page, you’ll notice that Input and Destination columns are already mapped based on matching names. A problem with this is, we transformed some of the columns. We want to use columns from Data Conversion for those columns that we changed the data type. We can use the remaining columns from upstream.
Leave the mapping for Region column since we didn’t change it’s data type, but for CYear and Sales, remove the existing mappings and use iCyear and iSales respectively from Available Input Columns.
If you are following along, your Data Flow and Control Flow should appear as shown in images below.
Testing the SSIS Package
Code - yes SSIS is also code - is neither complete nor working unless it’s tested. To test the package, press F5 on your keyboard or click Start Debugging (green arrow) on the menu bar. You should see green tick marks everywhere. In addition, number of rows in the Data Flow should match the number of rows in the source file. 5 in this case.
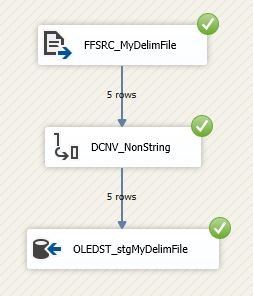
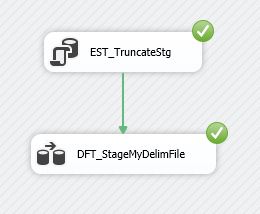
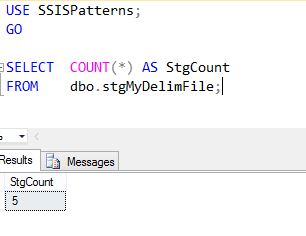
You can also verify the count of rows in the staging table. Also 5 in this case.
Summary
In this article, I provided a SSIS design pattern to stage delimited flat files. You Destroy (truncate existing data in staging table), Read From Source Flat File, Convert Data Type, and Write to Destination. Data Type conversion step applies to non-string data only, and is optional. If you want, you can store non-string data - such as dates and numbers - as text in SQL Server, but know that it uses up additional storage unnecessarily and could degrade performance.
When there are several flat files, manually creating the SSIS packages and staging tables can be redundant and time consuming. In the next article, I’ll provide a solution that automatically generates SSIS packages to stage flat files.


