Data cleansing is a vital part of the ETL processes used for our Business Intelligence applications. This is due to the fact that we can import data from several sources to our data warehouse and most of the times, the fields does not have the format we want. This means additional tasks must be perform to suit our needs.
One of the most basic data cleansing tasks is to split a text column into various columns (or separate just a part of it). In this article, I will show you how to import a CSV file into a table with a simple column split function using SQL Server Data Tools (SSDT) using the Derived Column transformation.
Setup
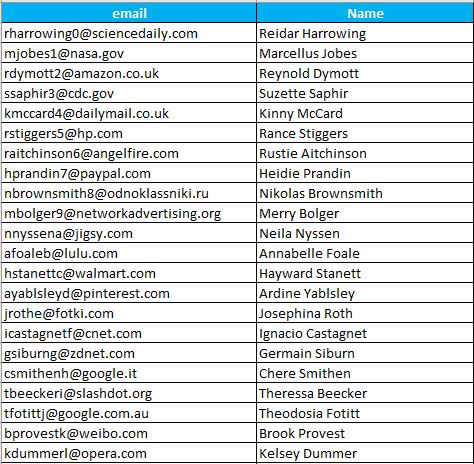
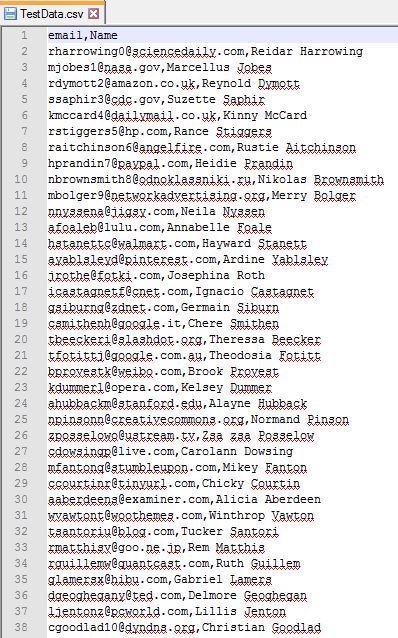
For this example, we will use a simple CSV file with an Email and Name columns as follows:
(table view)
(Text file view)
Our objective will be to separate the Name column into First Name and Last Name using the space character as separator, then import it to our table in SQL Server. The table has the following definition:
CREATE TABLE [PersonInfo_1](
    [id] [bigint] IDENTITY(1,1) NOT NULL,
    [FirstName] [nvarchar](100) NOT NULL,
    [LastName] [nvarchar](100) NOT NULL,
    [EmailAddress] [nvarchar](100) NOT NULL,
) ON [PRIMARY]
GO
Creating our SSIS Solution
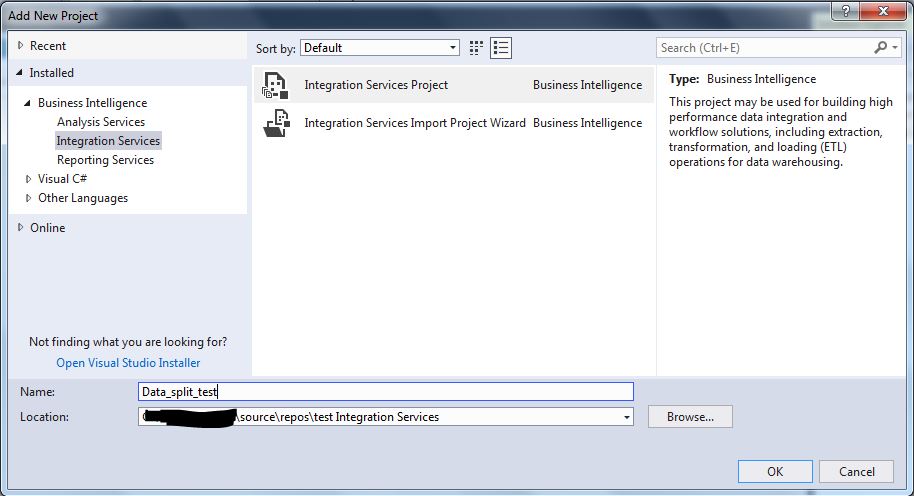
Using SSDT, create a new integration services project and name it as shown below:
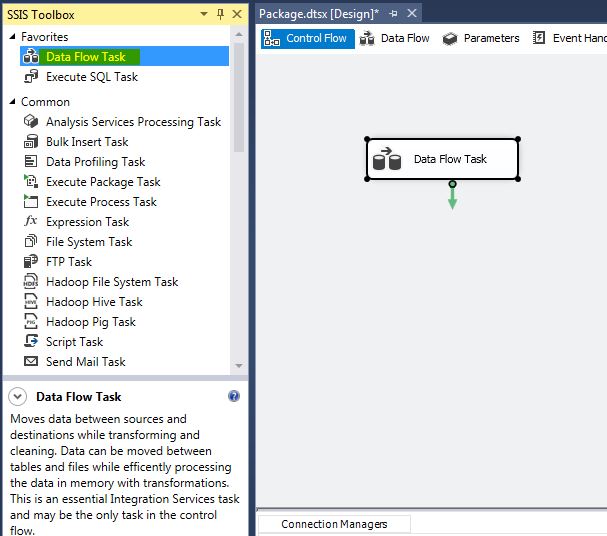
In the package designer, select Control Flow and add a new data flow task:
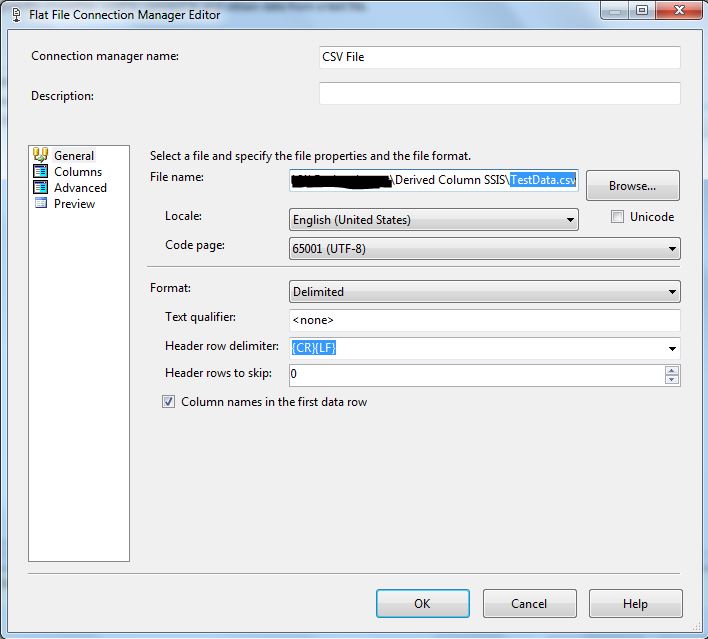
Double-click on it and then add a source and destination connections, for our example, the source is a flat file connection pointing to our CSV file and the destination is our SQL Server database, and the destination table, as follows:
Source connection
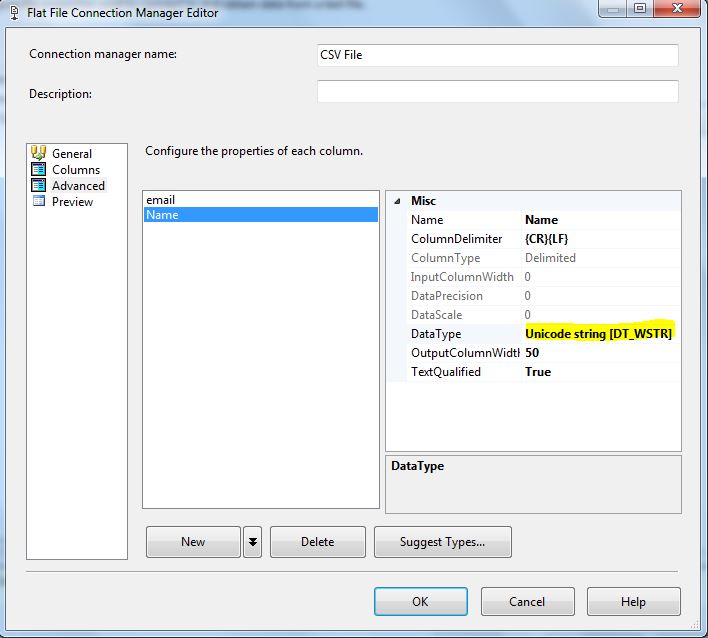
Since we are using Unicode data, make sure to change it on the column datatype if it is not automatically detected:
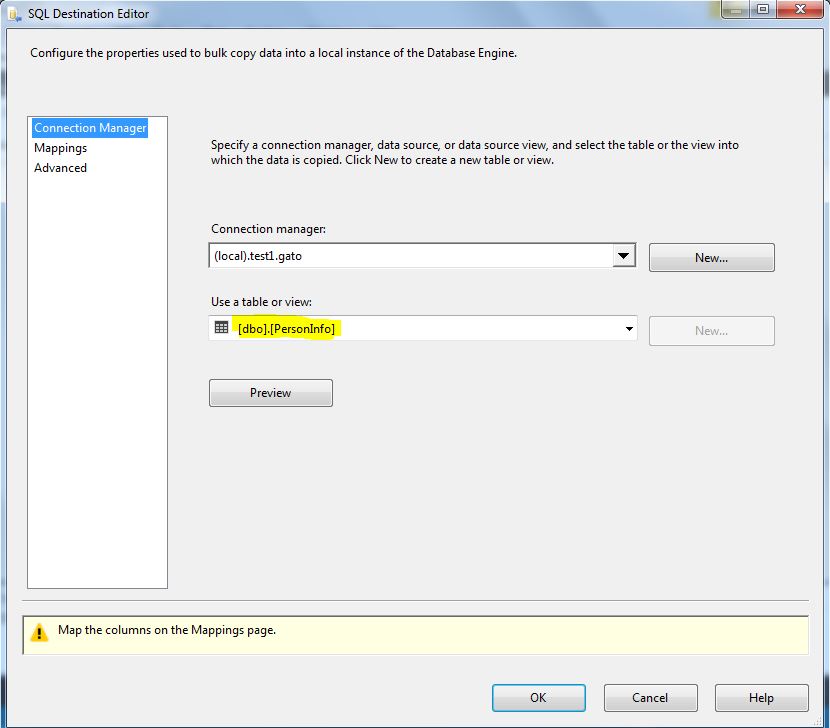
Destination Connection
Just connect to your destination SQL Server table, ignore the mappings for now and save it
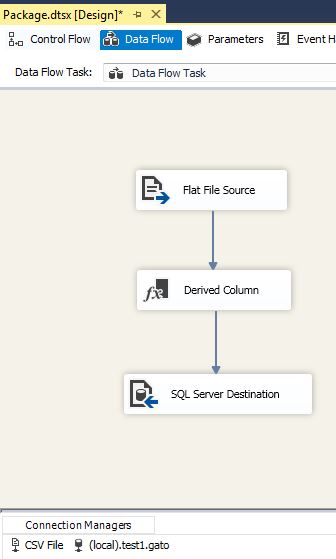
Your package should look similar to this at this point:
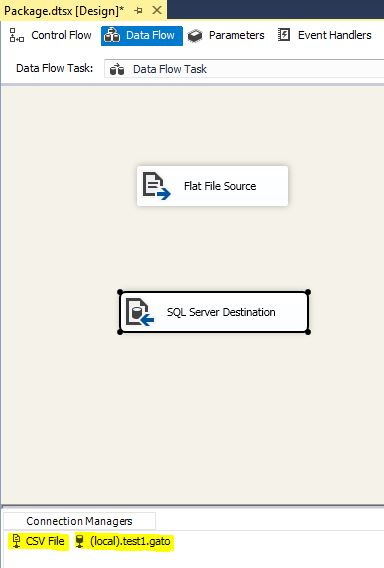
Now we are ready to create and configure our derived column task.
Implementing the Data Cleansing Task
From the toolbox drag and drop a Derived Column transformation, then connect the flat file source to it, as follows:

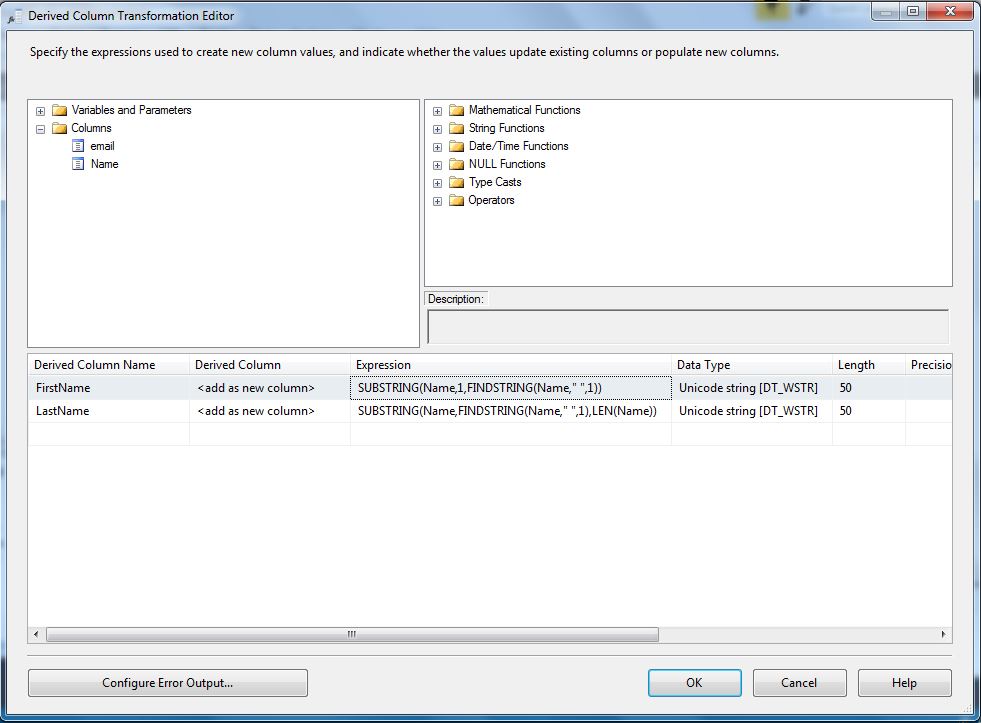
Double click on it to configure the transformations. For the Derived column name put the column names you want as an output, for this example, FirstName and LastName. It is very important for the Derived Column to leave the <add as new column> option selected, otherwise, your original column will be overwritten for next steps.
In Expression, put the transformation you want to do for each column, for this example we will use the following expressions:
FirstName: SUBSTRING(Name,1,FINDSTRING(Name," ",1))
LastName: SUBSTRING(Name,FINDSTRING(Name," ",1),LEN(Name))
They will split the Name string into First Name and Last Name using the space character as the separator. It should look like this, of course, more complex expressions are allowed, so you can try different things if you want:
Click on OK to save it.
Now proceed to connect the Derived Column transformation to the destination connection:
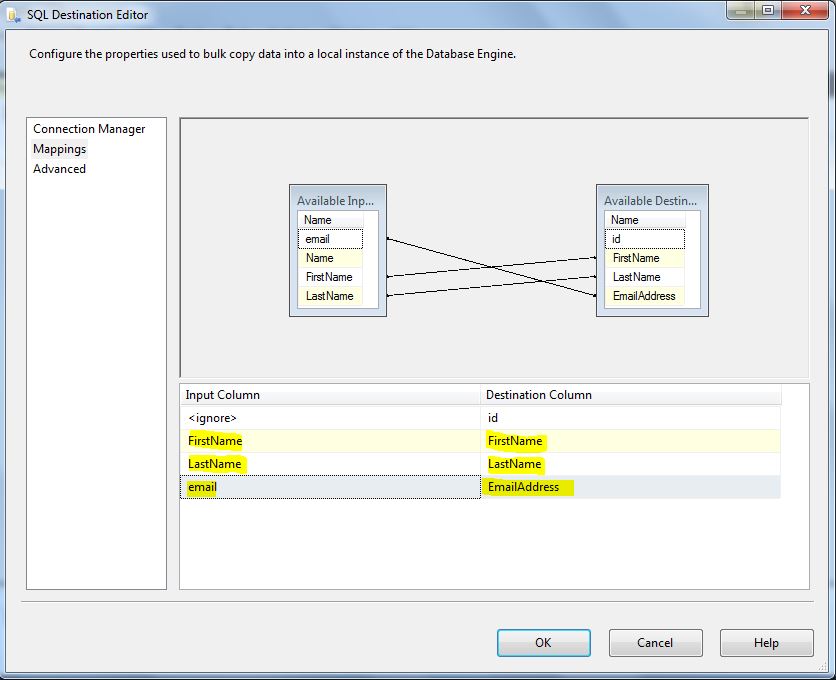
Now double click on the SQL Server Destination and select the Mapping tab, then perform the required mappings by matching the source column with its destination column as follows:
Click on OK to save the changes. Save the package and now we are ready to test it.
Testing the Package
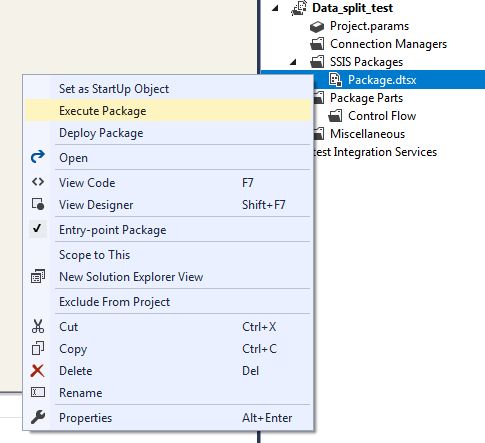
To test the package, just right click on it from the solution explorer and select the Execute Package option
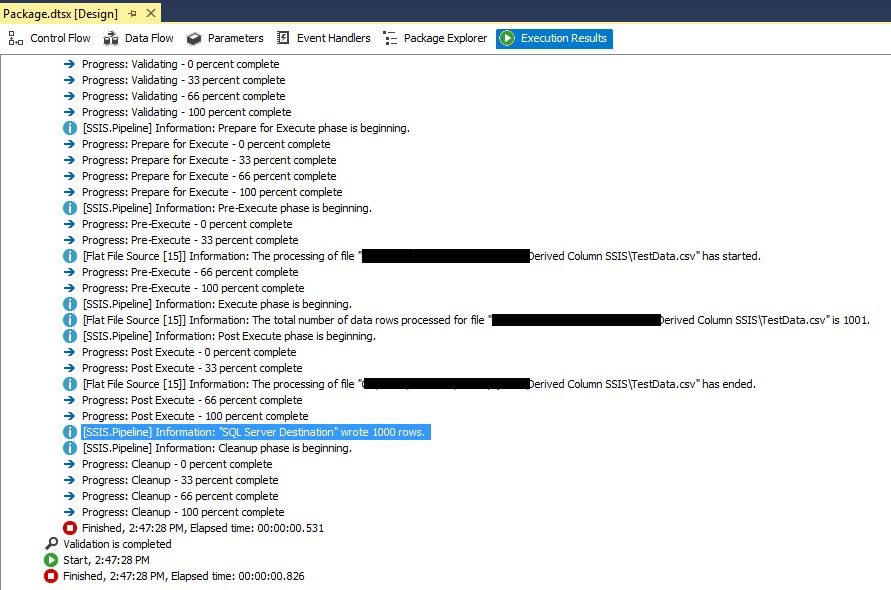
If everything is Ok, in the Execution results tab, you will see the progress and a successful execution
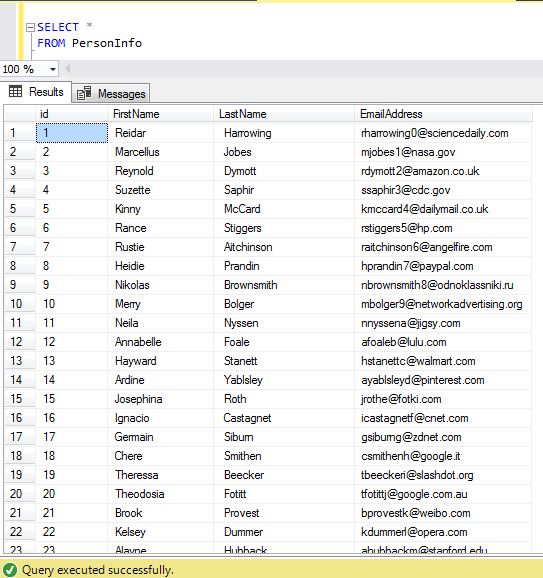
Now let us check our table to see if the data was splitted correctly, we perform a simple SELECT statement to check the table, we can see that the first name and last name were separated successfully for this example:
We have demonstrated how to perform one of the simplest data cleanup tasks, you can try to do more complex expressions or do the inverse operation (to merge 2 columns in one) as a next step.

