Introduction
This article teaches how to use the Azure Data Studio extension to handle SQL Database projects. It is a good practice to handle code as a Database project. Keeping the version history in Visual Studio is easier, and you can easily publish your changes in the testing environment, cert, and production. If you have already used the SQL Database Project in Visual Studio, it will be extremely easy to use it in Azure Data Studio. If you did not, you will learn how in this article.
If you do not have experience with Azure Data Studio, refer to this link: Azure Data Studio.
Requirements
- First of all, we need to install an SQL Server.
- Secondly, we need to install Azure Data Studio.
- The AdventureWorks database or any testing database of your preference.
Installation
To install this extension in Azure Data Studio, go to the Extensions blade and select SQL Database Projects. Click Install in the main pane.
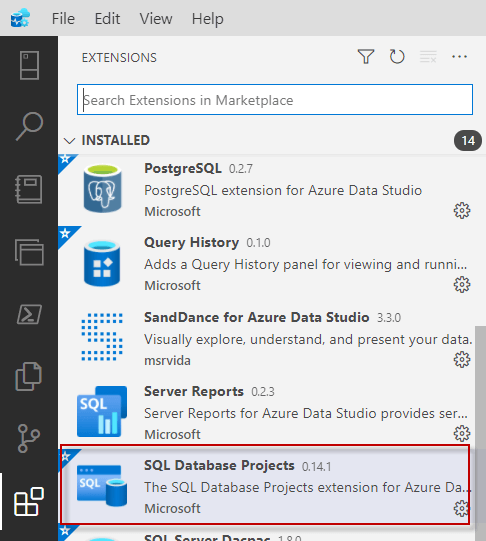 Install database project extension
Getting started creating a project from an existing database
First, you can right-click on Server in an existing database and select the option, Create Project from Database. This will create the project. In this article, we will use the Adventureworks, but you can use any database.
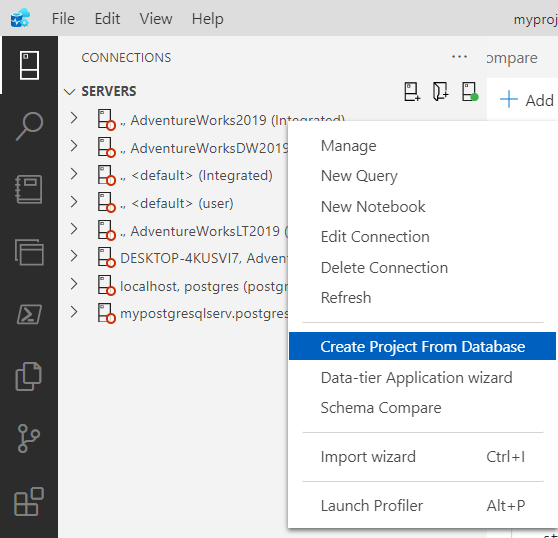 Create project from db
Secondly, specify the project's name, select a location for the project, and press the Create button.

Go to Projects. You will see the new project created.
How to create a blank project
First, in Azure Data Studio, go to projects.
![]()
Secondly, press the + icon.

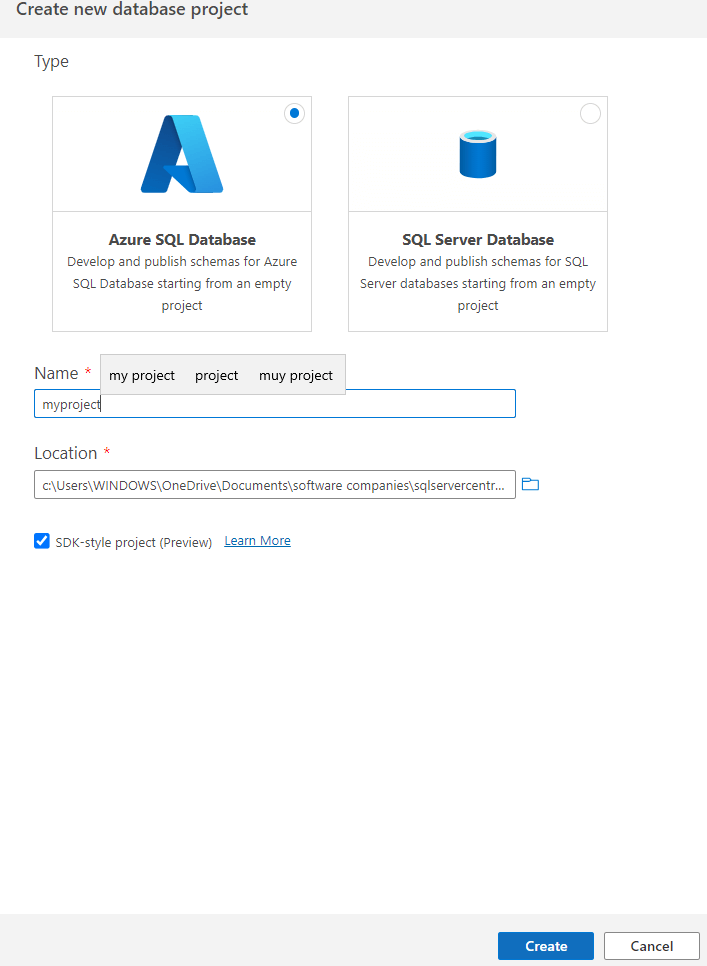
Secondly, you can create an SQL Server Database or an Azure SQL Database. If you will work in Azure, select the first option, otherwise, the SQL Server Database is OK.
Thirdly, write a name for the project. Also, select a location for the project.
Finally, press the Create button.
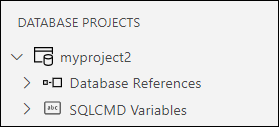
If everything is OK, you will visualize a new project under database projects.
Create tables in a SQL Database Project
Once we have a project, follow these steps to add a table.
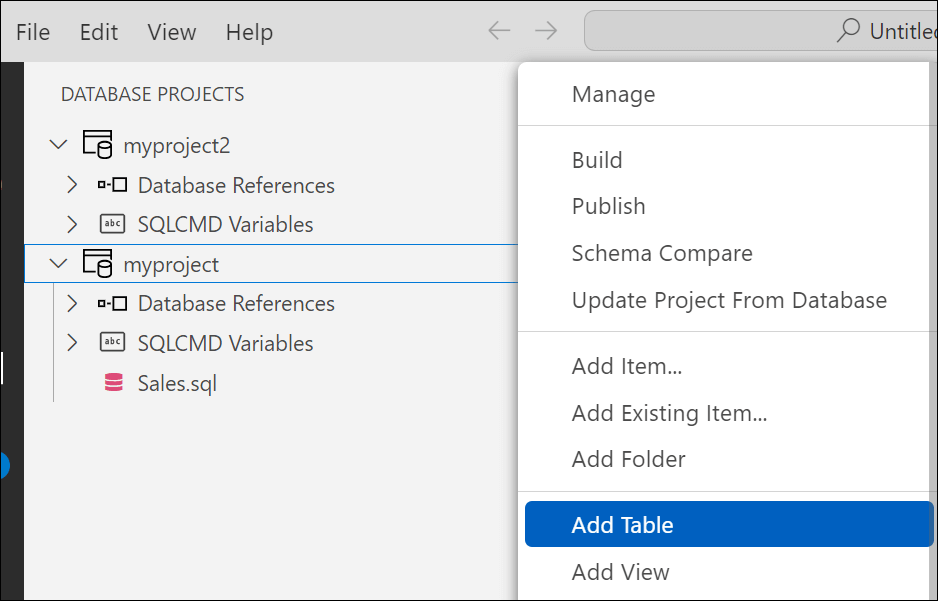
First, right-click the project and select the Add Table option.
Secondly, write a name for the table.

Thirdly, check the code to create a table. The following code creates a table named sales and a column named Id the data type is an integer (INT) and a primary key not null.
. 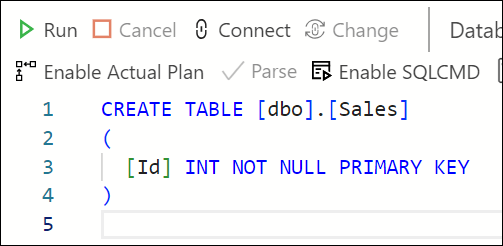
Also, we will modify the code and add the column product and the price column. The data types are varchar(30) and integer respectively.
CREATE TABLE [dbo].[Sales]


(


  [Id] INT NOT NULL PRIMARY KEY,


  product varchar(30),


  price int


)
The following link provides more information about creating tables:
Create views in a SQL Database Project
The view is a virtual table that stores the query of the data you want from one or multiple tables. To create views in a Database Project follow these steps:
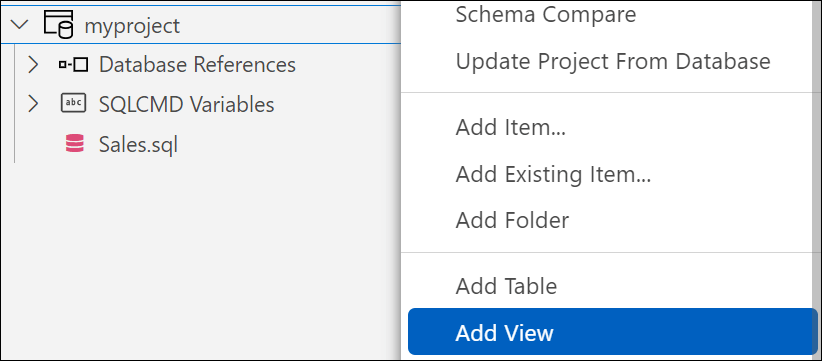
First, right-click the project and select Add View.
Secondly, write a name for the view.

The following code will be created automatically:
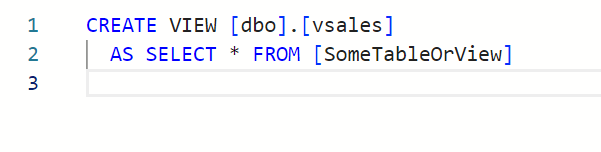
The code creates a view named vsales and the select contains the query used inside the view. Also, we can modify the view:
CREATE VIEW dbo.vsales

AS

SELECT product,price

FROM dbo.sales

WHERE PRODUCT ='cell phone'
This view named vsales will show the product and price of the table sales where the product is cell phone.
For more information about views, refer to our link: CREATE VIEW (Transact-SQL)
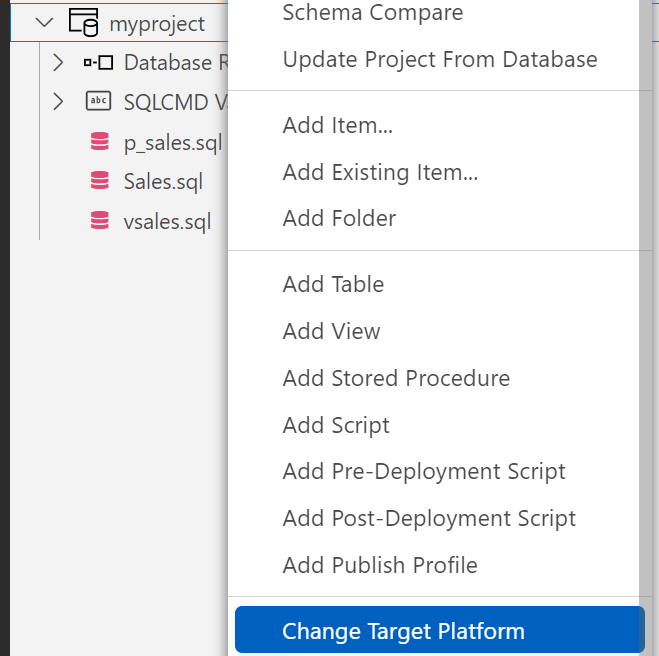
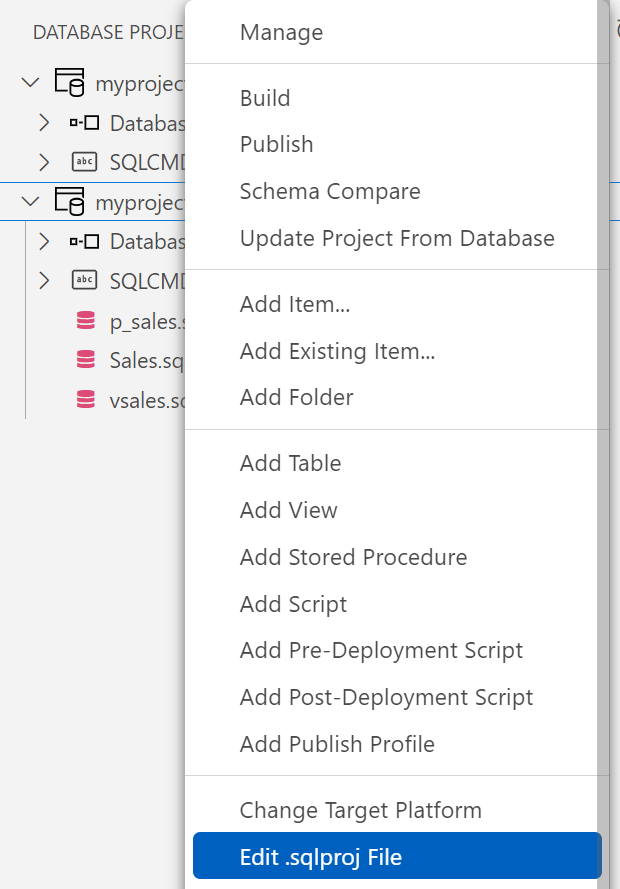
There are several options if we right-click the Database project. We will explain them.
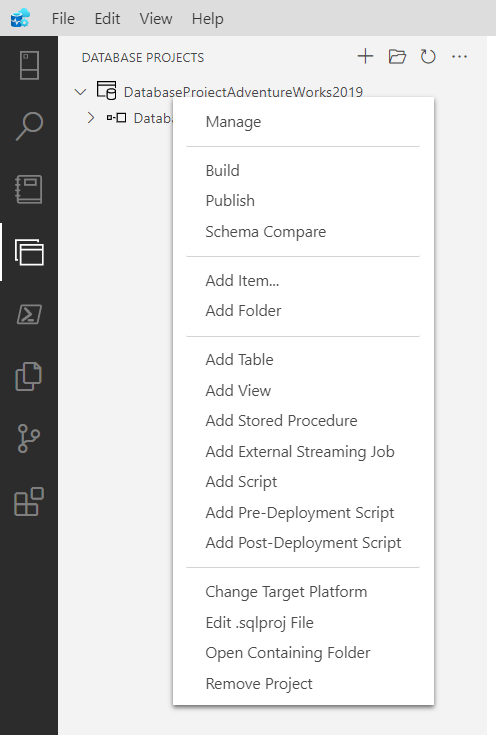 Database Project options
Create stored procedures in an SQL Database Project
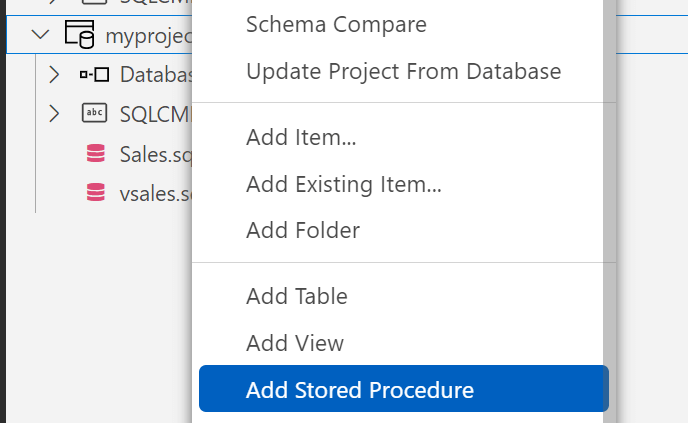
Also, you can create Stored Procedures. A stored procedure contains precompiled SQL code stored inside the database. It can accept parameters, IF statements, and SWITCH statements. You can also invoke other stored procedures here. To create a stored procedure in an SQL Database Project follow these steps:
First, right-click the project and select Add Stored Procedure.
Secondly, add a name for the stored procedure.

Some generic will be created.
Also, you have the CREATE PROCEDURE followed by the procedure name. Optionally, you have the input parameters and then you have the query.
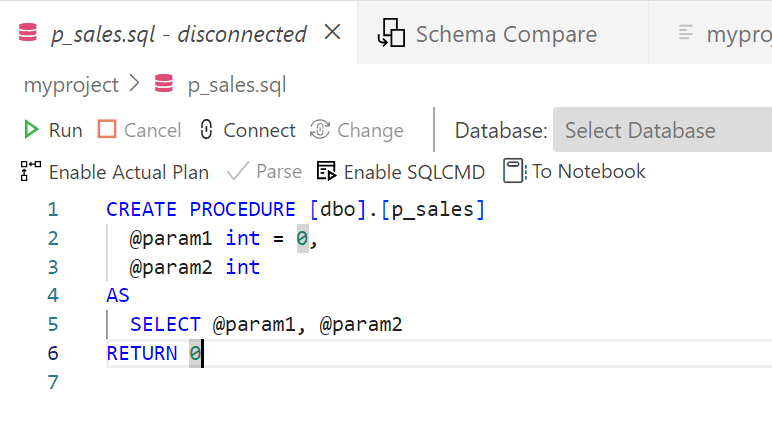
In addition, we will modify the code as follows:
CREATE PROCEDURE [dbo].[p_sales]

  @param1 int

AS

  SELECT

  id,

  product,

  price

  FROM sales

where id = @param1
This code creates a procedure named p_sales with the param1 used as an integer parameter. It shows the data of the products where the id is equal to the parameter value.
For more information about stored procedures, refer to our links provided:
Add item to a SQL Database Project
We have the Add item, which allows adding Scripts, Tables, Views, Stored Procedures, Data Sources, File Formats, External Streams, and External stream jobs. I will talk in-depth about them later. To add a new item, follow these steps:
First, right-click the project and select Add Item.
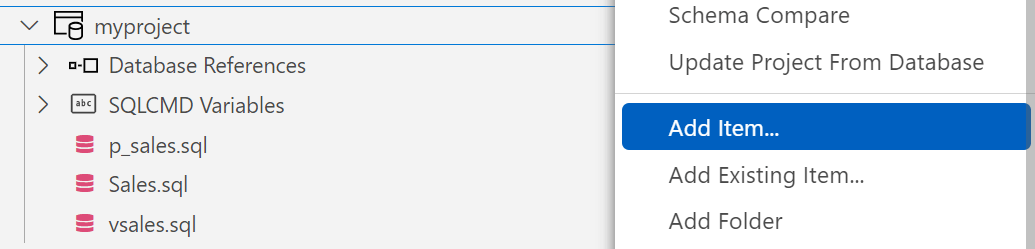
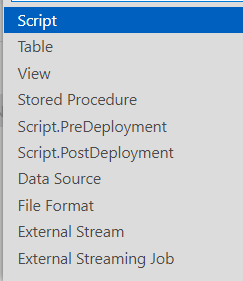
Secondly, select which object you want to create:
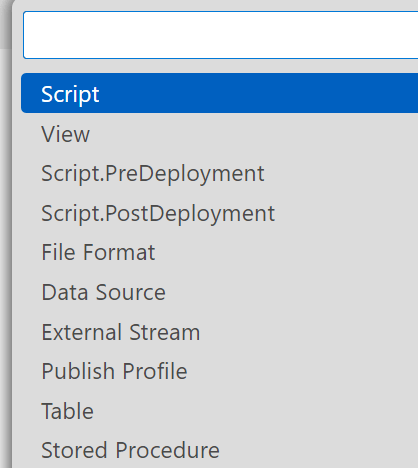
You can create scripts, views, script.PreDeployment, Script.PostDeployment, etc.
Script.PreDeployment and Script.PostDeployment is just code that you want to run before and after the deployment. The code is in T-SQL language. For example, you could create backups here, clean temp data, or any task that you want to run before or after deployment.
Polybase related items
Also, in the items we have the Data Source. This is used to create external data sources. This is to access external data using Polybase which is a technology for that purpose. For more information, we have an example, to access external data from Azure Synapse using Polybase: Access external data from Azure Synapse Analytics using Polybase
The file format allows for defining the layout of the external data. In the previous link, you will find an example of real external file creation.
Finally, External Stream allows creating an external stream to input and output stream. You can for example query Azure IoT Hub or Kafka. For more information about external streams, refer to the following reference link: CREATE EXTERNAL STREAM (Transact-SQL)
 objects supported
Add folders in a SQL Database Project
In addition, we have the Add folder to organize our code. I usually create folders to separate tables, stored procedures, views, and scripts. Also, I commonly use subfolders for schemas.
 Add new folder
Other SQL Database Project options
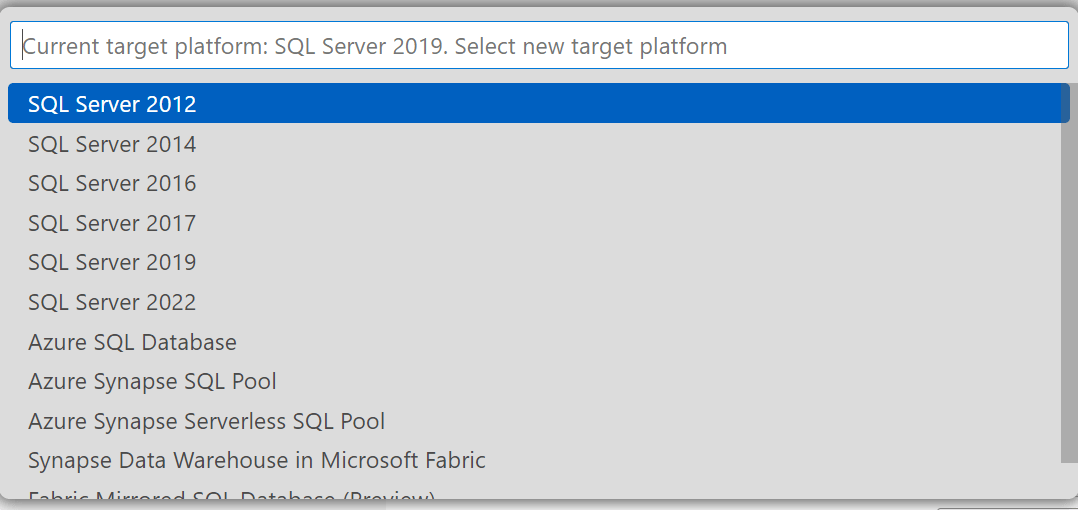
In addition, we have an option to change the target platform.
This option supports SQL Server 2012. There are some differences between the versions and this option helps with that.
Edit sqlproj file
Also, there is an option to edit the sqlproj file.
You can edit the XML file directly. It is strongly recommended to have a version history of your project, that way, if you make a mistake on the file, you can revert to the previous version.
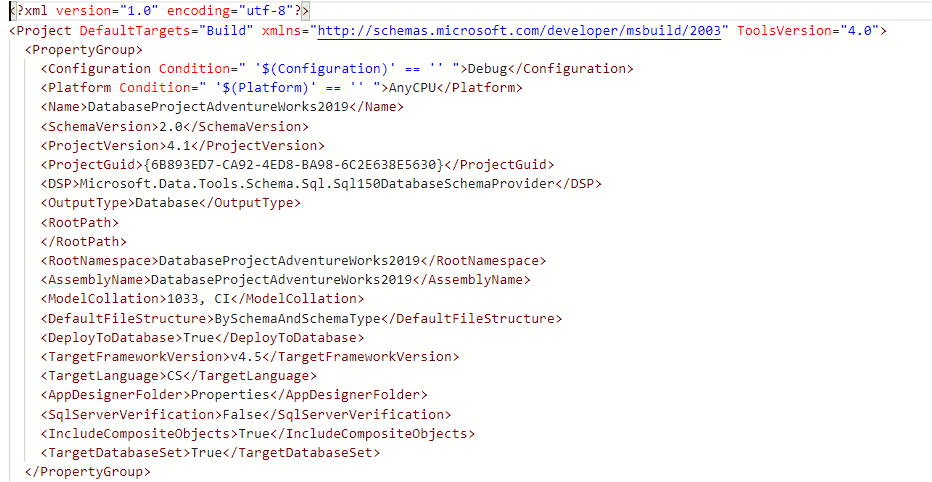 Edit the Database project
For more information about adding the project to Github to have version history, please refer to this link: Using Azure Data Studio with Git
We also have an option to Open Containing Folder. This option will open the folder with the sqlproj file which is an XML file. Finally, we can Remove Project from Azure Data Studio.
Add Database Reference
If we need to link other objects from another database or project, we can use the Add Database Reference.
First of all, right-click Database References and select the Add Database Reference option.
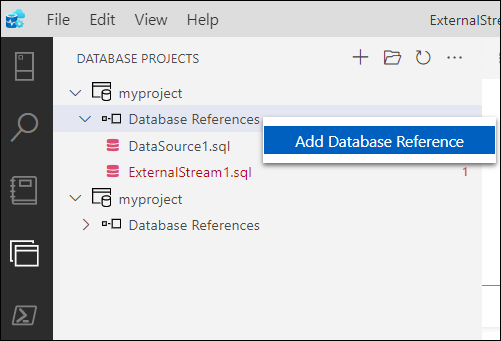 reference to another database
Secondly, you can add the database as a project, a System database, or a dacpac. This option allows access to resources from a different project database or database.
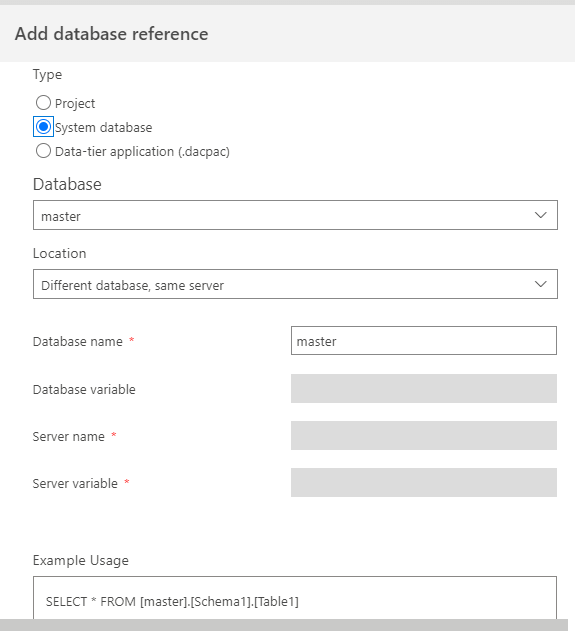 Add a reference from another database
Compare tables
There is also a Schema Compare option that allows comparing databases.
You need to provide the source and target. You can compare an online database with Data-tier Application Files (dacpac) or compare with Database Projects:

This option will show the difference between the source and destination.
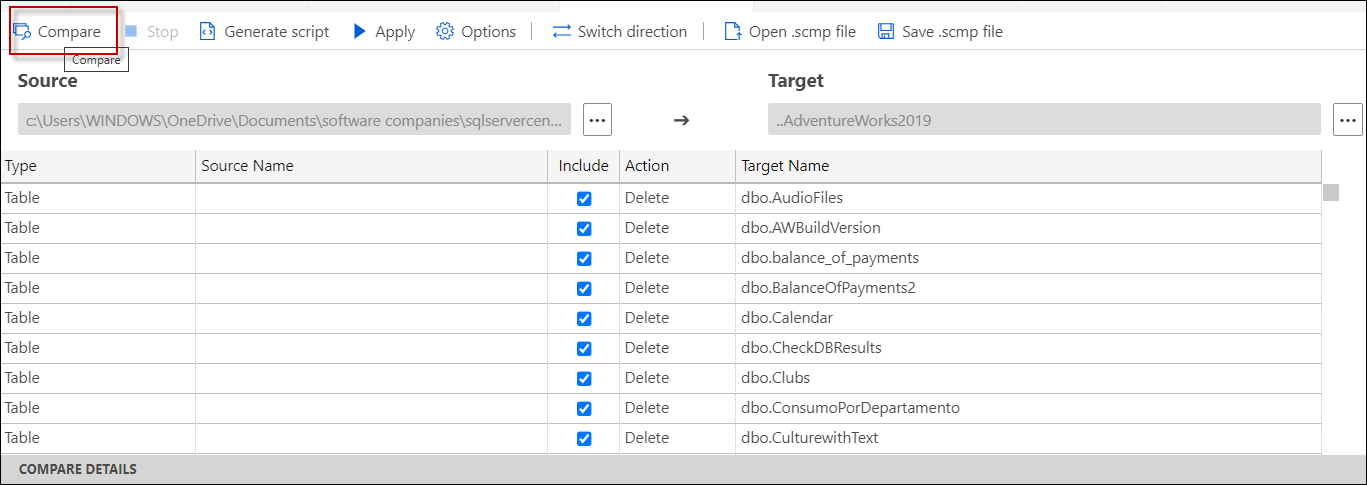
Compare different databases
For more information about comparing databases with Azure Data Studio, refer to this link: How to Compare Tables in Azure Data Studio
How to publish a project
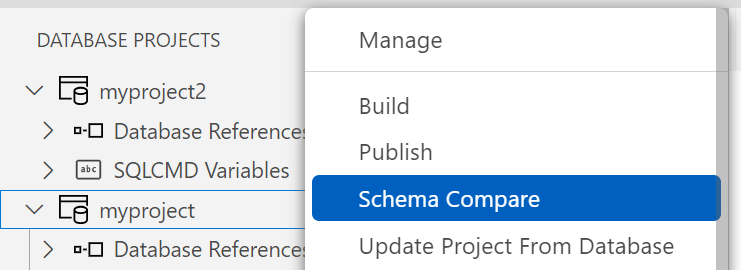
The Publish option is used to deploy your database project to an SQL Server instance. To publish a project, right-click the project and select the Publish option.

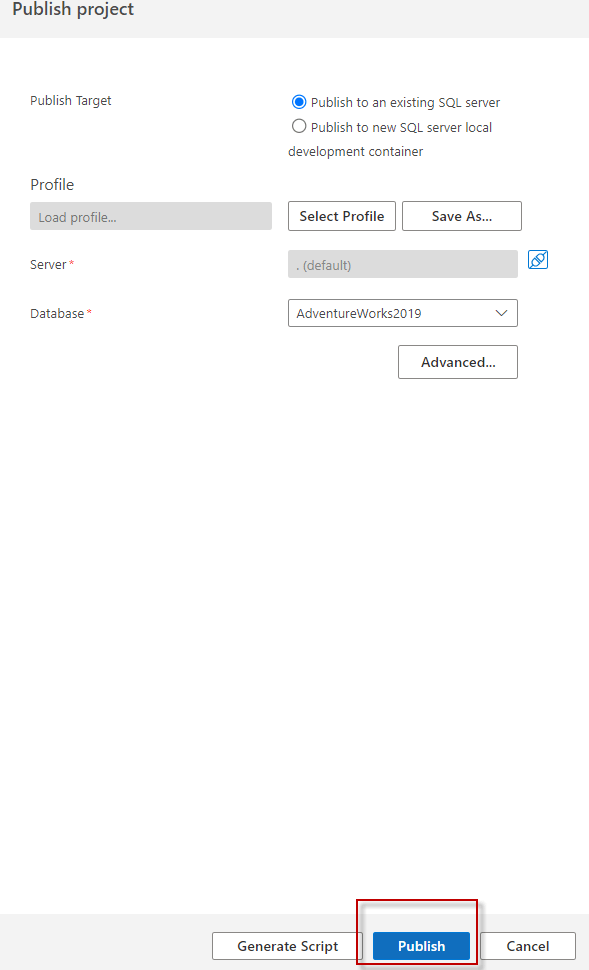
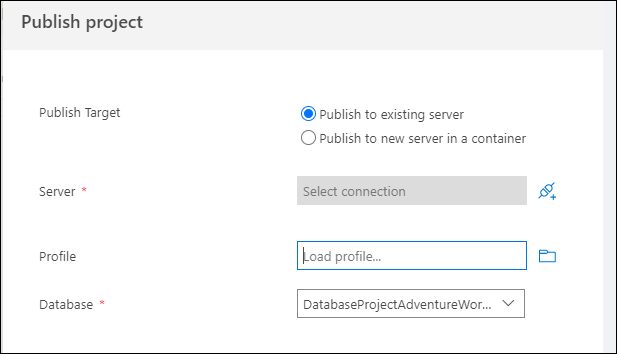
Also, publish to an existing SQL server or a new SQL server local development container. Press the connect icon to select the database where you want to publish.
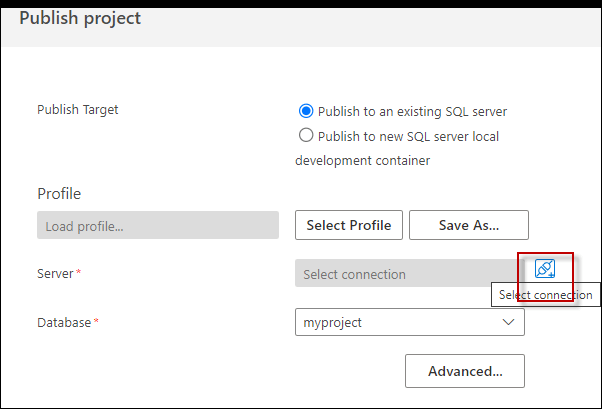
In addition, select the Server, Database where you want to publish your database project.

Finally, once the connection is set, press the publish button.
Publish history in SQL Database Projects
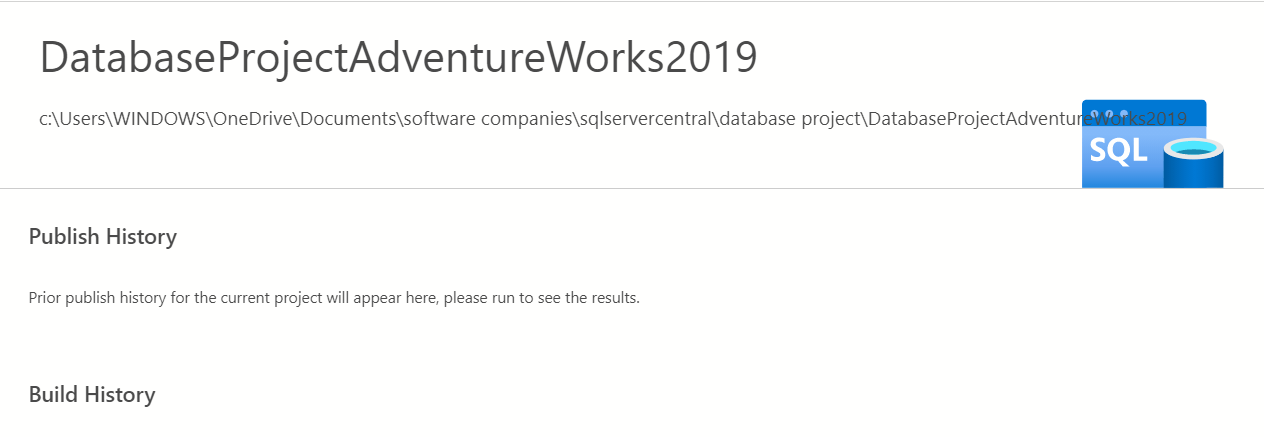
Firstly, we have the option, Manage, that allows you to see the published history.
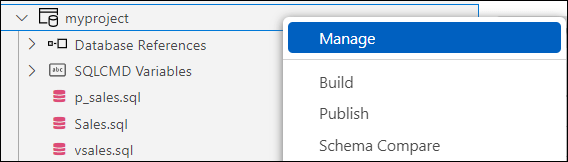
The Publish History contains the date and time that the project was deployed and the date and time that the project was built. First, you need to build a project and then you can publish it.
 publish your code created
In addition, we have the build option that builds the project file. It is an XML file with all the project information.
Finally, the publish option publishes your code like views, stored procedures, tables, and so on. It allows publishing easily your changes on different servers. You only need to specify the connection properties, the profile, and the database.
 database project publishing
Conclusion
To conclude, we learned how to use the Database Project in Azure Data Studio and learned the most important options available. Also, we learned that handling the database as a project allows you to easily administer your code, deploy it on different servers and get historical versions of your code.