Reading Andy Leonard's Anatomy of an Incremental Load got me itching to share my take on how to do an incremental data load in SSIS using MD5 hashes to track data changes. This would potentially give a huge speed boost to the process by not having to store so many rows in memory just for comparison purposes and removing the bulk of conditional split processing at the same time.
Andy covers a lot of the basics and why doing data loads this way is important, so I encourage everyone to read his article first to get a good idea of why you do incremental loads vs. truncation loads. His article shows why this technique is a general best practice guideline for how you build these types of packages. Do this enough and you'll get used to seeing what I call the ETL Tree since you usually end up with something looking like a tree or a triangle in your Data Flow with your data source at the top and your insert and update destinations at either side of the bottom.
Since this article was inspired by Andy's, I'll be using the Adventureworks.Person.Contact table as my data source as well.
I'm using the SQL Server 2008 x86 version of the AdventureWorks database and we'll be ignoring the PasswordHash, PasswordSalt, AdditionalContactInfo, and rowguid rows for simplicity's sake in this example. First let's start with the script to create our test database and destination table:
-- Create test database
use master
go
if exists(select name from sys.databases where name = 'HashTest')
drop database HashTest
go
create database HashTest
go
-- Create Contact Destination table
use HashTest
go
if exists(select name from sys.tables where name = 'Contact')
drop table dbo.Contact
go
CREATE TABLE dbo.Contact
(
ContactID int NOT NULL,
NameStyle bit NOT NULL,
Title nvarchar(8) NULL,
FirstName nvarchar(50) NOT NULL,
MiddleName nvarchar(50) NULL,
LastName nvarchar(50) NOT NULL,
Suffix nvarchar(10) NULL,
EmailAddress nvarchar(50) NULL,
EmailPromotion int NOT NULL,
Phone nvarchar(25) NULL,
ModifiedDate datetime NOT NULL,
HashValue nvarchar(35) NOT NULL
)
Notice the added field to our destination called HashValue. This character field is where we will store the hash value for our data when it arrives at the destination table.
Now pop open BIDS or Visual Studio and create a new Integration Services project. First create two OLEDB connections, one for the AdventureWorks database and one for the HashTest database. Now drag your data flow task out into the control flow and double click on it to start setting up your data flow. Once inside your data flow drag over an OLE DB Source from the Data Flow Sources section of your toolbox. You should set it up to look like this:
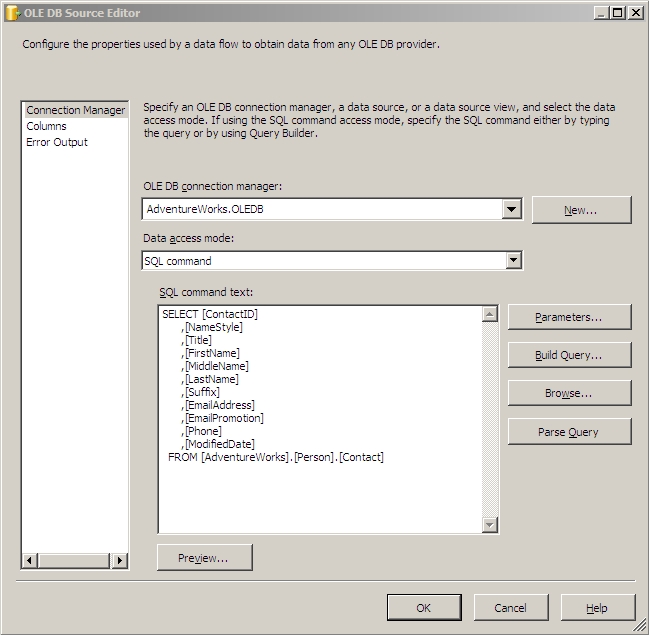
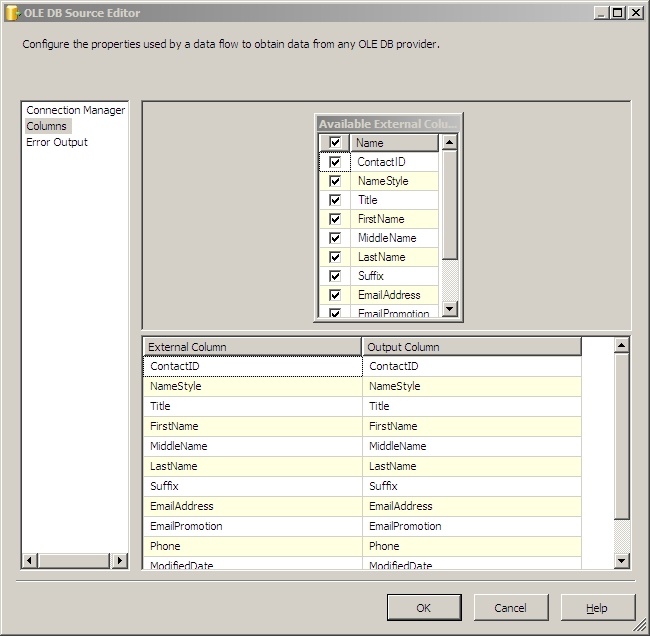
Make sure all of your columns are selected on the Columns screen.
Now we're going to use a transformation script component to calculate the MD5 hash value for each record and add it as a column into the pipeline. Drag the script component task out of the transformations section in your toolbox. Connect your OLE DB Source to it and double click on it to start setting it up.
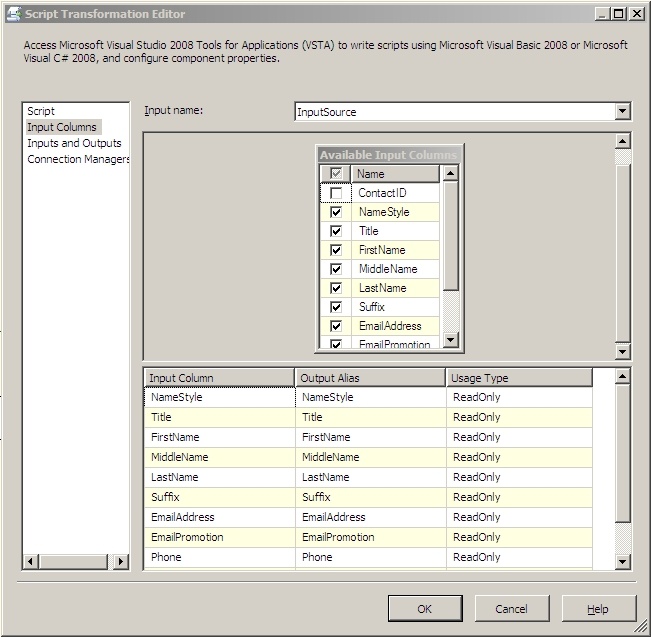
We'll look first at the Input Columns screen. You should see all of the columns from your source in the available input columns box. Check all of them except for your ContactID field. It's somewhat pointless to include this field in the hash calculation as it's what we're going to be doing our matching by, so we have to assume the IDs don't change. Your screen should look similar to this:
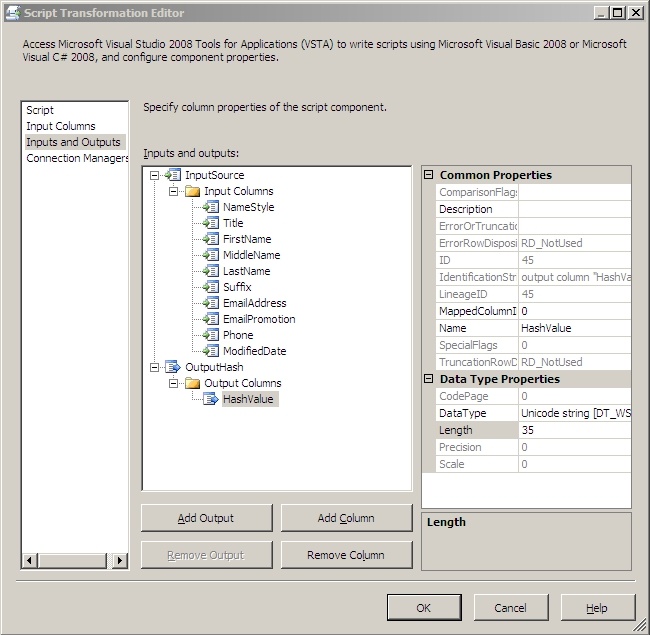
Next go to the Inputs and Outputs screen. I always rename the default input and output to something a little friendlier and more descriptive but that's optional. Here you want to add a column to the default output called HashValue and make it a unicode string with a length of 35. It should look something like this:
Now go back up to the Script screen, change the script language to Microsoft Visual Basic 2008 and click on the Edit Script button. We'll do this example in VB.Net so the code can be re-used in SSIS 2005 as well. First, underneath Imports Microsoft.SqlServer.Dts.Runtime.Wrapper add these lines:
Imports Microsoft.SqlServer.Dts.Pipeline
Imports System.Text
Imports System.Security.Cryptography
The Microsoft.SqlServer.Dts.Pipeline namespace will let us access the columns in our data flow pipeline dynamically which will greatly increase the re-usability of this task. System.Text lets us use the StringBuilder class that we'll use to concatenate all of our columns together to build a hash value from. And finally System.Security.Cryptography gives us the tools to actually generate the hash values.
After that, we need to declare a private instance of a PipelineBuffer to store our data flow pipeline data in for access later in the script. Do this inside ScriptMain but outside of any other function or method:
Private inputBuffer As PipelineBuffer
Now we need to override the ProcessInput method to get the pipeline buffer into our private instance:
Public Overrides Sub ProcessInput(ByVal InputID As Integer, ByVal Buffer As Microsoft.SqlServer.Dts.Pipeline.PipelineBuffer)
inputBuffer = Buffer
MyBase.ProcessInput(InputID, Buffer)
End Sub
The meat of this script component is in a function we'll call CreateHash. It's purpose is to take a string and create a hash from it. We won't be using a salt here because security is not our objective, we're just trying to track changes to a record. Here is the code:
Public Shared Function CreateHash(ByVal data As String) As String
Dim dataToHash As Byte() = (New UnicodeEncoding()).GetBytes(data)
Dim md5 As MD5 = New MD5CryptoServiceProvider()
Dim hashedData As Byte() = md5.ComputeHash(dataToHash)
RNGCryptoServiceProvider.Create().GetBytes(dataToHash)
Dim s As String = Convert.ToBase64String(hashedData, Base64FormattingOptions.None)
Return s
End Function
Once you've created the CreateHash function, the InputXX_ProcessInputRow method needs to overridden as well. InputXX stands for whatever you named your input on the inputs and outputs screen when we created the HashValue column; mine is called InputSource. This method will iterate through inputBuffer.Item and using a StringBuilder, it will concatenate all the values of your columns together by row, then use that string to get a hash value from the CreateHash function and assign it to the HashValue column we created earlier. Here is the code:
Public Overrides Sub InputSource_ProcessInputRow(ByVal Row As InputSourceBuffer)
Dim counter As Integer = 0
Dim values As New StringBuilder
For counter = 0 To inputBuffer.ColumnCount - 1
Dim value As Object
value = inputBuffer.Item(counter)
values.Append(value)
Next
Row.HashValue = CreateHash(values.ToString())
End Sub
Now you can click save on the script and close the script editor.
Once back in your data flow designer we need to add a lookup task and connect our script component to it. The lookup task is going to look up the ID and HashValue columns in your destination table so we can compare the generated HashValue column with the looked up HashValue column and see if any data has changed.
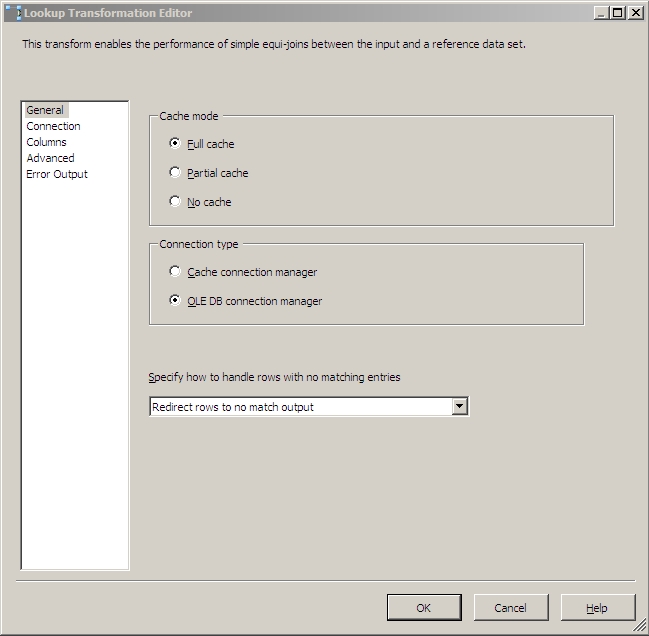
On the General screen in the Lookup Transformation Editor, the important setting here for SSIS 2008 is the "Specify how to handle rows with no matching entries" setting. You'll want to change this to "Redirect rows to no match output". Using this output will shuttle any new rows from your source right on out to your data flow destination for new rows. Your screen should look like this:
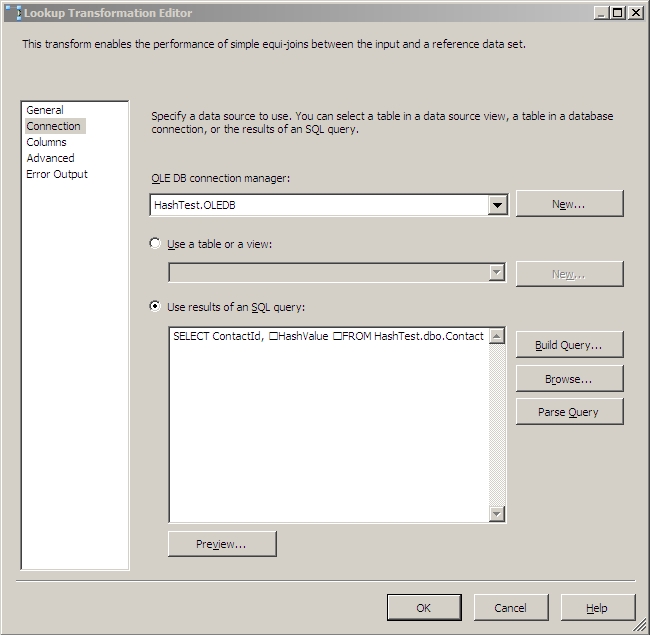
On the Connection screen, you'll be using your HashTest OLE DB connection, and this SQL query:
SELECT ContactId,
HashValue
FROM HashTest.dbo.Contact
So that your screen looks like this:
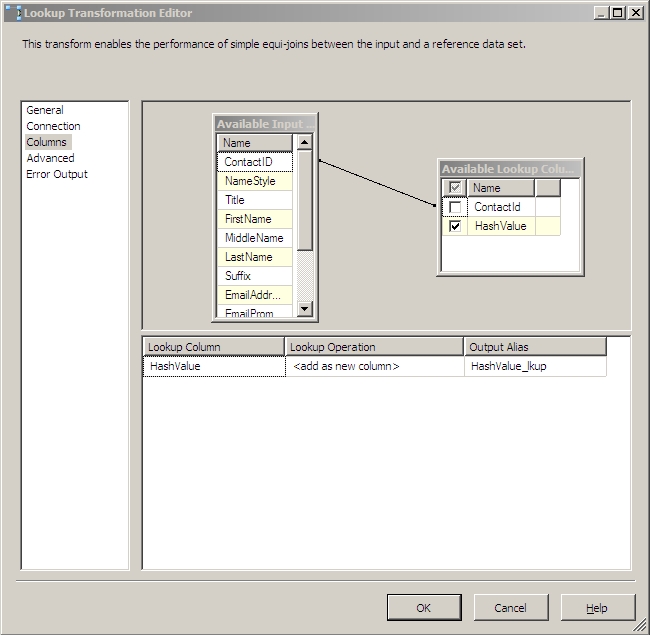
Then on the Columns screen you'll want to drag a line between the two ContactId columns, put a check by the HashValue column, and give it an output alias of HashValue_lkup to denote what task it's coming from. This will hold the current HashValue for each record in your destination table for comparison with the newly calculated hash value already in the pipeline. The columns screen should look like this:
You shouldn't have to touch the Advanced and Error Output screen in SSIS 2008, but in SSIS 2005, you should configure your Error Output to Redirect Row. You can abuse the Error Output of the Lookup Transform in SSIS 2005 to send your new rows to your destination much like the No Match Output in SSIS 2008. Alternatively in SSIS 2005, you can also set it to Ignore Errors and use a Conditional Split to redirect output much the way Andy did in his article.
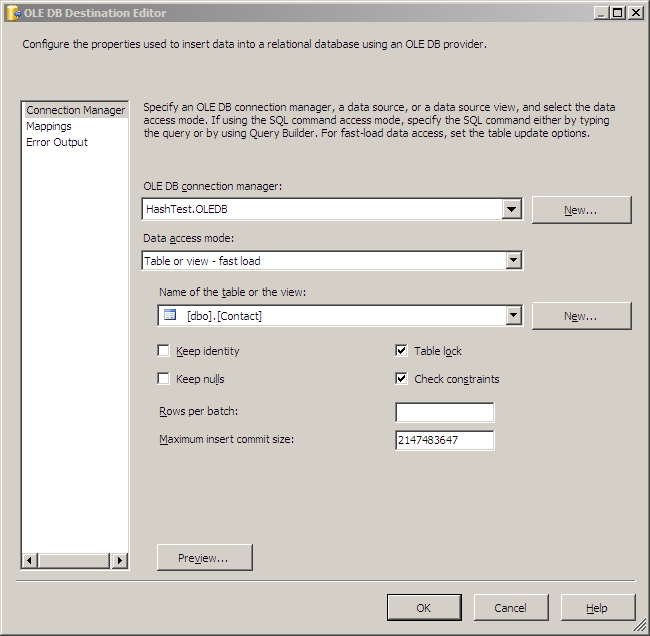
In SSIS 2008, you can now go ahead and drag an OLE DB Destination out into the designer and connect the Lookup No Match Output to it. In the destination editor you want to set it up to connect to your HashTest database and insert your records into the Contact table there. On the mappings screen, make sure all the columns match up by name. These two screens will look similar to this:
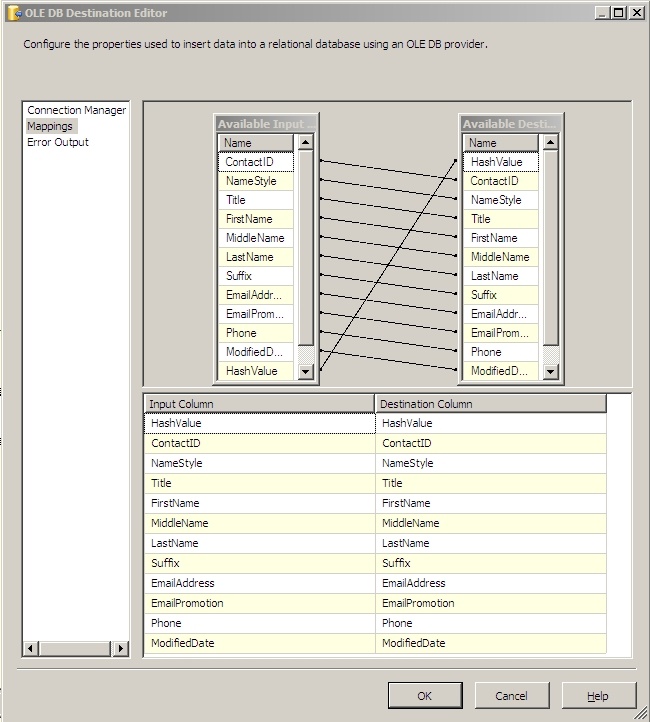
That's all there is for the new rows. Now we move on to the reason we're using this method in the first place, to determine differences in the rows that already exist.
Drag a Conditional Split out of your Data Flow Transformations toolbox section and direct your Lookup Match Output data flow from your Lookup task to it. Now lets start setting up the Conditional Split. This will be a very simple operation since by using the hashes we only have two values to compare. Name your first output something descriptive like Modified Records. The condition for this output should be:
HashValue != HashValue_lkup
This will compare the HashValue that we've generated, to the HashValue stored in the database and output the records that have differences.
For reference your Conditional Split configuration should look something like this:
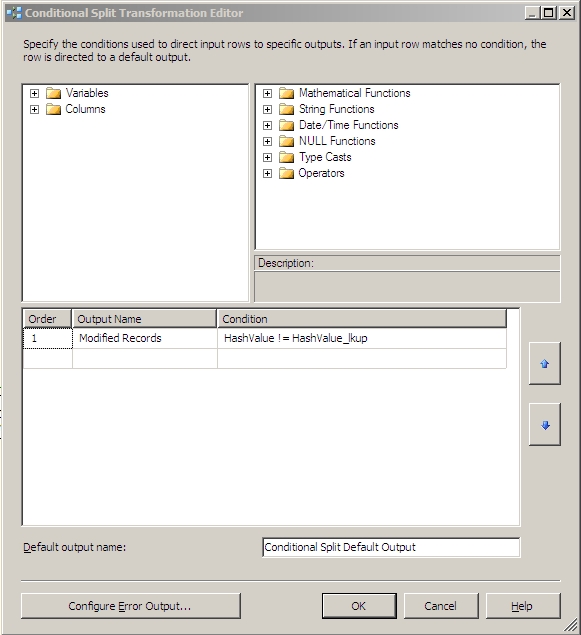
Now you can go one of two ways. You can either have another OLEDB Destination to insert your modified records to and then run a batch update on the whole table, or use an OLEDB Command to do updates line by line. We're going to pick the latter here as we're dealing with a small dataset. For large datasets, definitely choose the former.
Now drag your OLEDB Command out of your toolbox, and connect your Modified Records data flow from your Conditional Split to it.
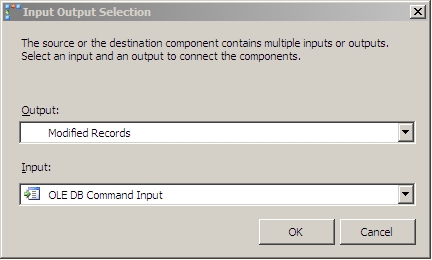
Now double click on your OLEDB Command and let's start configuring. For your connection manager, you need to select your destination connection. It should look something like this:
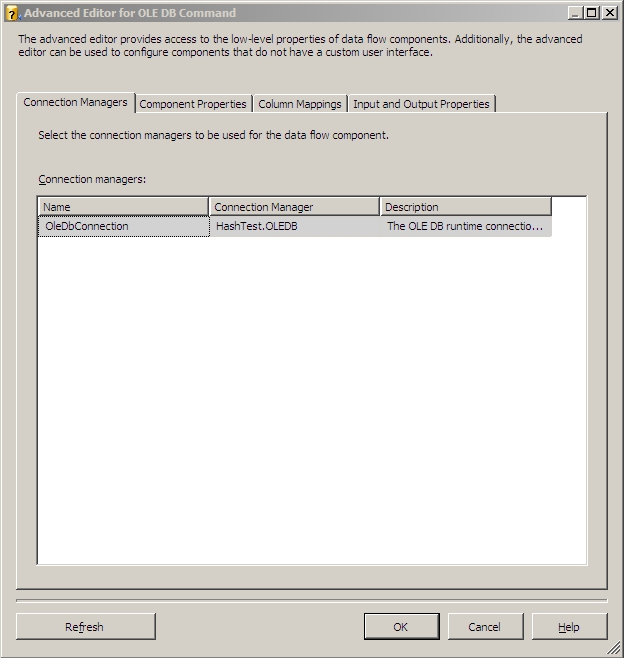
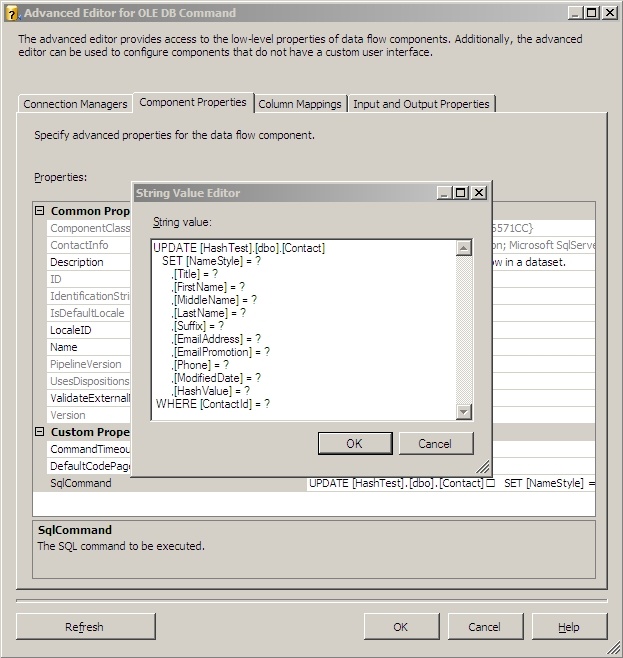
On the Component Properties tab, leave everything at default for this example but click the ellipses on the SqlCommand line and enter this text:
UPDATE [HashTest].[dbo].[Contact]
SET [NameStyle] = ?
,[Title] = ?
,[FirstName] = ?
,[MiddleName] = ?
,[LastName] = ?
,[Suffix] = ?
,[EmailAddress] = ?
,[EmailPromotion] = ?
,[Phone] = ?
,[ModifiedDate] = ?
,[HashValue] = ?
WHERE [ContactId] = ?
And it'll look something like this:
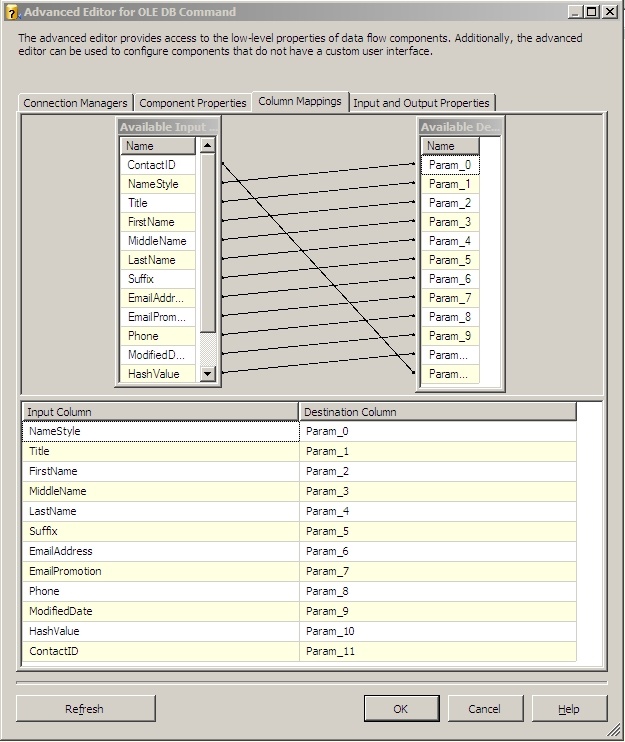
Then go to the Column Mappings tab. It's important to remember the order you put your columns in on the previous tab, as you'll now have to match them up in order on the mappings tab. When you get done it should look similar to this if you've been following along:
That's it for the OLEDB Command, click ok and go back to your Data Flow.
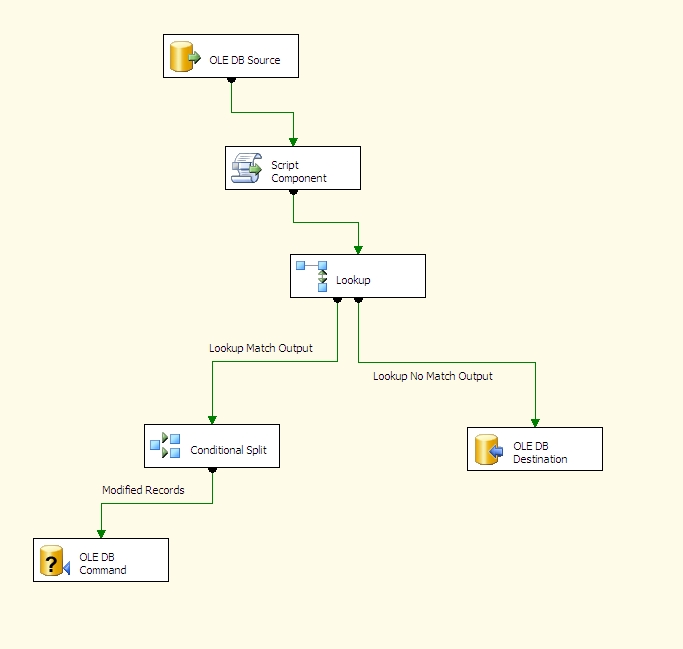
And now for review, here's what your Data Flow should roughly look like:
Ok. Now let's run it and load our destination table for the first time:
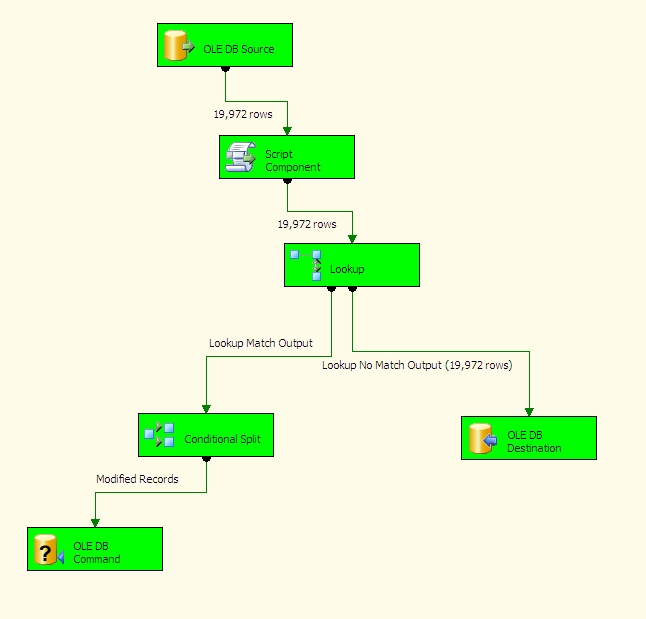
As you can see, since the table was empty the Lookup Task directed everything down the right side of the tree. Now we're going to look at one record in particular and modify in the source system so we can get a row going down the other side of the tree and test our hash comparison method.
We're going to pick the record with a ContactID of 10:
SELECT [ContactID]
,[NameStyle]
,[Title]
,[FirstName]
,[MiddleName]
,[LastName]
,[Suffix]
,[EmailAddress]
,[EmailPromotion]
,[Phone]
,[ModifiedDate]
FROM [AdventureWorks].[Person].[Contact]
WHERE ContactID = 10

SELECT [ContactID]
,[NameStyle]
,[Title]
,[FirstName]
,[MiddleName]
,[LastName]
,[Suffix]
,[EmailAddress]
,[EmailPromotion]
,[Phone]
,[ModifiedDate]
,[HashValue]
FROM [HashTest].[dbo].[Contact]
WHERE ContactID = 10

The records are identical save for the addition of the HashValue field in our HashTest destination database.
Now we're going to change his email address:
UPDATE [AdventureWorks].[Person].[Contact]
SET [EmailAddress] = 'radina@adventure-works.com'
WHERE [ContactID] = 10

Let's run our SSIS package again to see if we pick up this row as modified and update it in the destination table.
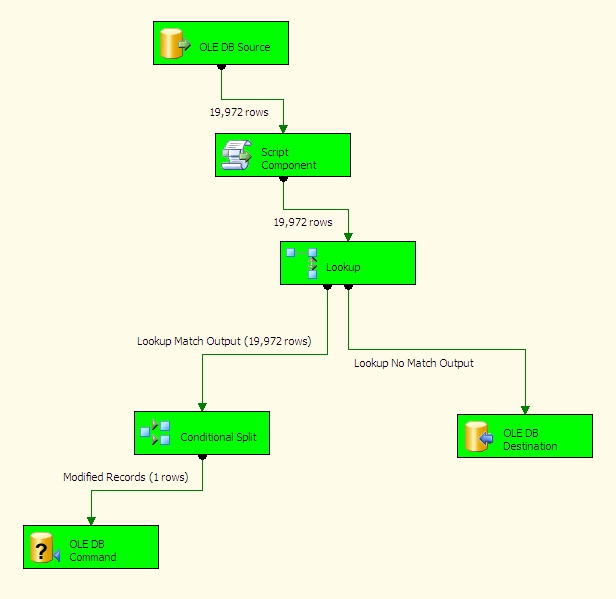
As you can see, we did indeed pick up this one row and see that it was different. Notice that since all of our rows now exist at the destination, the Lookup Task directed all of the rows down to the conditional split. Since we had no newly inserted rows at the source, no rows were sent to the destination table to be inserted.
Let's query our results at the destination:
SELECT [ContactID]
,[NameStyle]
,[Title]
,[FirstName]
,[MiddleName]
,[LastName]
,[Suffix]
,[EmailAddress]
,[EmailPromotion]
,[Phone]
,[ModifiedDate]
,[HashValue]
FROM [HashTest].[dbo].[Contact]
WHERE ContactID = 10

You'll notice the EmailAddress field now matches the source table and that the HashValue has been updated from its original value. Our tables are now in sync once again between the data source and destination.
The biggest caveat to this method is that currently it can't be used to calculate hashes on recordsets that contain blobs, so no binary data types. You can calculate hashes on those values separately though if the need arises. I've also noticed occasional problems when doing string manipulations in my data source query, some of these problem can be mitigated by loading a staging table first, then doing a more simple select out of the staging table to use for your hash calculations.
This is just one way to do incremental updates. It was born out of a need to move very large datasets very quickly and keep the Lookup Tasks from running the servers out of memory. Doing Lookups on just an ID and a HashValue and then having to compare only one column in your conditional split to detect changes decreases memory use dramatically and improves package performance overall because you are simply working with smaller datasets. I whole heartedly recommend doing ETL this way over truncating your destination tables and reloading all of your data on every ETL run.
Sources:
Clarity Consulting Blog: How to protect your data using a one way hash
SSIS - SQL Server Tidbits: One-Way hashing, HashBytes, and SSIS


