There will be occasions when you will need to recover native backup file from the file which has been compressed by Litespeed. I received the following error message when trying to restore a database at a customer site.

This is because I was trying to restore a database that was compressed by Litespeed software. In this article i will explain below how to restore the database by following two 2 simple steps using Quest's extractor utility.
STEP1
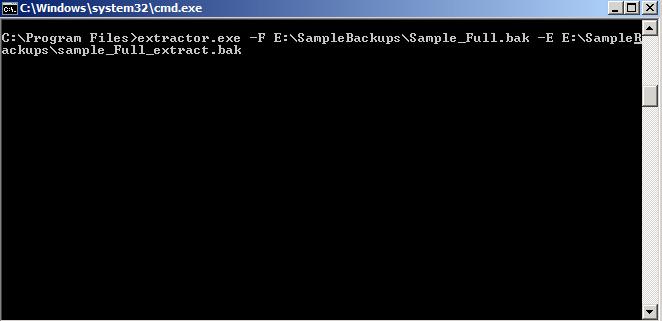
Open a Command Prompt and navigate to the location where Quest's Utility extractor.exe is located. The command to extract the native backup file is as shown below:
extractor.exe -F (Path where Litespeed backup is) -E (Path where you would like to extract the backup).
For example, if your litespeed backup was located in E:\Samplebackups\Sample_Full.bak and you wanted to extract the files in this same directory with new file names then you would run the command as shown in the screenshot below.

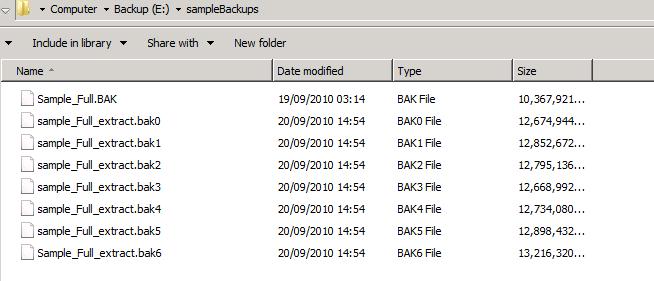
Once this command is run you will see multiple files extracted, as Litespeed creates a file for each thread when a backup is taken. So you will see files extracted as shown in the screenshot below. Here Sample_Full.bak is the litespeed backup and the rest of the 7 files are the extracted files.

Now that the Files have been extracted, the next step is to Restore the database using these files.
Step 2
You can restore the database using these files by running TSQL or SSMS. The syntax to restore using TSQL is as follows.

RESTORE DATABASE [Sample]
FROM DISK = 'E:\Sample_Full_ext.bak0',
DISK = 'E:\Sample_Full_ext.bak1',
DISK = 'E:\Sample_Full_ext.bak2',
DISK= 'E:\Sample_Full_ext.bak3',
DISK='E:\Sample_Full_ext.bak4',
DISK='E:\Sample_Full_ext.bak5',
DISK='E:\Sample_Full_ext.bak6'
With Recovery
Go
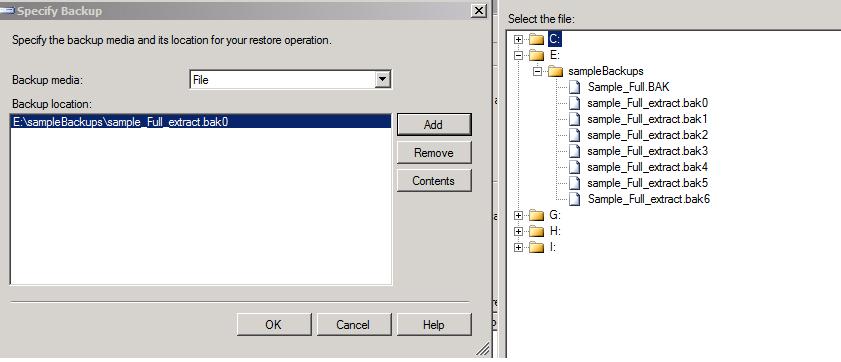
If you are using SSMS then you will need to add the extracted files as shown in the screenshot below. Once all the files are added click OK. Then select your restore point and click OK.

The database will get restored without any error message.

