Learn how to provision Microsoft Fabric with ease! Unveiled at Microsoft Build 2023, Microsoft Fabric is a cutting-edge Data Intelligence platform that has taken the industry by storm. This article will cover a simple step-by-step guide to provisioning Microsoft Fabric using the efficient Microsoft Fabric Capacity.
Before we look into the Fabric Capacity, let's get into different licensing models. There are three different types of licenses you can choose from to start working with Microsoft Fabric:
- Microsoft Fabric trial - It's free for two months and you need to use your organization email. Personal email doesn't work. Please find how you can activate your free trial
- Power BI Premium Per Capacity (P SKUs) - If you already have a Power BI premium license you can work with Microsoft Fabric.
- Microsoft Fabric Capacity (F SKUs) - With your organizational Azure subscription, you can create Microsoft Fabric capacity. You will find more details about Microsoft Fabric licenses
We will go through the steps in detail on how Microsoft Fabric capacity can be provisioned from Azure Portal.
Step 1: Please login to the Azure Portal and find Microsoft Fabric from your organization's Azure Portal as shown below in Fig 1.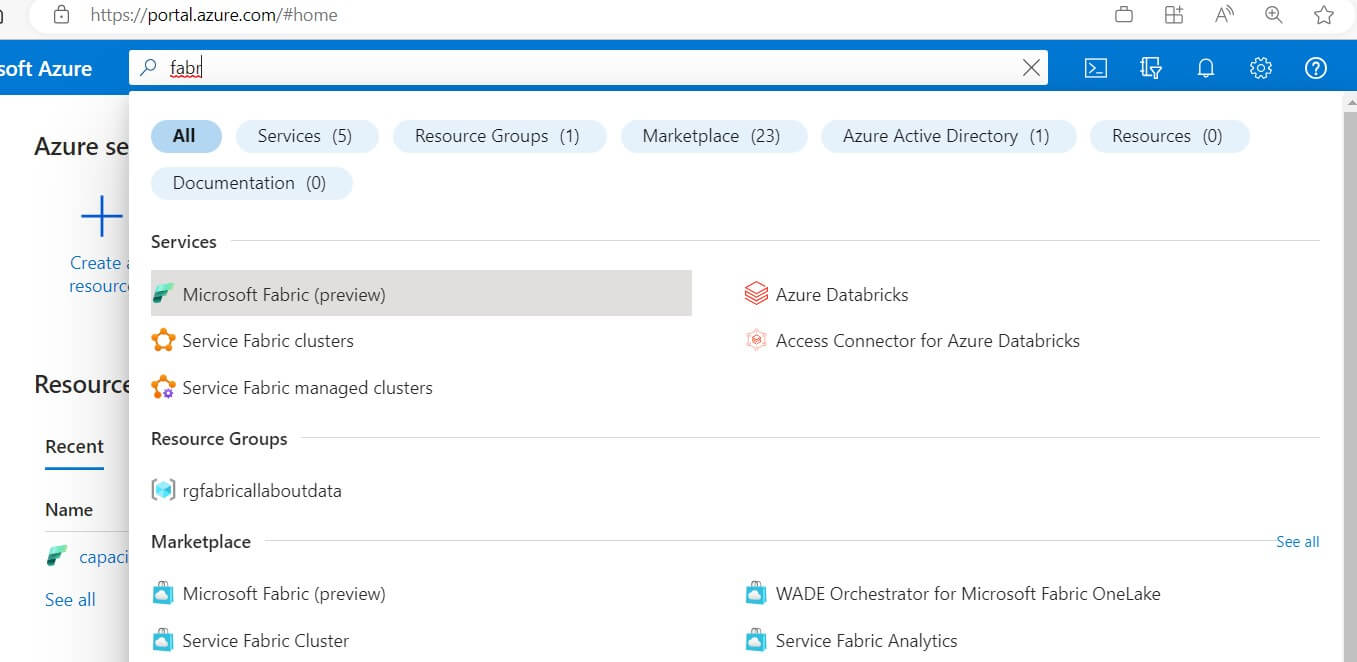
Fig 1: Finding Microsoft Fabric in Azure Portal
Step 2: To create the Fabric capacity, the very first step is to create a resource group as shown in Fig 2. This must be a unique name in your subscription.
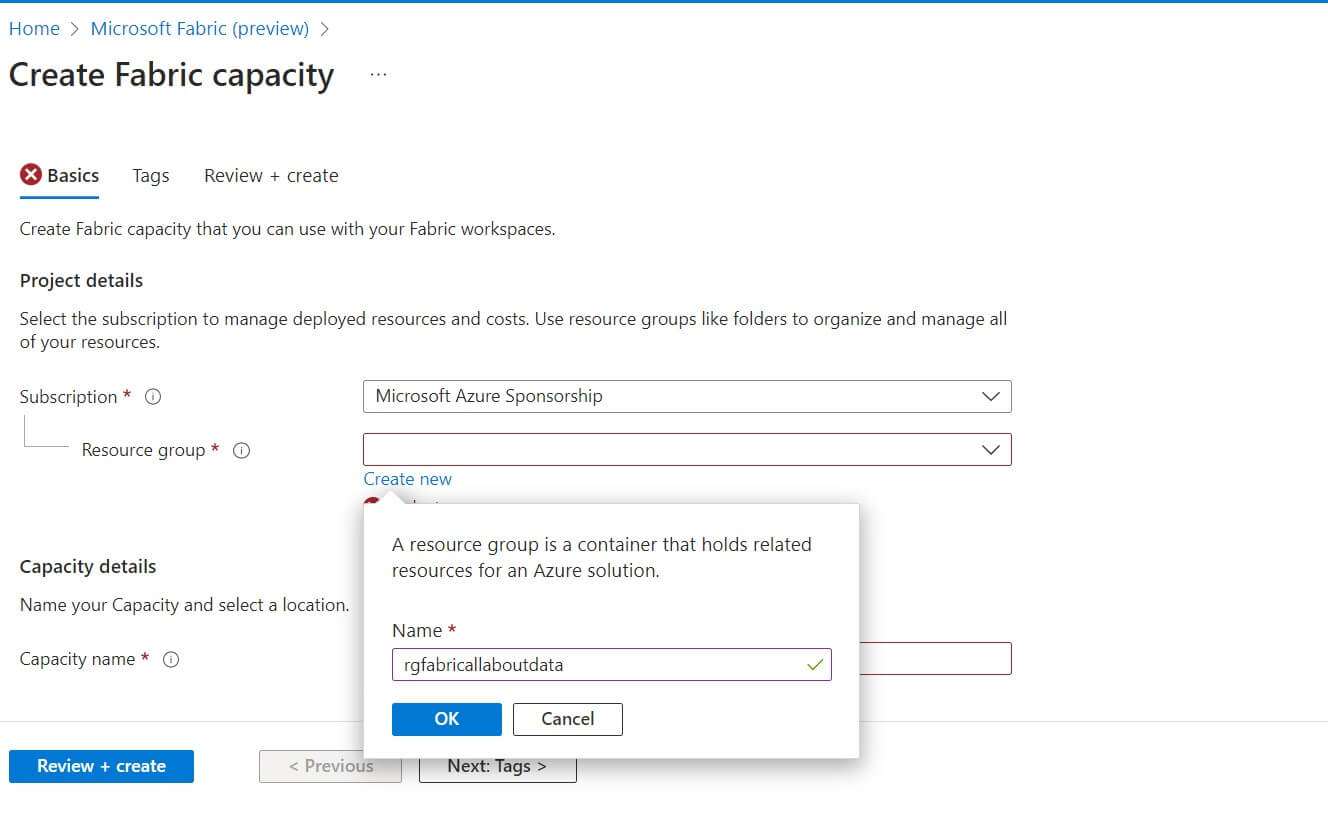 Fig 2: Creating resource group
Step 3: To create the right capacity you need to choose the resource size that you require. e.g. I have chosen F4 as shown in the below figure 3
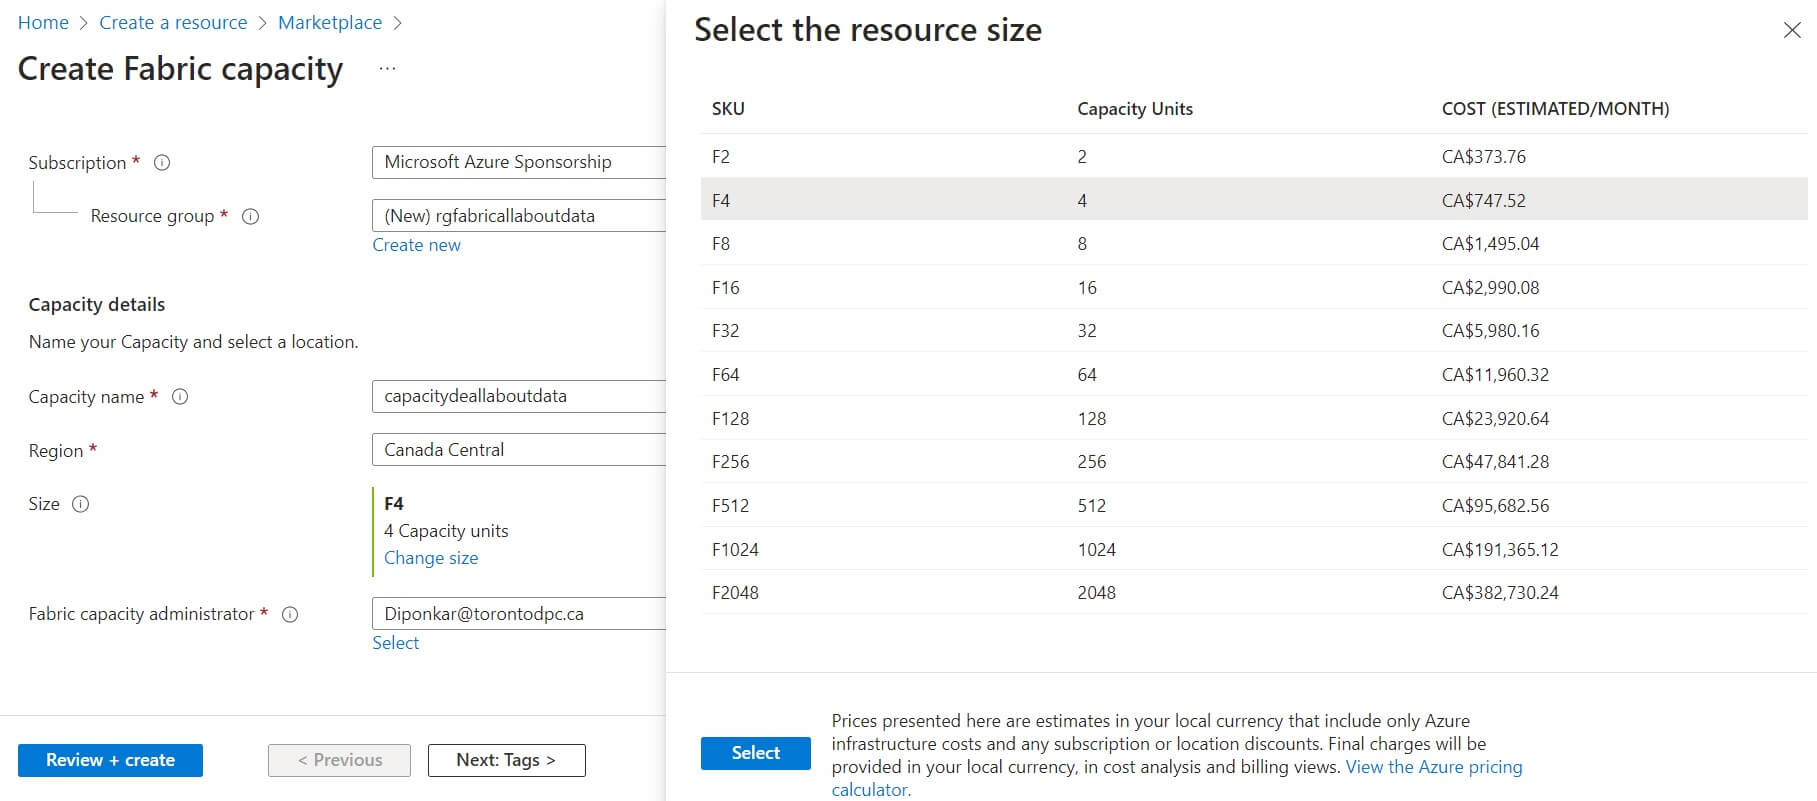 Fig 3: Choose the right resource size
You will find more capacity details in this Microsft blog post. Choose the capacity that meets your requirements and budget.
Step 4: As shown below in Fig 4, before creating the capacity please review all the information you have provided including resource group, region, capacity size, etc., and then hit the "create" button.
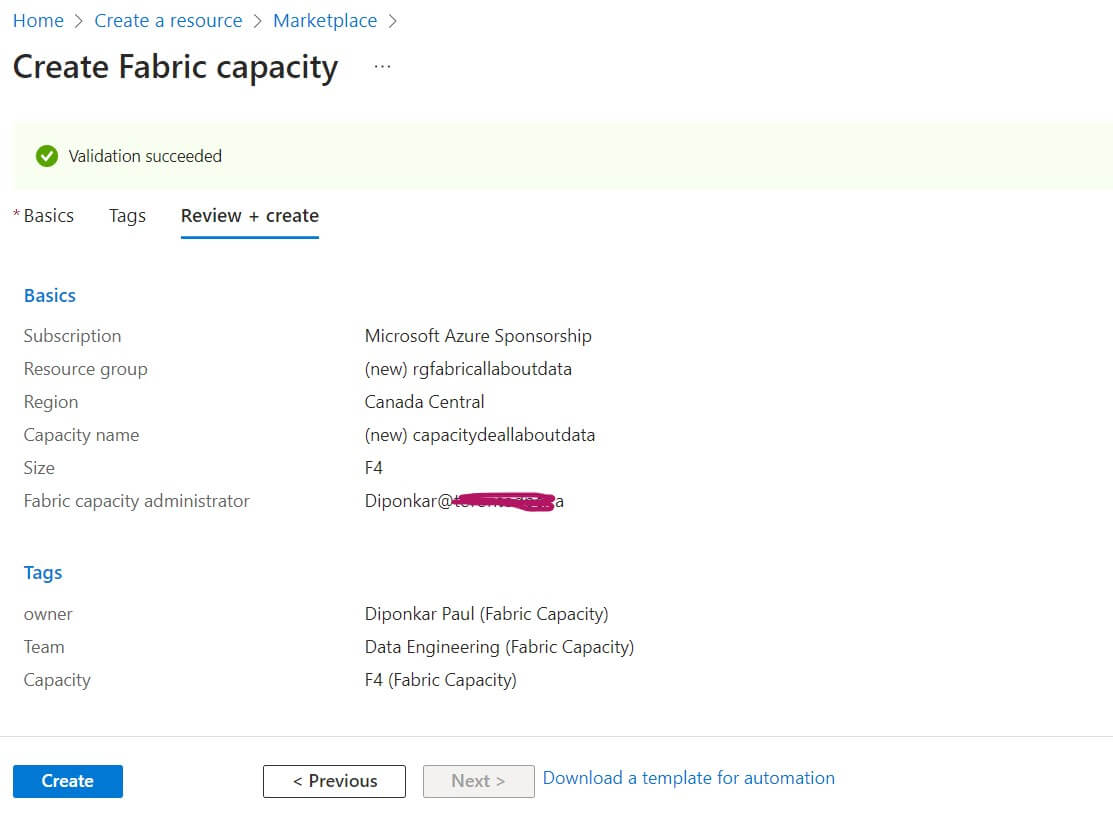 Fig 4: Review and create
When it's done you will able to see Microsoft Fabric Capacity is created (see below fig 5)
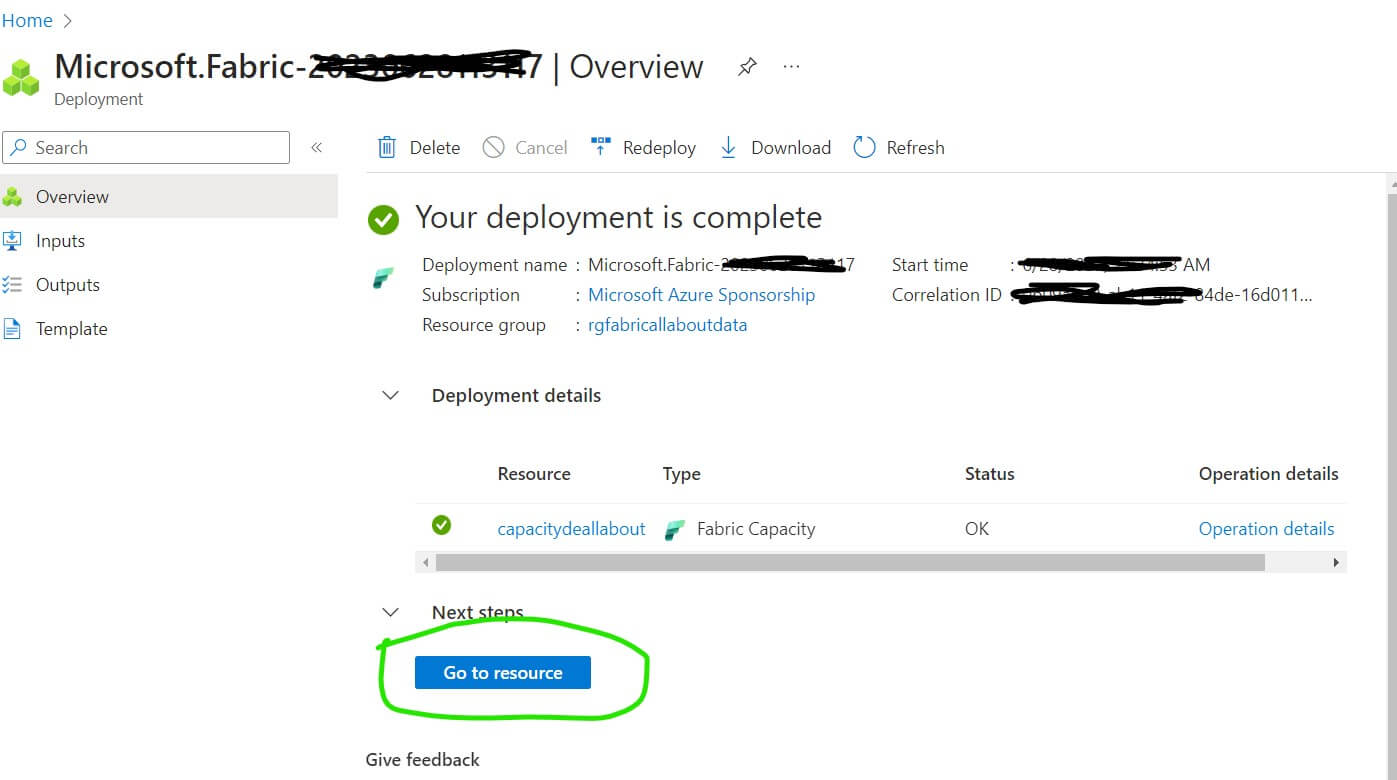 Fig 5: Microsoft Fabric capacity created
You can also go to the admin portal to validate your recently created Fabric capacity. Fig 6, shows the Fabric capacity under the admin panel.
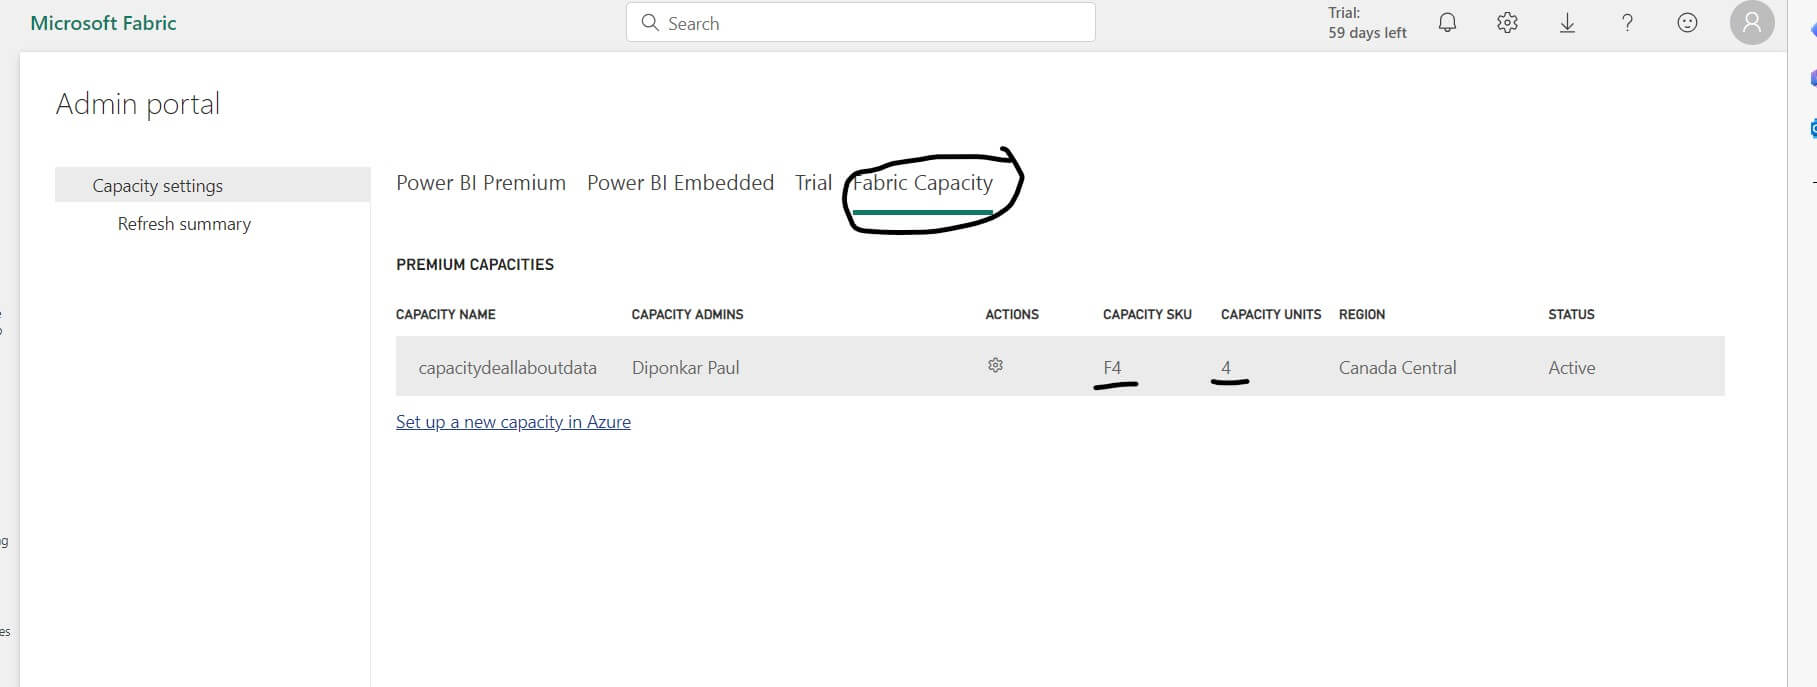 Fig 6: Fabric capacity under admin portal
To explore the Microsoft Fabric please browse through the site and you will find the capacity you just created finally and the home page will look like below in Fig 7
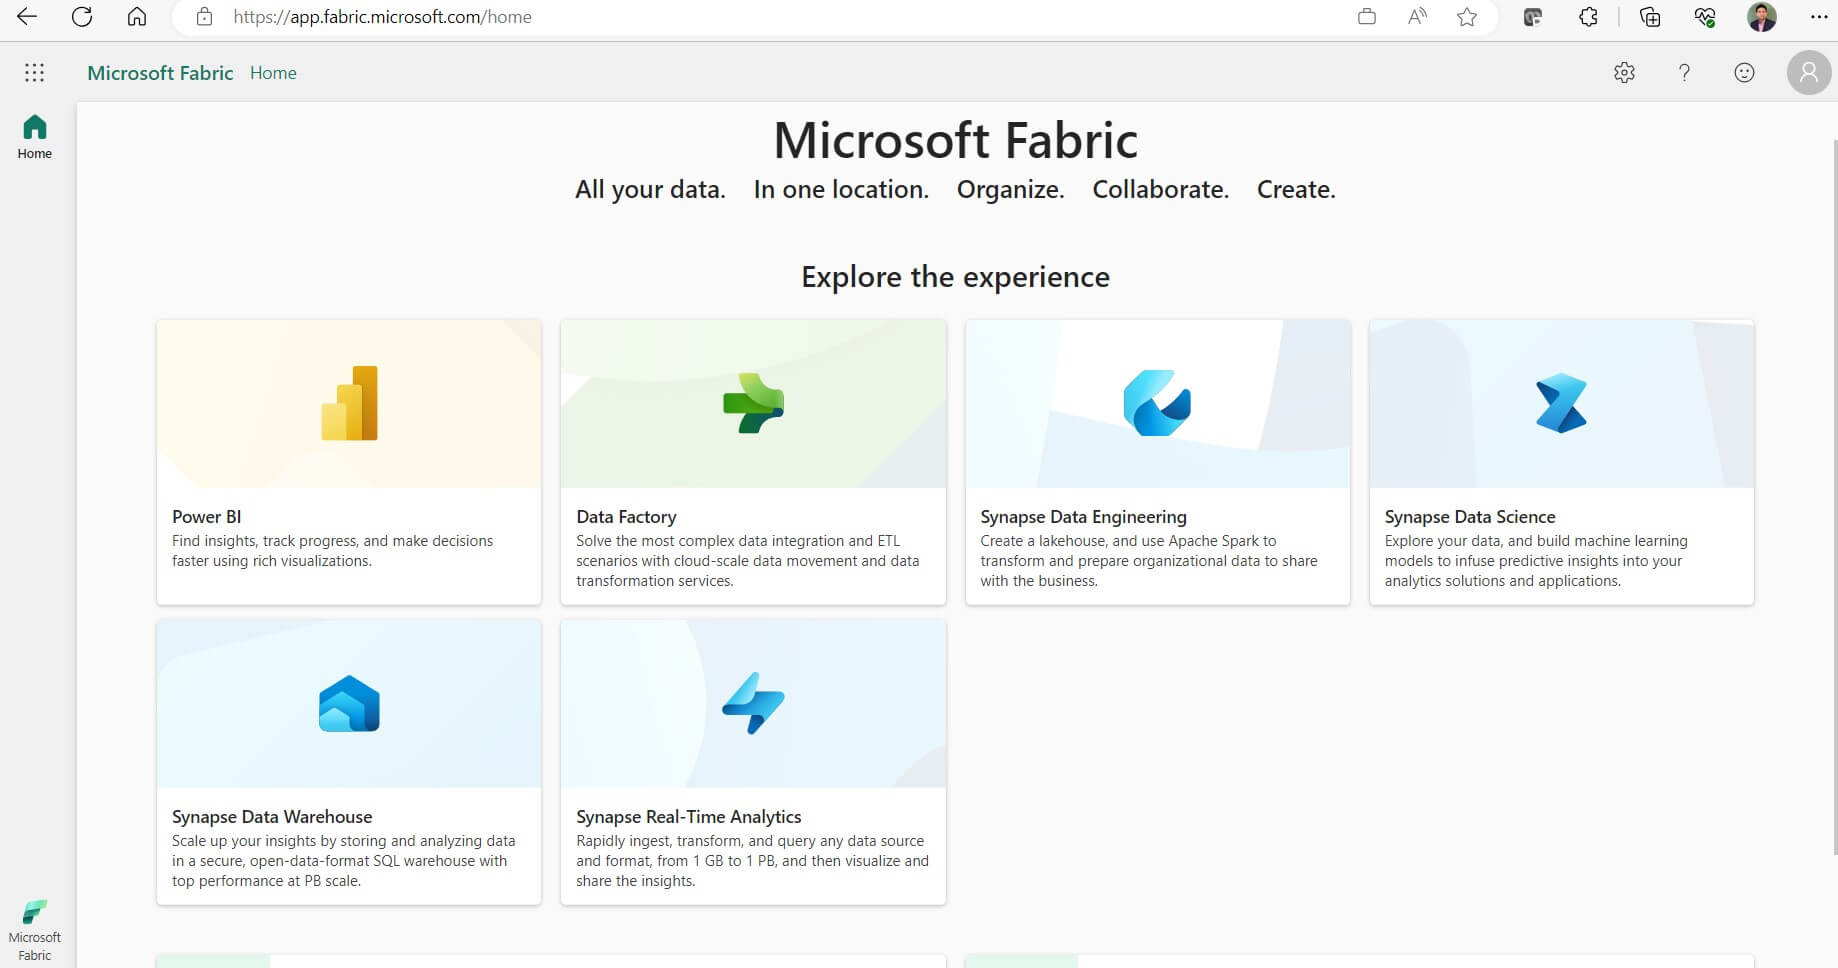 Fig 7: Fabric Home page
In summary, you have a few ways to use Microsoft Fabric and learned provisioning Fabric by using Fabric Capacity. However, it's important to remember you must need to Enable Microsoft Fabric for your organization before start provisioning Fabric Capacity.

