DML, or Data Manipulation Language, statements are used to manipulate the data present in a database. The most important DML statements are INSERT, UPDATE & DELETE. This tutorial covers the various PostgreSQL DML statements and how we can use them with SQL shell as well as pgAdmin.
Assuming you are familiar with table creation in PostgreSQL, we are going to use a table, named 'employees', to execute all our queries. In case you wish to learn all about table creation please visit the the following tutorial: https://www.sqlservercentral.com/articles/a-getting-started-postgresql-tutorial
Let's get started.
PostgreSQL Insert
The INSERT command is the first and foremost DML statement. It is used to insert new data in a table of a database. This statement mainly consists of two segments. First, the table name after the "INSERT INTO" clause is where you want to insert data. The second is the comma-separated lists of columns and values.
Let us take a look at the syntax:
INSERT INTO table_name (column1, column2, column3,..) VALUES ( value1, value2, value3,..);
Sample Code:
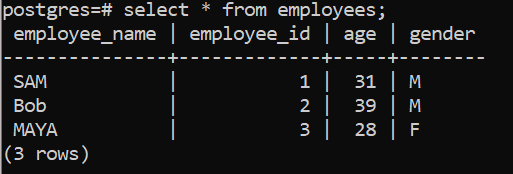
INSERT INTO employees (employee_name,employee_id,age,gender) VALUES ('SAM',01,31,'M');The data can be verified by executing the select statement
RETURNING Clause
This is an optional keyword that can be used with the INSERT statement to return information of the inserted row. To return the entire inserted row, put an asterisk (*) after the RETURNING keyword:
INSERT INTO table_name(column1, column2, …)
VALUES (value1, value2, …)
RETURNING *;
To return some specific information about the inserted row, specify one or more columns after the RETURNING clause.
INSERT INTO table_name(column1, column2, …)
VALUES (value1, value2, …)
RETURNING columnn;
This returns information about the specified column.
Inserting Data Using PgAdmin
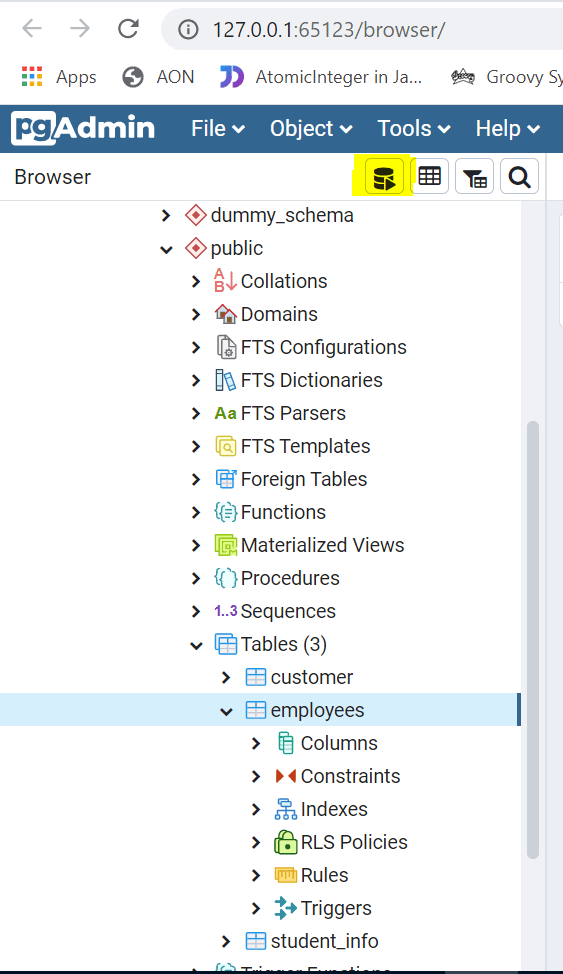
After starting PgAdmin, navigate to Databases->Database->Schemas->Schema->Tables->Table and click on the Query Tool button as shown below:
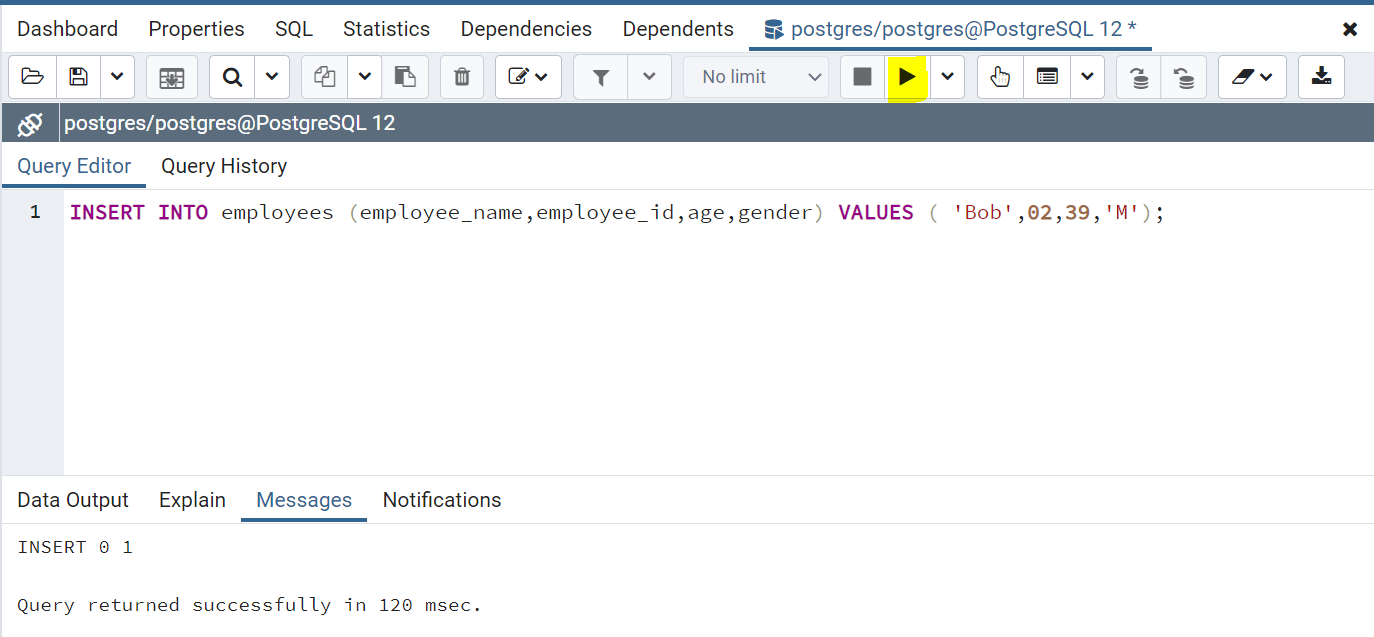
Type the query in the SQL editor and click the execute button as shown below:
POSTGRESQL UPDATE
The UPDATE command is used to modify existing data in a table. It is possible to update a single column, a single row, multiple columns, or multiple rows at a time. Let us take a look at the syntax:
UPDATE table_name SET column1 = value1, column2 = value2,... columnn = valuen
WHERE condition;
In this statement, we first, specify the name of the table that you want to update data after the UPDATE keyword.
Second, the SET keyword is used to specify columns and their new values. If there are multiple columns to change, separate each column=value pair with a comma.
Next, the WHERE keyword is used to define condition to determine which row(s) to update for the column(s) already specified after the SET keyword. The WHERE keyword is optional and if omitted the UPDATE statement will update all rows in the table.
The UPDATE statement returns the count of the number of rows updated.
UPDATE Statement with the SQL Shell
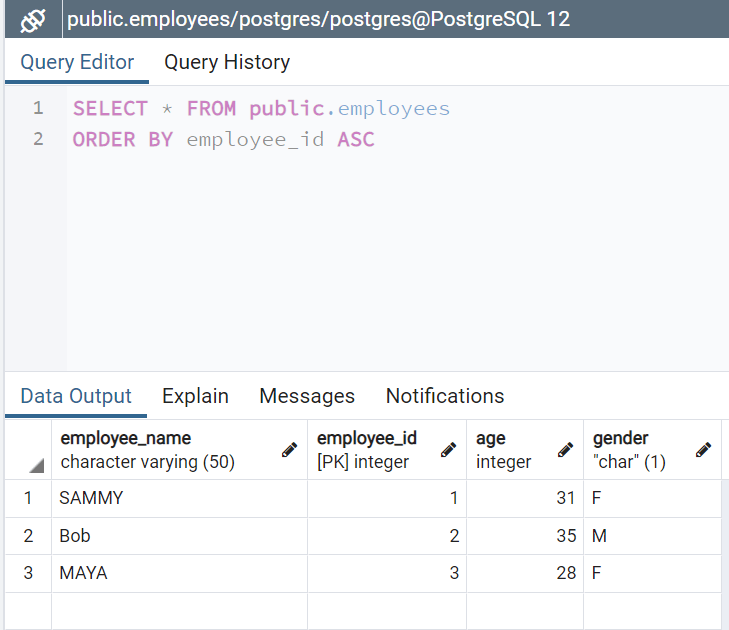
Consider the following table, having records as shown. We will run some queries on this table to demonstrate the UPDATE statement.
Scenario 1 - Update single column,row
The following query is an example which would update the column, employee_name, for the employee whose employee_id is 1
UPDATE employees SET employee_name = 'SAMMY'
WHERE employee_id=1;
Scenario 2 - Update multiple rows
The following query is an example which would update multiple rows, for example it would update the gender of all rows whose ID's are mentioned in 'IN' clause of WHERE condition
UPDATE employees SET gender = 'F'
WHERE employee_id in (1,2);
Scenario 3 - Update multiple columns
The following query in an example where in multiple columns corresponding to a single row are updated.
UPDATE employees SET age=35,gender = 'M'
WHERE employee_id=2;
Updating Data In Table In PgAdmin
There are two different approaches to update data in pgAdmin. One way is to open the SQL editor and execute the update query which is similar to the process shown above for Insert. The second approach is by manually editing the table data as shown below:
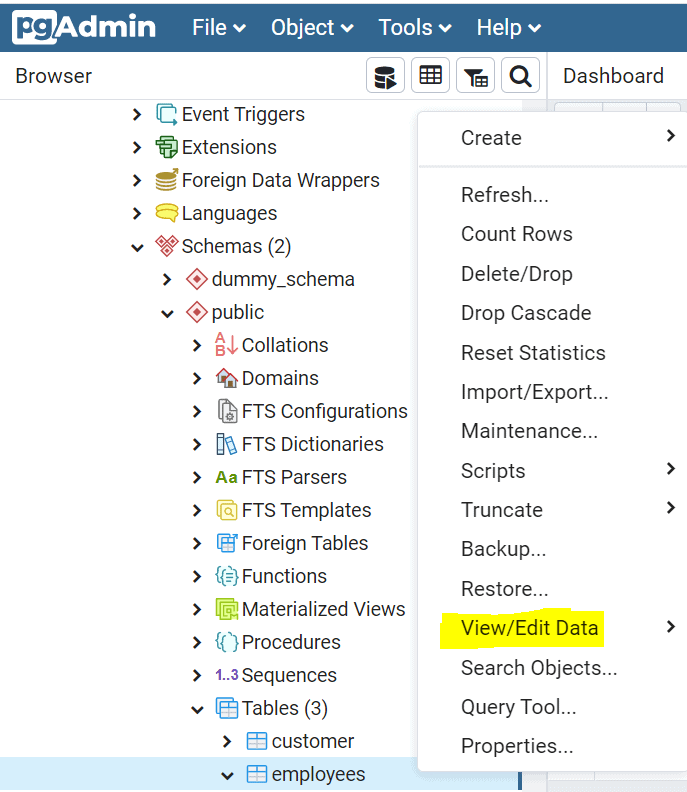
Navigate to Databases->Database->Schemas->Schema->Tables->Table->View/Edit Data
Opens up the data window to view/edit
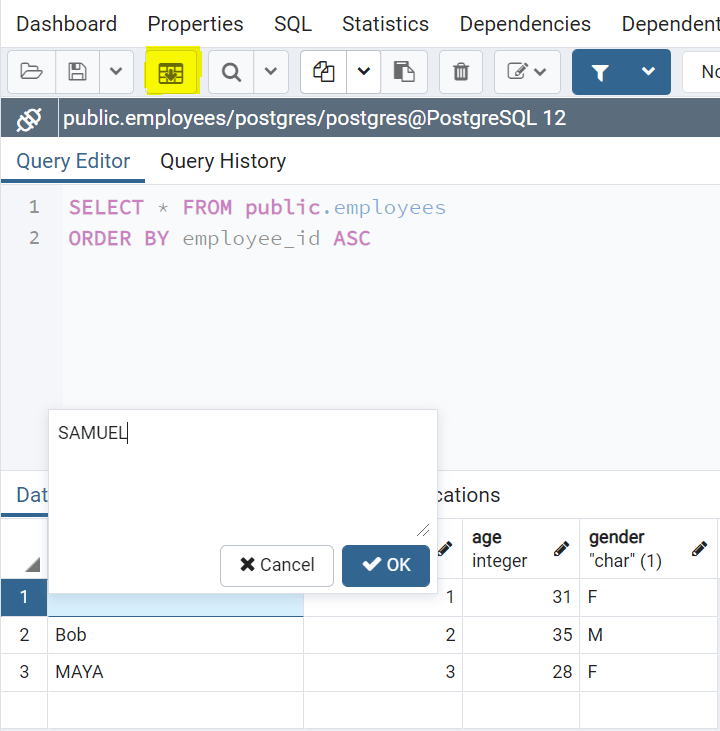
Select the particular row, double tap on the data to edit and click on "Save Data Changes" or F6 to save changes.
POSTGRESQL DELETE
The DELETE command is used to delete data from a table in a database. Let us take a look at the syntax:
DELETE FROM table_name
WHERE condition;
In this statement, we specify the table name from which you want to delete data after the 'DELETE FROM' keyword. Next, use the 'WHERE' condition to determine rows from the table from which you want to delete data
The DELETE statement returns the count of the number of rows deleted.
DELETE Statement with the SQL shell
Sample Code:
DELETE FROM employees
WHERE employee_id=2;
Delete one row from the table
This statement deletes entry from the table for the employee whose employee_id is 2;
Delete all rows from the table
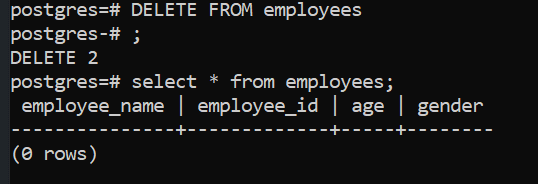
The 'WHERE' clause is optional and if omitted , the DELETE statement will delete all rows in the table. Example:
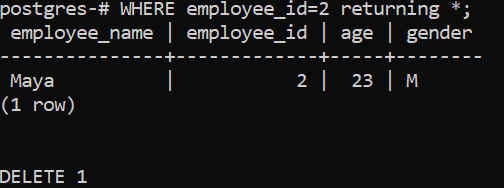
Delete a row and then return the deleted row
To return the deleted row, specify RETURNING keyword after the 'WHERE' clause.
To return some specific information about the deleted row, specify one or more columns after the RETURNING clause.
Deleting Data In Table In PgAdmin
Navigate to Databases->Database->Schemas->Schema->Tables->Table->View/Edit Data
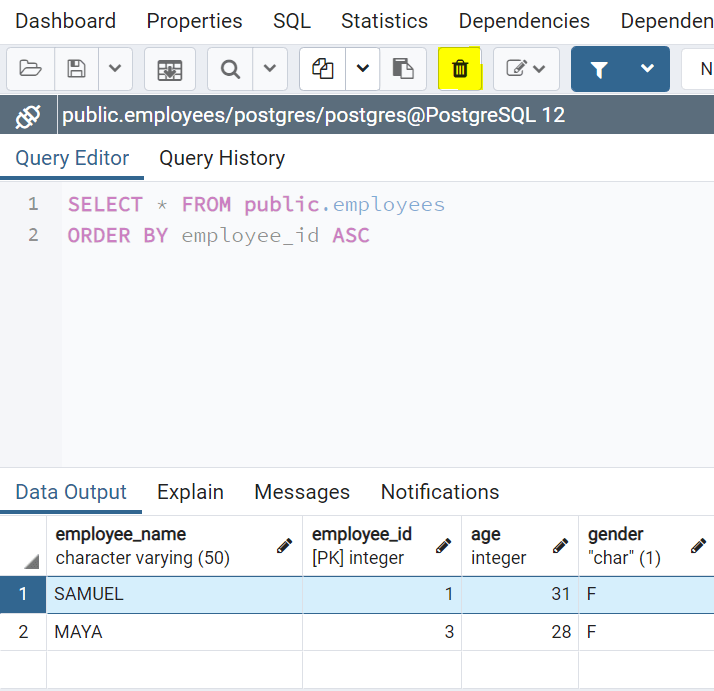
Select the row and click 'Delete' on the top panel
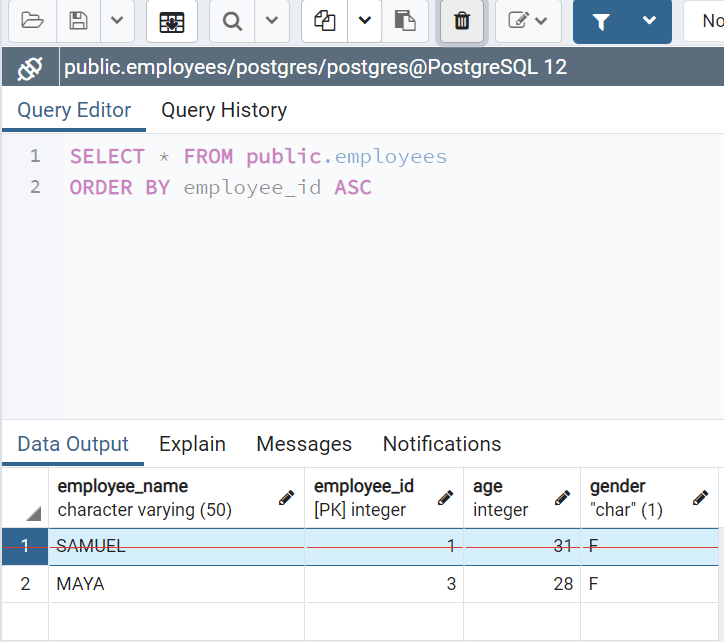
The row is automatically strikeout to indicate cancellation.
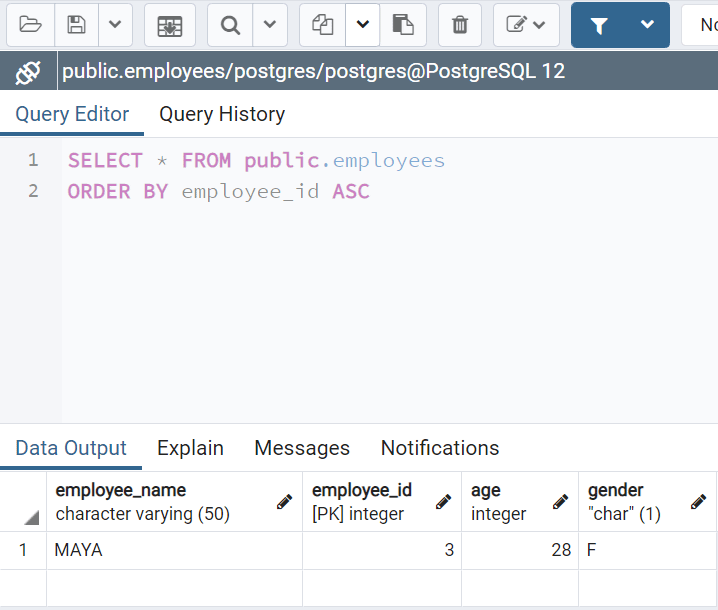
Click 'Save Data Changes' or F6 to effect cancellation and display updated data
Conclusion
This article gives an overview on the different types of DML statements in PostgreSQL. We show how to insert, update, delete data in PostgreSQL using both SQL shell and pgAdmin.


