

Introduction
Sometimes, we need to test our apps in Azure and we do not have time to connect and work with Azure directly. We want a simple free offline solution to test our Azure without connecting to the real Azure Storage.
This article will show how to work with the Azure Storage Simulator and create blob containers, queues, and tables using the Azure Storage Emulator.
Requirements
First, we will download the standalone Azure Storage emulator installer. The emulator is included in the Microsoft Azure SDK as well. The Azure Storage Emulator uses SQL Server to store the data. It can be the Express edition or other editions.
Make sure to have the localdb database installed if you have Use the azure emulator. For more information about installing the Localdb, refer to this link: Install the localdb.
Download using the following link: Download the standalone installer.
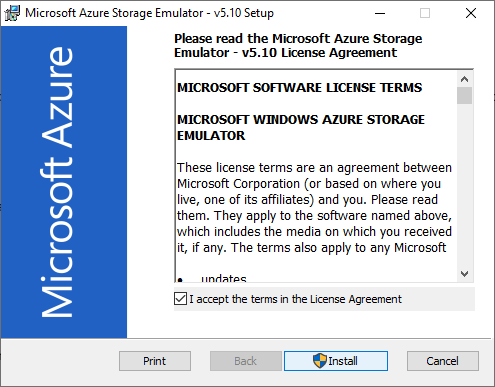
Secondly, run the installer and accept the terms.
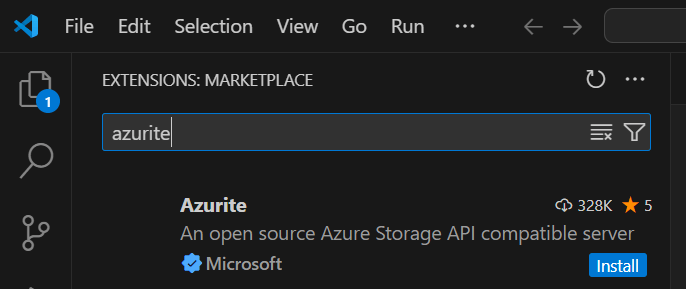
If you prefer, you can use the Azurite installer instead. This is a new Azure emulator.
In Visual Studio code, go to extensions and Install the Azurite emulator.
Finally, we will use the Microsoft Azure Storage Explorer. You can download from the following link: Download Azure explorer
Getting started
In Windows, open the Microsoft Azure Storage Emulator.
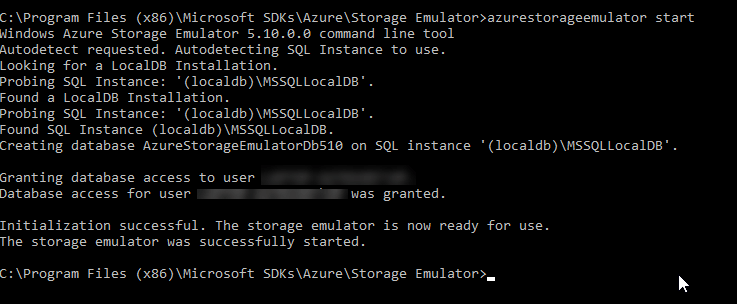
The emulator will find a SQL Server instance and will install a database in SQL Server:
Testing the Simulator
We will use Microsoft Azure Explorer to test the Azure Storage Emulator. The Azure Explorer is used to create Azure Storage blogs and upload and download files, queues, and tables. Also, we could also connect to Azure Data Lake Storage.
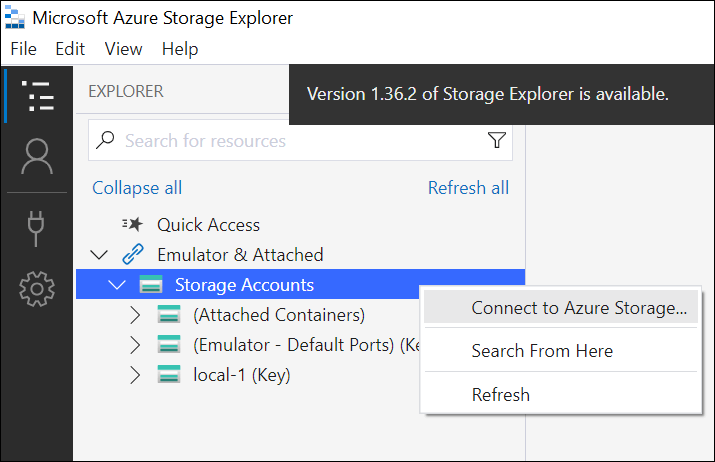
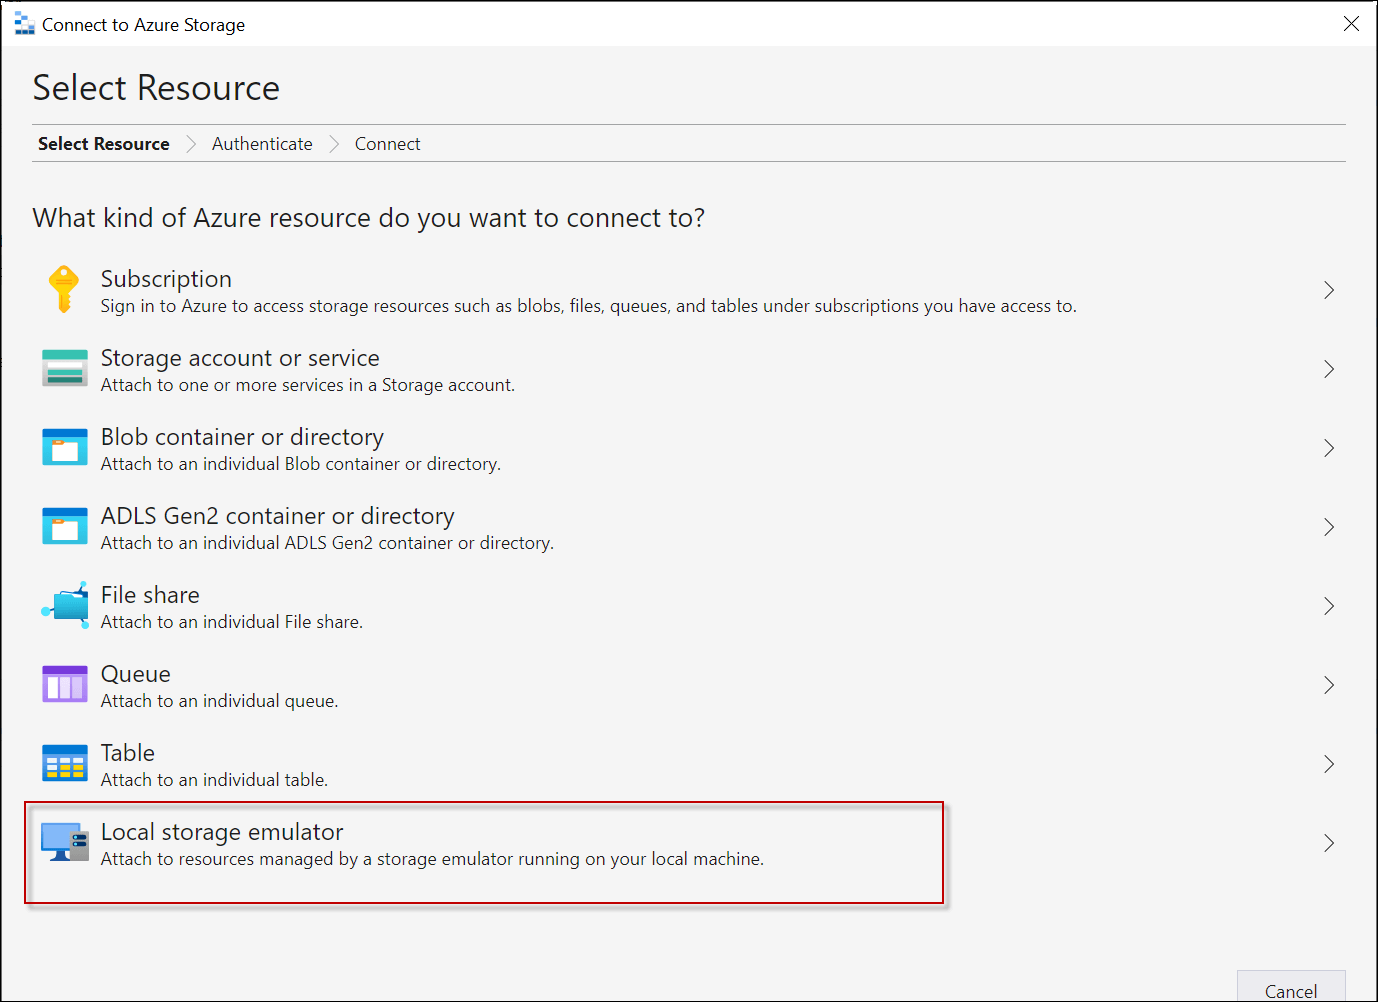
Also, select the Local storage emulator.
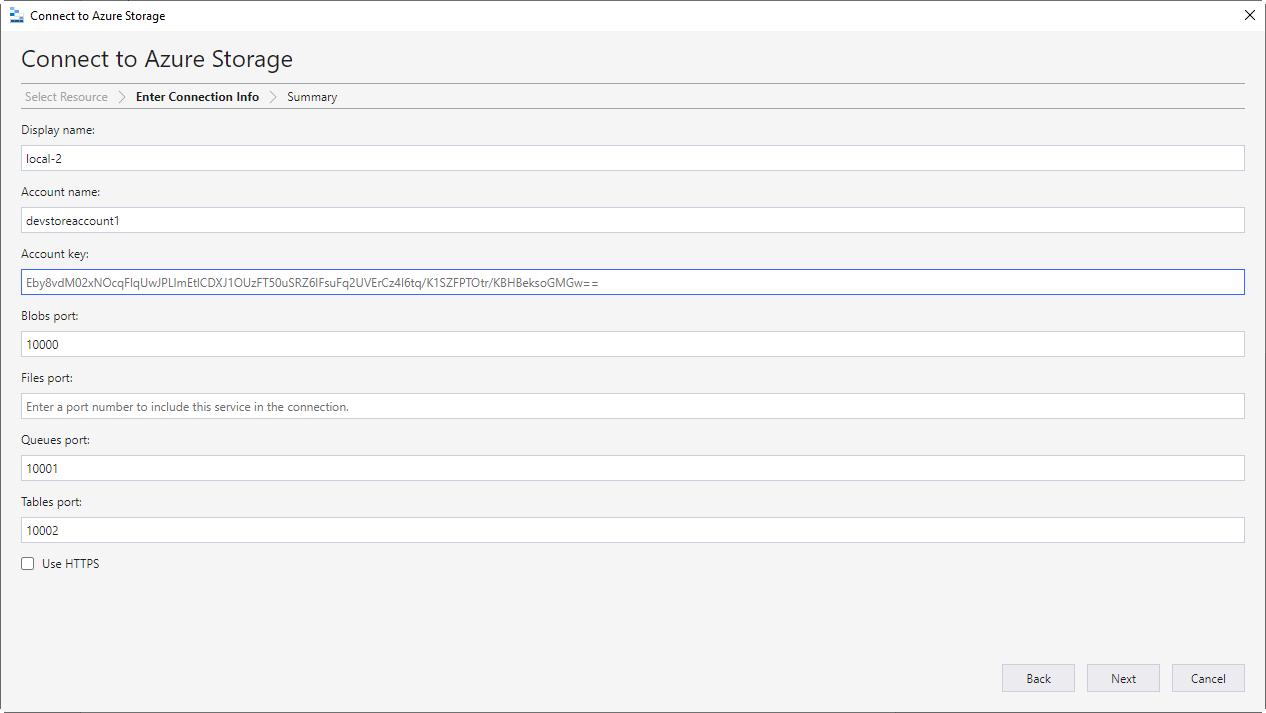
The default account key will work. Press Next to continue.
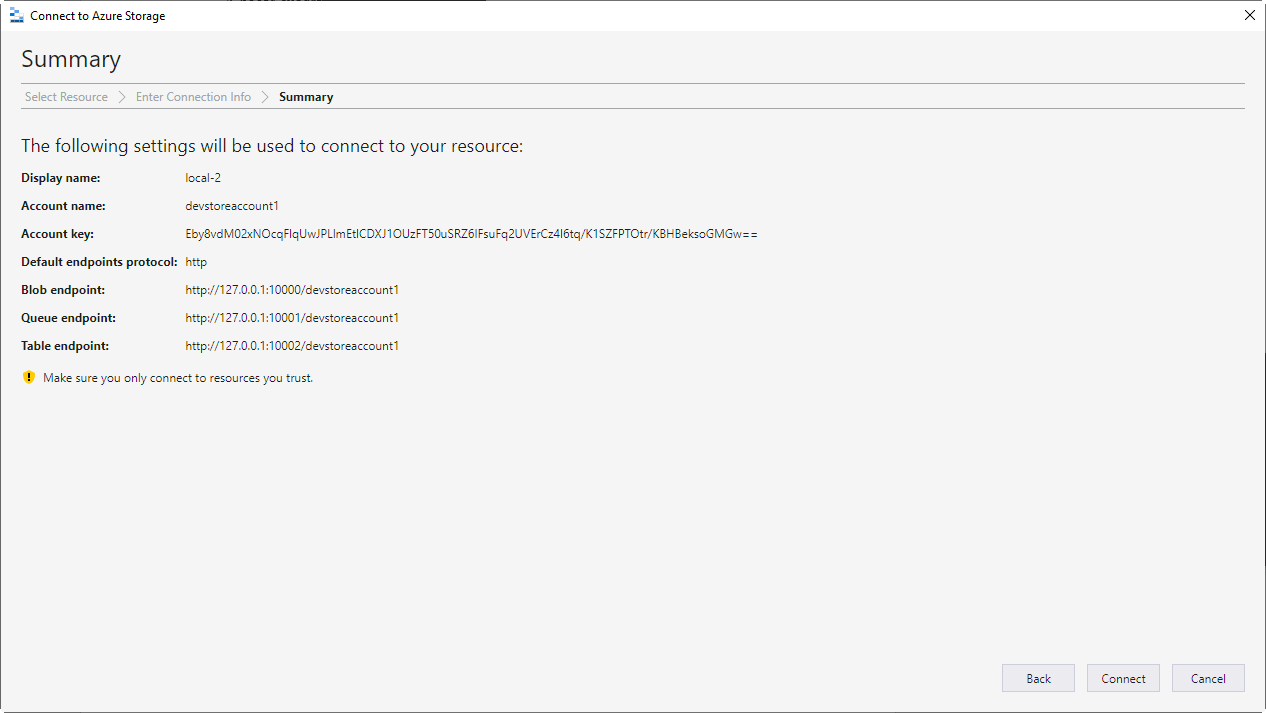
In addition, press the Connect button to connect to the Azure Simulator.
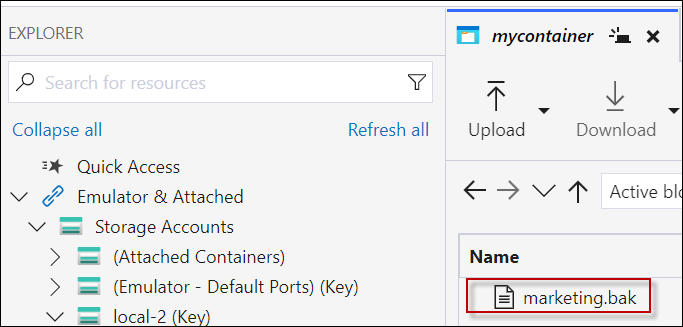
Open the local storage account. Open the Blob Containers tree.
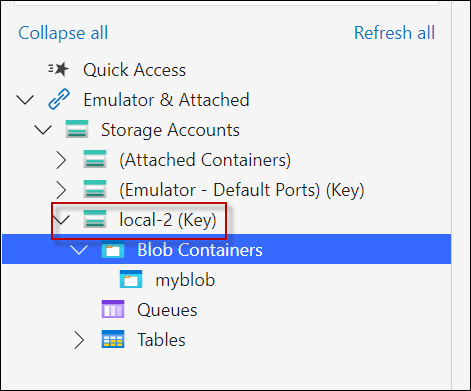
Working with Blob Containers in the Azure Storage Emulator
The Blob containers are containers used to store large amounts of unstructured files. You can store backups, CSV files, and other large files here. Also, you can create folders that are virtual directories. A Blob is a Binary Large Object, it can be a file, an image, a video, or an audio file.
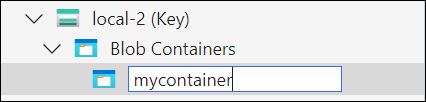
To create a Blob Container, follow these steps. First, in the Azure Storage Emulator, open the local Storage account, right-click the Blob Containers,, and select the Create Blob Container option.

Secondly, write a name for the container.
In the container created press the New Folder to create a folder.
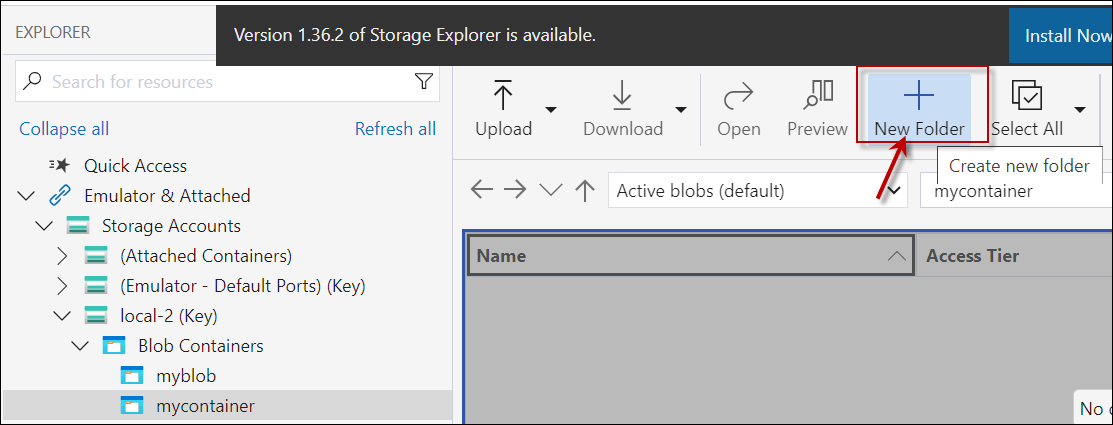
In this example, we will create a folder (virtual directory) named mybackups. Press OK.

Add folders and files in the blob container.

Also, press the Upload button in the folder and select the local file you want to upload to the Azure Storage Emulator.
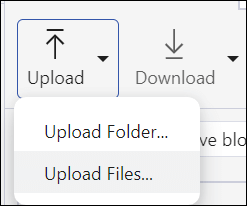
Upload a file. In this example, we will upload a SQL backup file.
In addition, press the browse button to select the file to upload.
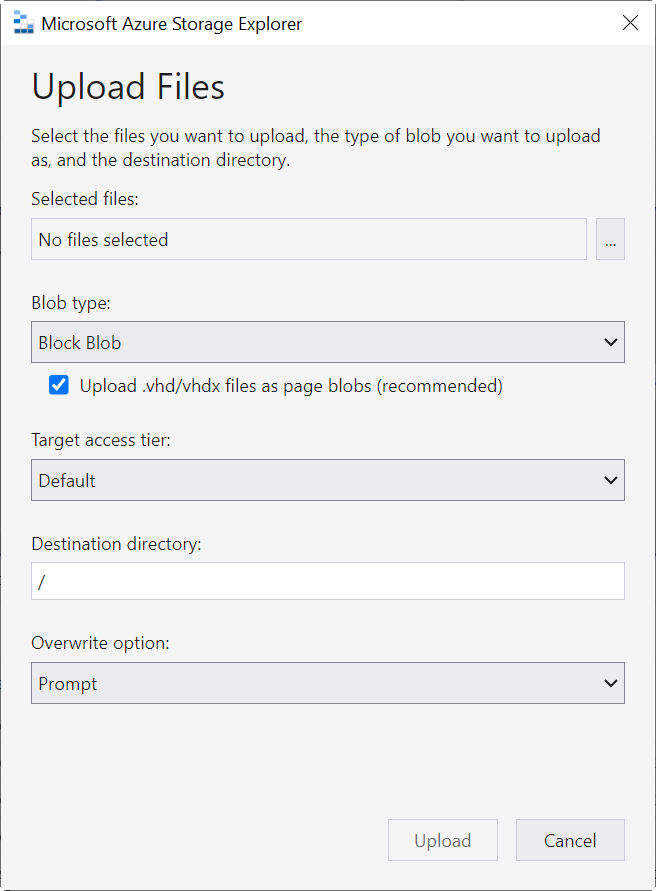
Blob Type options
In the options, you have the Blob Type. The Blob is a Binary Large Object. The Blog Type combo box has the following options:
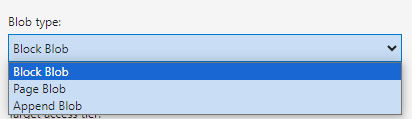
There are several types of Blobs. Here you have an explanation for each one:
- Block blobs are a type of blob storage. It is optimized for large files. Each block has a block ID. The blobs have up to 50000 blocks. It is ideal for storing text and media files.
- On the other hand, page blobs are a collection of pages of 512 bytes. It is optimized for reading and writing operations in virtual hard disk files.
- Finally, we have the append blob. This blob contains blocks optimized for append operations. When the append blob is changed, the block is added to the end of the blob. It is ideal for log files.
Target access tier
Also, we have the target access tier.
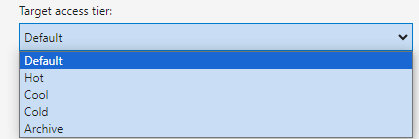
First, we have the default tier. This default value is usually Hot.
Secondly, the hot tier is the best option for storing data that will change frequently. For example, if the data changes daily, or hourly, the Hot option is a good choice.
Thirdly, the cool tier is optimized to store data that is not frequently modified. For example, in a weekly fashion. This data must be stored for at least 30 days.
Also, we have the cold tier. This data is rarely modified but requires to be retrieved quickly. This data must be stored for at least 90 days.
Finally, we have the archive tier, this data is rarely accessed and has a flexible latency. This data must be stored for at least 180 days.
For more information about the access tier, refer to this link: Target Access Tier.
Another option is the Overwrite option. We have the following options:
Overwrite options
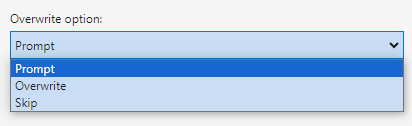
First, we have the prompt option. This option will prompt a message asking if you want to overwrite.
Overwrite will overwrite the file if it already exists. Skip will not overwrite the file.
Once you have you have selected the options and the destination, press the Upload button.
Working with Queues in the Azure Storage Emulator
The Azure Storage Emulator also offers Message Storage. Here you can store queues up to 64 KB. You can use HTTP or HTTPS calls to access these messages.
To create queues, follow these steps:
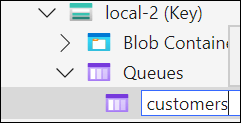
First, in the Queues, right-click and select Create Queue.
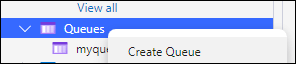
Secondly, write the name of the queue.
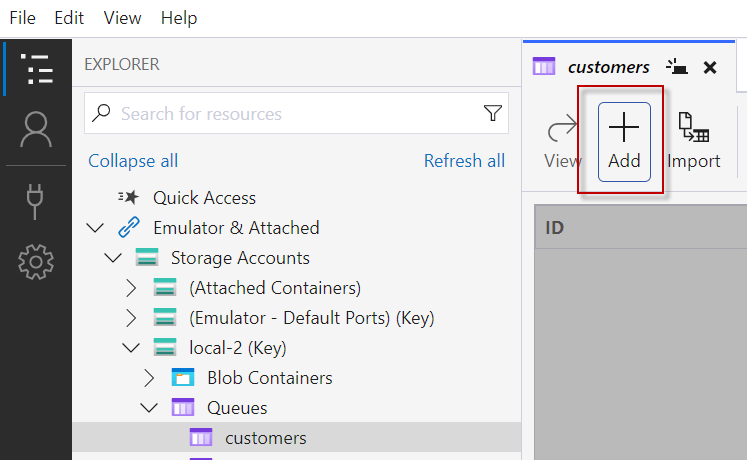
Also, click the queue just created and press the + icon.
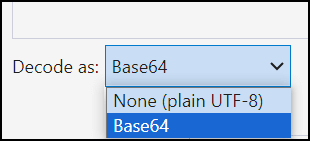
Thirdly, write the message. The message can be decoded as base 64 or it can be plain text. The following example shows a JSON message, however you can write a plain text instead.
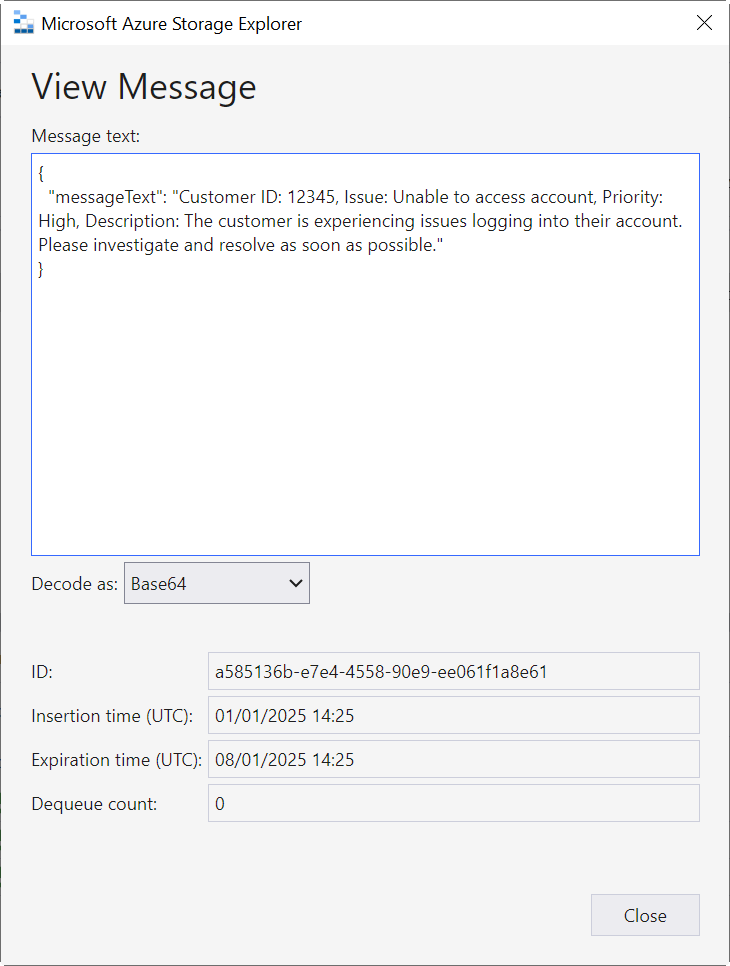
The base64 ensures that the message is safely received.
Also, you can send the message in plain text, XML, JSON, or binary data in base64.
Use the base 64 encoding if it is binary data, or if there are special characters that do not work in plain text. If your message contains plain UTF-8 data and it does not contain binary data, the None (plain UTF-8) is enough.
Working with Tables in the Azure Storage Emulator
The Azure Storage Emulator can also emulate the Azure Table Storage. These tables are NoSQL tables in the cloud. They have a key or attribute. They do not have a schema. This type of storage is fast and cheap. Compared to SQL Server, it is cheap.
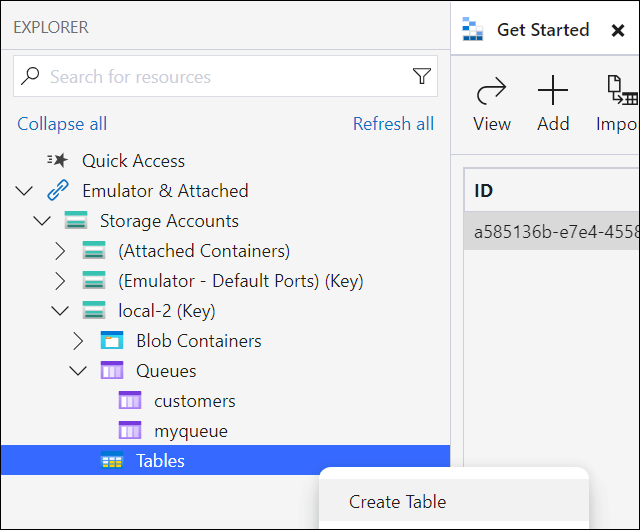
To create a table, go to tables in the Azure Storage Emulator.
The Properties are similar to columns in an Azure Table. The properties are key-value pairs that store the data for each entity. The Entities are like rows in a table.
Table properties with Azure Emulator
The tables have the following properties. First, you have the PartitionKey. This property is used to group different entities into partitions. The partitions are used to organize and handle the entities in a table.
Secondly, you have the RowKey. The RowKey is a unique identifier for entities in a partition. A combination of PartitionKeys and RowKeys identifies the Entities.
Also, press the Add Property if you need to create your property (like a column). You can add the property and the values.
In addition, if you want to insert the data, the Insert button will do that.
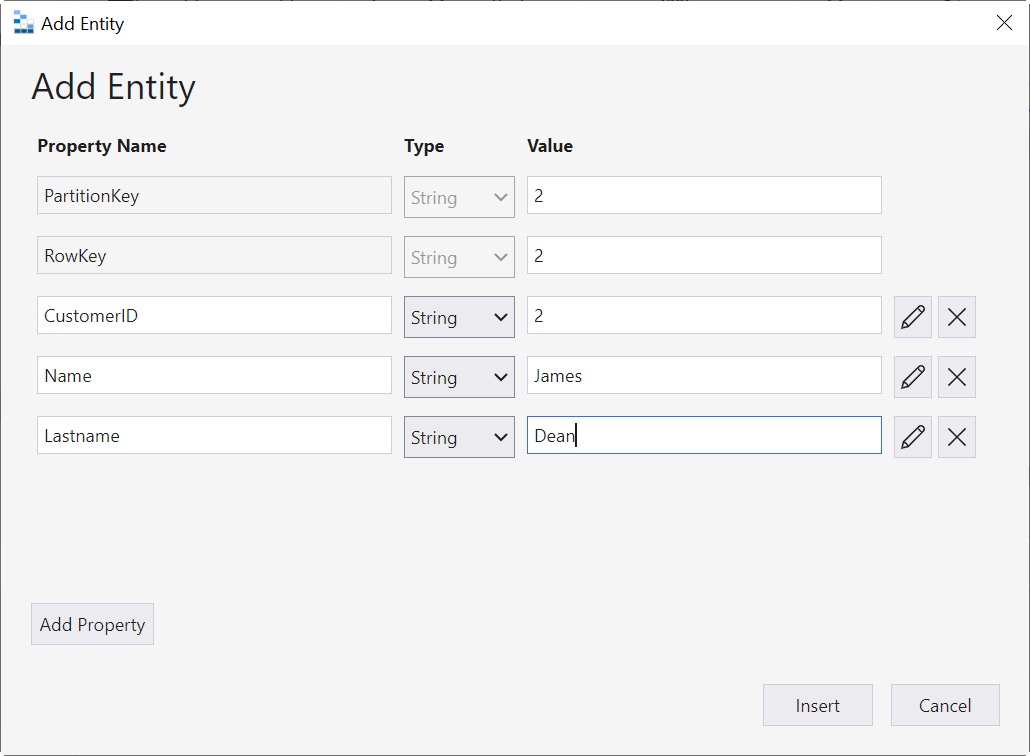
Finally, insert some columns and some data.

Next Steps
For more information about the Azure Storage Emulator, refer to these links: