Introduction
In this article, we will learn to create a Power BI report using MySQL data. The article will teach us to use the MySQL Workbench (something like the SSMS, but for MySQL). We will do the following in this article.
- First, we will connect and create a database in MySQL.
- Secondly, we will create a schema (database).
- Thirdly we will create and import data into a MySQL table.
- Also, we will connect to Power BI and load data from MySQL.
- Finally, we will create a Power BI report using MySQL data.
Requirements
- First, you need to install MySQL on your Windows Machine. This tutorial is oriented to Windows environments make sure to install the MySQL Workbench which is included in the installer.
- Finally, you need to have Power BI Desktop installed.
Create a database in MySQL
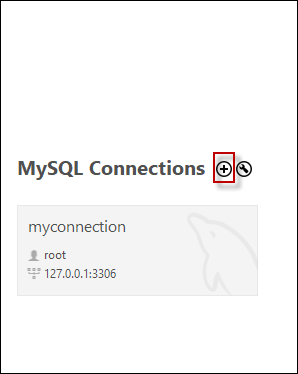
First, open the MySQL Workbench and press the + icon to open a new connection.
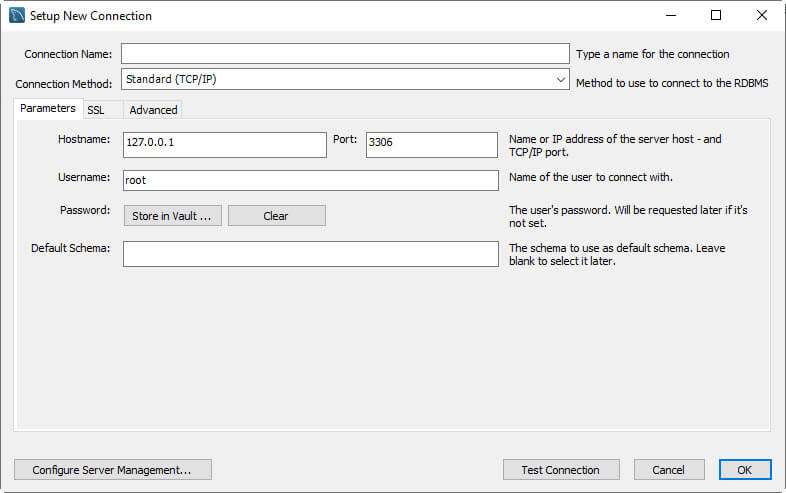
Secondly, write a connection name of your preference, write the root password, and press OK. The root password is set during the MySQL installation.
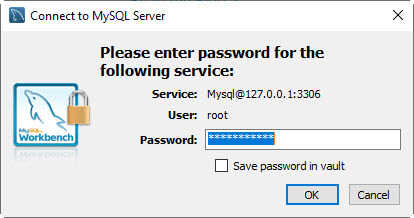
Thirdly, the software will ask you for the root password. Write a password and press OK.
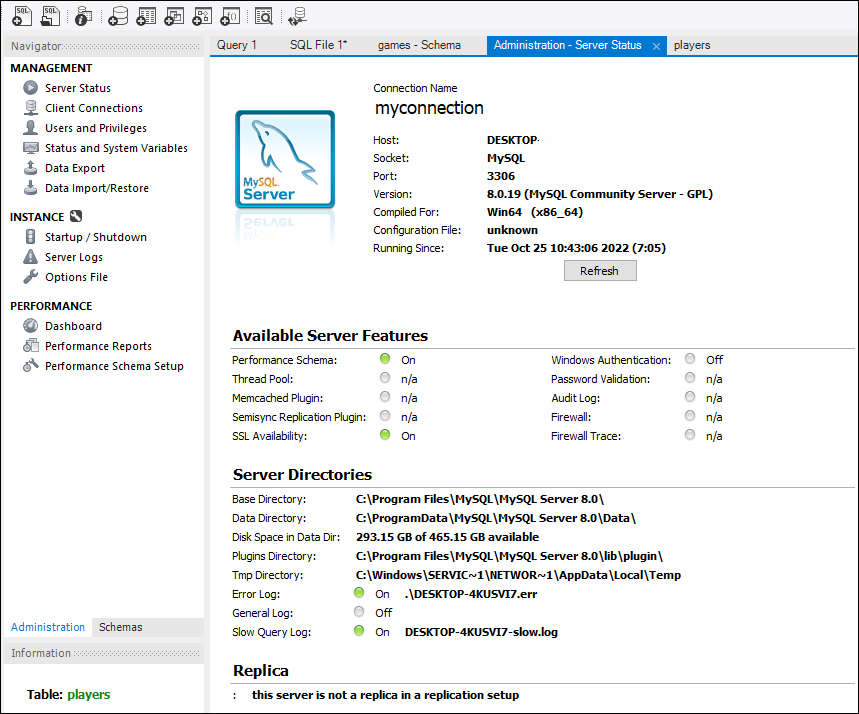
Finally, you will be connected to MySQL using Workbench
Create a schema (database) in MySQL
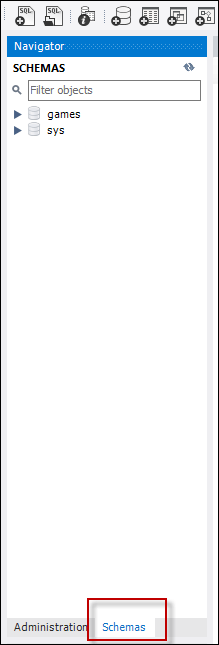
Now, create a new MySQL schema. First, go to the Schema tab.
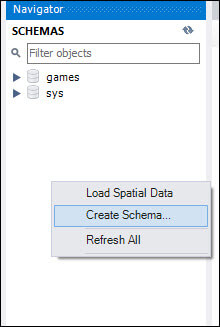
Secondly, right-click and select the Create Schema option
Finally, write a name for the schema. In this example our schema name is games. Press the Apply button. In MySQL the schemas and the databases are synonymous.

Create and import data into a MySQL table
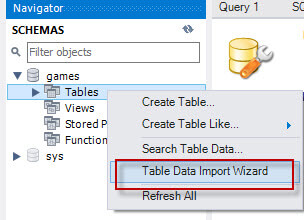
To create a table, we will import data from the players.csv file. Download the file in your machine. First, right-click the Tables in the games schema and select the Table Data Import Wizard option.
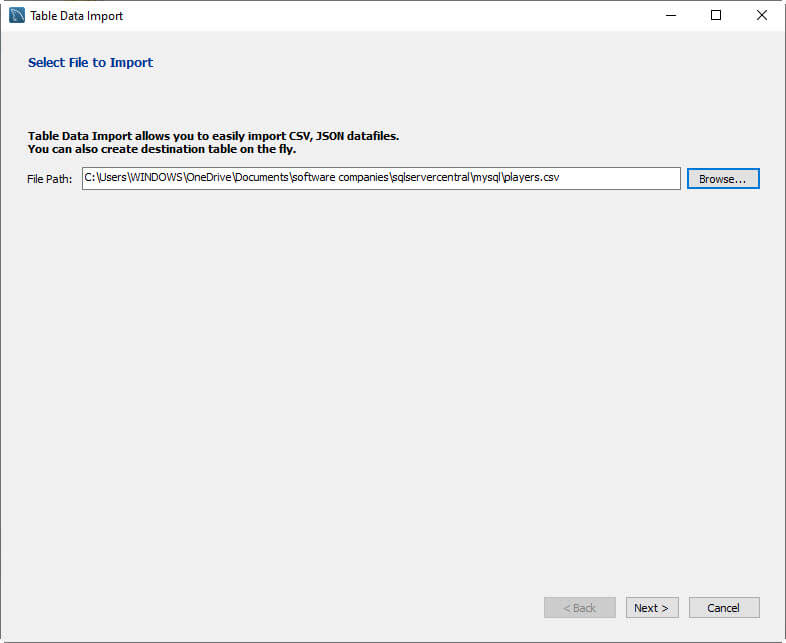
Secondly, press the Browse button and select the players.csv file, and press Next.
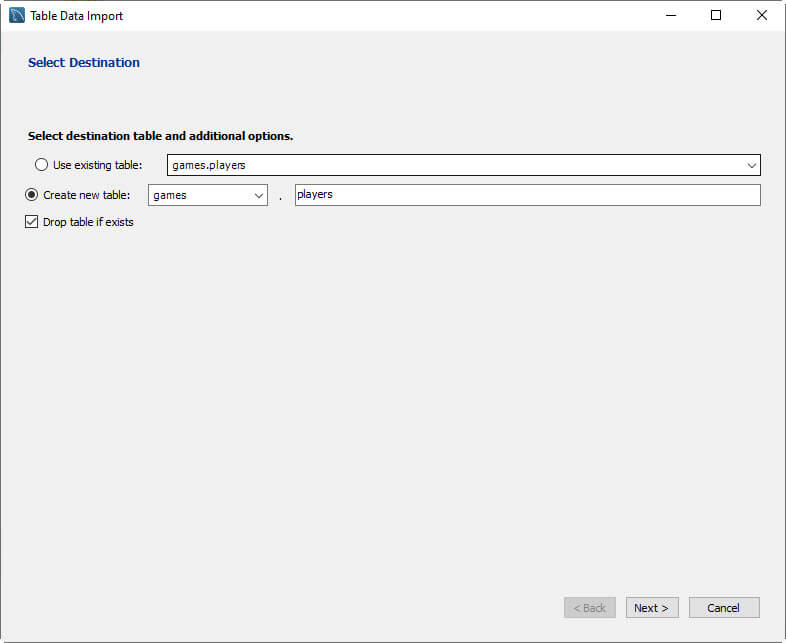
Thirdly, select the Create new table option. Optionally, you can select the Drop table if exists if you want to delete an existing table with the same name.
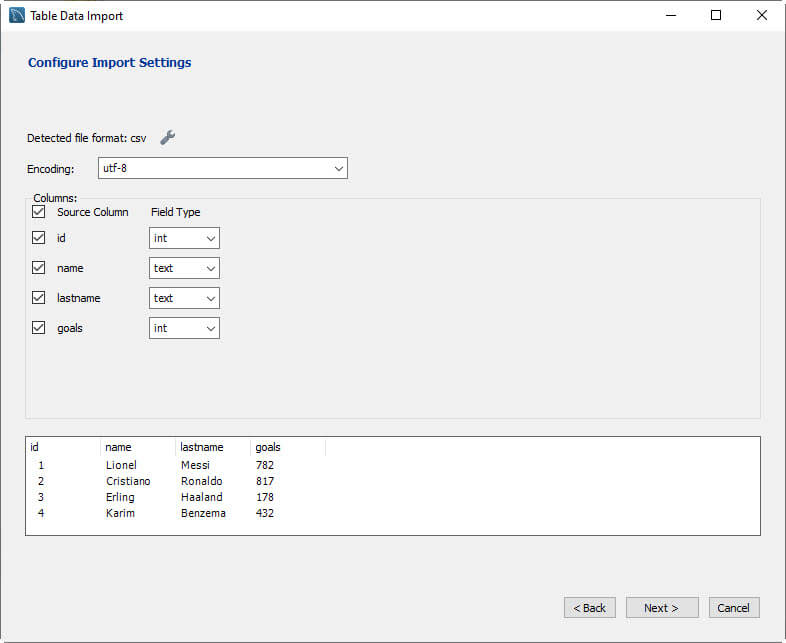
In the configure import settings, you can set the encoding and the data type (field type). In this example, we will not modify these properties. Press Next. For more information about data types, refer to this link.
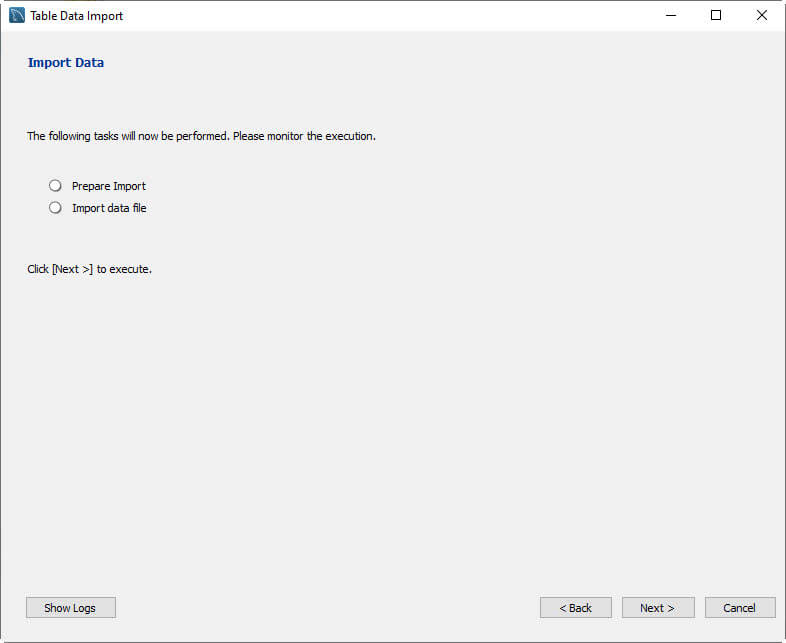
In addition, in the import data settings, press Next.
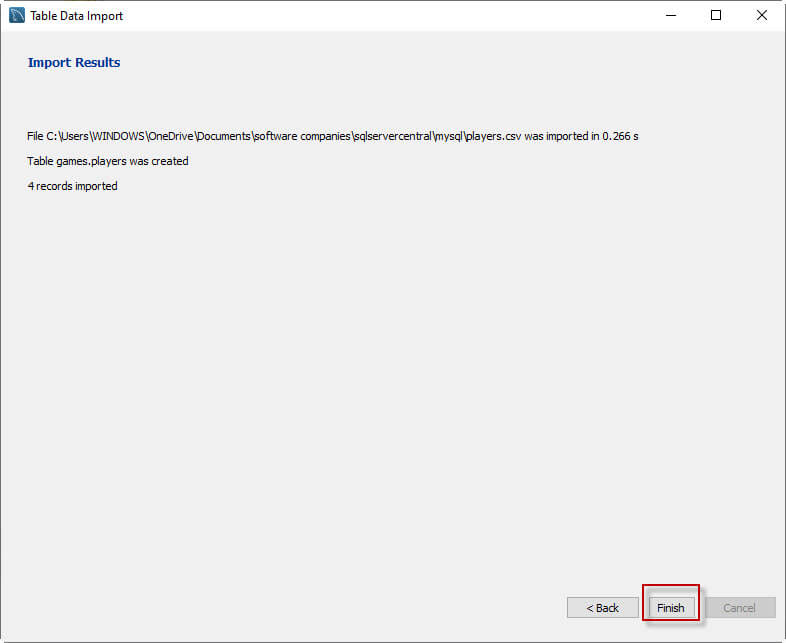
Next, in the Import Results windows press Finish.
Finally, to verify that the data was imported successfully, right-click on the player's table just created in Tables and select Select Rows – Limit 1000.
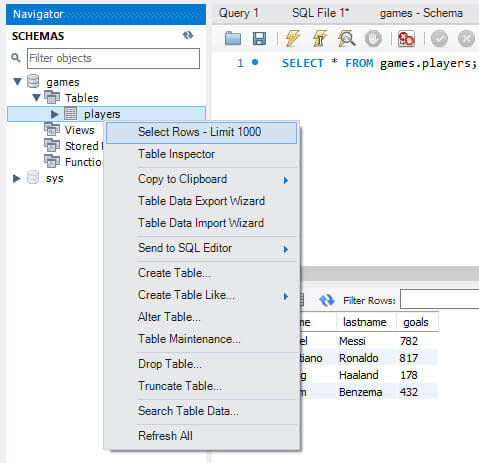 Power BI report using MySQL - verify data
You will see a table like this one.

Connect to Power BI and load data from MySQL
Previously, we created a database with Workbench, and then we created a table with data in MySQL. Now we will connect to MySQL using Power BI.
First, open Power BI Desktop and select the Get Data option.

Secondly, in the search textbox write my to look for MySQL database, select that option and press Connect.

Thirdly, in Server, write the IP of your MySQL database. In this example, we are using the localhost. Also, write the port number used by MySQL.
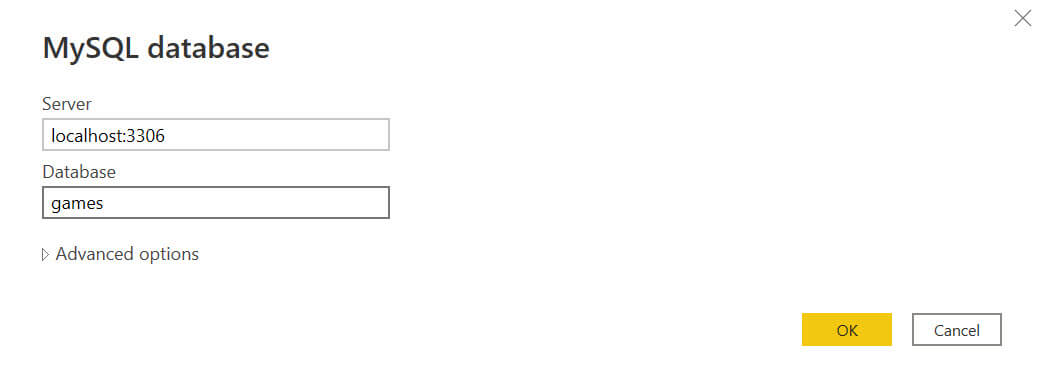
If you do not know the port number, in Workbench, go to the Administration tab and select the Server Status option. You will see the port number used and the hostname. By default, it is 3306.

Also, Power BI will ask for credentials to connect. Go to the Database and use the root name and root password. The root password is set during the MySQL installation. Next, press the Connect button.

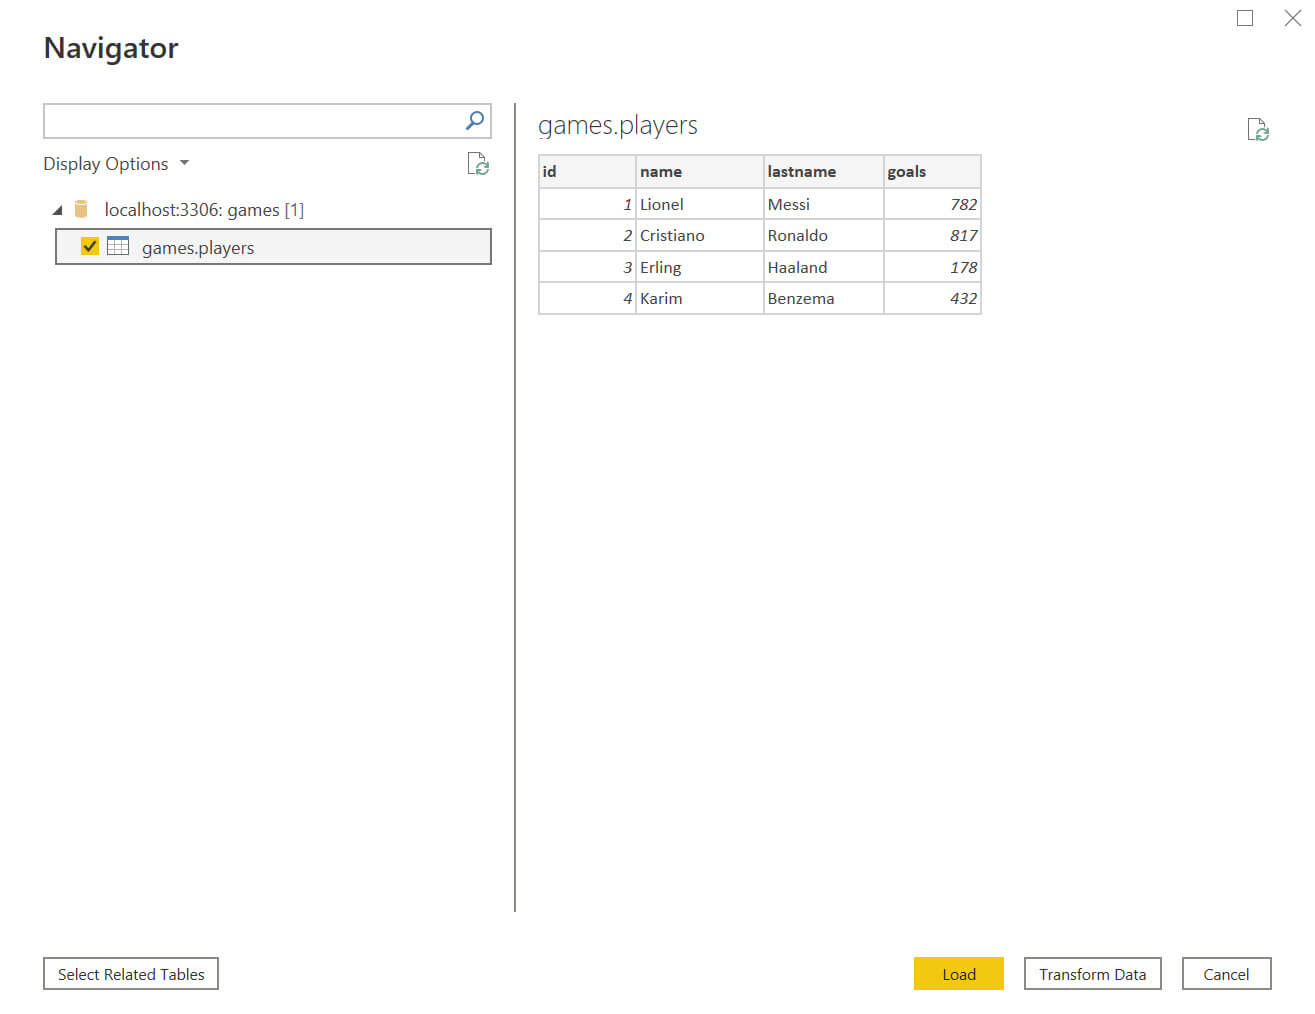
In addition, select the games.players table. You will be able to see the table’s data. Press the Load button.
Create a Power BI report using MySQL data
In order to create the report, check the goals field and the lastname. Check the Clustered column chart in Visualizations.

Finally, you will be able to see the last name of soccer players and the total goals. Ronaldo (Cristiano Ronaldo) has more goals than Messi, Benzema is in 3rd position and Haaland is in 4th position.
 A chart in Power BI
Conclusion
MySQL is a very popular tool and may have important information in that database. If we need to connect with Power BI to generate reports, it is not hard to connect to a MySQL Server in Windows. Also, you may need to open configure the firewall to open the 3306 port or the port used by MySQL.
As you can see, connecting to MySQL in Power BI is a straightforward process. You only need to know the port used and the root password.

