

Article Overview
In this article we will learn about Azure Cosmos DB PostgreSQL, which is the latest addition to the already existing family of various database API's supported by Azure Cosmos DB. Azure Cosmos DB for PostgreSQL capability enables to build highly scalable applications using the Postgres relational database. This article will explain how to create an Azure Cosmos DB for PostgreSQL on Azure portal and thereafter how to connect to it from a client say PgAdmin.
Azure Cosmos DB PostgreSQL Features
With the introduction of Azure Cosmos DB PostgreSQL, it is now possible to build highly scalable cloud native apps with relational capabilities within a single managed service. Apparently one can start from a single node with a regular Postgres table and as the workload grows it is possible to add nodes to the cluster to increase compute and distribute the tables to balance workload across the cluster. Replication across regions is also possible with more increased workload.
Azure Cosmos DB PostgreSQL is a fully managed service with the latest features for worry-free operation in production. Some of the main features include:
- automatic high availability
- Scalability
- Replication and backups
- built-in pgBouncer
- read-replicas
- easy monitoring
- private endpoints
- encryption
Azure Cosmos DB for PostgreSQL is powered by the Citus open source extension to PostgreSQL. This superpower enables user to build highly scalable relational apps. In real world implementation one can start building apps on a single node cluster, the same way you would with PostgreSQL but going forward as the app's scalability and performance requirements grow, it is possible to seamlessly scale to multiple nodes by transparently distributing the tables.
Pre-requisites
- Access to Azure portal and an active Azure subscription
- Basic knowledge of PostgreSQL
- PgAdmin
Steps to create Azure Cosmos DB for PostgreSQL
To commence your journey with Azure Cosmos DB PostgreSQL, the first and the foremost thing needed is an active Azure subscription. Subscription could be free or pay as you go.
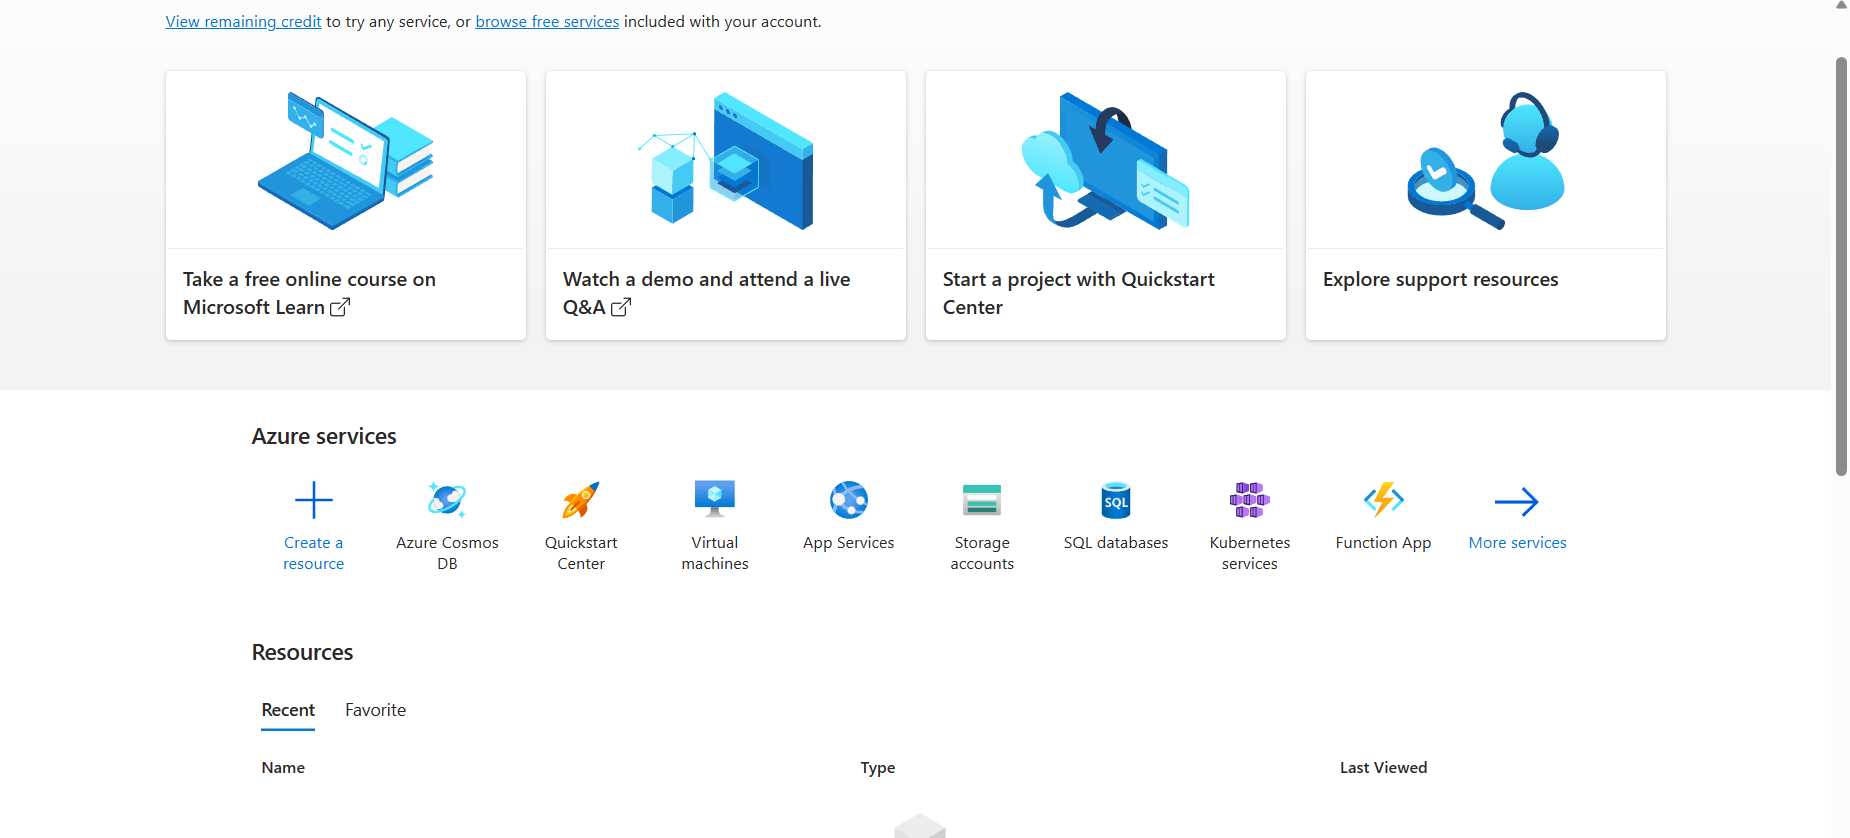
Once you have acquired a subscription, next step in the journey would be to login into the Azure portal and navigate to Azure Cosmos DB section to create an Azure Cosmos DB account.
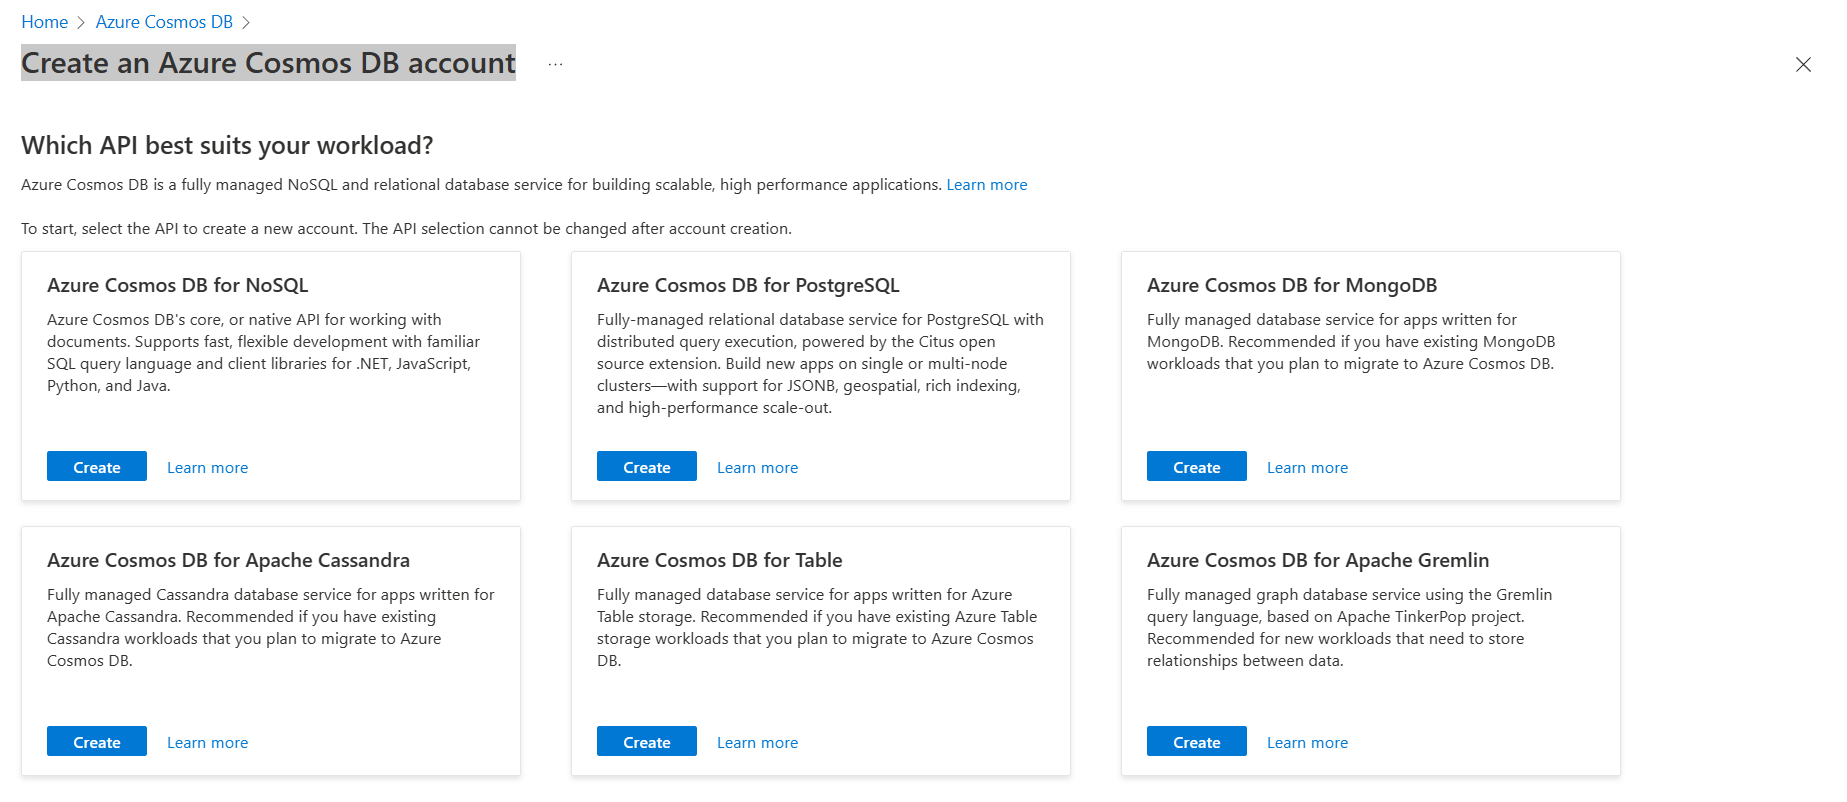
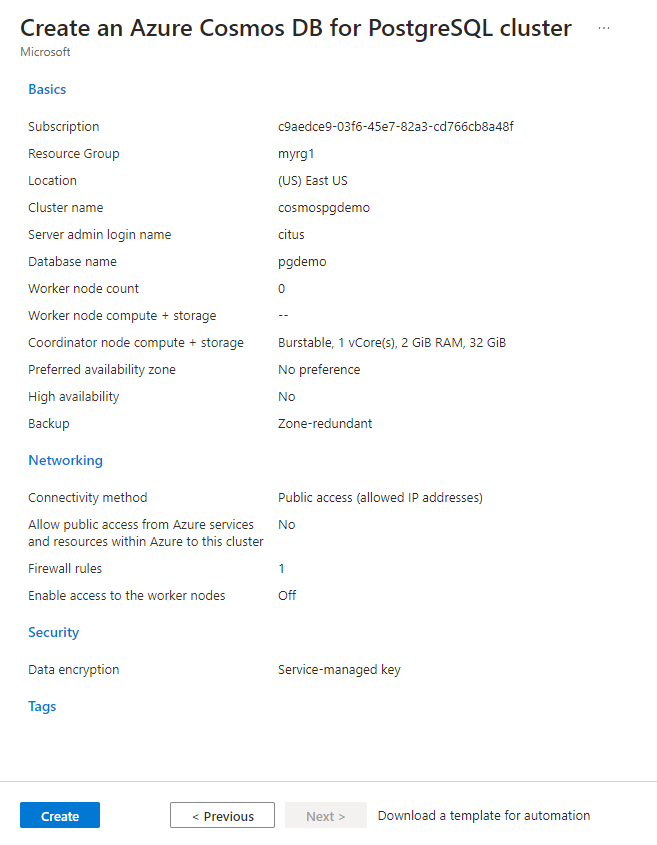
Next, click Create on the Azure Cosmos DB for PostgreSQL section. Enter the subscription, resource group, cluster and administrator account details.
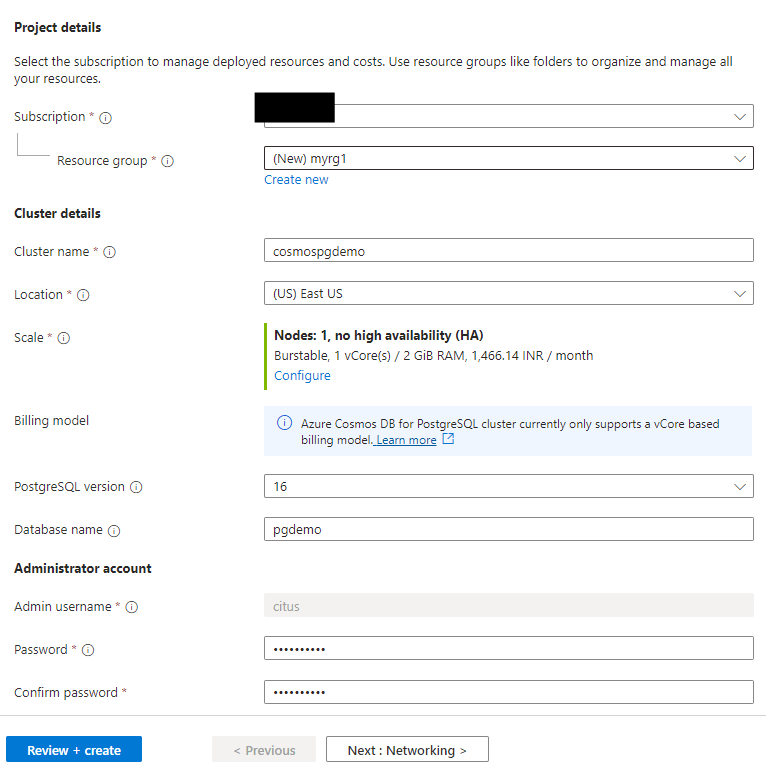
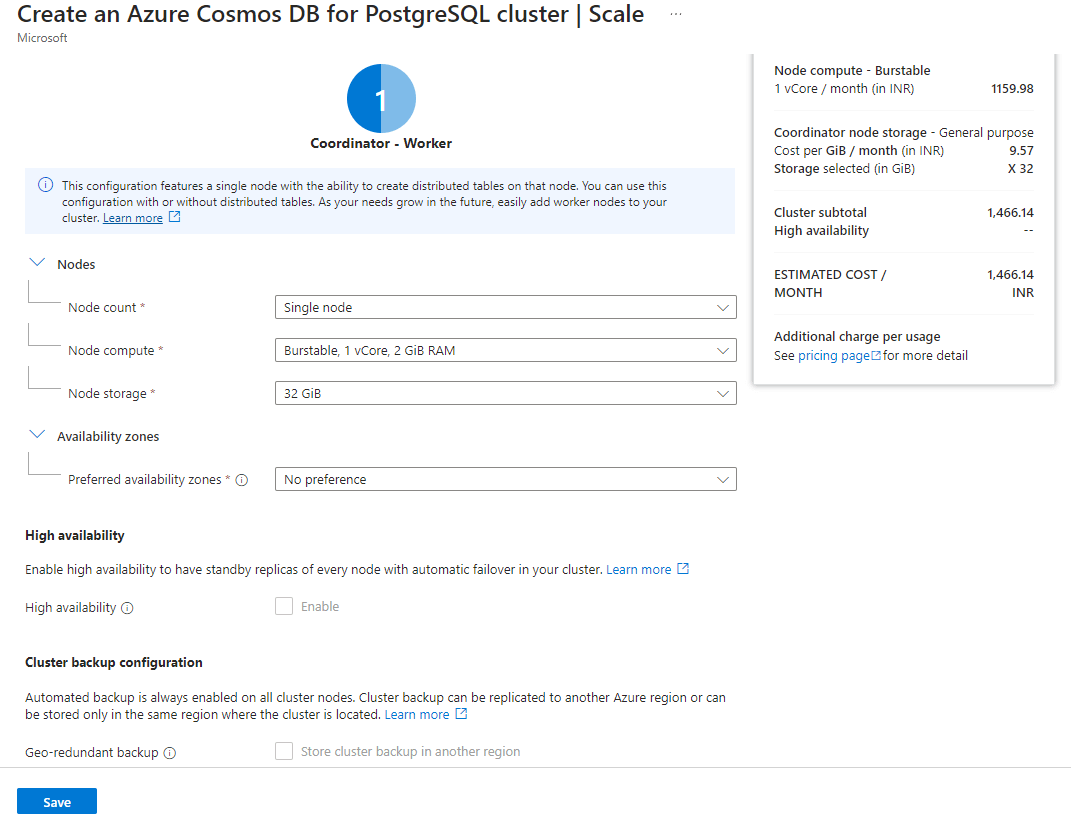
The important point to note here is the cost of the service primarily depends on the configuration of the scaling. Let us take a look at the configuration we have used for this tutorial along with its estimated cost and understand the key points.
- Node count - Number of nodes present in the cluster. The tables may or may not be distributed on the node(s)
- Node compute - Physical configuration of the node, defines the number of cores present along with the capacity of the RAM
- Node Storage - Storage capacity of the node in GiB
- Availability Zone - We can choose the availability zone(s) to deploy the cluster. This ensures backup and high availability of the database in situations when one zone could be down or malfunctioning.
For this demo, I have chosen the very basic configuration.
In the networking tab it is necessary to configure the client IP addresses else client won't be able to establish connection with the cluster. Let us keep the default settings of the other tabs like Encryption, Tags. Review the data on the final page and click on create to create the Postgres cluster. The final page shows the summary of the settings chosen along with the estimated price per month in local currency.
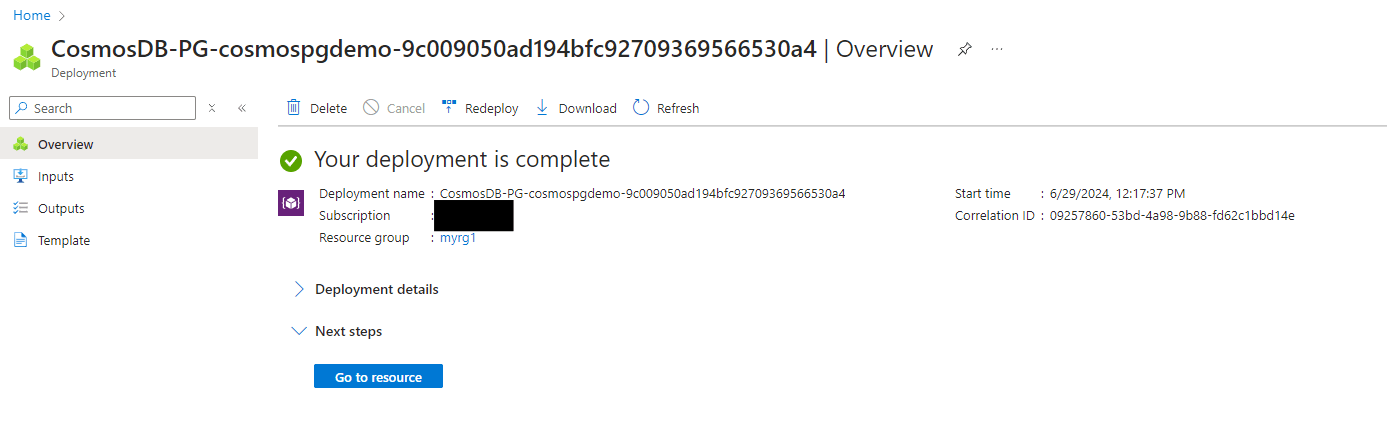
Click on Create to commence the deployment. The deployment takes few mins to complete. Once completed, the dashboard shows the details of the resource, it is possible to delete/re-deploy the resource if needed.
Understanding the Resource
Let us now go to the resource to explore it. The dashboard 'Overview' represents the view of an admin. The 'Essentials' section mentions the actual details of the resource like Location, Subscription details, Resource Group, Postgres version, database name, availability zone, etc. The menu on the left contains the configurable properties of the resource along with other important features, like 'Activity log'.

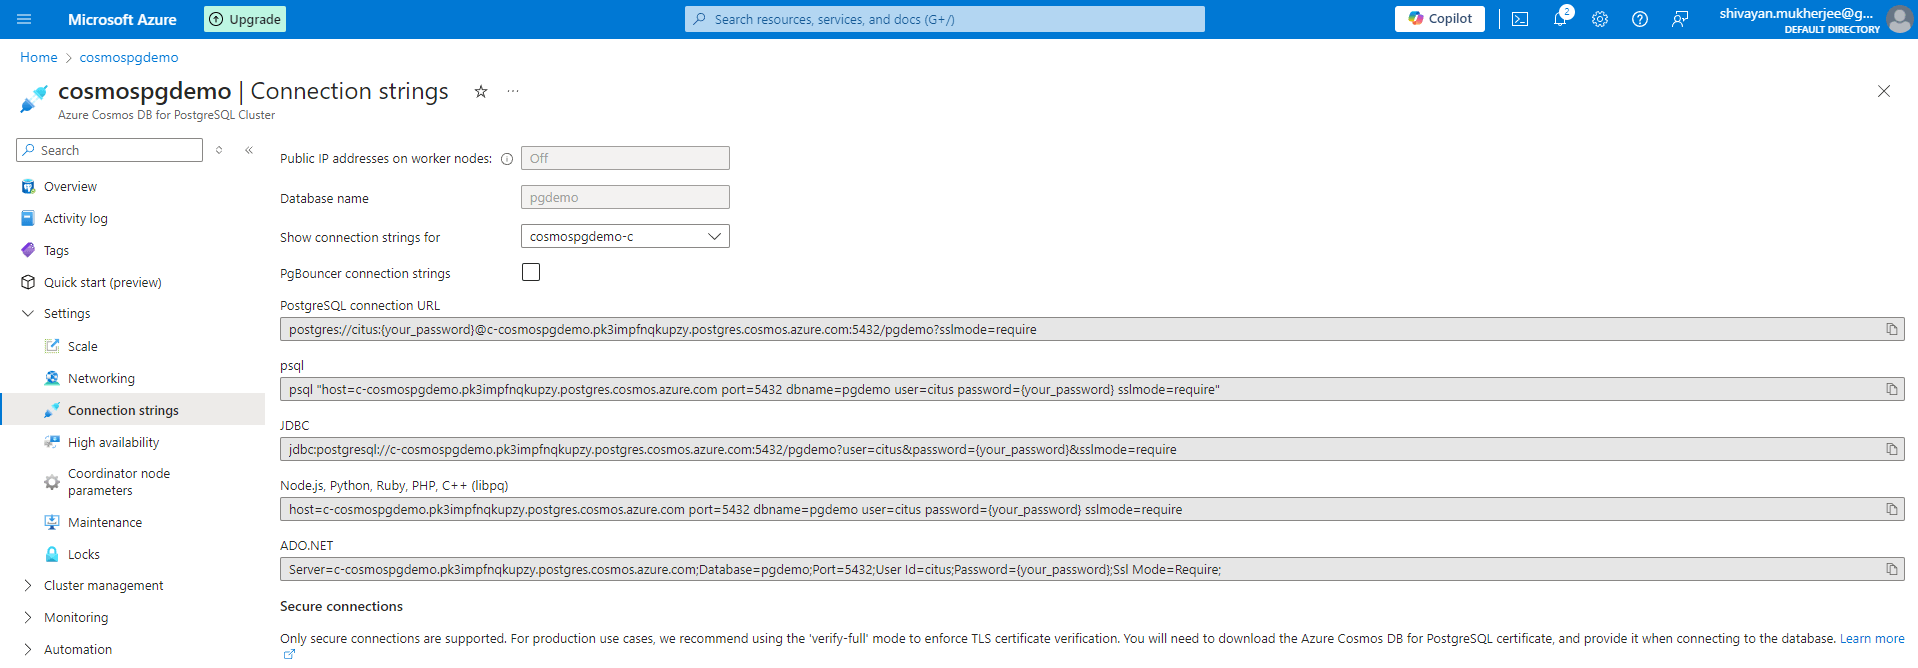
In order to connect to this database from client tools or various language based applications, the connection details of the database are required. These details are available within Settings -> Connection Strings.
How to connect to the database from client?
In this very important and interesting section of the tutorial we will see how to connect to the database from a client. For this demo, our client is PgAdmin and we will see how to establish connection from it.
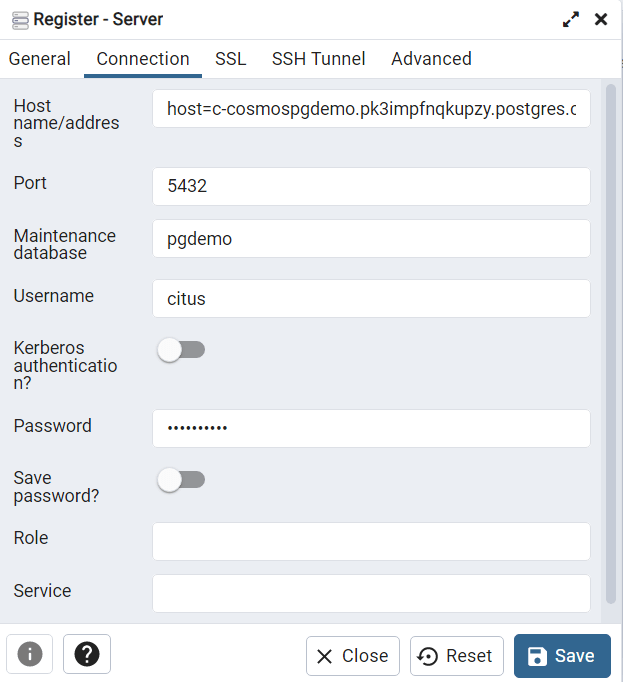
Navigate to servers -> Register -> Server
Enter name, connection and SSL details
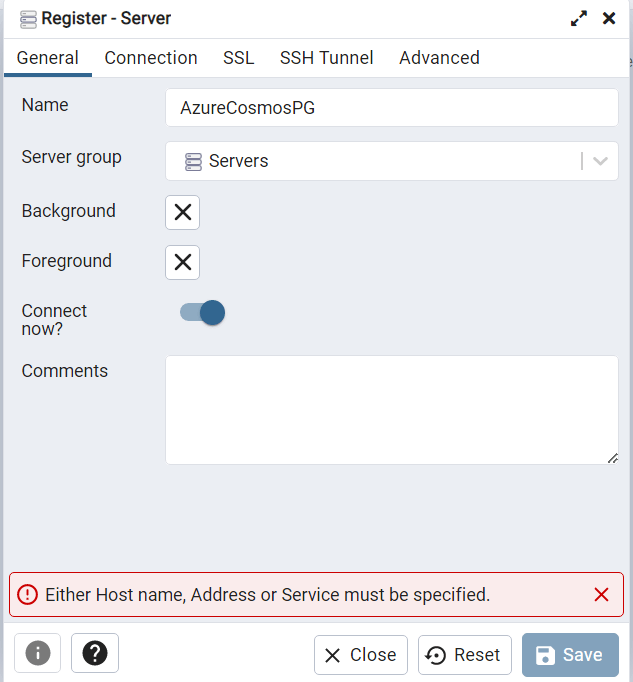
- Host name/address: Obtain this value from the Overview page for cluster in the Azure portal. It's listed there as Coordinator name.
- Maintenance database: use the value supplied previously during database creation.
- Username: use the value
citus. - Password: the connection password supplied previosuly during database creation
- Save password: enable if desired.
- In the SSL tab, set SSL mode to Require. Save to connect
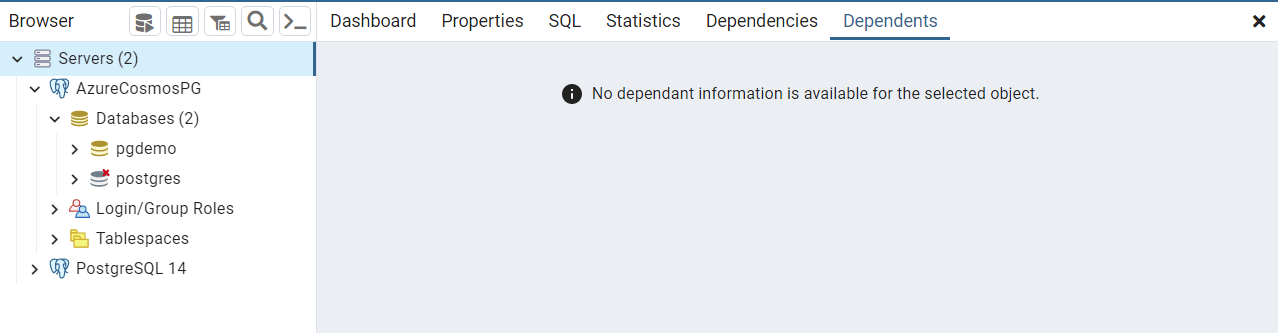
After successful connection, the server along with its database is listed as shown below. Now it is ready for operation.
Conclusion
In this article we learn about Azure Cosmos DB for PostgreSQL, the steps in detail to create a new database in Azure portal and how to access the same from a client like PgAdmin. Hopefully, this article will help you get started on your journey with Azure Cosmos DB for PostgreSQL.