

In this article, we are going to configure a maintenance place on the SQL Server 2017 instance installed locally. Maintenance Plans are used in SQL Server to easily configure and automate tasks that keep the database instance in shape. Today's demo is executed on a SQL Server 2017 instance however, Maintenance Plans are still relevant in SQL Server 2022. This is a real live demo from start to finish so we shall mention some bottlenecks you might face in the wild attempting this process.
You can learn more about Maintenance Plans in Microsoft’s documentation here: Maintenance Plans.
First Attempt at Maintenance Plan Configuration
We get started with Maintenance Plans by right-clicking Maintenance Plans in Object Explore in the SQL Server Management Studio tool. You can navigate to this session by following the path Instance Name> Management>Maintenance Plans, as shown in Figure 2. In this first attempt an error is returned indicating that a requirement for configuring Maintenance Plans is not available. This pre-requisite is referred to as Agent XPs.
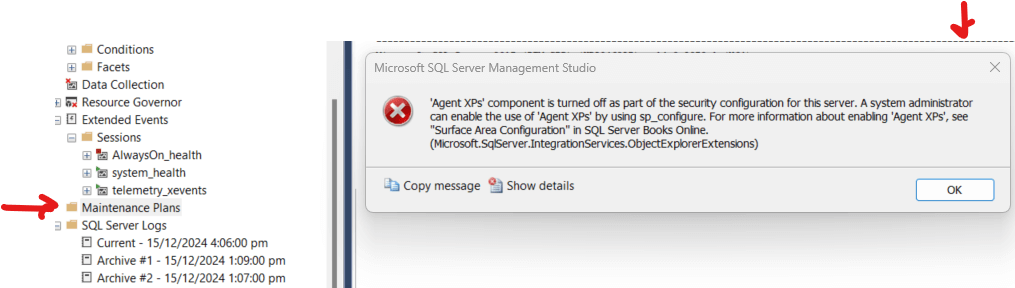 Figure 2: Navigate to Maintenance Plans
What are “Agent XPs”
The word "Agent" in this expression refers to the SQL Server Agent. SQL Server Agent is a component of SQL Server that allows you to execute a broad range of automated tasks outside the SQL Server core database engine. "XP" means "Extended Procedures" or, better put, "Extended Stored procedures".
In summary, Agent XPs are extended stored procedures used by the SQL Server Agent to execute privileged actions external to the DBMS using the SQL Server Agent service account. Such external tasks may include accessing operating system files and folders, executing scripts, and connecting to other instances. Security specialists typically advise that Agent XPs are disabled if they are not being used since this reduces the attack surface for your SQL Server instance.
It is likely that if your instance is a new instance installed with default options or explicitly hardened, Agent XPs is turned off. To turn on Agent XPs, we can use the sp_configure stored procedure. Ideally, you must have received clearance from your Cybersecurity department that this is allowed. Let's look at the steps.
Exploring SP_Configure
Inbuilt Stored Procedures in SQL Server are typically named using the prefix sp_. SP-Configure is a stored procedure used to view and manipulate global SQL Server settings. You can read more about sp_configure in this Microsoft article: SP_Configure.
To view the current setting for Agent XPs, we can execute sp_configure as follows:
-- Listing 1: Execute SP_Configure

use master

go

sp_configure

go
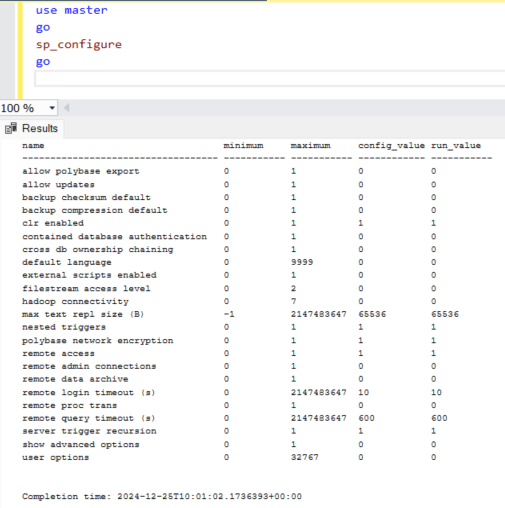 Figure 3: Execute SP Configure
We realize there is no such configuration option in this view. This is because, by default, likely as another security mechanism, some server configurations require that sp_configure be executed in advanced mode. We do this by turning on advanced mode as follows:
-- Listing 2: Execute SP_Configure

sp_configure 'advanced', 1

go

reconfigure

go
Running Listing 1 again returns the following output:
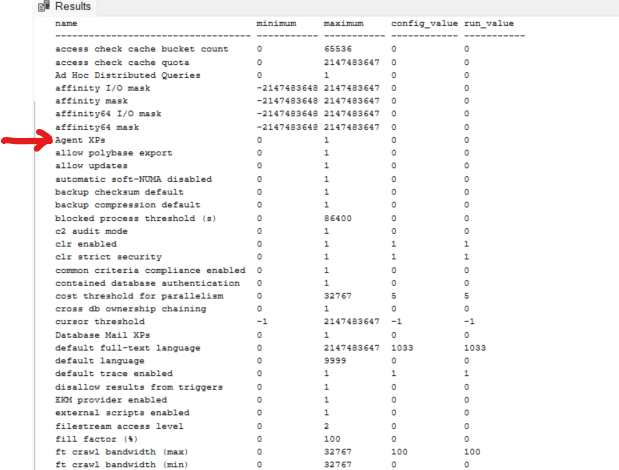 Figure 4: SP Configure Advanced Options
It is a much longer output, with Agent XPs showing up as the eighth item. We see that the run_value is 0, which means Agent XPs is turned off. To turn it on, we run the following:
-- Listing 3: Execute SP_Configure

exec sp_configure 'agent xps', 1

go

reconfigure

go
This updates the configuration for Agents XPs as shown in Figure 5.
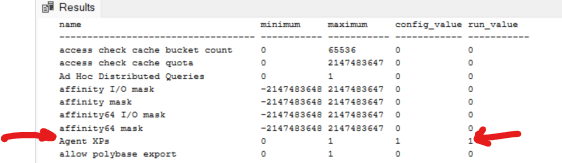 Figure 5: Turning on Agent XPs
Create a Maintenance Plan on the Design Surface
Once Agent XPs is up and running, we can retry creating a Maintenance Plan. This time, we can get a positive response. We shall name this one “Sample Maintenance Plan”.
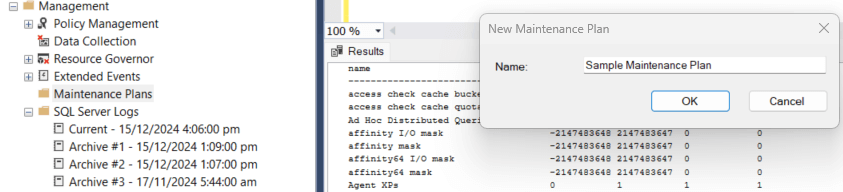 Figure 6: Creating a Maintenance Plan
Developing a Maintenance Plan from Scratch requires that we first establish a connection to the instance where we want to execute tasks. For this demo, we shall connect to the local server. We select the drop-down menu option under Manage Connections and select local server connection (See Figures 7 and 8).
 Figure 7: Manage Connections Menu
This brings up a dialog with the properties.
 Figure 8: Local Server Connection
We can double-click the Subplan_1 row to open its details and rename it as appropriate. We can also add other sub plans which represent additional tasks. We are naming the subplans "Rebuild Indexes" and "Backup Databases" respectively (See Figures 9, 10 and 11).
 Figure 9: Renaming the Subplan
 Figure 10: Subplan to Rebuild Indexes
 Figure 11: Subplan to Backup Databases
This Design Surface results in a set of background activities in SQL Server Agent that creates the Maintenance Plan and associated SQL Server Agent jobs. You can view all this in Object Explorer (See Figure 12).
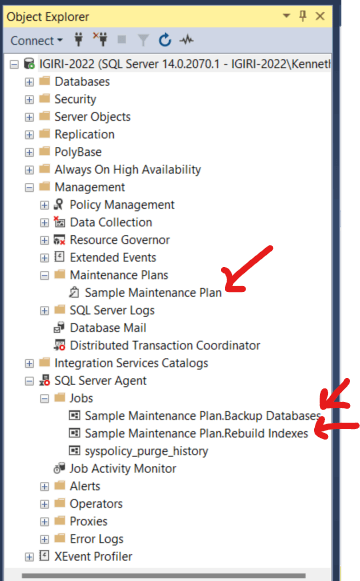 Figure 12: Maintenance Plans and Jobs in Object Explorer
Be sure to save the configuration so far using the save button shown in Figure 13.
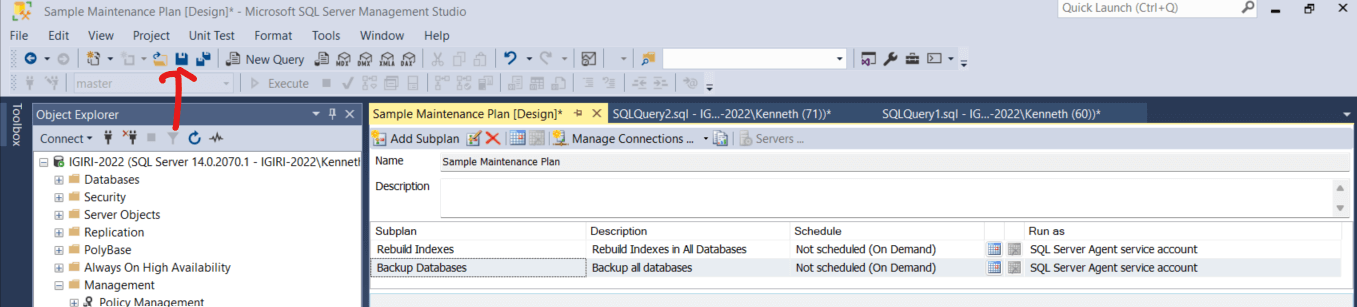 Figure 13: Save Maintenance Plan Configuration
However, this is not the end of the story because the Jobs are just containers, no steps have been specified in the jobs. We can see this clearly in the lower section of the Design Surface (See Figure 14).
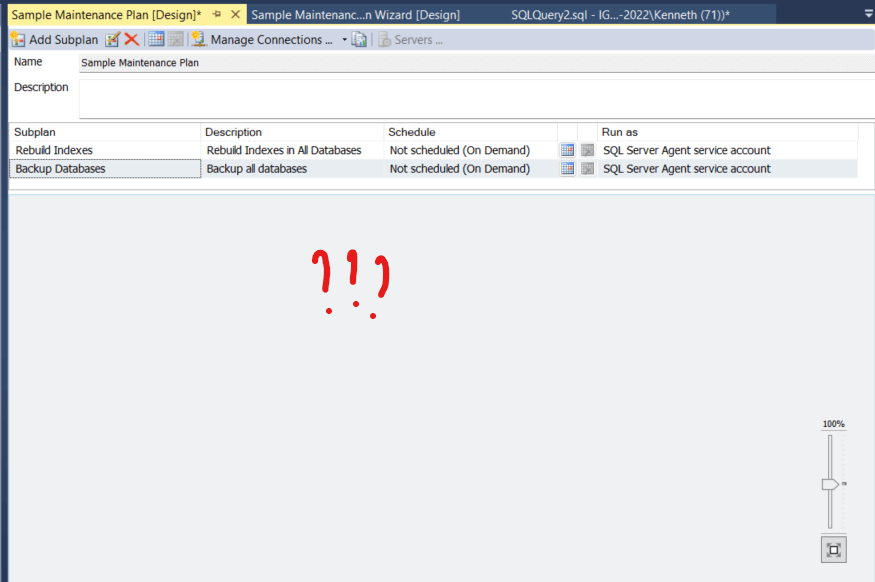 Figure 14: Blank Design Surface for Backup Databases Subplan
Using the Toolbox in Design Surface
To define what each subplan is going to do, we must invoke the ToolBox. From the SQL Server Management Studio Menu, click View > ToolBox. This gives access to a set of Maintenance Plan Tasks, which you can click and drag to the design Surface on the right-hand side (See Figure 15).
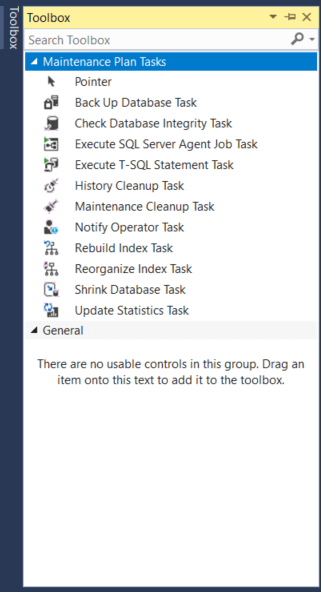 Figure 15: The ToolBox
We can open this from the View menu if needed.
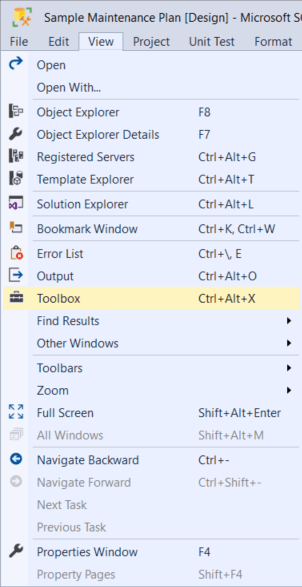 Figure 16: The ToolBox [Navigation]As an example, we click and drag the Rebuild Index Task (Figure 17) as a task in the Rebuild Indexes Subplan. Notice that we still must do some more work on this task, as indicated by the error symbol indicated in Figure 15. Double-clicking the task helps us look deeper and then configure the connection for this task and other properties.
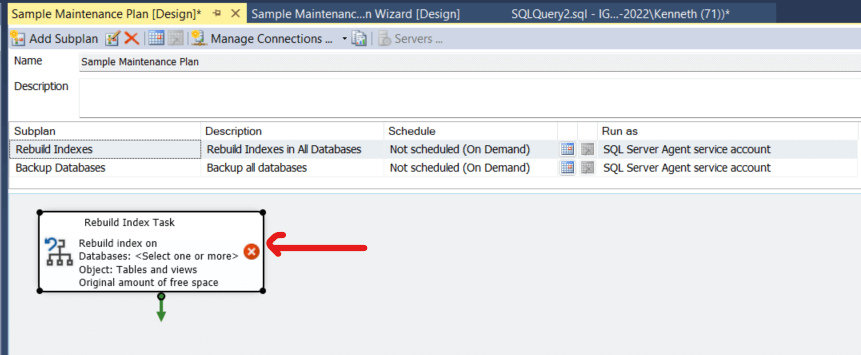 Figure 17: Create the "Rebuild Index" Task
Figure 18 shows how we select the connection and include the databases we would want re-indexed. Other options are also shown, such as MAXDOP, Fragmentation, and more, but these are out of the scope of this article.
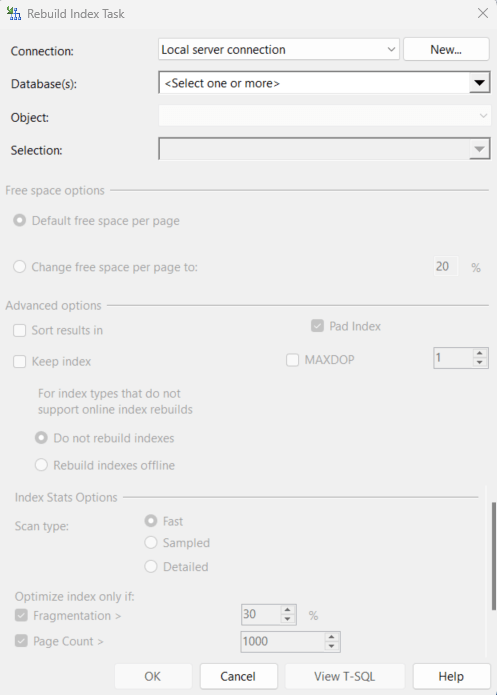 Figure 18: Configure Connection for Rebuild Index Task
Once we choose those, we can configure options.
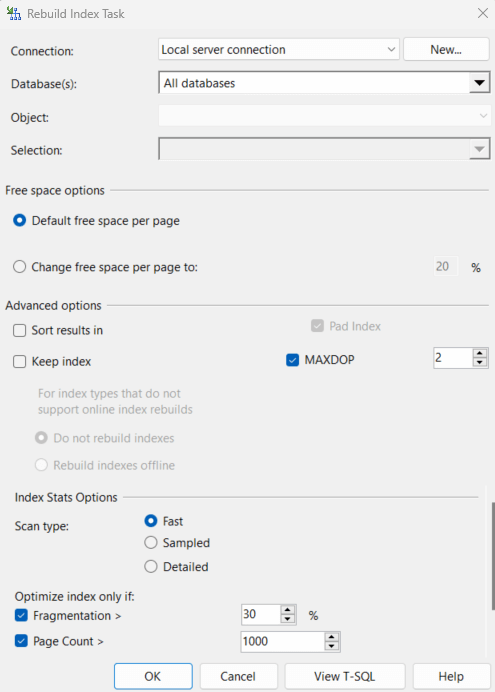 Figure 19: Index Rebuild Options for "Rebuild Index" Task
Once we get the configurations right, we can proceed, as shown in Figure 20.
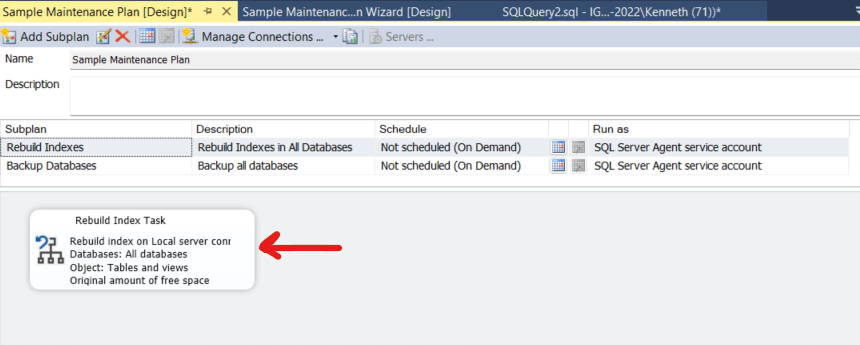 Figure 20: Rebuild Index Task
We could go on with adding other tasks to our two subplans and configuring same. However, the alternative to this is using the Maintenance Plan Wizard.
Launch the Maintenance Plan Wizard
Using the maintenance plan wizard simplifies the process of creating a Maintenance Plan along with its associated tasks and schedules. We will demonstrate this in xx simple steps. While the Wizard may not give us as much control of the underlying configuration, it makes the process much simpler.
Launch the Maintenance Plat Wizard from Instance Name> Management>Maintenance Plans> Maintenance Plan Wizard. (Figure 21)
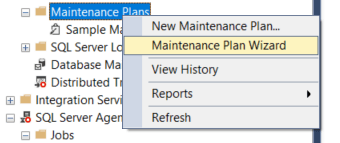 Figure 21: Launch Wizard
Review the tasks that may be performed and click NEXT. (Figure 22)
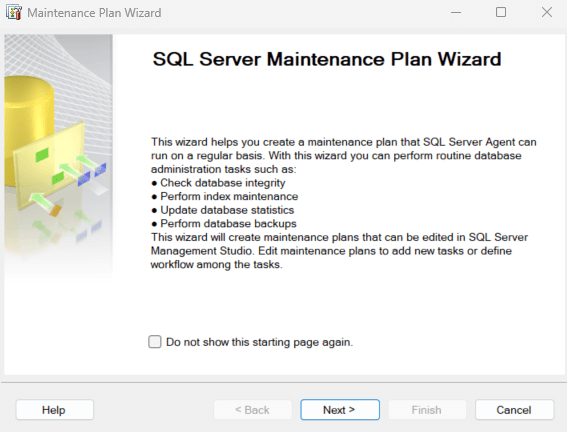
Figure 22: Review Wizard Intro.
Name the plan and select whether you want a separate schedule for each task or a single schedule for the entire Maintenance Plan.
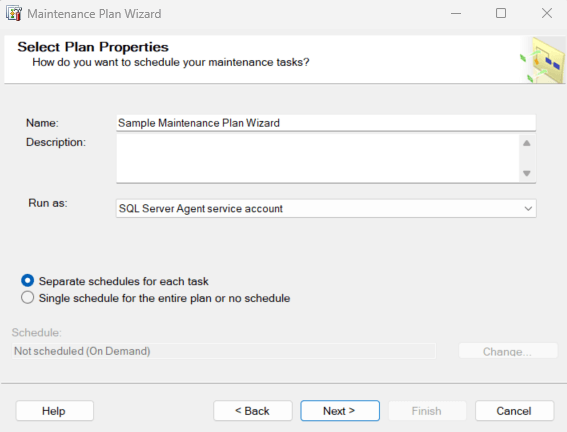 Figure 23: Name Subplan and Choose Schedule Option
Figures 24 and 25 show the visual difference between these two options on Design Surface. Observe that these tasks will be executed by the SQL Server Agent Account. Using a separate Schedule for each task ensures you can change schedules for tasks like rebuilding indexes or backups without having to recreate the plan. This might help manage the performance impact of the tasks. Here we see one schedule.
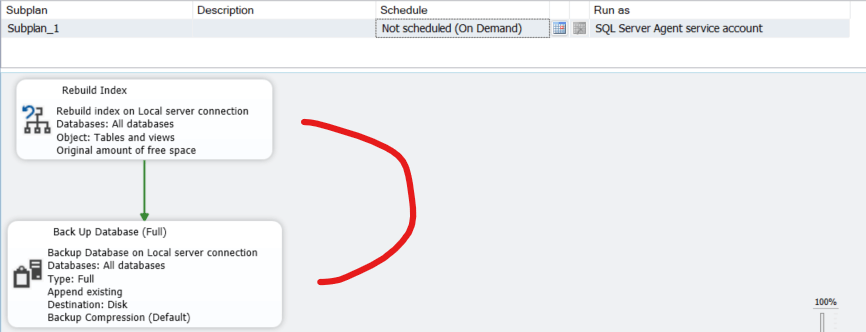 Figure 24: One Schedule for all Tasks
Here we see two schedules.
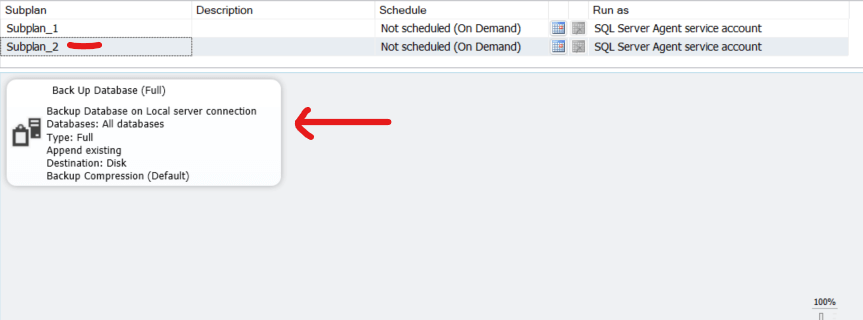 Figure 25: Separate Schedule for Each Task
In this step we select the tasks we had previously chosen in the previous approach – Rebuild Indexes and Backup Databases (Figure 26).
 Figure 26: Select Maintenance Tasks
The next step confirms this selection and allows us to reorder the tasks if we want to (Figure 27).
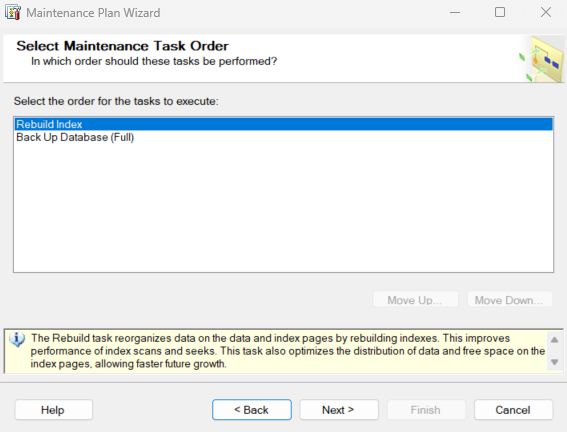 Figure 27: Order Maintenance Tasks
6. Next, we select the databases we want to rebuild indexes for. We are selecting all databases to match the choice we made when we configured Maintenance Plans using the Design Surface (Figure 28).
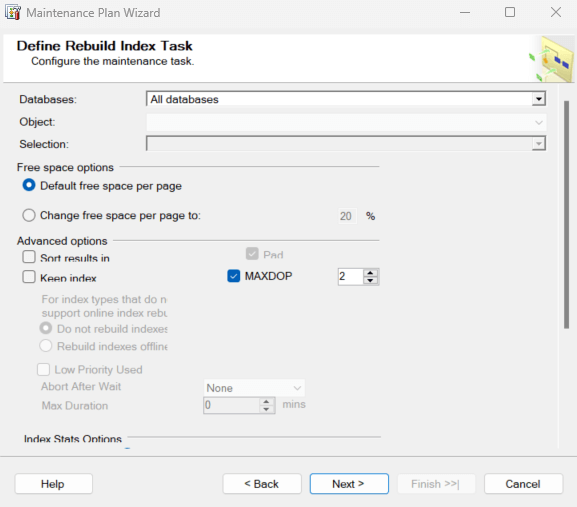 Figure 28: Select Databases for Index Rebuild
Also, notice the additional configuration options we could explore specific to index management (Figure 29).
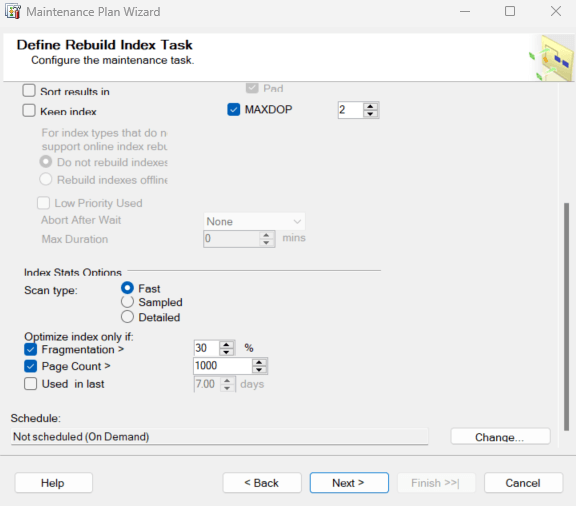 Figure 29: Indexing Options
We repeat the selection of database for the Backup databases task as shown in Figure 30. Backup is configured to go to disk.
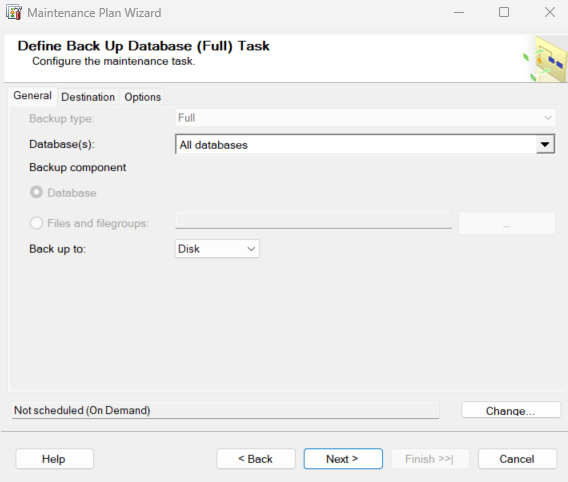 Figure 30: Select Databases for Backup
The backup files will be written to the default backup directory. You can confirm this directory by checking the instance properties (See Figure 31).
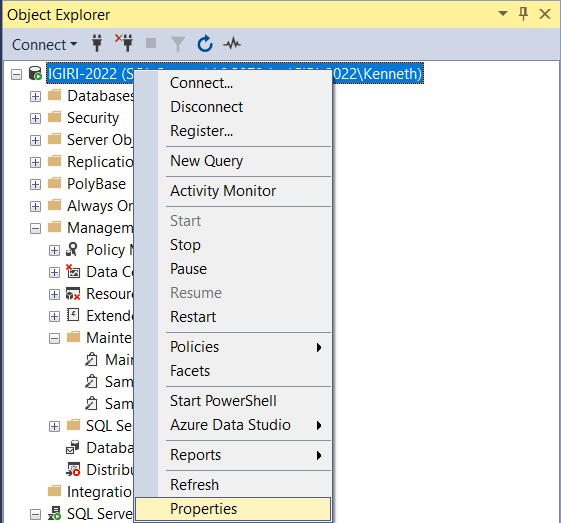 Figure 31: Instance Properties
Choosing the report text file destination (or choosing to send by email) is about the last step. We leave this at the default locations for logs in this demo. See the instance defaults below.
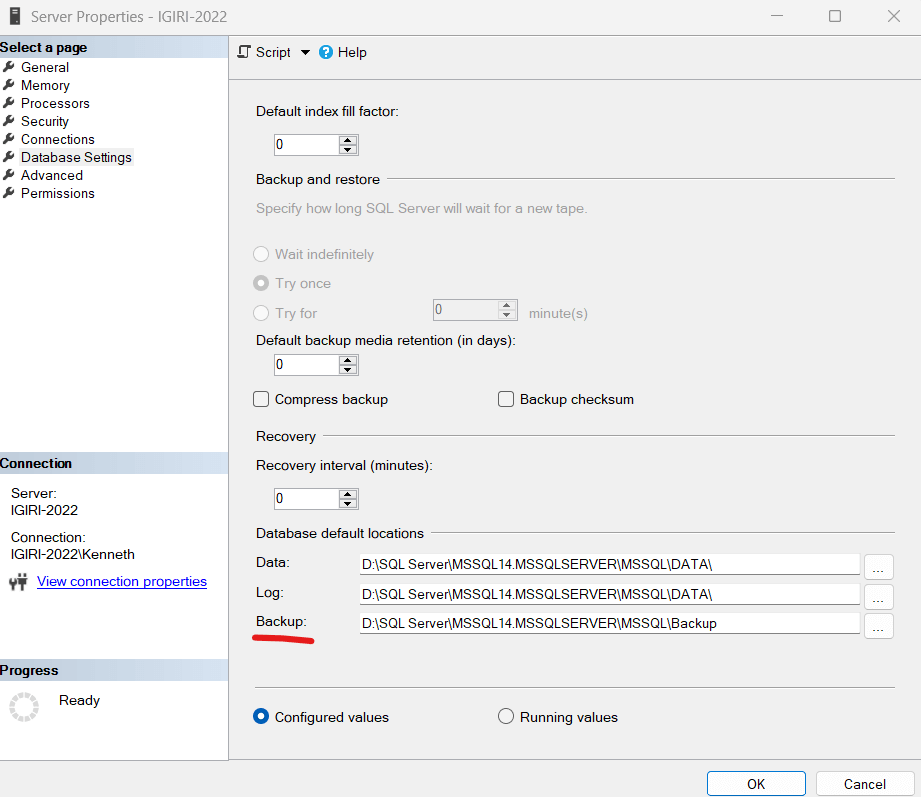 Figure 32: Backup Location
This is the same location shown in the options.
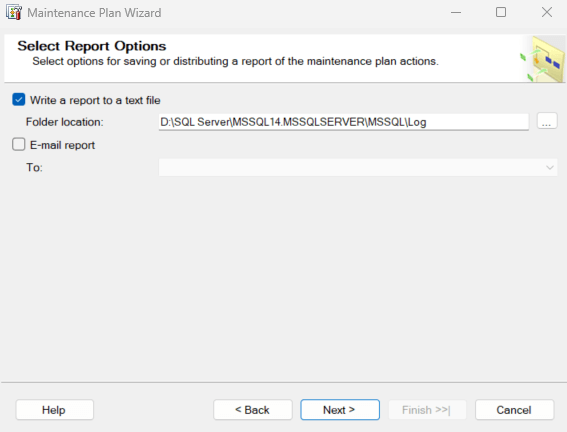 Figure 33: Maintenance Plan Log Options
You will see a summary of the wizard next.
 Figure 34: End of the Wizard
The last step summarizes our options, and we can review before hitting that “Finish” button.
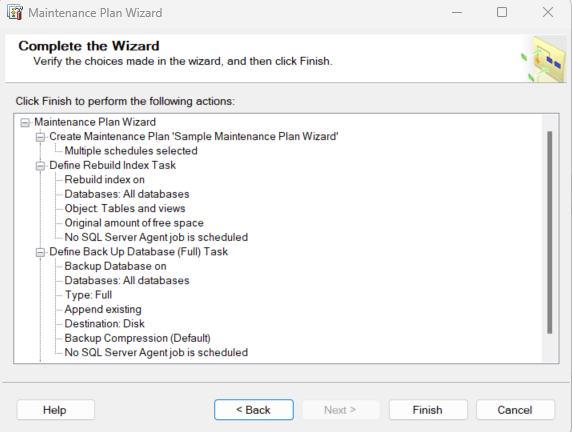 Figure 35: Summary of the Configuration
Conclusion
In this article, we went through the steps of setting up a Maintenance Plan with two tasks – rebuilding indexes on all databases in an SQL Server instance and backing up databases. There are obviously many other tasks that can be included in a Maintenance Plan, but this is just a demo.
We explored configuring Maintenance Plans using the Design Surface and using the Maintenance Plan Wizard. While using the Wizard is much simpler, using the Design Surface gives us more control over the options so long as we know what we are doing.
Maintenance Plans can help automate the routine tasks of a Database Administrator, Data Engineer, or any other role that works with managing SQL Server databases. While inbuilt tools in SQL Server and SSMS are helpful, third-party tools can help database administrators and data engineers perform maintenance more efficiently. For example, dbForge SQL Tools is a pack of 15 tools covering nearly any database-related task on Microsoft SQL Server and Azure SQL Database. It is designed to increase productivity and reduce costs associated with database development and deployment by automating them under a consistent DevOps cycle.
