Introduction
PHP is one of the most popular programming languages in the Web. Facebook, Yahoo and millions of web sites were created using PHP. In this new article, we will learn the following:
- How to create an Azure Web Application.
- How to create our first PHP page in Azure.
- How to work with forms using PHP in Azure.
- How to insert data to an Azure SQL Data WareHouse (ASDW) table using PHP.
- How to retrieve the information of the ASDW table in PHP.
Requirements
4. An ASDW Database created (to create it follow the steps 1 to 3 of the Machine Learning article)
Getting started
Here are the steps to publish your new application based on Azure SQL Data Warehouse and PHP.
1. How to create an Azure Web Application
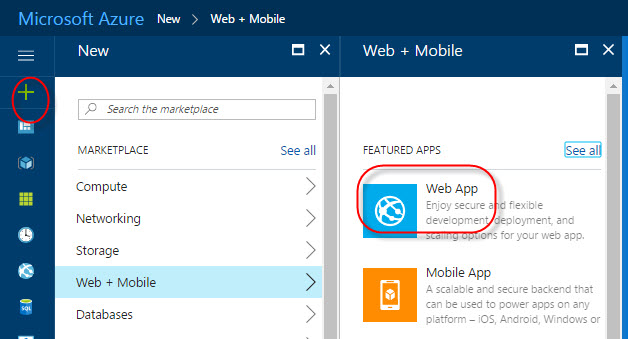
We will first create a Web App. In the Azure Portal, press the + icon and select Web + Mobile> Web App:
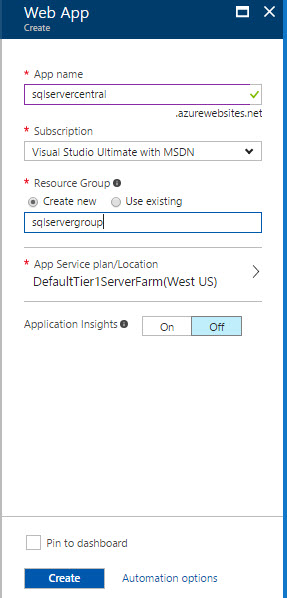
Enter an App name and create a Resource Group if necessary. The resource groups are used to administer multiple Azure Resources. Once that the information is entered, press Create:
2. How to create our first PHP page in Azure
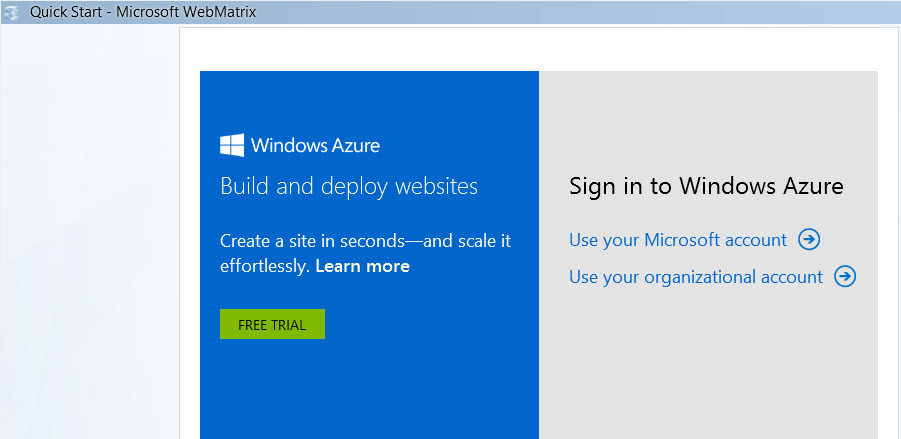
We will first create a Hello world example in Azure using PHP. First, open WebMatrix and connect to the Azure. You can also use Visual Studio. Use your credentials to login:
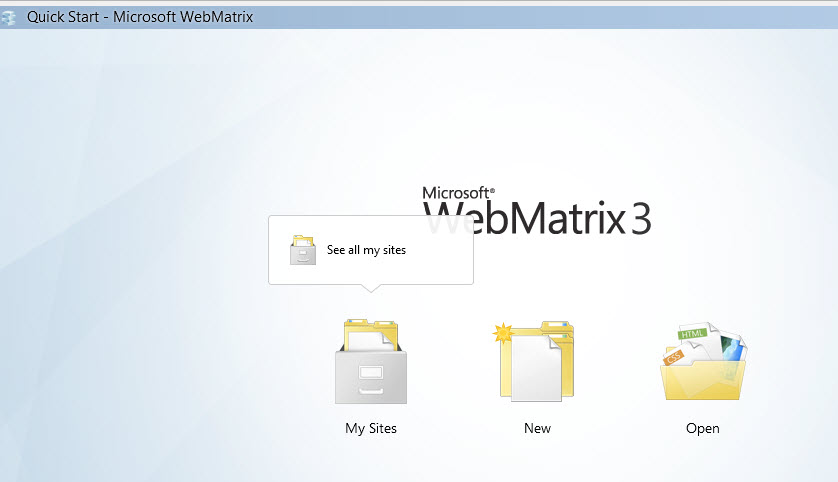
Press My Sites>See all my sites:
Select your Web App created at the beginning of this article:
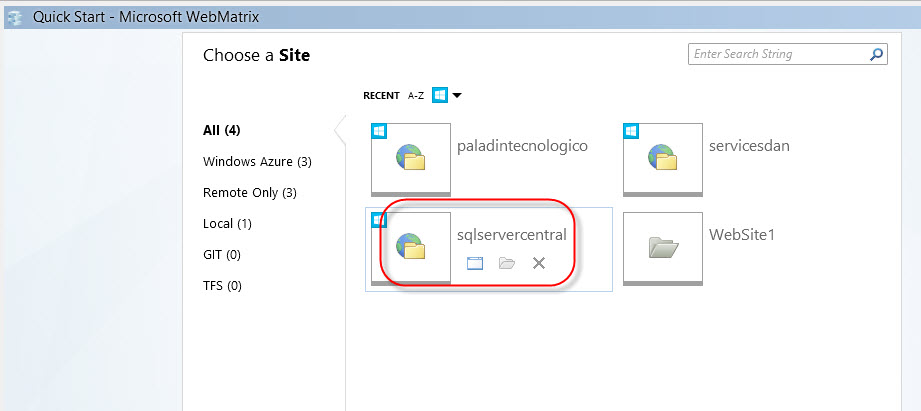
Right click on your site and select New File:
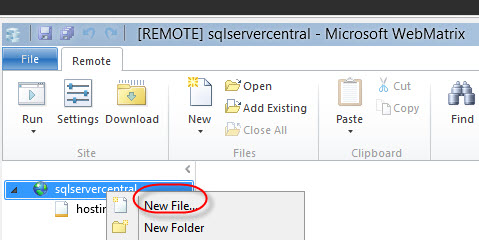
Press All(34) and select PHP. Specify a name for the PHP file:
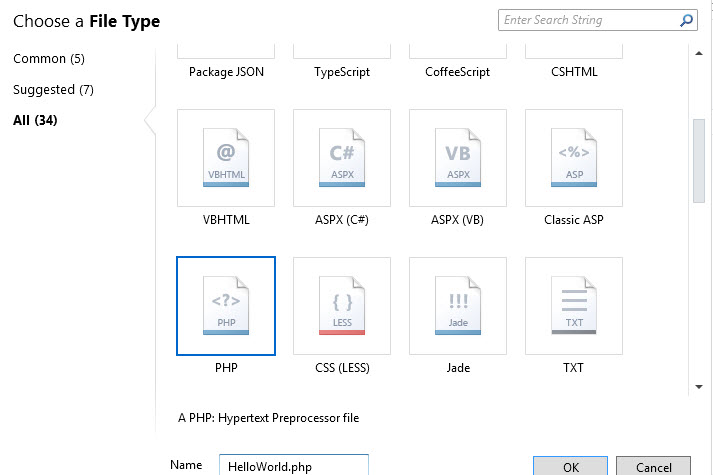
You can now edit the file:
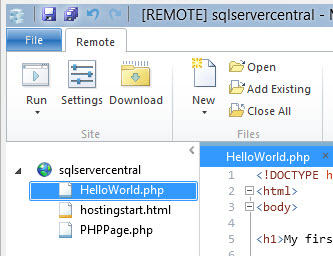
Add the following code (you can download the file in the Resource files section in the samples.zip file):
Helloworld.php
<!DOCTYPE html>

<html lang="en">
    <head>
        <meta charset="utf-8" />
        <title>Hello world sample</title>
    </head>
    <body>
 <?php
echo "Hello SQLServerCentral!";
?>
    </body>
</html>
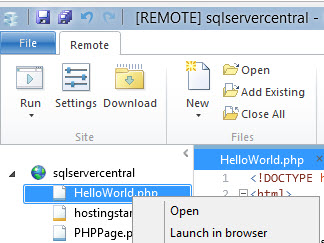
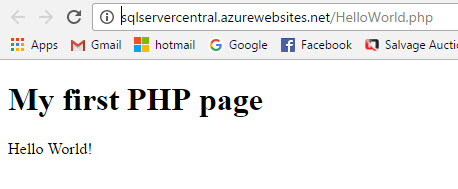
The code is a simple Hello SQLServerCentral message. Save the file and view the file in Azure. To view the php file in Azure, right click on the file and select Launch in browser:
Here it is your first PHP code in Azure!!
3. How to work with forms using PHP in Azure.
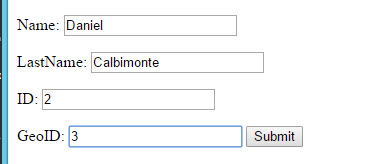
In the next example, we will show how to display information from HTML textboxes in PHP. We will create a Web form like this one:
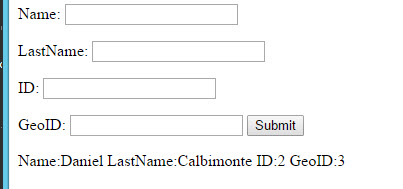
And when we press the Submit button, we will be able to print the information of the textboxes using PHP like this:
The code used will be the following (you can dowload the file in the Resource files section in the samples.zip file):
PHPForms.php
<!DOCTYPE html>

<html lang="en">
    <head>
        <meta charset="utf-8" />
        <title></title>
    </head>
<body>
    <form action="?action=show" method="post" enctype="multipart/form-data">
      <p>
        Name:
        <input name="Name" type="text" value="" />
      </p>
      <p>LastName:
        <input name="LastName" type="text" value="" />
      </p>
      <p>ID:
        <input name="ID" type="text" value="" />
      </p>
      <p>GeoID:
        <input name="GeoID" type="text" value="" />


        <input type="submit" name="Submit" id="Submit" value="Submit" />
      </p>
</form>
</body>
</html>
<?php
if(isset($_GET['action']))
{
    if($_GET['action'] == 'show')
    {
 print "Name:".$_POST['Name'] ."\tLastName:".$_POST['LastName'] . "\tID:".$_POST['ID'] . "\tGeoID:".$_POST['GeoID'] ."<br />\r\n";


}
}

?>
The form has an action named show and when we press the button, the PHP action is activated. Print is used to show the textboxes' values.
4. How to insert data to an Azure SQL Data WareHouse (ASDW) using PHP
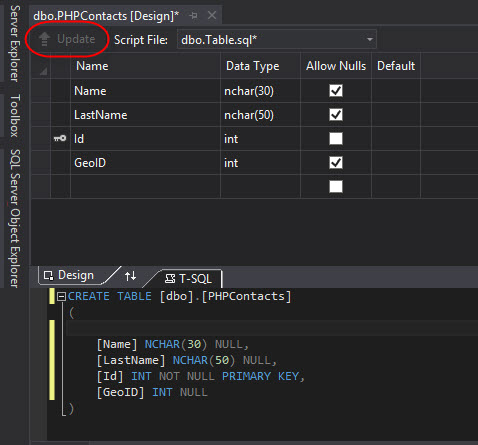
In this new example, we will connect to ASDW. We will create the following table using Visual Studio.
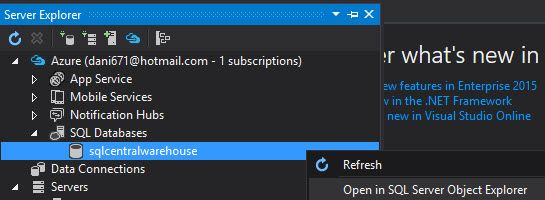
In Visual Studio, go to the Server Explorer and connect to your Azure SQL Datawarehouse and open the SQL Server Object Explorer:
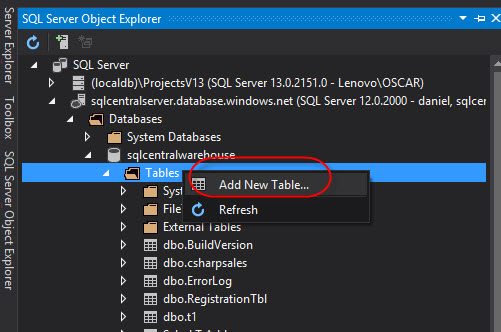
In the sqlcentralwarehouse (see the requirements if you do not have an ASDW database), right click Tables and select Add New Table:
We will create a table with the following information and press Update to create in Azure:
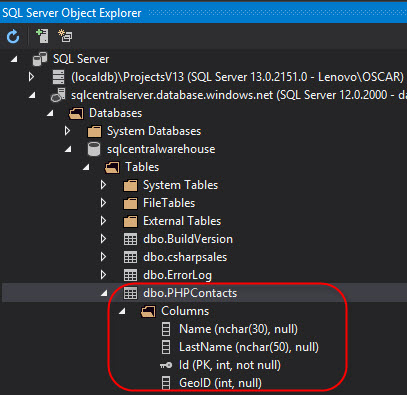
If everything is OK, you will be able to see the table in the SQL Server Object Explorer:
Now, we will create a form similar to this one and when we press the submit button, the values will be stored in our ASDW table named PHPContacts:
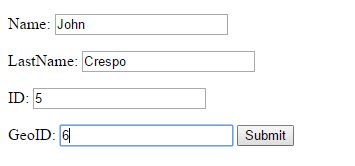
The code used for this purpose is the following:
insertdata.php
<!DOCTYPE html>

<html lang="en">
    <head>
        <meta charset="utf-8" />
        <title></title>
    </head>
<body>
    <form action="?action=insert" method="post" enctype="multipart/form-data">
      <p>
        Name:
        <input name="Name" type="text" value="" />
      </p>
      <p>LastName:
        <input name="LastName" type="text" value="" />
      </p>
      <p>ID:
        <input name="ID" type="text" value="" />
      </p>
      <p>GeoID:
        <input name="GeoID" type="text" value="" />


        <input type="submit" name="Submit" id="Submit" value="Submit" />
      </p>
</form>
</body>
</html>
<?php
/* Connect to SQL Azure */
$server = "tcp:sqlcentralserver.database.windows.net, 1433";
$user = "daniel";
$password = "MyPwd";
$databasename = "sqlcentralwarehouse";

$connectionoptions = array("Database" => $databasename,
                           "UID" => $user,
                           "PWD" => $password);

$connection = sqlsrv_connect($server, $connectionoptions);


try
{
if(isset($_GET['action']))
{
    if($_GET['action'] == 'insert')
    {
        /*Insert data.*/
        $insertSql = "INSERT INTO PHPContacts (Name, LastName, ID, GeoID) VALUES (?,?,?,?)";
        $parameters = array(&$_POST['Name'],
                        &$_POST['LastName'],
                        &$_POST['ID'],
                        &$_POST['GeoID'], );
        $stmt = sqlsrv_query($connection, $insertSql, $parameters);

            echo "Data registered successfully.</br>";
     }

  }
}
catch (Exception $e)
{
    echo 'Caught exception: ',  $e->getMessage(), "\n";
}

?>
</body>
</html>
We first specify the Azure Server Name, which is in this case sqlcentralserver.database.windows.net. You can get the server name in Visual Studio. The user and databases are created when you create Azure SQL Database. We use a try and a catch to handle errors. We insert the values of the textboxes into the PHPContacts table and after that, PHP sends a sucessful message.
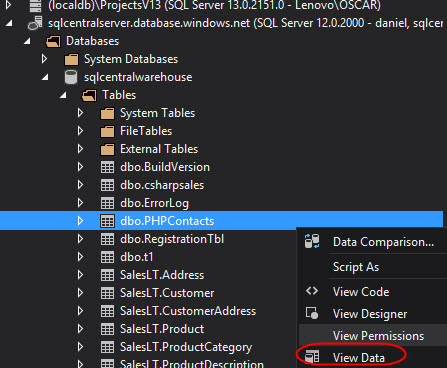
To verify that the data was inserted successfully, right click the table and select View Data:
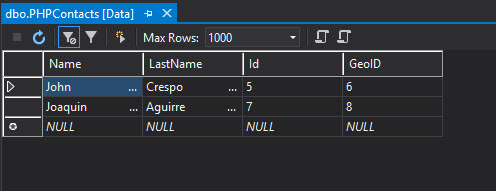
You will be able to see all the information inserted using PHP in Azure:
5. How to retrieve the information of the ASDW table in PHP
In the last example, we will see how to display the ASDW table information using an HTML table format using PHP.
The result displayed will be similar to this one:
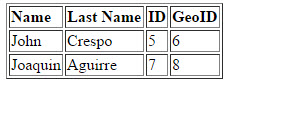
The code used is the following:
showdata.php
<html>
<head>
<Title>Show data</Title>
</head>
<body>


<?php
/* Connect to SQL Azure */
try
{
    $server = "tcp:sqlcentralserver.database.windows.net, 1433";
    $user = "daniel";
    $pass = "MyPwd";
    $database = "sqlcentralwarehouse";

    $connectionoptions = array("Database" => $database,
                           "UID" => $user,
                           "PWD" => $pass);

    $conn = sqlsrv_connect($server, $connectionoptions);
    if($conn === false)
    {
        die(print_r(sqlsrv_errors(), true));
    }


/*Display registered people.*/
$query = "SELECT * FROM PHPContacts";
$statement = sqlsrv_query($conn, $query);


if(sqlsrv_has_rows($statement))
{
    print("<table border='1px'>");
    print("<tr><td><strong>Name</strong></td>");
    print("<td><strong>Last Name</strong></td>");
    print("<td><strong>ID</strong></td>");
    print("<td><strong>GeoID</strong></td></tr>");
    while($row = sqlsrv_fetch_array($stmt3))
    {

        print("<tr><td>".$row['Name']."</td>");
        print("<td>".$row['LastName']."</td>");
        print("<td>".$row['Id']."</td>");
        print("<td>".$row['GeoID']."</td></tr>");
    }
    print("</table>");
}
}
catch (Exception $e)
{
    echo 'Caught exception: ',  $e->getMessage(), "\n";
}
?>


</body>
</html>
We are using an HTML table and the headers are in bold (using the strong tag). We use the sqlserv_fetch_array to get the information for each row using a while.
The query used is a select * from PHPContacts to get information from the ASDW.
Conclusion
In this article, we learned PHP from 0. We started with a simple Hello world example, we learned how to create our first PHP file in Azure and then we learned how to get information from ASDW.
As you can see, working with Azure is an intuitive and simple process.


