

Introduction
In the previous article, we learned how to install a SQL Server instance with basic parameters like InstanceName, Features, SourcePath, SQLSysAdminAccounts, etc using Powershell DSC. In this article, we'll discover how to enhance our SQL Server installation with additional configurations. We'll cover things like setting up service account credentials, custom installation directories, configuring TempDB and backup locations, defining user database paths, and more using Powershell DSC. We will also explore how to install other SQL-related services like Integration Services, Analysis Services, and Reporting Services, all using the simplicity and power of PowerShell DSC.
Integration Services (SSIS - SQL Server Integration Services) is a tool for building data integration and ETL (Extract, Transform, Load) processes to extract data from various sources, transform it into a usable format, and load it into a data store or data warehouse. Analysis Services (SSAS - SQL Server Analysis Services) is used for multidimensional data modeling and analysis. It allows users to create data cubes, define measures, and perform complex data analysis to gain insights from the data. Reporting Services (SSRS - SQL Server Reporting Services) is a platform for designing, creating, and delivering reports. It enables you to generate and distribute formatted reports containing data from various sources, making it a valuable tool for data visualization and sharing insights with stakeholders.
Environment
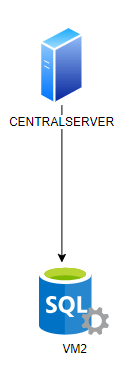
For the demo part, we use two servers named CENTRALSERVER and VM2.
- CENTRALSERVER - the server from which the DSC script is initiated.
- VM2 - the server where we install the SQL Server using the DSC.
SQL Server DSC Module Installation
Let us prepare the environment for DSC, including installing PowerShell DSC and SQL Server prerequisites in CENTRALSERVER. Open a PowerShell command line or PowerShell ISE tool as Run as Administrator. Then run this code:
# Install PowerShell Desired State Configuration (DSC)
Install-Module -Name SqlServerDsc
You may get this pop-up while installing the SqlServerDsc module. Click Yes to continue.

A folder with the module, named SqlServerDsc, will be created in the location C:\Program Files\WindowsPowerShell\Modules as shown below.

Download the SQL Server Media File
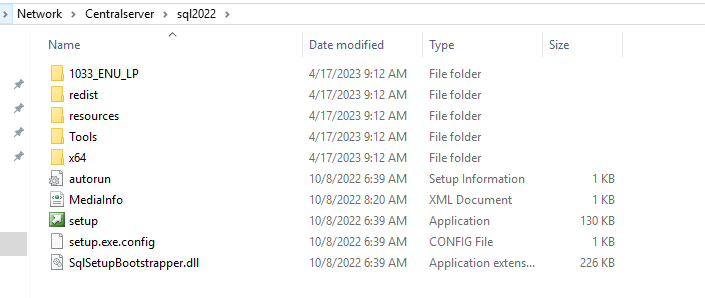
For the demo purpose, we downloaded the SQL Server 2022 ISO from Microsoft site to C:\Downloads. Extract it to a shared folder that is accessible to both CENTRALSERVER and VM2.
In our case, we created a folder named C:\SQL2022 folder in CENTRALSERVER and made it a shared folder granting access to everyone. However, it is advisable to grant access only to the user performing the SQL Server installation. The shared folder in our case is \\Centralserver\sql2022
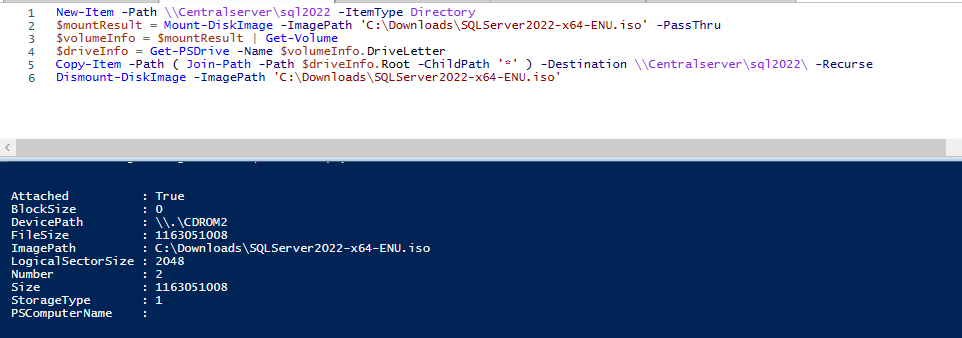
The below script can be used to extract the iso files to the shared folder \\Centralserver\sql2022.
New-Item -Path \\Centralserver\sql2022 -ItemType Directory
$mountResult = Mount-DiskImage -ImagePath 'C:\Downloads\SQLServer2022-x64-ENU.iso' -PassThru
$volumeInfo = $mountResult | Get-Volume
$driveInfo = Get-PSDrive -Name $volumeInfo.DriveLetter
Copy-Item -Path ( Join-Path -Path $driveInfo.Root -ChildPath '*' ) -Destination \\Centralserver\sql2022\ -Recurse
Dismount-DiskImage -ImagePath 'C:\Downloads\SQLServer2022-x64-ENU.iso'
The output of the script looks like the below one.
Create a DSC Configuration File
Next, you need to create a DSC configuration file that defines the desired state of the SQL Server installation. This file includes multiple resources inside the Node resource like SQLInstall, SqlMemory, SqlProtocolTcpIp, and SqlRSSetup for setting up configurations for the SQL server installation, SQL Server Memory configuration, Port number configuration, and Reporting Services installation, respectively.
All the available parameters and usages that can be used in the WindowsFeature, SQLSetup, SQLMemory, SqlProtocolTcpIP, and SqlRSSetup resources are available on the SQLServerDSC GitHub page.
The below PowerShell script creates the configuration function, named InstallSQLServer. SqlSetup resource in the DSC configuration file includes the parameters to mention the instance name, Features to be installed like SQLENGINE, Integration Services, Analysis services, different service accounts, installation directories, and other options to be configured while SQL Server installation. SQLMemory resource includes the memory options like min and max memory settings. SQLRSSetup includes the parameters that are required to configure the Reporting Services.
Configuration InstallSQLServer
{
Import-DscResource -ModuleName SqlServerDsc
Import-DscResource –ModuleName 'PSDesiredStateConfiguration'

$password = "######" | ConvertTo-SecureString -asPlainText -Force
$username = "LAB\PSUser"
[PSCredential] $SqlAdministratorCredential = New-Object System.Management.Automation.PSCredential($username,$password)


   Node VM2
    {
       WindowsFeature 'NetFramework45'
          {
                Name   = 'NET-Framework-45-Core'
                Ensure = 'Present'
          }

      SqlSetup SQLInstall
         {
            InstanceName = "MSSQLSERVER"
            Features = "SQLENGINE,IS,AS"
            SourcePath = "\\Centralserver\sql2022"
            SQLSysAdminAccounts = @("LAB\Administrator","LAB\DBAs","LAB\PSUser")
            ASSvcaccount=$SqlAdministratorCredential
            ISSvcAccount=$SqlAdministratorCredential
            ASSYSADMINACCOUNTS=@("LAB\Administrator","LAB\DBAs","LAB\PSUser")
            SQLCollation         = 'SQL_Latin1_General_CP1_CI_AS'
            SQLSvcAccount        = $SqlAdministratorCredential
            AgtSvcAccount        = $SqlAdministratorCredential
            InstallSharedDir     = 'C:\Program Files\Microsoft SQL Server'
            InstallSharedWOWDir  = 'C:\Program Files (x86)\Microsoft SQL Server'
            InstanceDir          = 'C:\Program Files\Microsoft SQL Server'
            InstallSQLDataDir    = 'C:\Program Files\Microsoft SQL Server\MSSQL13.MSSQLSERVER\MSSQL\Data'
            SQLUserDBDir         = 'C:\Program Files\Microsoft SQL Server\MSSQL13.MSSQLSERVER\MSSQL\Data'
            SQLUserDBLogDir      = 'C:\Program Files\Microsoft SQL Server\MSSQL13.MSSQLSERVER\MSSQL\Data'
            SQLTempDBDir         = 'C:\Program Files\Microsoft SQL Server\MSSQL13.MSSQLSERVER\MSSQL\Data'
            SQLTempDBLogDir      = 'C:\Program Files\Microsoft SQL Server\MSSQL13.MSSQLSERVER\MSSQL\Data'
            SQLBackupDir         = 'C:\Program Files\Microsoft SQL Server\MSSQL13.MSSQLSERVER\MSSQL\Backup'
            #ASServerMode         = 'TABULAR'
            ASConfigDir          = 'C:\MSOLAP\Config'
            ASDataDir            = 'C:\MSOLAP\Data'
            ASLogDir             = 'C:\MSOLAP\Log'
            ASBackupDir          = 'C:\MSOLAP\Backup'
            ASTempDir            = 'C:\MSOLAP\Temp'
            UpdateEnabled        = 'False'
            ForceReboot          = $false

            PsDscRunAsCredential = $SqlAdministratorCredential

            DependsOn            =  '[WindowsFeature]NetFramework45'

         }
      SqlMemory Set_SQLServerMaxMemory_To12GB
        {
            Ensure               = 'Present'
            DynamicAlloc         = $false
            MinMemory            = 1024
            MaxMemory            = 1024
            ServerName           = $AllNodes.Nodename
            InstanceName         = 'MSSQLSERVER'
            #PsDscRunAsCredential = $DomainCreds
            DependsOn = '[SqlSetup]SQLInstall'
        }


       SqlProtocolTcpIp 'SqlProtocolTcpIp_IPAll' {
           InstanceName           = 'MSSQLSERVER'
           Enabled                = $true
           IpAddressGroup         = 'IPAll'
           TcpPort                = 1999

    }

      SqlRSSetup 'InstallDefaultInstance'
        {
            InstanceName = 'SSRS'
            IAcceptLicenseTerms = 'Yes'
            SourcePath =  '\\Centralserver\sql2022\SSRS\SQLServerReportingServices.exe'
            Edition = 'Development'

            PsDscRunAsCredential = $SqlAdministratorCredential
        }
}
}
Another important thing to note is that if you use the credential password in plain text in your DSC configuration, we should add the below code in the script before compiling the DSC configuration file. Try to remove the mof file if you have the password mentioned in it in plain text.
# Setup our configuration data object that will be used by our DSC configurations
$config = @{
    AllNodes = @(
        @{
            NodeName = 'VM2'
            PSDscAllowPlainTextPassword = $true
            PsDscAllowDomainUser = $true
         }
    )
}
Compile the DSC Configuration File
After creating the DSC configuration file, you need to compile it into a MOF (Managed Object Format) file. This file is used to configure the server and install SQL Server.
Here is the PowerShell script to compile the DSC configuration file. Create a folder named C:\DSC for saving the MOF file. Then run the compilation.
# Compile the DSC configuration file
InstallSQLServer -OutputPath "C:\DSC"
This script creates the mof file in the C:\DSC folder named VM2.mof
Apply the DSC Configuration
Once you have the MOF file, you can apply the DSC configuration to the server using PowerShell. This will initiate the installation of the SQL Server, and DSC will ensure that the installation is completed according to the defined configuration. Here is an example PowerShell script to apply the DSC configuration:
# Apply the DSC configuration
Start-DscConfiguration -Path "C:\DSC" -Wait -Verbose -Force
The below image shows the status when the installation gets kicked off

The below image shows when the installation is completed

Reboot the server.
Verify the Installation
After the installation is complete, you should verify that SQL Server is installed and configured correctly. Also should check for the installation of Integration Services, Analysis Services, and Reporting Services. You can do this by connecting to SQL Server using SQL Server Management Studio and verifying that the databases and features you specified in the DSC configuration are present.
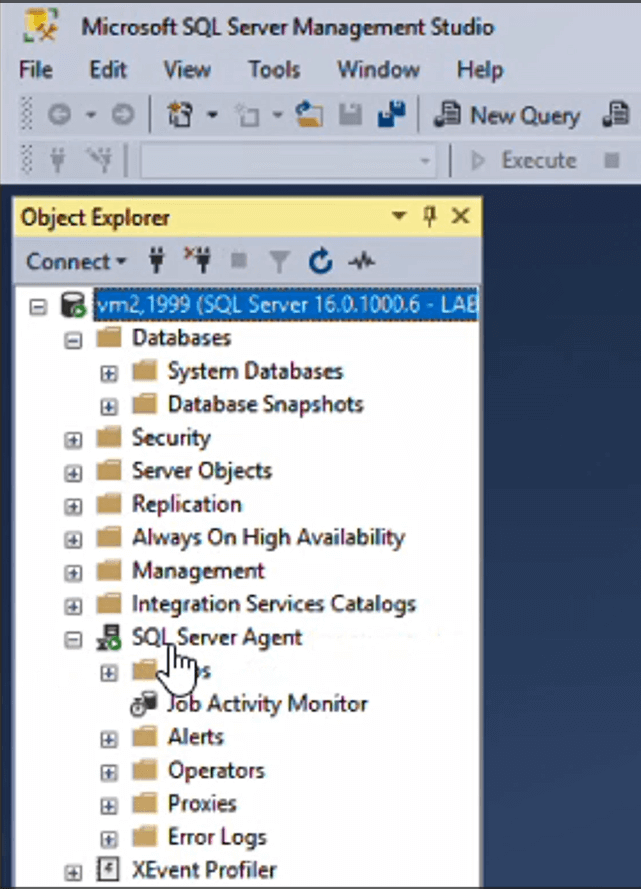
SQL Server Engine, Analysis Services, Integration Services verification
Go to SQL Server Configuration Manager and ensure SQL Server Engine, Integration Services, Analysis Services, and Reporting Services are installed.

Connect to SSMS with the connection string VM2,1999 and ensure the connectivity as shown below.
Reporting Services Installation verification
Go to Report Server Configuration Manager which will take you to the below page.
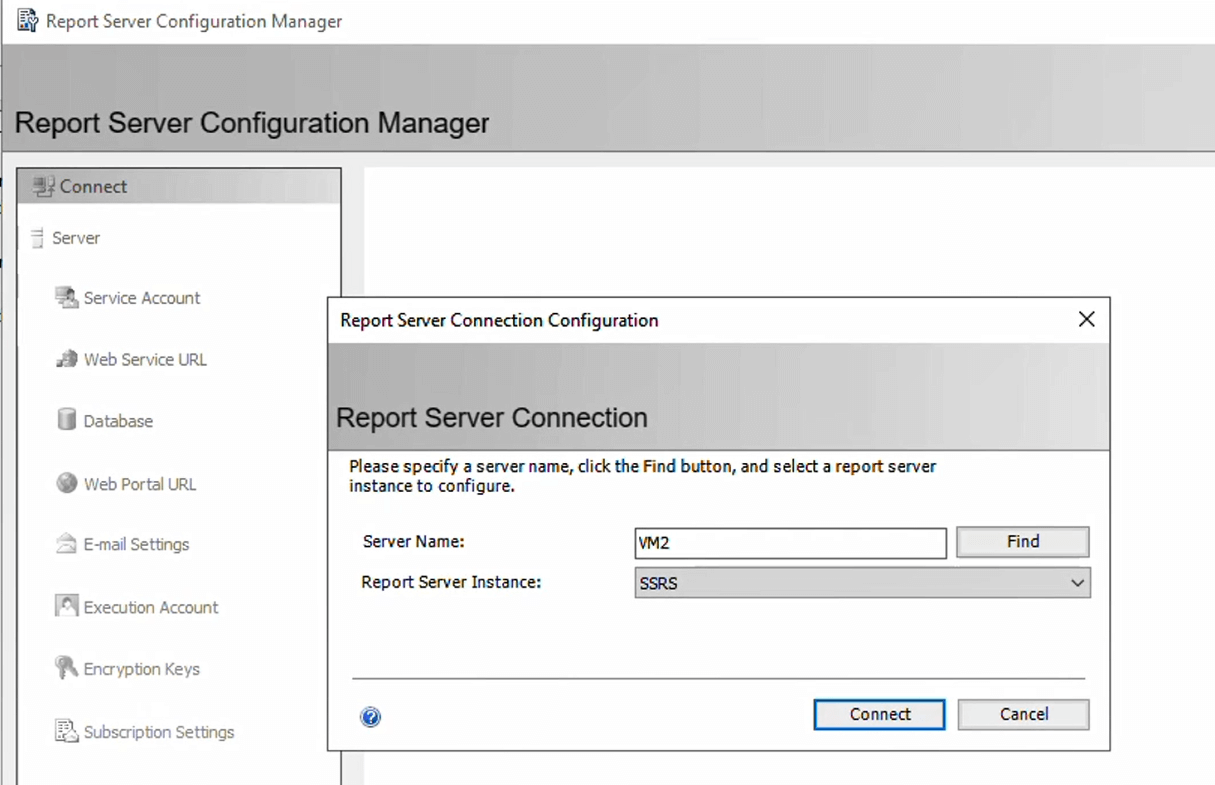
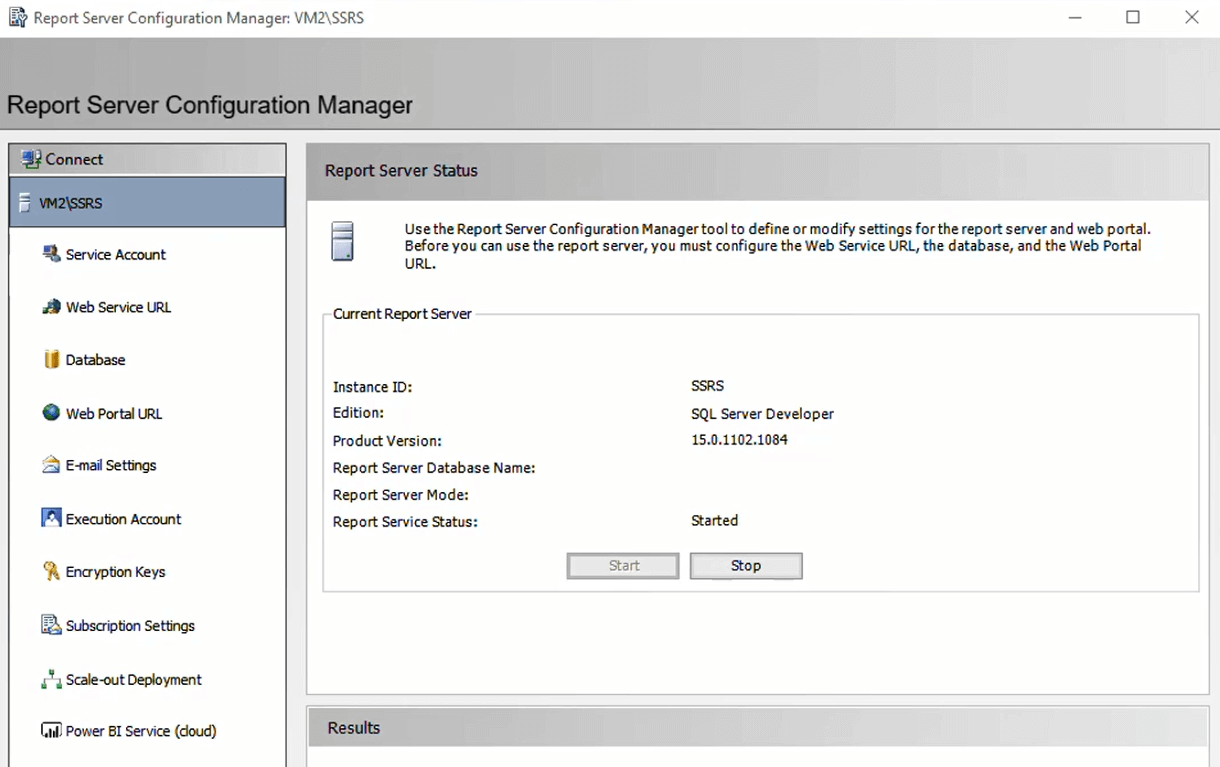
Click on 'Connect' and ensure the Services are in the start state like the below image.
Port number verification
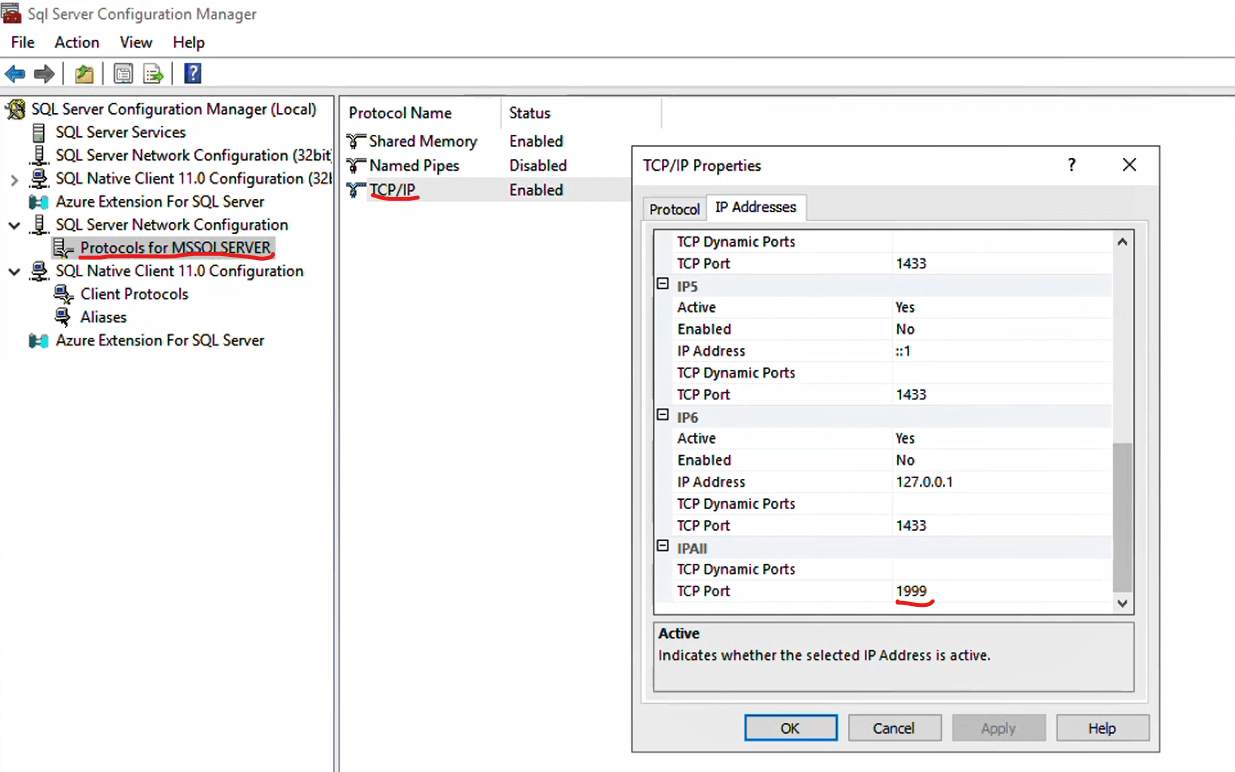
Begin by accessing SQL Server Configuration Manager, where you'll find the necessary options. Navigate to the SQL Server Network Configuration section, specifically selecting 'Protocols for MSSQLSERVER.' Right-click on the TCP/IP protocol located on the right side of the interface. To confirm that the port number is set correctly, proceed to the IPAll option and ensure it is configured to your desired port number, which in this case is 1999. These steps are essential to guarantee that your SQL Server is appropriately configured to use the intended port for communication, making sure your system functions as expected.
Summary
The article provides a step-by-step guide on how to use PowerShell Desired State Configuration (DSC) to install SQL Server in a remote server from another server with SQL Services like Integration Services, Analysis Services, and Reporting Services with multiple SQL Server parameters specified.