Introduction
This article will show eight ways to export rows from a T-SQL query to a txt file. We will show the following options:
- Shows results to a file in SQL Server Management Studio (SSMS)
- SQLCMD
- PowerShell
- Import/Export Wizard in SSMS
- SSIS Wizard (almost the same than the number 4, but we are using SSDT instead of SSMS to create the package).
- C#
- SSRS
- BCP
Requirements
You need a SQL Server Installed with SSIS and SQL Server Data Tools (SSDT).
Getting Started
Let's look at each of the ways we can export the results of a query.
1. Show results to a file in SSMS
In the first option, we will configure SSMS to display the query results to a txt file. We will use the following script, named myscript.sql:
USE [AdventureWorks2016CTP3]
GO
SELECT TOP 5 [BusinessEntityID]
      ,[NationalIDNumber]
      ,[OrganizationNode]
      ,[OrganizationLevel]
  FROM [HumanResources].[Employee]
GO
The result displayed in SQL Server Management Studio (SSMS) is the following:
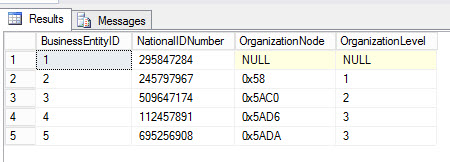
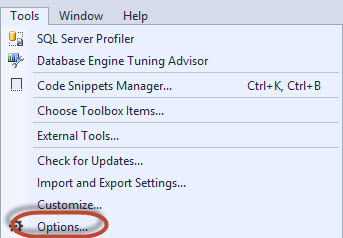
If you want to save the results in a txt file, you can do this in SSMS. Go to Tools>Options:
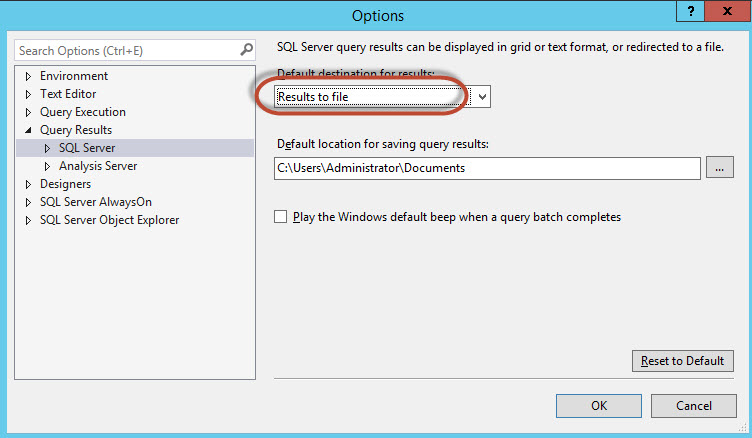
Select the option Result to file:
Create a query and execute the query. An option to specify the name and path will be displayed. We will call the results in a file named Results.rpt:

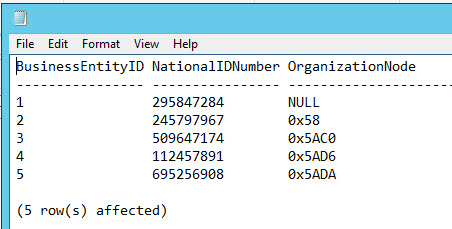
The result saved are the following:
2. SQLCMD
SQLCMD is the SQL Server Command Line utility. You can save the results in a file from here. This option is useful when you are using batch files to automate tasks.
Use the following command in the cmd:
sqlcmd -i c:\sql\myquery.sql -o c:\sql\myoutput.txt
The command used the myquery.sql file created before and the output is store to the file myoutput.txt:

3. PowerShell
PowerShell is an extremely popular command line shell to automate tasks. We can export the SQL Server query results to a txt file by executing the following cmdlets:
Invoke-Sqlcmd -InputFile "C:\sql\myquery.sql" | Out-File -filePath "C:\sql\powershelloutput.txt"
Invoke-Sqlcmd will call the script myquery.sql created at the beginning of this article and store the results in a file named powershelloutput.txt. The results will be the following:

4. Import/Export Wizard in SSMS
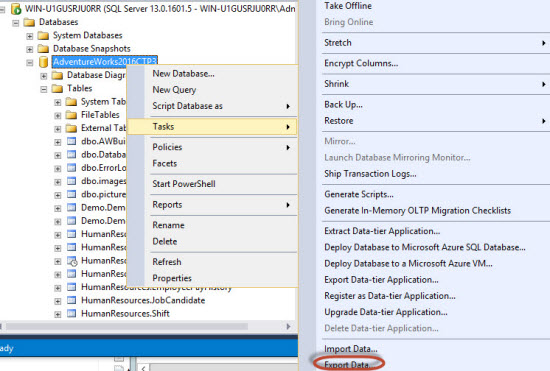
In SSMS, when you right click a database. There is an option to import or export data. Go to Tasks>Export Data:
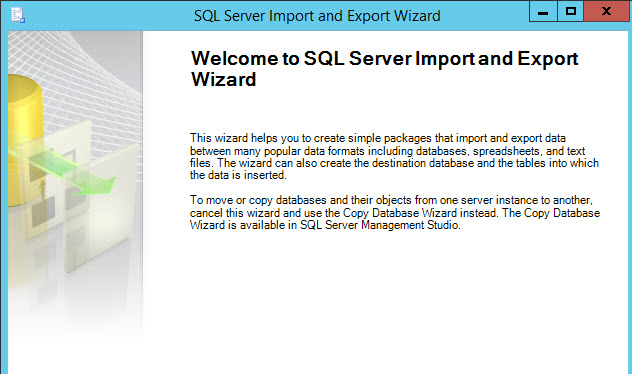
You will open the SQL Server Import and Export wizard:
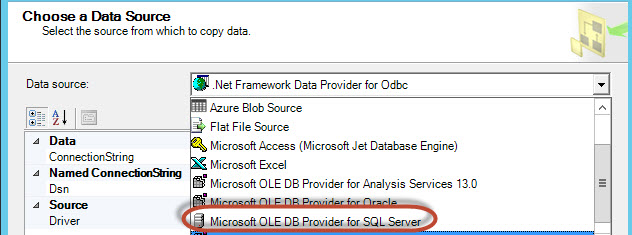
We will export from SQL Server to a Flat file. Select the Microsoft OLE DB Provider as the Data Source:
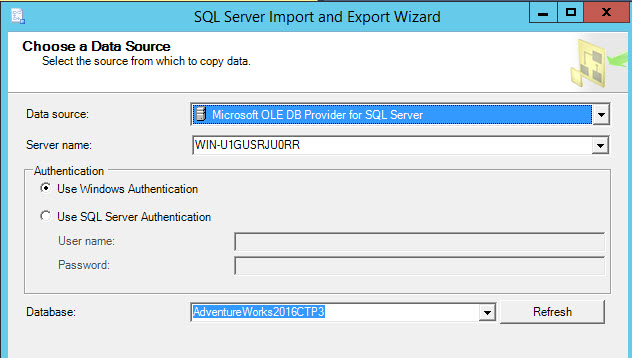
Specify the Server name and the connection information if necessary:
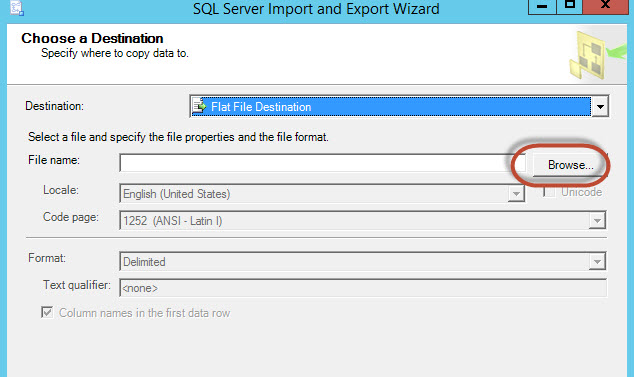
In Destination, select Flat File Destination and press browse to specify the file name and path:
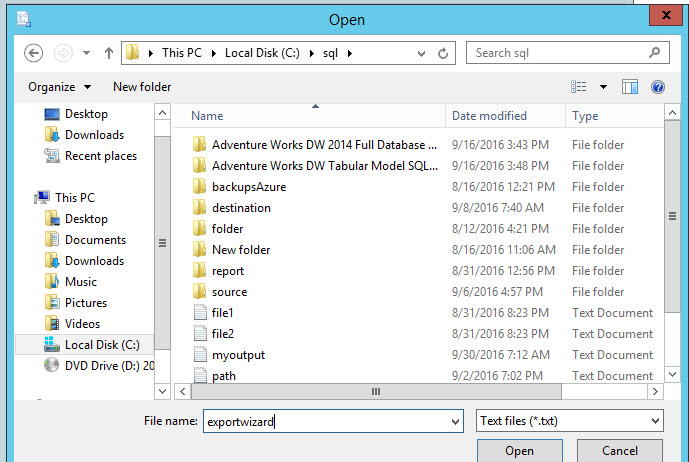
In this example, the flat file name will be exportwizard.txt:
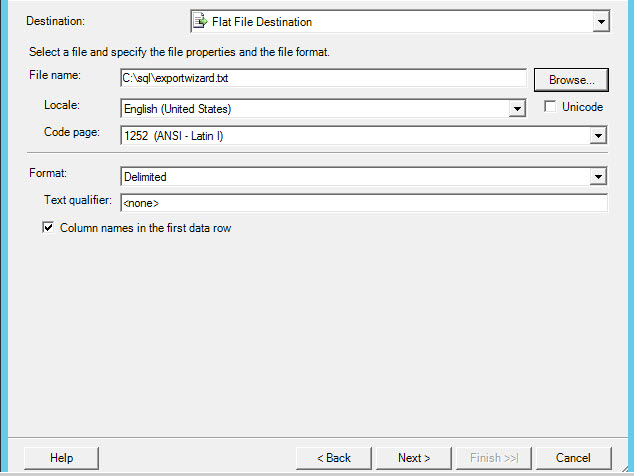
Once that you have the file name and path, press next:
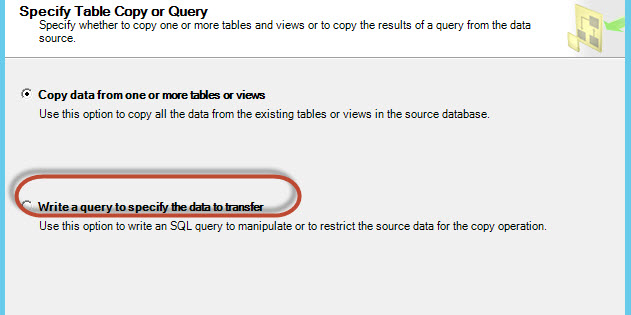
Select the option "Write a query to specify the data to transfer":
Specify the query of the file myquery.sql (used in other methods) and press parse to verify that the query is OK. A message specifying that the statement is valid should be displayed:

Keep the default values:

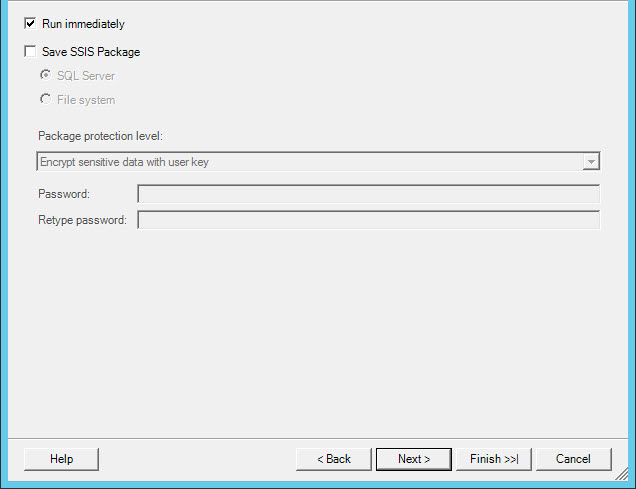
Select Run immediately to export the data immediately:
The file created will be similar to this one:

5. SSIS in SSDT
You can also use SSIS in SSDT. This method is similar to the Import/Export Wizard in SSMS, because SSMS calls SSIS to import and export Data.
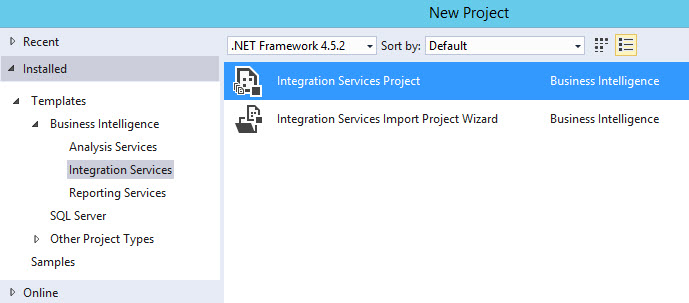
Go to SSDT and then go to File>New Project and select Integration Services Project:
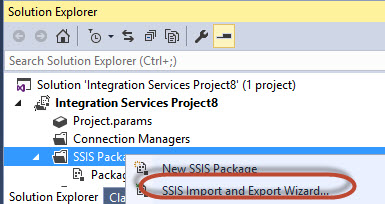
In Solution Explorer, right click SSIS Packages and select SSIS Import and Export Wizard:
The next steps are the same than in SSMS when we call the Import/Export wizard, but at the end, you do not have the option to run immediately.
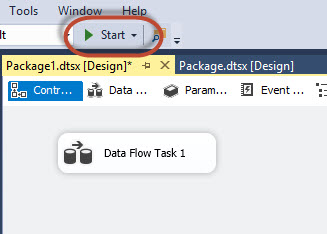
To run the package, press Start:
The package will generate a text file with the CSV format.
6. C#
You can export from SQL Server to a text file using C#. You could also perform a similar task using Visual Basic. In this example, we will use the Script task included in SSDT. This option is very useful if you are writing code and you need to integrate this task to the code.
To do this, in SSDT, drag and drop the Script Task:

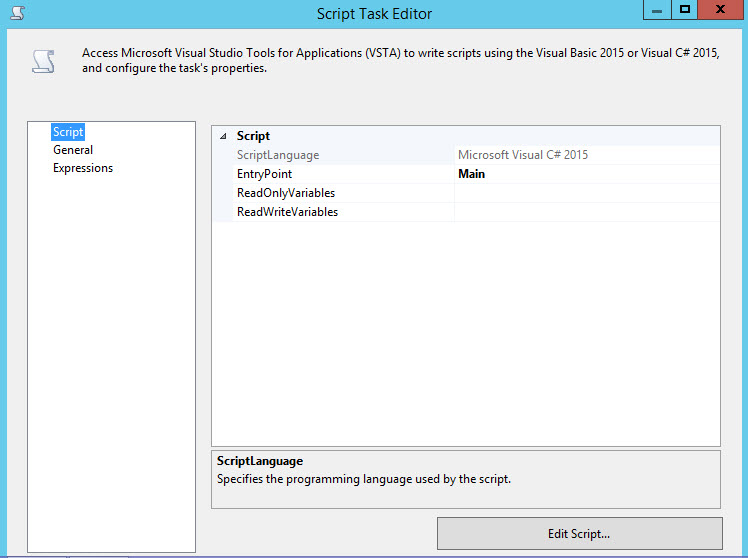
Double click Script Task and press the Edit Script button:
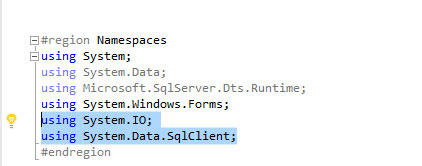
In #region Namespaces add System.IO and Data.SqlClient. Sysem.IO is used to write information to a file (in this scenario a txt file) and Data.SqlClient is used to connect to SQL Server:
In the Script in the region where is says add your code here, add the following code:
// TODO: Add your code here
                string query = "SELECT TOP 5 [BusinessEntityID],[NationalIDNumber],[OrganizationNode],[OrganizationLevel] FROM [HumanResources].[Employee]";
                string connectionSql = "Server=(local);Database=AdventureWorks2016CTP3;Integrated Security=true";
                StreamWriter myFile = new StreamWriter(@"c:\sql\fileCSharp.txt");

                using (SqlConnection connection = new SqlConnection(connectionSql))
                {
                    SqlCommand command = new SqlCommand(query, connection);
                    connection.Open();
                    SqlDataReader reader = command.ExecuteReader();
                    try
                    {
                        while (reader.Read())
                        {
                            myFile.WriteLine(String.Format("{0}, {1}, {2}, {3}",
                            reader["BusinessEntityID"], reader["NationalIDNumber"], reader["OrganizationNode"], reader["OrganizationLevel"]));
                        }
                    }
                    catch (Exception ex)
                        {
                            MessageBox.Show(ex.ToString());
                            Dts.TaskResult = (int)ScriptResults.Failure;
                        }
                    finally
                        {
                            reader.Close();
                            myFile.Close();
                        }
                }
The first line is to specify the T-SQL Query:
string query = "SELECT TOP 5 [BusinessEntityID],[NationalIDNumber],OrganizationNode],[OrganizationLevel] FROM [HumanReources][Employee]";
The second line is to specify the connection information (SQL Server name, database name and Authentication method):
string connectionSql = "Server=(local);Database=AdventureWorks2016CTP3;Integrated Security=true";
The third line is to specify the text file path:
StreamWriter myFile = new StreamWriter(@"c:\sql\fileCSharp.txt");SqlCommand command = new SqlCommand(query, connection);
We will use the SQL Connection and the query and open the connection:
using (SqlConnection connection = new SqlConnection(connectionSql))
        {
                    SqlCommand command = new SqlCommand(query, connection);
                    connection.Open()
The try structure is used to handle exceptions. The line with "while(reader.Read())" is used to read row by row the results of the SQL Query. myFile.WriteLine will write to the txt file all the information from SQL Server:
try
{
      while (reader.Read())
      {
            myFile.WriteLine(String.Format("{0}, {1}, {2}, {3}",
            reader["BusinessEntityID"], reader["NationalIDNumber"], reader["OrganizationNode"], reader["OrganizationLevel"]));
      }
}
"Catch" is used to catch the exception errors. This is used to handle errors. MessageBox.Show will show the error and Dts.TaskResult will show a failure red color if it fails. This code is used when an exception error is generate by the package.
Finally, we will chose the file and SQL Server connection with Reader.Close and myFile.Close:
catch (Exception ex)
{
        MessageBox.Show(ex.ToString());
        Dts.TaskResult = (int)ScriptResults.Failure;
}
finally
{
        reader.Close();
        myFile.Close();
}
7. Reporting Services
Another option is to create a Report in SQL Server Reporting Services and save it as CSV. Reporting Services allows you to save reports in PDF, Excel, XML, MHTML, Word, CSV, PowerPoint and TIFF format. If the presentation is important, Reporting Services is the best option.
In SSDT, go to File>New Project and select Report Server Project Wizard:

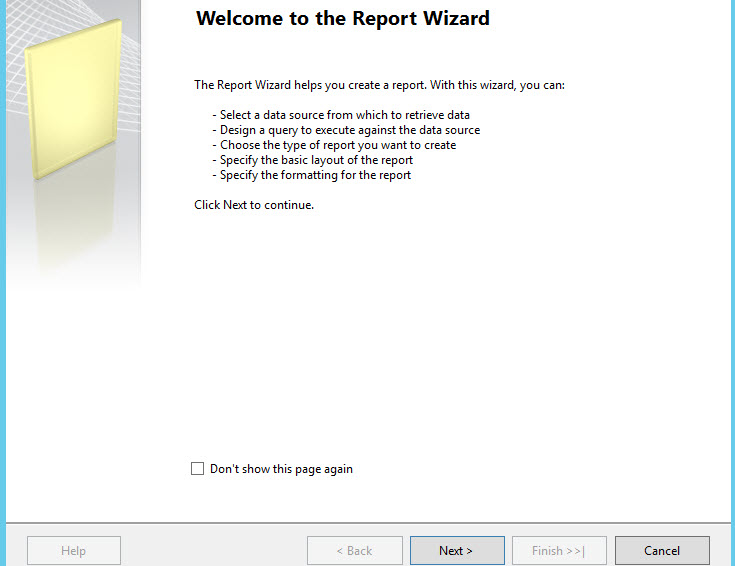
A Welcome wizard will be displayed. Click next:
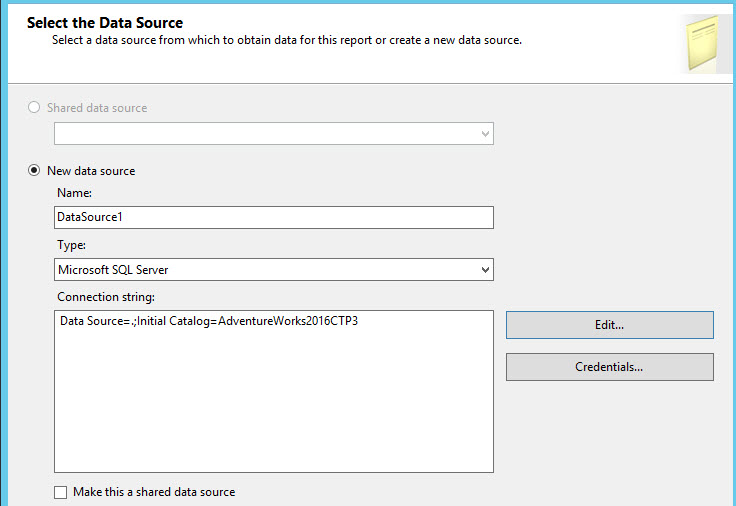
Specify the connection the SQL Server and Database. In this example, we are connecting to the local SQL Server and the AdventureWorks2016CTP3 database:
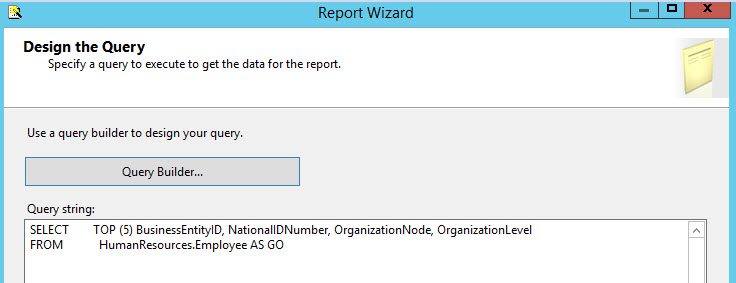
Specify the query:
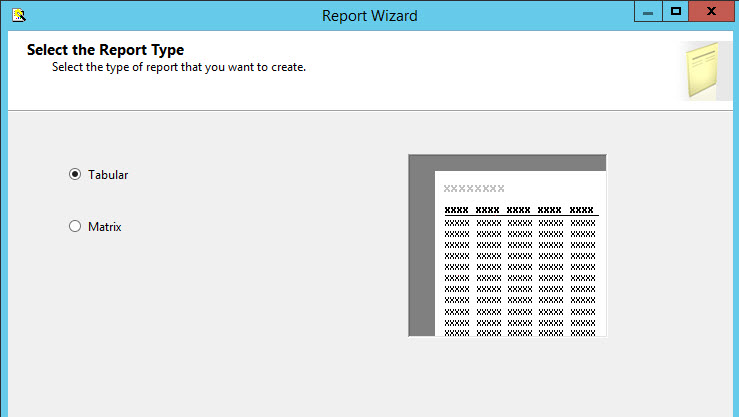
Select the Tabular Report Type:
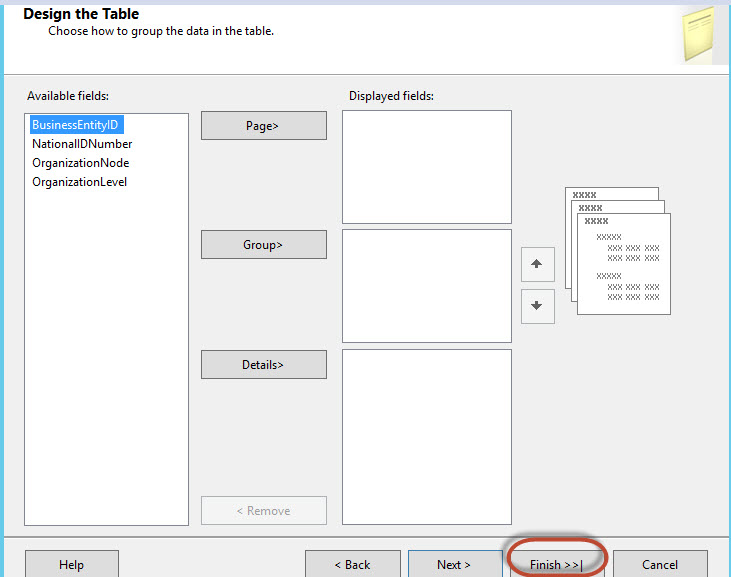
In "Design the table", press Finish:
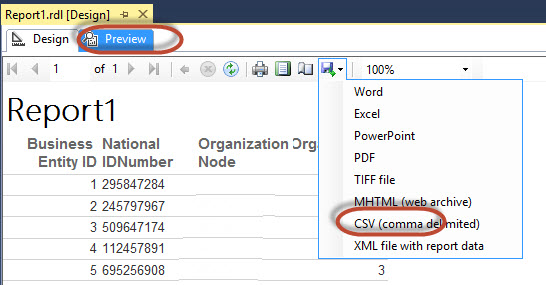
Press Preview and in the Save icon, select CSV (comma delimited) to save the file with the csv extension:
8. BCP
BCP is the Bulk Copy Program that comes with SQL Server. It is used to import data from a data file to SQL Server or from SQL Server to a data file. It is a very fast option. Use it if you have millions of rows and you need to use the command line or if it is easy to call the command line from your program or script.
The following example uses bcp to export the query results to a file named bcp.txt. -T is used to specify that we are using a Trusted Connection (Windows Connection) and -c is used to perform an operation of data type:
bcp "SELECT TOP 5 [BusinessEntityID],[NationalIDNumber],[OrganizationNode],[OrganizationLevel] FROM AdventureWorks2016CTP3.[HumanResources].[Employee] WITH (NOLOCK)" queryout c:\sql\bcp.txt -c -T
Conclusions
There are many other ways to export results. However, these options will inspire you to use other ones.
To resume, here you have some tips about when to use them:
1. SSMS destination to file option - This is the easiest option. Used if you do not need to automate anything and you just one a txt report immediately.
2. SQLCMD - Use it when you have a batch file or if you are using the command line to automate several tasks.
3. PowerShell - Use it when you are automating tasks with PowerShell or when you are using tools to call PowerShell scripts.
4. Import/Export Wizard in SSMS - Use it when you have millions of rows to copy files. It is a very fast option specialized in exporting and importing data from multiple sources.
5. SSIS Wizard (almost the same than the number 4, but we are using SSDT instead of SSMS to create the package). It is similar to 4, but it can be customized and you can create really complex packages integrated with Web services, send mails, PowerShell and more. Use it if you need a complex solution that requires integration between multiple tools.
6. C# - Use it when you have code for other tasks and you need to integrate with other lines of code in C#.
7. SSRS - SSRS is useful to create a nice customized report. Use it when the presentation is important.
8. BCP - It is a very fast option. Use it for large volumes of data.
References


