Introduction
SQL Server 2005 Integration Services (SSIS) is a flexible data-related development platform. In all computer languages flexibility is proportional to complexity and SSIS is no exception.
In this article I will discuss three parts of SSIS that I often use together:
· The Execute SQL Task Resultset property
· Variables of the Object data type
· Foreach Loop Containers
The Execute SQL Task Resultset Property
Execute SQL Tasks provide lots of cool functionality in SSIS. A lot of the power of this task is misunderstood or underused in SSIS packages – even by experienced SSIS developers. The task is able to execute any SQL statement using a host of data access providers including:
· Excel
· OLEDB
· ODBC
· ADO
· ADO.Net
· SqlMobile
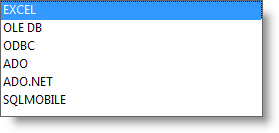
Figure 1: Execute SQL Task ConnectionType Property Options
I recently learned from Carol Rucker how to improve the performance of SQL Server stored procedure calls. To do this use the ADO.Net ConnectionType – connected to an ADO.Net Connection Manager. Set the IsQueryStoredProcedure property to True and enter a stored procedure name in the SQLStatement property as shown in Figure 2, and configure the Parameters for the stored procedure using parameter names as show in Figure 3.

Figure 2: Configuring a Stored Procedure Call

Figure 3: Configuring Stored Procedure Parameters
Executing a SQL Server stored procedure using this method is about twice as fast as executing an Exec T-SQL statement as demonstrated in the Execution Results shown in Figure 4. Thanks Carol!
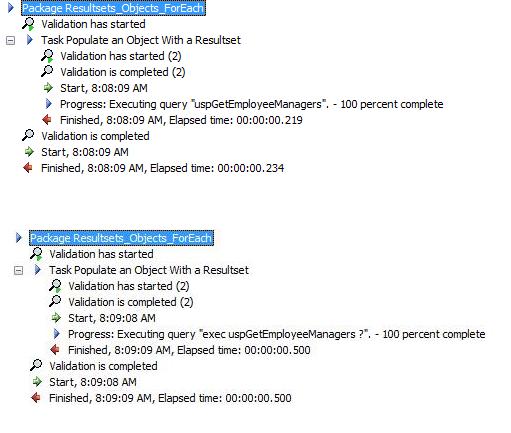
Figure 4: Execution Results of ADO.Net Stored Procedure vs. OLE DB Exec T-SQL Statement
Like everything else related to database development, this is pretty simple and cool – once you know about it! J
When you execute a SQL statement using an Execute SQL Task, whether it’s a stored procedure or not, you sometimes get the results of a Select statement. SSIS can store these results in a variable of the Object data type.
Let’s walk-through an example: Create a new SSIS project and rename the Package.dtsx package object to “Resultsets_Objects_ForEach.dtsx”. Drag an Execute SQL Task onto the Control Flow. Double-click the task to open the editor. Leave the ConnectionType property set to OLE DB and click the Connection property dropdown to select <New Connection…>.
On the Configure OLE DB Connection Manager form, create a connection to a local database. In this example, I am using the SQL Server 2005 AdventureWorks database available from www.codeplex.com. After the Connection Manager is configured, click OK to return to the Execute SQL Task editor.
Add the following T-SQL statement to the SQLStatement property:
 Select
   ContactID
  ,Title
  ,FirstName
  ,MiddleName
  ,LastName
  ,Suffix
  ,EmailAddress
  ,Phone
 From Person.Contact
Listing 1: T-SQL Select Statement
When I’m developing SSIS projects I use SQL Server Management Studio (SSMS) to develop T-SQL statements. After they’re working like I want, I copy them to the clipboard and paste them into the SQLStatement property of the Execute SQL Task. One “gotcha” in SSIS is the property value textbox will allow you to paste only the first line of a multi-line statement. Since you can only see the first line in this textbox, many developers believe they have pasted the entire multi-line statement into the property when this is not the case. To be safe, always click the ellipsis (the button with three dots) on the right side of the SQLStatement property value textbox to open the Enter SQL Query form as shown in Figure 5:

Figure 5: Using the Enter SQL Query Form
Click the OK button to close the Enter SQL Query form and store the T-SQL query in the Execute SQL Task’s SQLStatement property.
To return the results of this query into an SSIS object variable, configure the Resultset property of the Execute SQL Task – setting it to “Full result set” as shown in Figure 6:
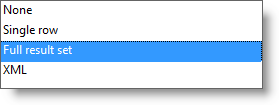
Figure 6: Execute SQL Task Resultset Property Options
The default Resultset property option is None, indicating no results from the T-SQL stored in the SQLStatement property will be captured. The other options are:
· Single Row – indicating the results will contain one or more columns but only one row.
· Full result set – indicating the results will contain one or more columns and one or more rows.
· XML – indicating the results will be in XML format.
The Full result set option returns an ADO.Net dataset object, and SSIS variables of the Object data type can hold a dataset. To configure the variable, select the Result Set page in the Execute SQL Task and click the Add button. Replace the text “NewResultName” in the Result Name column with the ordinal 0. In the Variable Name column, select <New variable…> from the dropdown.
When the Add Variable form displays, click the Container dropdown to configure the scope of the variable. Set the variable scope to the Package as shown in Figure 7:
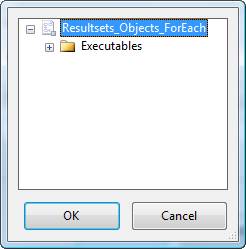
Figure 7: Selecting Package Scope in the Add Variable Container Dropdown
One suggested improvement for SSIS is to put this dialog in the Variables window, allowing developers to select or edit Variable scope without having to delete and re-create SSIS variables.
Click the OK button to accept the Package scope for this variable, returning to the Add Variable form. Change the variable name to People and set the Value type (data type) property to Object as shown in Figure 8:
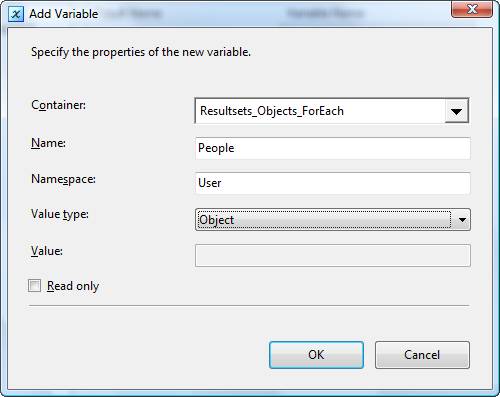
Figure 8: Configuring the People Variable
Click the OK button to complete the People variable creation and configuration as shown in Figure 9:

Figure 9: Configured People Variable for the Result Set
We’re done configuring the Execute SQL Task – click the OK button to close the editor. Our Execute SQL Task will execute a T-SQL statement against the AdventureWorks database, return a result set, and push the result set into an Object variable named People.
We can test the execution of this statement by right-clicking the task on the Control Flow and selecting Execute Task. Green boxes are a good thing:
![]()
Figure 10: Successful Execution of Execute SQL Task
Shredding User::People
The People variable is in the User namespace. You can see this in Figure 8. The namespace can also be viewed by clicking the Choose Variable Columns button on the Variable viewer toolbar:

Figure 11: The Choose Variable Columns Button on the Variables Viewer
Walking through a multi-value object is referred to as shredding. In this case we will use a Foreach Loop Container to shred the People variable (although phrasing that differently sounds macabre…). Drag a Foreach Loop Container from the Toolbox onto the Control Flow. Click on the Execute SQL Task to connect a Success Precedence Constraint from the Execute SQL Task to the Foreach Loop Container as shown in Figure 12:
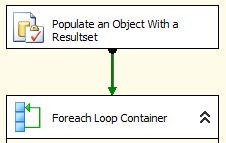
Figure 12: Success Precedence Constraint
Double-click the Foreach Loop Container to open the editor and view the Collection page. The Foreach File Enumerator is selected by default. The available enumerators are:
· Foreach File – iterates files in a specified directory. You can retrieve all the *.CSV files in a folder.
· Foreach Item – iterates items in a collection. You can loop through the rows and columns in an Excel spreadsheet.
· Foreach ADO – iterates the rows in an ADO recordset or an ADO.Net dataset.
· Foreach ADO.Net Schema Rowset – iterates database schema objects.
· Foreach From Variable – iterates a collection in a variable. You can shred a string array contained in an object variable.
· Foreach NodeList – iterates XML.
· Foreach SMO – iterates SQL Management Objects (SMO) objects. Use this to loop through database objects, but can also be used to iterate SQL Server instances on the network.
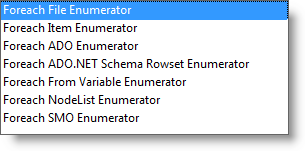
Figure 13: Enumerator List on the Foreach Loop Container Collection Page
Select the Foreach ADO Enumerator. In the ADO object source variable dropdown, select User::People. The Enumeration Mode defaults to “Rows in the first table”. Since we only have one table that will work well for our example. This option works with ADO recordsets and ADO.Net datasets, but the other options – “Rows in all tables” and “All tables” – work only with ADO.Net datasets (because ADO recordsets contain only a single table).
On the Variable Mappings page, click the Variable dropdown (in the first row) and click <New variable…>. Configure the variable as shown in Figure 14:
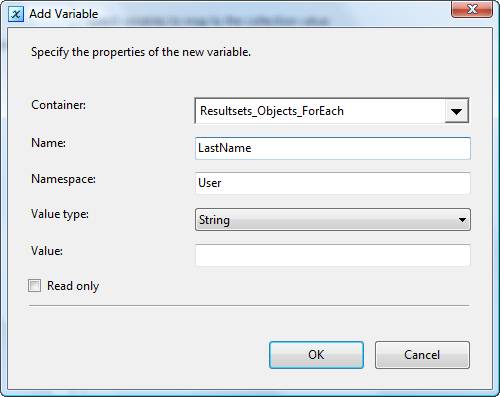
Figure 14: Creating the LastName String Variable
Click the OK button to complete the variable creation process.
Set the Index for User::LastName to 4. “Why 4?” I hear you asking. It is because the LastName column in our SQL query in Listing 1 is the fifth listed in the Select clause. Since the ordinal of the fifth item in this zero-based list is 4, we use 4 to identify this column:

Figure 15: Configuring the LastName Variable Mapping
Click the OK button on the Foreach Loop Container editor.
Drag a Script Component into the Foreach Loop Container and double-click it to open the editor. Click the Script page and add LastName (variable names are case-sensitive) to the ReadOnlyVariables property of the Script Task as shown in Figure 16:

Figure 16: Adding the LastName Variable to the Script Task ReadOnlyVariables Property
Click the Design Script button to open the Visual Studio for Applications (VSA) editor. Replace the default code in Public Sub Main() with the following code:
       PublicSub Main()
             '
             ' Add your code here
         '
         Dim sLastName As String = Dts.Variables("LastName").Value.ToString
         Dim sMsg As String
         sMsg = "LastName: " & sLastName
         MsgBox(sMsg)
       Dts.TaskResult = Dts.Results.Success
      End Sub
Listing 2
This script reads the value of the User::LastName variable into a script String variable named sLastName. Next, a String variable named sMsg is created. sMsg is next populated with the value “LastName: “ and the value of the sLastName variable. This is then displayed in a message box (MsgBox).
Close the VSA editor and click the OK button on the Script Task editor.
Time to Test
Execute the SSIS package in the debugger by clicking the green VCR-style Play button on the toolbar or by pressing the F5 key.
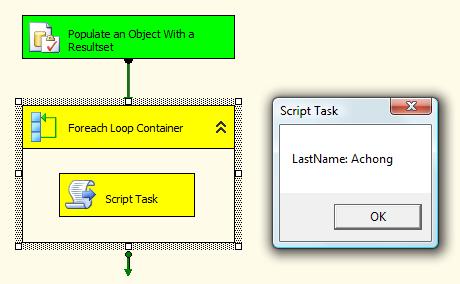
Figure 17: Displaying the First LastName Value
Figure 17 illustrates the package is operating as expected.
Conclusion
In this example, we created an Object variable named People and used an Execute SQL Task to push the results of a T-SQL query into this variable. We used a Foreach Loop Container to shred the dataset contained in the People variable, pushing the contents of one field (the LastName column) into a String variable named LastName. Finally, we displayed the value of the LastName variable with each iteration of the Foreach Loop Container.


