The importance of a good user interface cannot be overstated. But unlike in The Lord of the Rings, we can’t have one user interface to rule them all. Some of us like using GUIs, others prefer the command line. Fortunately, Snowflake has us covered on all fronts! We’re going to discuss the three main ways of interacting with Snowflake, which are (trumpets at the ready!):
- Snowsight, the Web UI
- SnowSQL, the command line interface
- Visual Studio Code, the IDE
I’ve already blogged about the basics of each of these UIs, but here we’re going into more detail. We'll cover Snowsight in this article.
Snowsight Introduction
Snowsight was introduced in 2021, and took over as the primary Web UI in early 2022, replacing what is now known as the Classic Console. The Classic Console still exists in some accounts, but it is not available to any new accounts.
Once you’re logged into Snowflake, you’re immediately confronted with the Snowsight interface’s Home page.
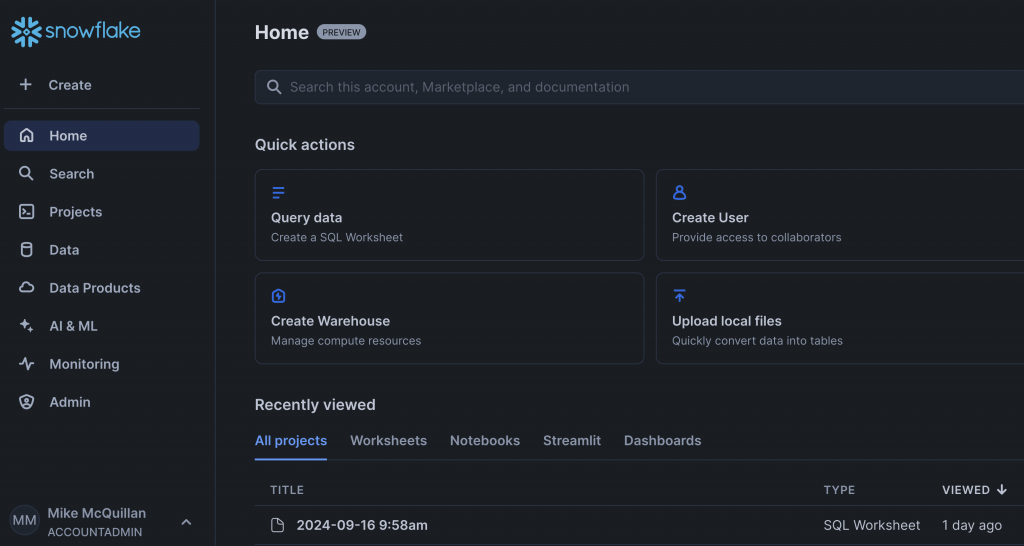
Most of the interesting stuff is in the menu on the left. Clicking on Create shows the various items you can create as you interact with Snowflake. We’ll look at many of these in future steps of this Stairway.

Snowsight SQL Worksheets
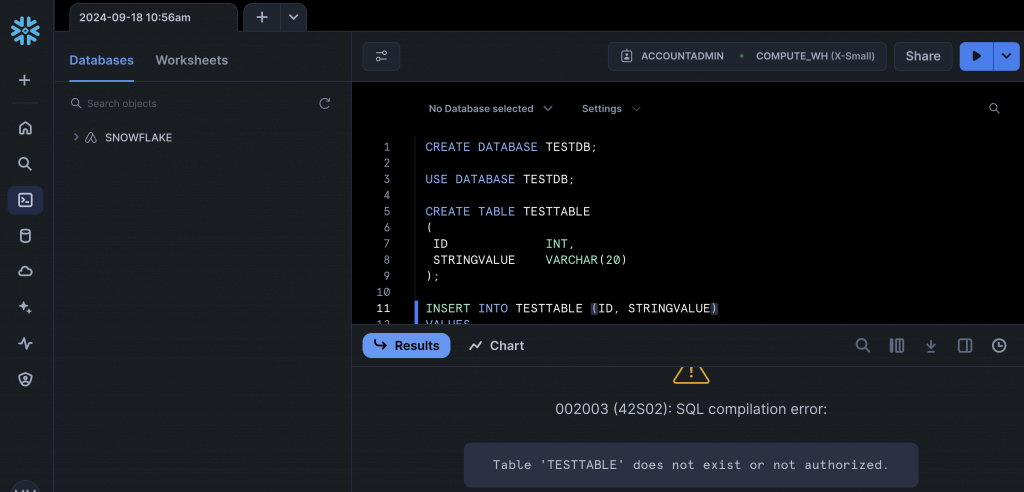
If you click on SQL Worksheet, you’re taken to a view which will look very familiar to users of SSMS or Azure Data Studio. There’s an Object Explorer on the left, and a query window on the right. The worksheet editor is full of the usual IDE features –code completion, colour coding, statistics on queries executed. One thing that might catch you out is executing multi-line queries. By default, Snowsight executes the statement the cursor is resting on. In the example below, the cursor was on the INSERT line, executed before any of the previous lines had been fired by hitting the big blue play button (you can download this script from GitHub):
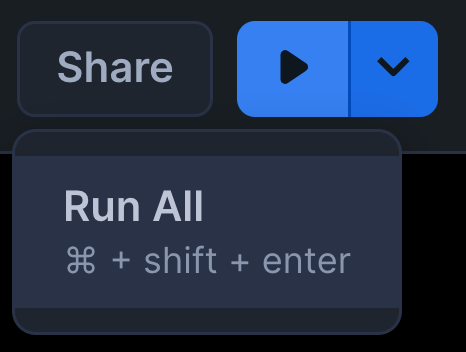
As somebody who is used to being able to just hit the play button to execute multiple statements in a worksheet, this caught me out a lot when I first started using Snowsight! But thankfully, there is a solution. Click the blue arrow next to the play button and you can hit Run All.
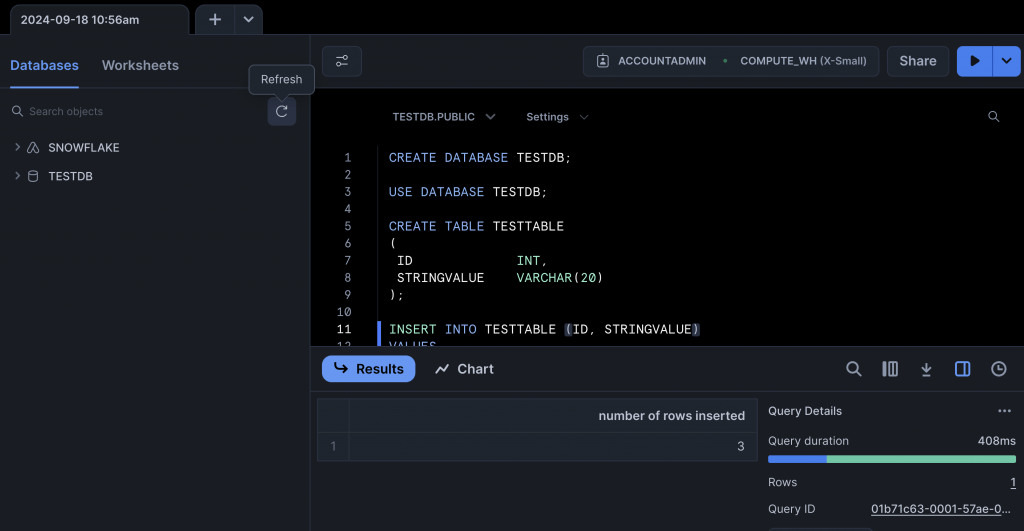
Do that and voila, you have a simple test database!
Other Snowsight Features
The Projects section allows you to create various types of Snowflake project, such as Notebooks and Dashboards. The Data section does two things. It lets you manage your databases – essentially the same Object Explorer view we saw in the SQL Worksheet – and also upload data via the Add Data option.
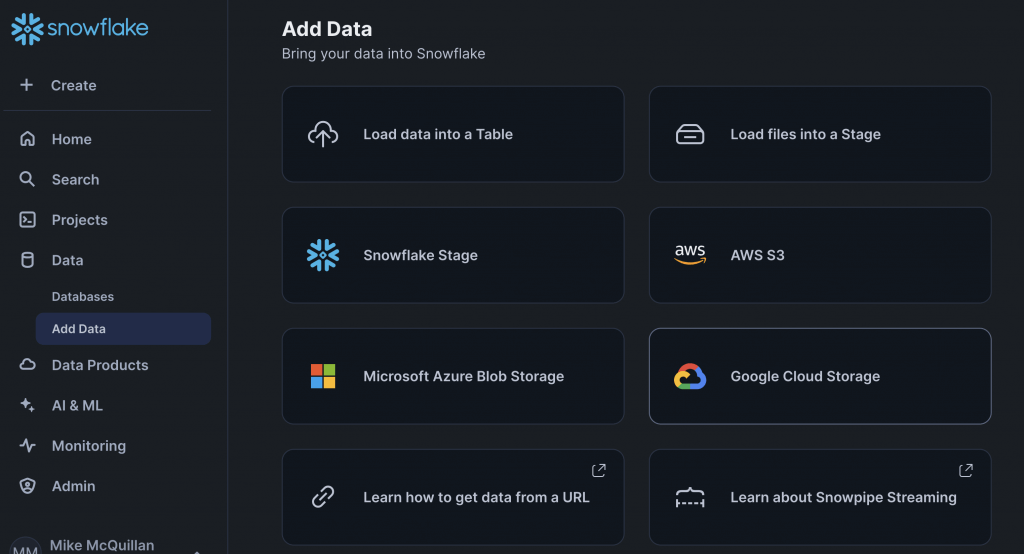
You can upload files from your own device, from a URL or from your accounts with one or more of the major cloud providers. We’ll be going in-depth on this in future articles.
Snowflake also offers the Snowflake Marketplace. Here, third-party providers offer things for sale, including data, apps and AI products. You can also use this section to publish your own offerings. Think of this as an App Store for Snowflake. You can also choose to share certain things with individual accounts if you wish, via the Private Sharing option.
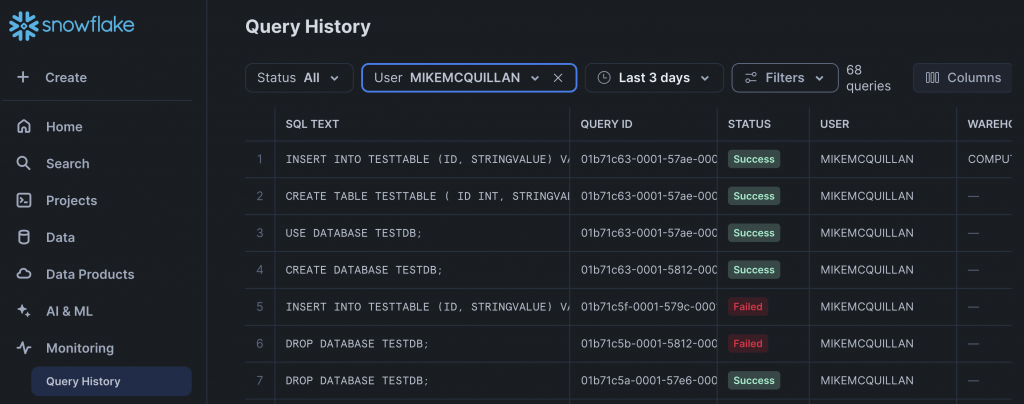
The AI & ML section unsurprisingly allows you to access the various AI features offered by Snowflake – again, these will be looked at in a future article. Monitoring is well worth a look, especially if your organisation’s Snowflake account is accessed by multiple users. You view a history of executed queries, check any security issues in the Trust Center and generally perform basic monitoring of your Snowflake account.
Snowsight Administration
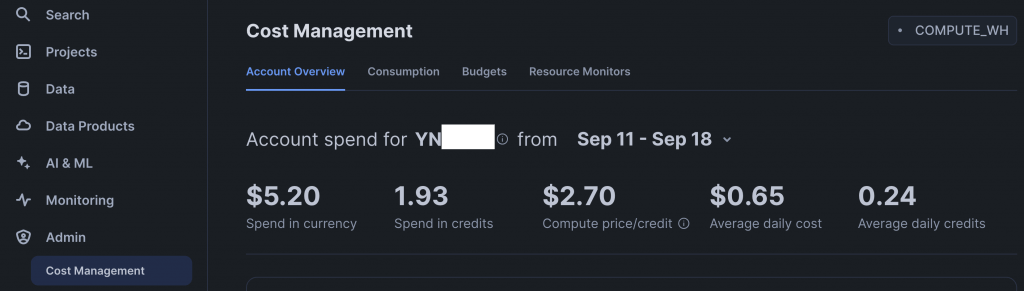
For me, the administration section is the most important area of Snowflake – because it allows you to monitor and manage your spending! The Cost Management section shows what you have spent so far, and you can set up a budget here to limit your spending. Snowflake utilises a credit-based approach to charging. The cost of a credit differs, depending upon the Snowflake edition you are using (Standard, Enterprise or Business Critical – there’s also Virtual Private Snowflake, but that runs on a completely separate environment).
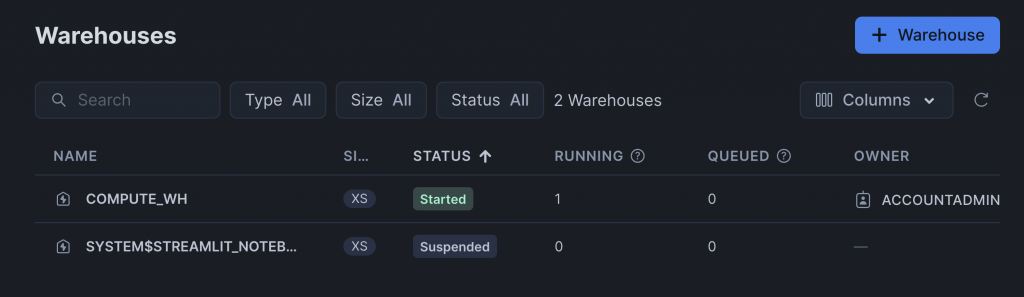
If you want to stop spending money (and who doesn’t!), head over to the Warehouses section. This shows you which of your virtual warehouses are currently running. Virtual warehouses are the compute engine of your Snowflake instance. You need them to run your queries, but you can suspend them at any time. A running warehouse = money leaving your account!
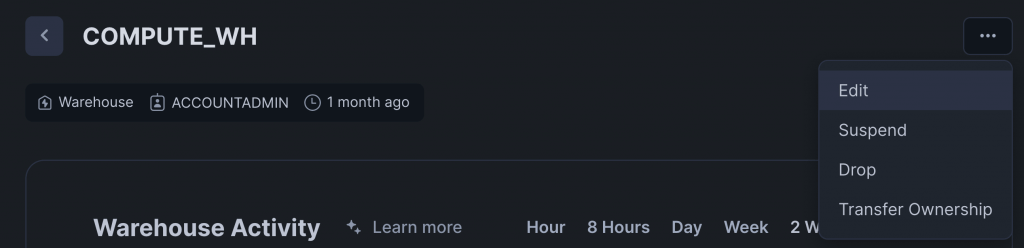
To manage when a warehouse starts and stops, or to do these things manually, click on the warehouse name in the list (COMPUTE_WH is the default warehouse, you’ll likely create your own virtual warehouses so you can manage the spend for individual work packages). An activity graph appears, with a three dots menu in the top right-hand corner. Click that and apart from being able to start/suspend or drop the warehouse, you can also edit it.
If you click Edit, you can set up whether the warehouse can auto-resume when a query is submitted, whether it can auto-suspend, and how long it should be inactive before auto-suspend kicks in. Snowflake is very quick at spinning the warehouse back up, so have a play with this and see what works for you.
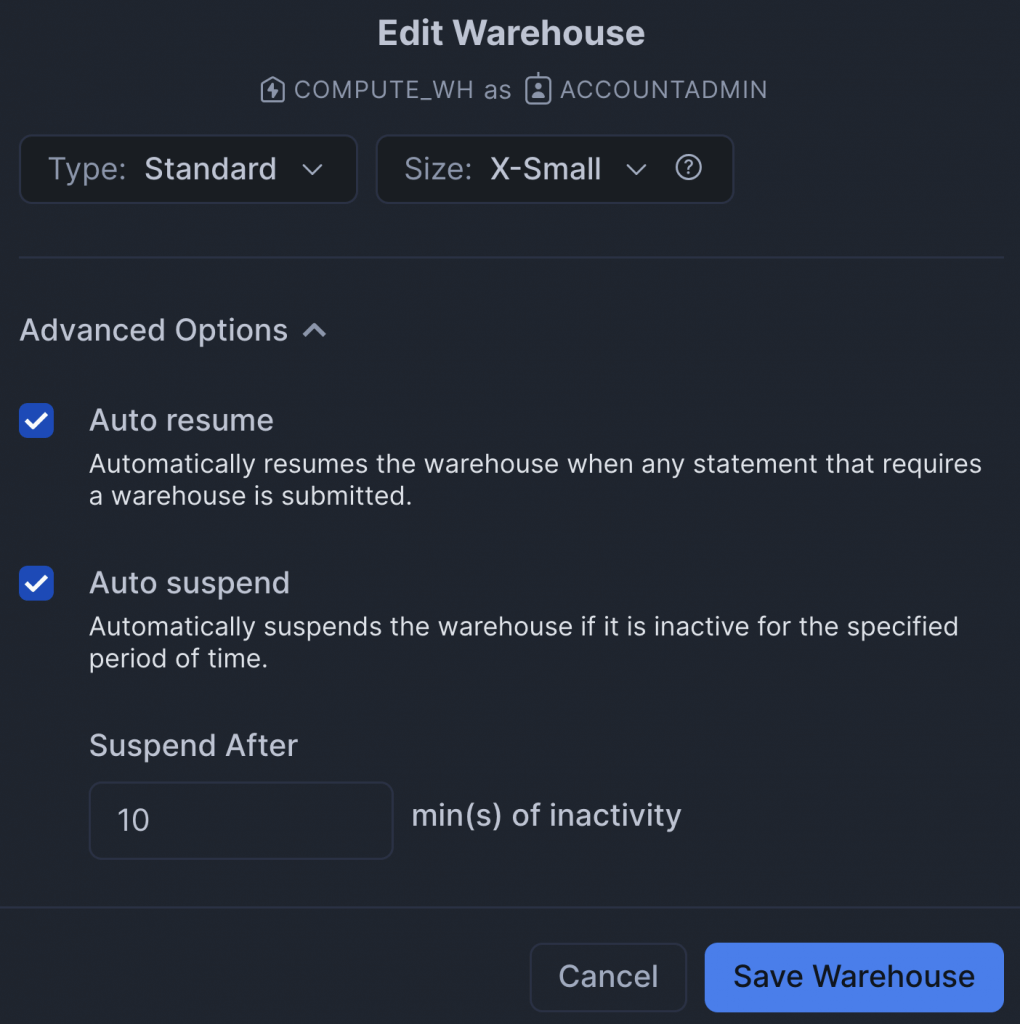
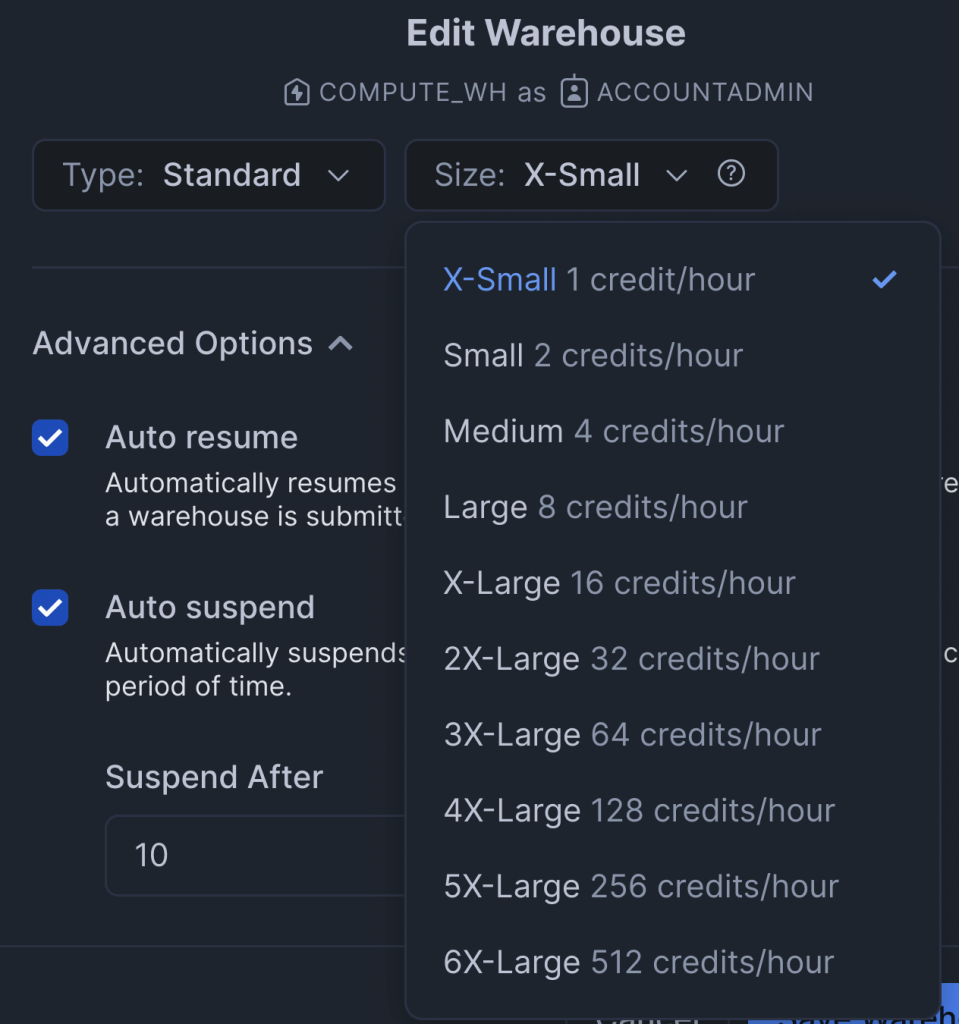
You might notice on the screenshot the size of my warehouse is X-Small. This is the cheapest warehouse to run, other sizes are available but they cost more credits per hour.
Managing Users, Roles and Accounts
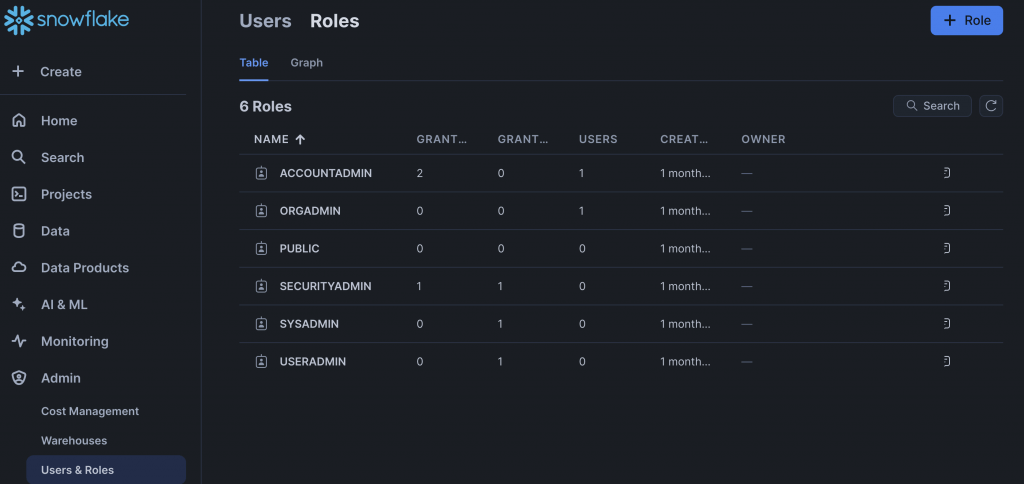
You also use the Administration section to manage the various Snowflake accounts. You guessed it, we’ll look at this kind of thing in a future article. A key tenet of Snowflake’s security model is you can’t assign permissions to users. Instead, permissions are assigned to a role, and you can assign roles to other roles too, building up a hierarchy. You then assign the relevant role or roles to the user, and you’re good to go.
The Accounts section allows you to manage your Snowflake accounts. Just as you may use multiple virtual warehouses to split out your compute usage, you may have multiple accounts to differentiate between areas of your company. You could have an account for finance, and another for sales. These can all be handled in this section.
The last administration section is Security. You can use this to set up network policies and rules that limit who can access your Snowflake account, and from where. For example, you can limit connectivity via IP address, even specifying whether the policy or rule applies to a database, and just for ingress or egress. One for the security-conscious amongst us (and that should be all of us!)!
User Account Management
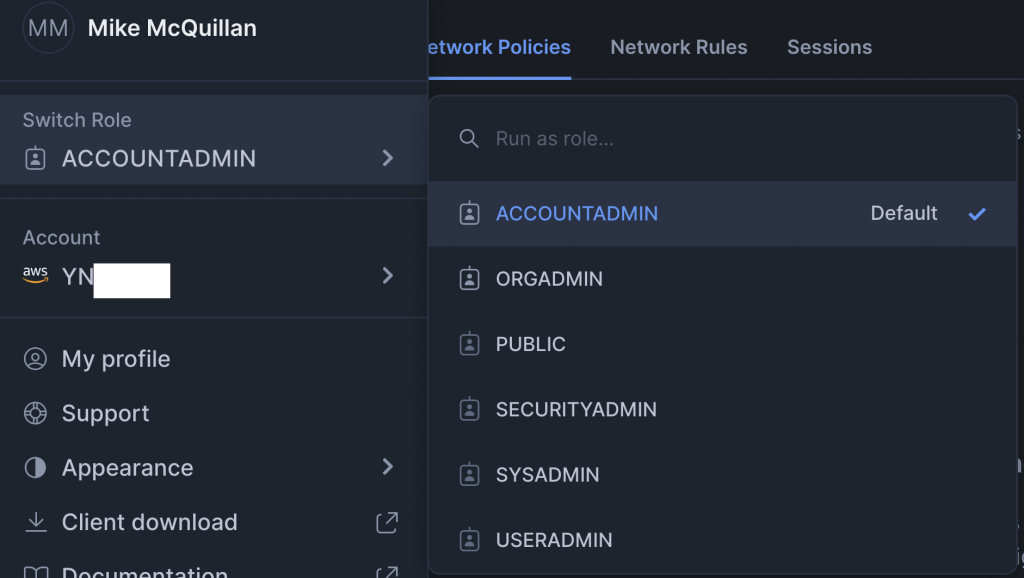
The last section of Snowsight is accessed by clicking on your own name at the bottom of the left-hand menu. This allows you to switch to a different account, to a different role, download documentation and manage your profile.
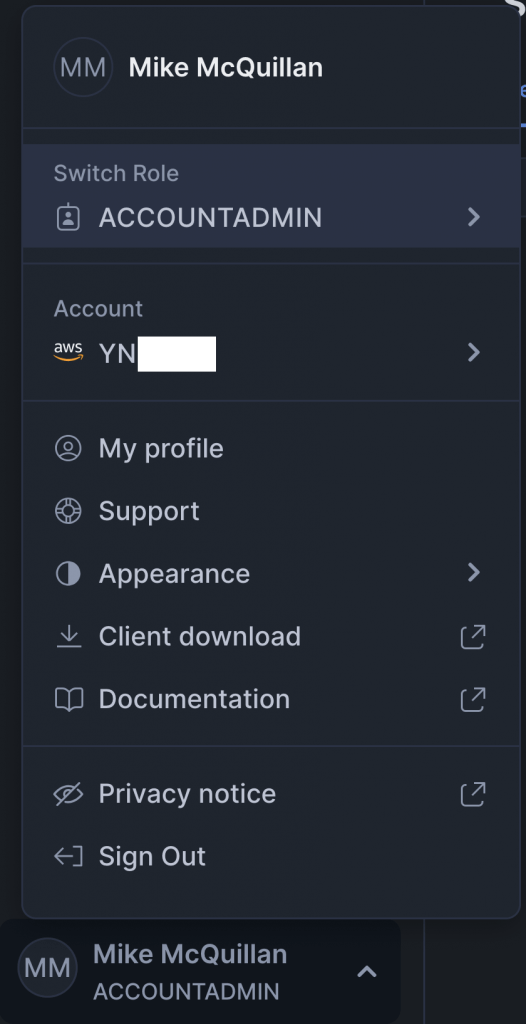
The ability to switch roles is important. It’s likely your Snowflake user account has been granted multiple roles, but only one of these is active at any one time. You have a default role, but if you want to do something under a different role you either need to switch roles, or tell the query you are executing under which role it should be executing, via the USE ROLE command.
You might also have noticed the Client download link in the screenshot. That’s going to be important for us next time, when we take a look at the SnowSQL command line interface!
Summary
This has been a deep dive into the various features of the Snowsight Web user interface used to interact with the Snowflake data platform. As we have wandered through the various features, we’ve also touched on some key aspects like billing, running queries, virtual warehouses and Snowflake’s role-based security model.
Next time out, we’ll look at the two other ways you can access your Snowflake instance, using the SnowSQL CLI tool and the Snowflake Visual Studio Code extension.