

I got a new laptop recently and instead of installing SQL Server, I decided to try and use containers to see how well this works. This article looks at how I got this working relatively quickly.
The short list of things I did is:
- Install Docker Desktop
- Create a location for data/logs/etc.
- Create a docker-compose file
- Create a few batch files
- Test
I did this as I was getting ready for a trip, and actually had most of this working in less than an hour. Step 3 took me a few experiments, but I figured this out on an airplane between Denver and Austin, after opening a few resources in browser tabs for reference.
Hopefully I cut your time here down to a few minutes outside of the download times for docker and images, and the install time for Docker.
Install Docker Desktop
I run Windows 11, and this likely works on Windows 10 as well. I went to Docker to download this, as it didn’t work well with Chocolatey for some reason. The Download page also has install instructions. I don’t remember enabling WSL, but I certainly am running linux containers, so I’m guessing WSL was already enabled on this machine.
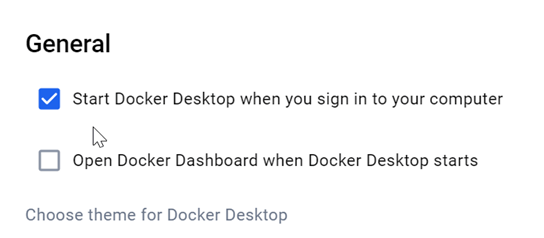
Two things. Set Docker to start with Windows.
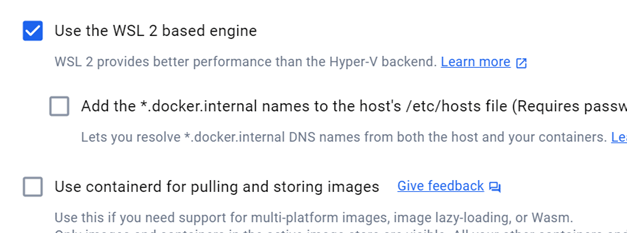
Also, verify Linux containers are the ones you are using. Remember, SQL Server isn't supported for Windows containers. If you want to build and maintain your own custom image, you can do that, but I don't want to.
Create Locations
You can just run containers, and as long as they aren’t removed (deleted), you can keep data. I don’t like that, and I do want to be able to copy backup files to/from easily, so I want to map places on my disk into the container. We’ll do that below, but first I need places.
I created c:\data on my machine. The plan is all my database data is here.
Under here, I created a SQL2022 folder, and in here, I added data, backup, log, and secrets folders. My structure is this:
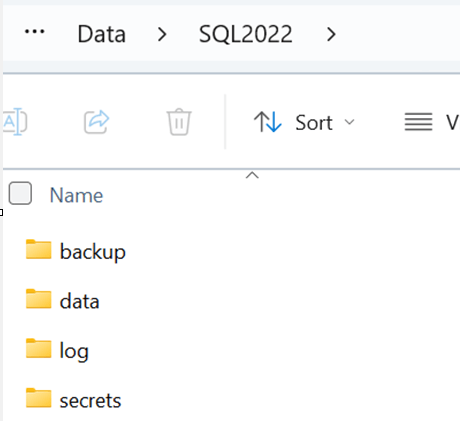
The code for this is:
mkdir c:\data
mkdir c:\data\SQL2022
mkdir c:\data2\SQL2022\data
mkdir c:\data\SQL2022\backup
mkdir c:\data\SQL2022\log
mkdir c:\data\SQL2022\secrets
This gets me a structure for the container persisted data. I'll keep the various data files in this structure. This makes it easy for me to see the files on the host, should I need to move files in or out of the container. Mostly this is for backup files, but I might as well know where the logs, data, etc. are located. This also makes it easy for me to check sizes of files if I think my mdf/ldf/ndf's are getting out of control.
The Docker Compose File
While you can just run a command, I decided a docker compose file is better, since I put all the config stuff inside one place. It’s easier to visualize and see changes when you do this. I'll show the file contents and then I’ll explain sections below.
services:
  mssql:
    container_name: sql2022-default
    hostname: sql2022
    image: mcr.microsoft.com/mssql/server:2022-CU14-ubuntu-22.04
    environment:
      ACCEPT_EULA: 'Y'
      MSSQL_SA_PASSWORD: 'Str0ngP@ssw0rd!'
      MSSQL_DATA_DIR: /var/opt/mssql/data
      MSSQL_PID: 'Developer'
      MSSQL_TCP_PORT: 1433
    ports:       - "1433:1433"

volumes:
      - ./data:/var/opt/mssql/data
      - ./log:/var/opt/mssql/log
      - ./secrets:/var/opt/mssql/secrets
      - ./backup:/var/opt/mssql/backup
Names
This is a YAML file, so the first item is we are grouping everything as a service. We call this mssql by indenting this. We could call it anything, but I’ve just called is mssql.
Under here, we set the container name, the hostname and the image first. These items are things you can choose. I set the container name, which is sql2022-default. I chose SQL2022 as the version and added default as I’m running this on port 1433, the default port. I’ll explain how this is different for other instances below.
The hostname is what the network should see as the container. It is not what the internal name of what is returned from @@servername.
The image is the version of SQL Server you want. I chose a SQL 2022 image, but I also picked the current CU. I don’t want to use latest as my version can rev without me being aware. I’ll explicitly upgrade things periodically by changing this tag.
Environment Variables
Next, the environment. These are environment variables that are set inside the Linux machine running in the container. The first two are required. Accept the EULA and set a password. Next, I map a data folder. This should be the default, but you can explicitly set this. I set the version as developer, since I’m doing this for dev/test work. Lastly, I could ignore the port, but might as well be explicit here in case I want/need to change this.
Ports
This section is where I map the host port to the container port. The host port is what I use in SSMS/ADS/etc. This is to connect to SQL Server. The inner port is what the instance is listening on, which corresponds to the MSSQL_TCP_PORT in the previous section. The format is host:container.
For this default instance in a container, I’m mapping 1433 to 1433. Since I can only have one service on a port, I need to choose something here that is unique. You’ll see a difference below in the SQL 2019 compose file.
Volumes
Here is where I get the mapping from my Windows Explorer to stuff inside the container for the instance. By default, the entire file system in the container stays there. I can find it on my machine, but better to explicitly set things.
The format is the same as above, with host:container. I map the current folder where I’ll run this, which is c:\data\sql2022 and the relative data folder as .\data. This is actually c:\data\sql2022\data. This maps to /var/opt/mssql/data, which is the default location inside a Linux machine for SQL Server data files.
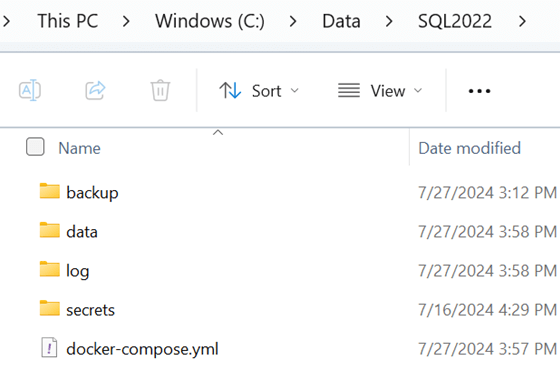
I do the same thing for log, secrets, and backup. I don’t put the entire path, as I’ll re-use some of this file and I want to minimize maintenance. This file is saved in my c:\data\SQL2022 folder as docker-compose.yml.
Batch Files
To start this container, you run the docker-compose command. The actual command is
docker-compose up –d
I added this in a batch file with a CD command, which looks like the listing below. This sets me into the right folder, then it runs docker using the docker compose file above. The –d runs this detached, which closes the cmd window after this runs.
cd C:\Data\SQL2019
docker-compose up -d
This is saved as startsql2022.cmd in my c:\utilities folder, which is in my path.
I also add a StopSQL2022.cmd file, which contains this code.
cd C:\Data\SQL2022
docker-compose down
This stops the container.
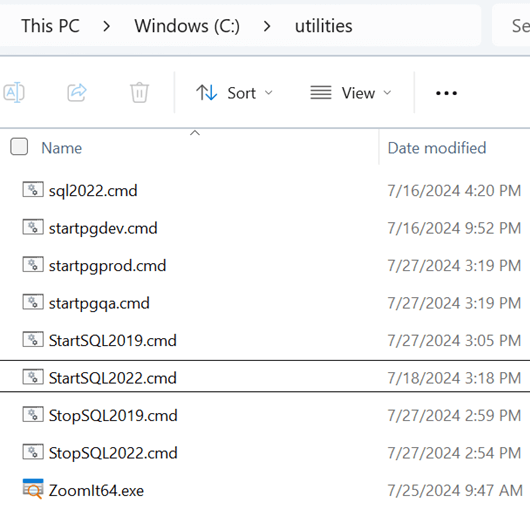
All my start/stop files are shown in this folder.
Testing
I double clicked the start file in explorer and the container downloaded and started. From there I ran @@servername and @@Version. Results below. I copied the @@version results into the comment.
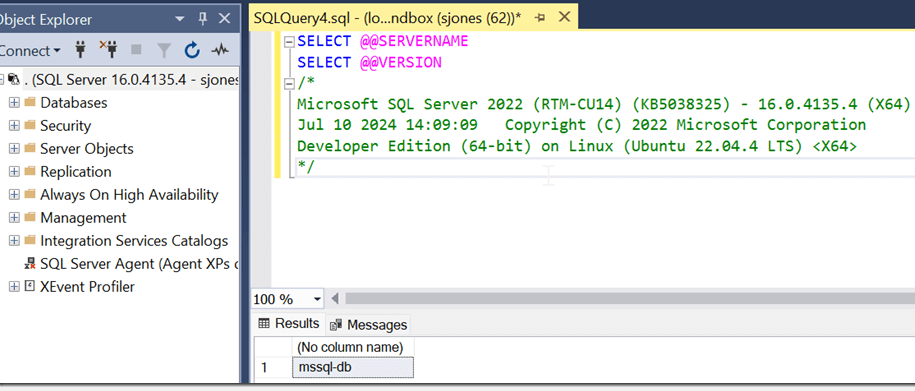
Note, I had added an sjones login as sa bothers me, so that was my connection.
SQL 2019
I duplicated my SQL 2022 setup with SQL2019 as the folder. The name of the folder was all I changed to start. Then I edited the docker-compose file to change my port to 41433, as well as putting this in the name. The relevant part is shown here.
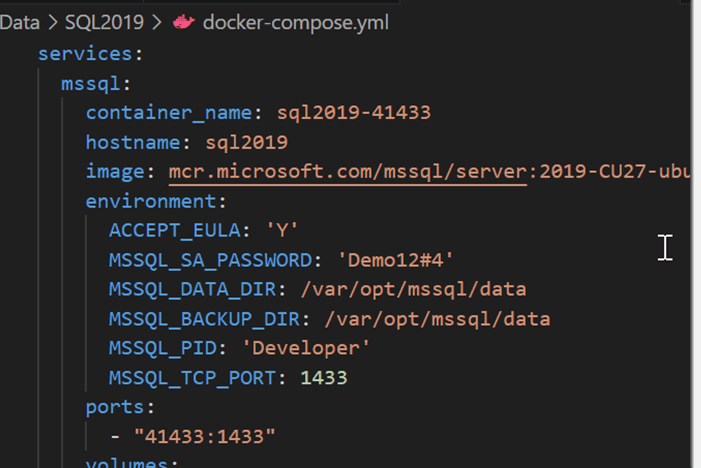
This gets me a second instance I can start/stop on demand, and it's self-contained. There are mappings to a separate set of folders that aren't shown, but they are a similar structure to that for the SQL 2022 container.
Summary
I've been using this setup for about a month, including during some presentations with live demos. I was able to take my ZeroDowntime repo, start the container and connect in SSMS, running all the scripts to startup/teardown the database and do the demo. Worked flawlessly.
I'm warming up to containers, and I like the idea of using them where I can rather than install software. I'd urge you to give this a try, not because you need to, but because you'll learn something and get the chance to experiment. This also might be an easy way to maintain copies of 2017/2019 in the future as we move past SQL 2022.
References
Various resources used and read
- Docker Desktop for Windows - https://docs.docker.com/desktop/install/windows-install/
- Configuring Linux environment variables - https://learn.microsoft.com/en-us/sql/linux/sql-server-linux-configure-environment-variables?view=sql-server-ver16
- Create and customize linux containers - https://learn.microsoft.com/en-us/sql/linux/sql-server-linux-docker-container-configure?view=sql-server-ver16&pivots=cs1-bash
- Best Practices for docker volumes - https://stackoverflow.com/questions/66624752/best-practice-docker-volumes-on-windows