

DBAs often face situations when the disk gets full for user database files, logs, or system database files. To overcome this issue, normally disks are extended. Expanding the disk is not a complex process but sometimes, extending the disk requires a few hours of downtime depending on the storage type and configuration an organization is using OR disk extension is not possible due to any other restriction. In that case, DBA will have to request a new disk to configure it for an SQL Instance to receive the incoming data.
In this article, we will show you step-by-step guidelines to add the shared disk to the Windows server failover cluster (WSFC) and then assign it to an already running SQL Role. In this example, the SQL role for which we are adding the new disk is a two-node failover cluster instance (FCI), because it is an FCI installation we will be required to add a new shared disk in the WSFC cluster. We will first discuss the steps to initialize/Online the new disk using disk management and then we will discuss the steps to add the new disk to WSFC. This article will not cover adding a new node to WSFC (Windows Server Failover Cluster).
Add the Disk to the Server
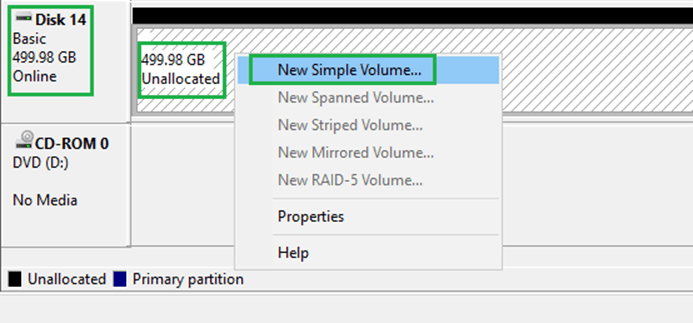
Let's start with the required steps. Once the storage team assigns the disk to the required server then connect to that server and open disk management. Scroll down to the newly added disk, right-click on the disk, and make it online. Again right-click on the disk, 'initialize' the disk, and select the GPT option.
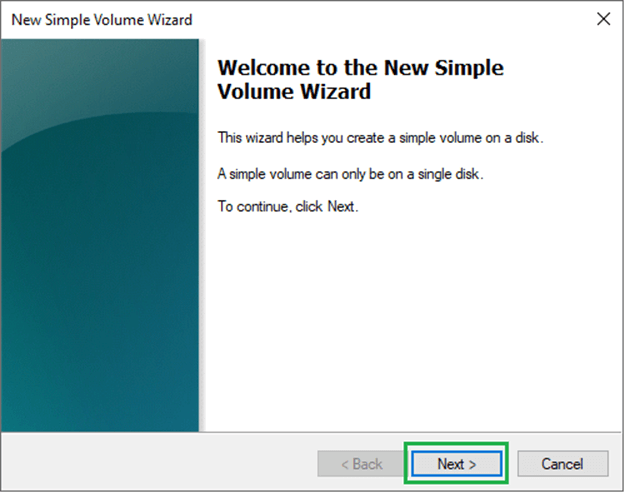
Now right-click on the 'Unallocated' area and click on 'New Simple Volume', a new wizard will pop up as shown in the below screenshot. Click on the Next button.
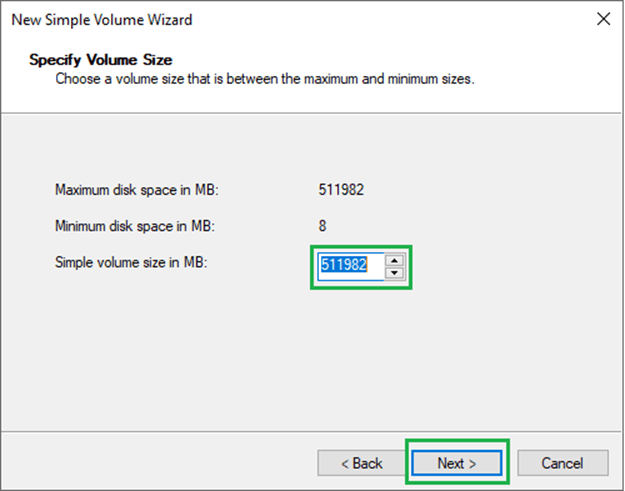
Select the default volume size and click Next.
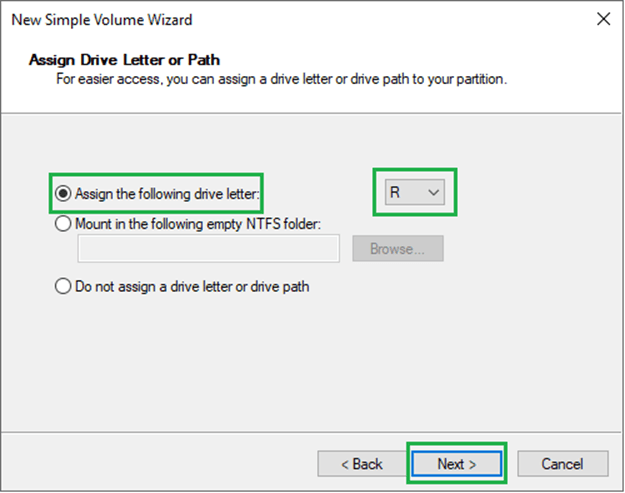
In this step, select the first option and choose the disk letter from the available letters as shown below.
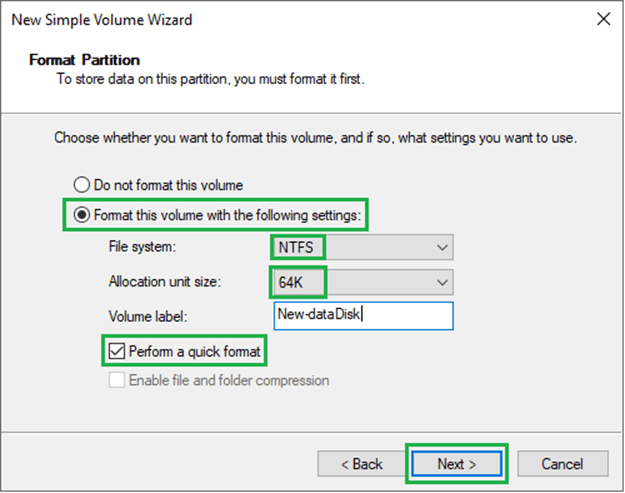
In this step, select the file system as NTFS and allocation unit size as 64K, give the proper volume label, select the checkbox if you want to perform quick format, and click the Next button.
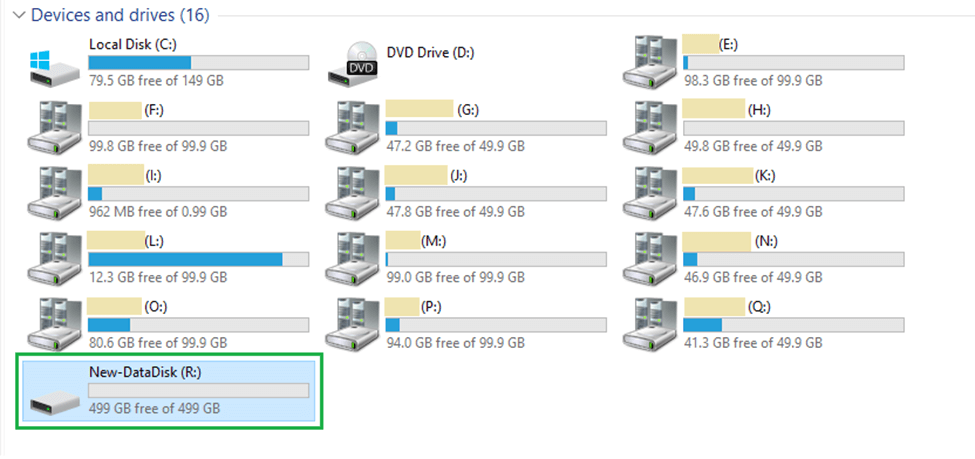
Once the format is complete, the disk will be visible as shown below.
Assign Permission on the Newly Added Disk
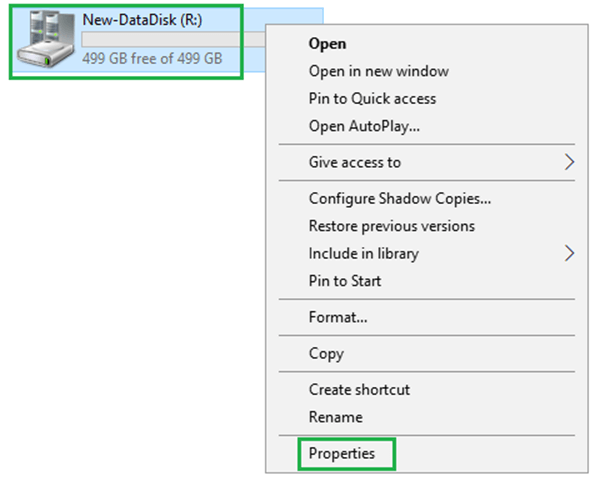
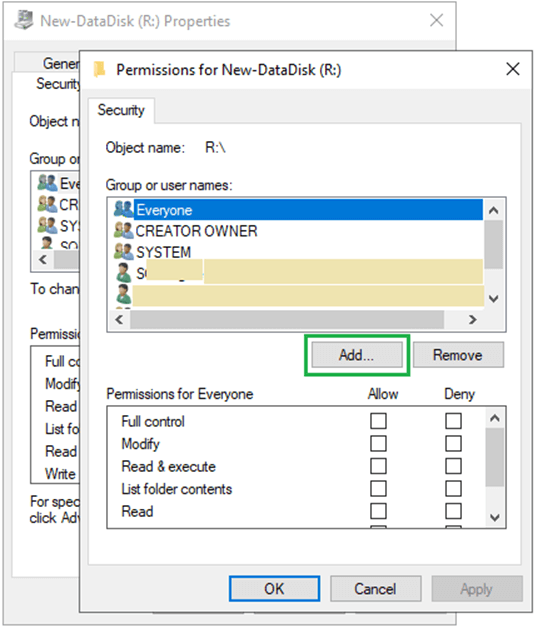
Once the disk is visible on the server, we need to grant full permission on that disk to the SQL Engine service account the failover cluster instance is running on. Right-click on the disk and hit properties.
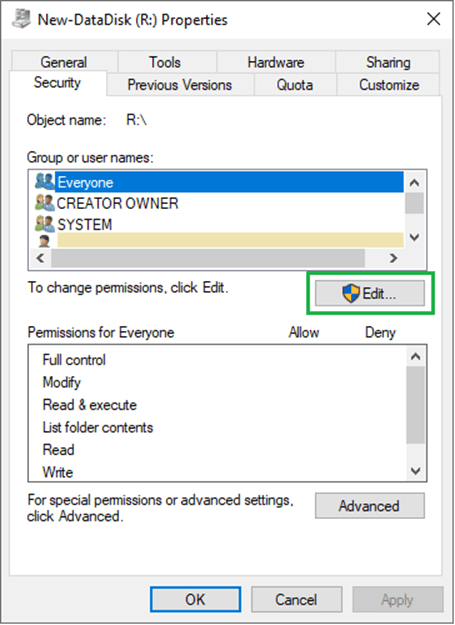
Properties window will appear, click on the Edit button as shown below.
A new window will open, click on the Add button to add the SQL Engine Service account.
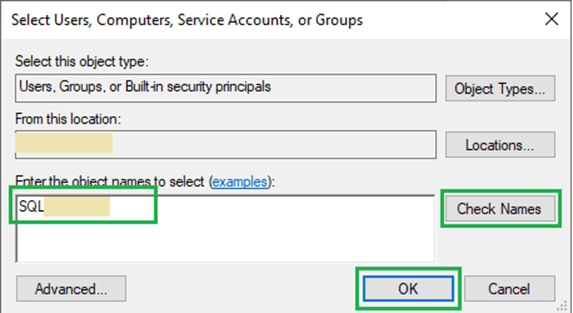
Search for the SQL Engine service account in the below window, select your domain from the Locations type your service account used for running SQL engine, and click the 'Check Names' button to search for it. Once you get the correct service account, click OK.
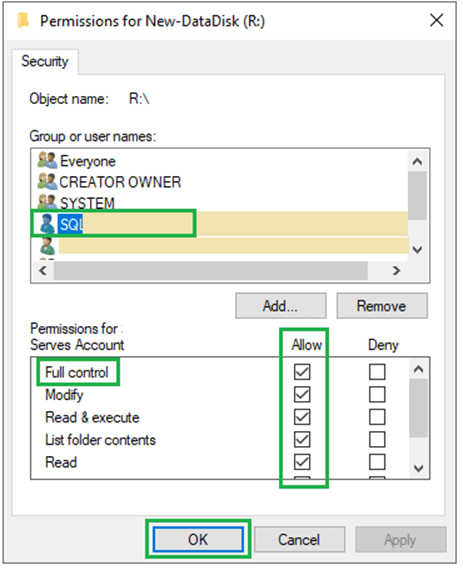
Control will come to your previous small window. The newly added SQL Engine service account will show here, Select the service account and tick the 'Allow' checkbox to grant full permission to that service account on the newly added disk (R). Click the OK button.
Add the Disk to the Cluster using Failover Cluster Manager
Now the new disk is visible on the server and permissions are also granted on the new disk to the SQL engine service account. The next step is to add the disk to the Windows server failover cluster. As discussed at the beginning of this article, the new disk will be a shared disk because it will be assigned to a failover cluster instance (FCI requires a shared disk) later in this article.
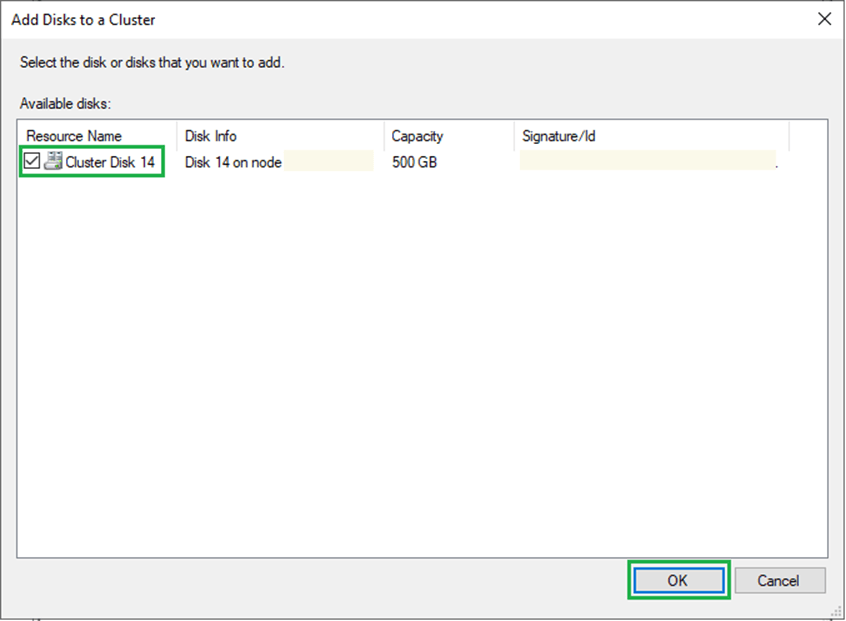
Open the failover cluster manager, Expand the cluster, right-click on the Disks, and then click on Add Disk as shown below.
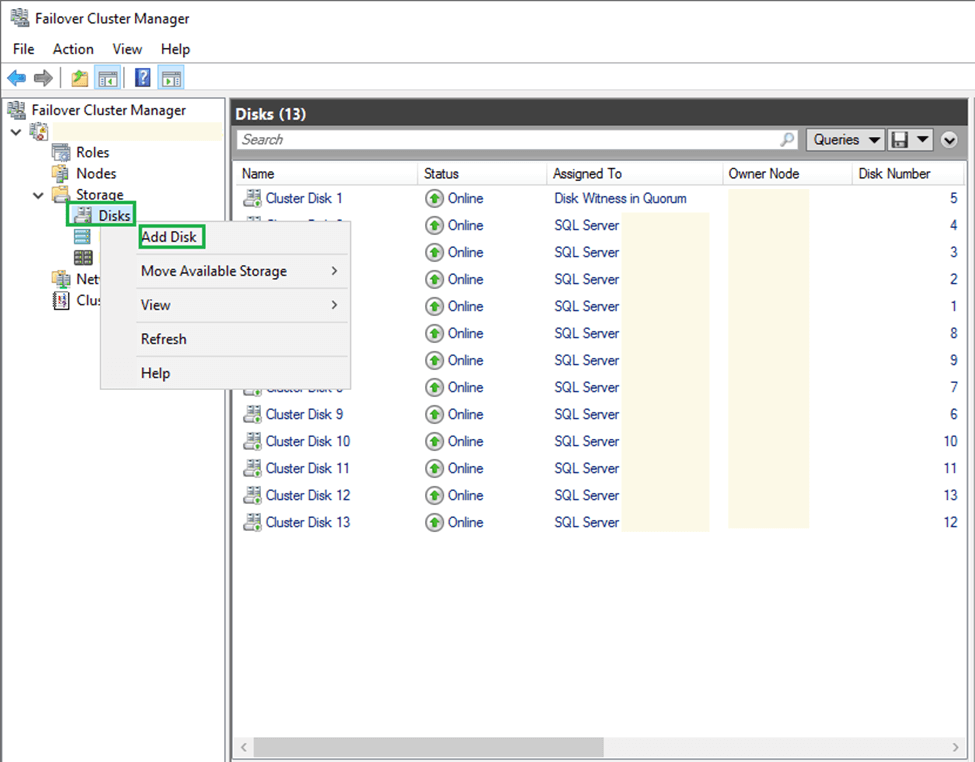
All the available and ready-to-join cluster disks will appear here. In our case, there is only one disk as shown below. Click the OK button to add the disk to the Windows cluster. It will appear in the disks option.
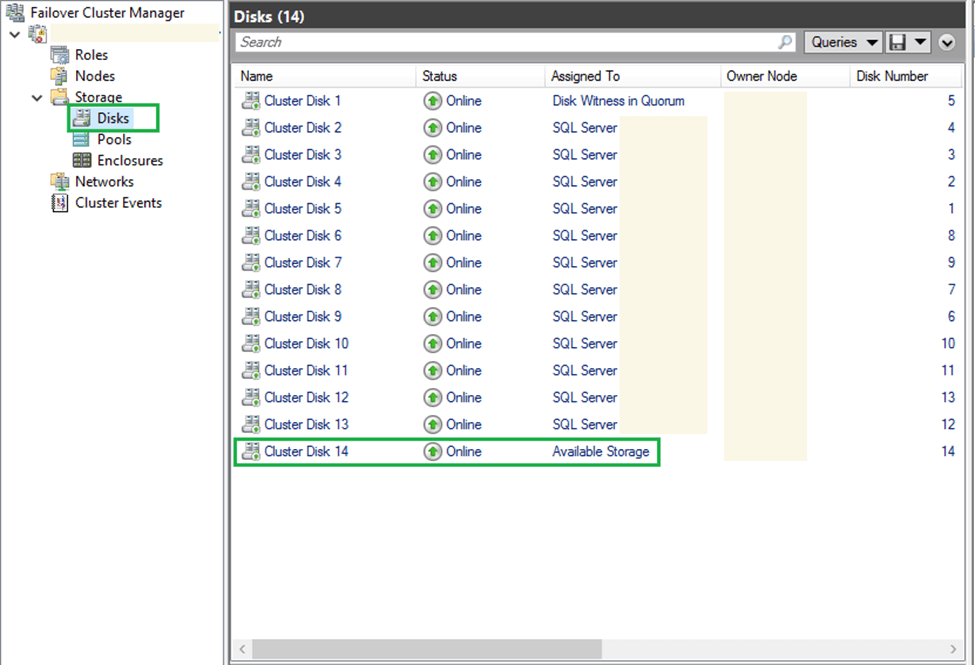
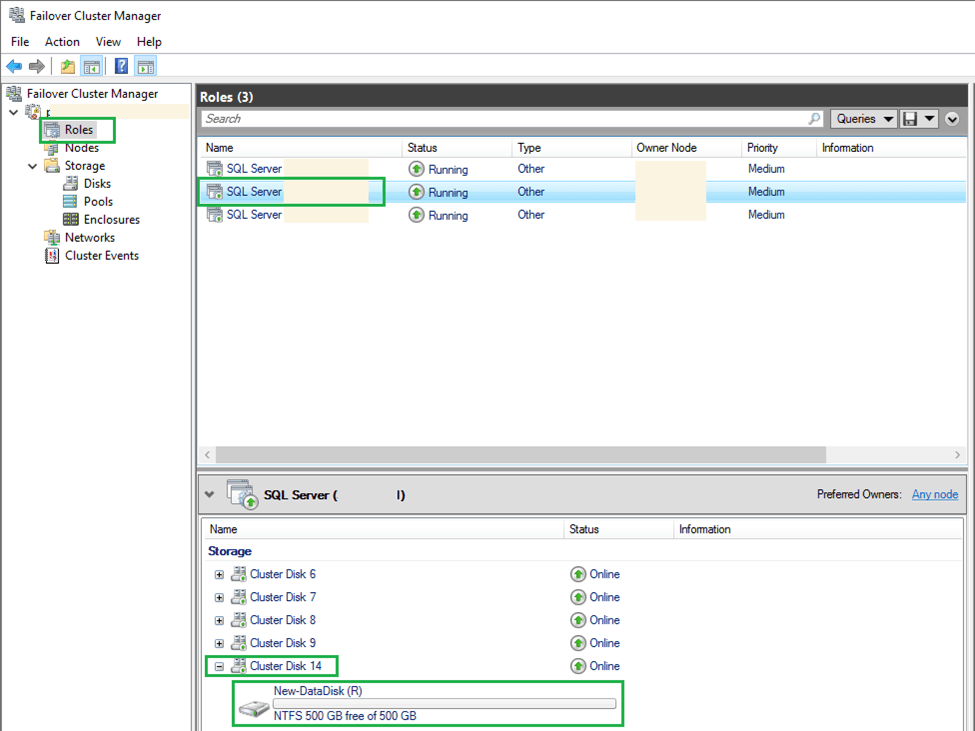
As we can see, Cluster Disk 14 (new shared disk) is now added to the Windows failover cluster. In the next step, we assign the disk to the already running SQL Role (used for one of the failover cluster instances). To accomplish this, follow the below steps.
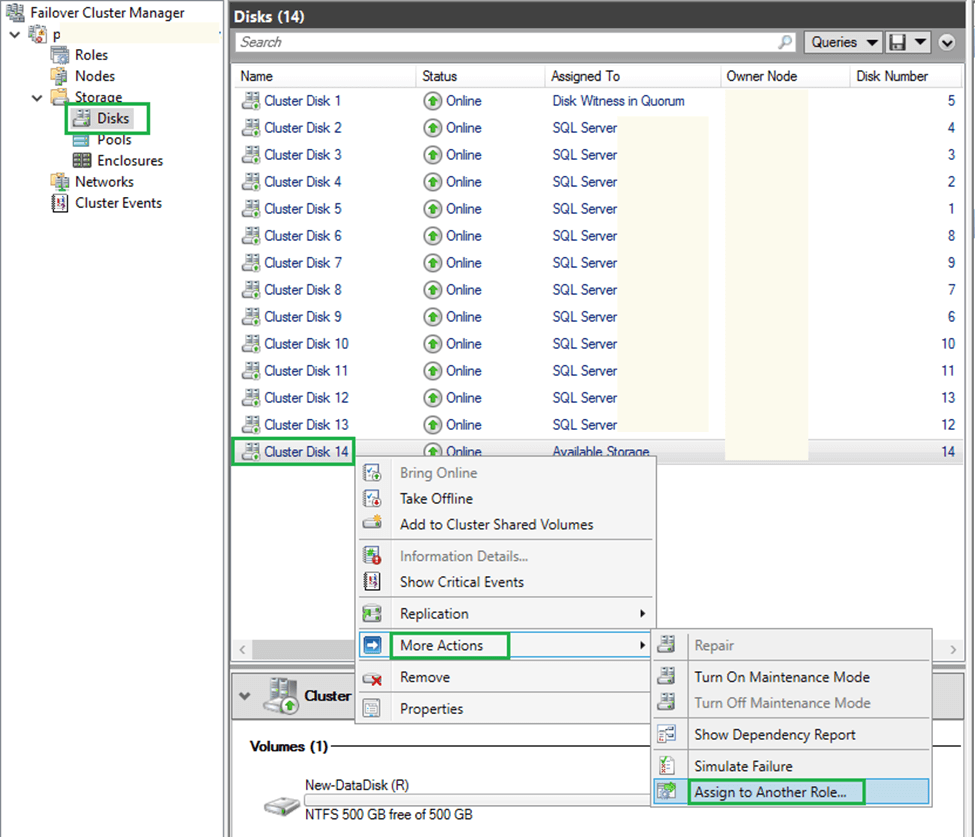
- Right-click on the new disk (Cluster Disk 14)
- Click More Actions
- Click Assign to Another Role
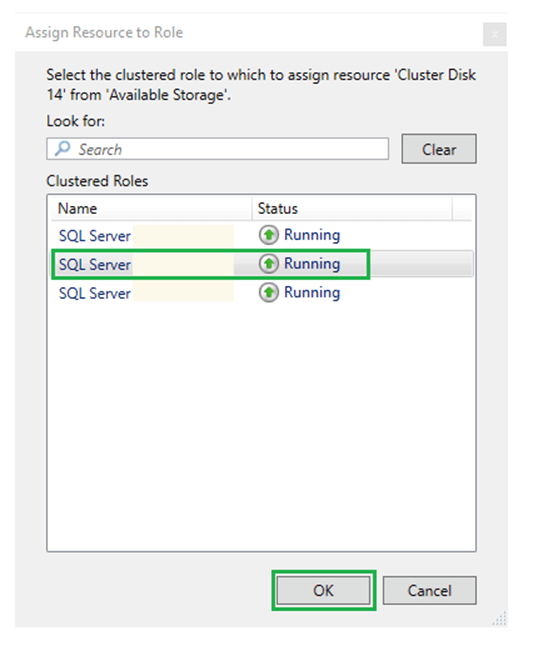
A new small window will appear showing a list of available Roles, choose the Role you want the new disk to assign to, and click OK. I have masked the role names for confidentiality reasons.
You will be able to see the new disk assigned to the role you selected. In the failover cluster manager, click on the Roles on the left, and then Select the same role the disk was assigned to in the previous step, you will see the new disk (Cluster Disk 14) under the storage in the resources tab as shown below.
Now as the disk is assigned to the SQL role as well, the only step remaining is to add the disk to the dependencies of the SQL Server Engine Resource. Right-click on the resource SQL Server (Your Instance Name) and click on properties.
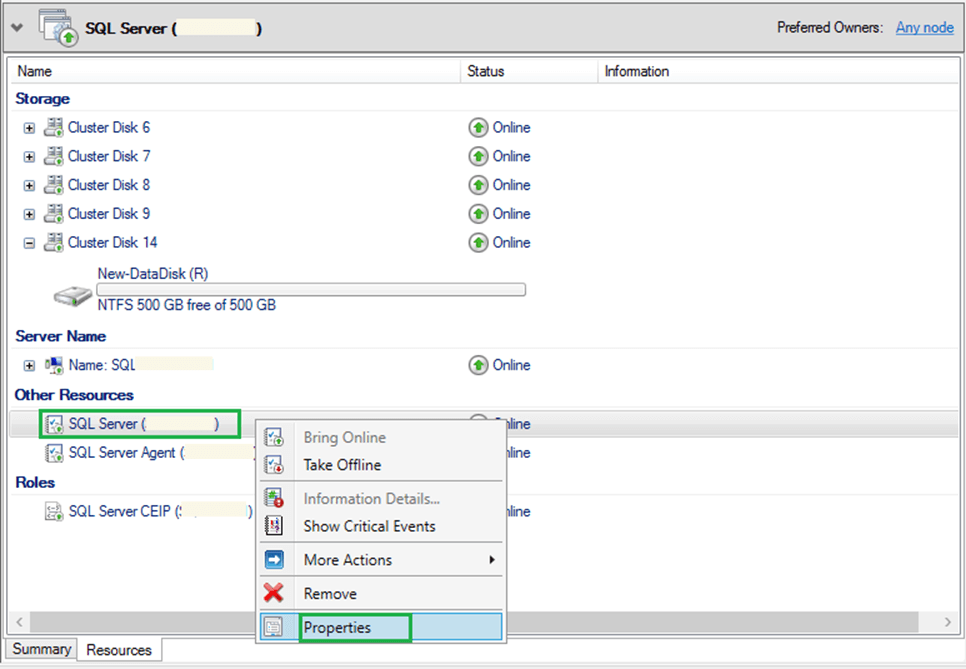
A small window will open, click on the 'Dependencies' tab, and you will see all the resources here on which this SQL Server service depends including all the disks used for that particular SQL Server instance. Click on the Insert button add the new disk (Cluster disk 14) from the list of available resources and click OK as shown in the below screenshot.

At this stage, the new shared disk is successfully assigned to SQL Server Instance and can be used for that SQL instance.
Summary
In this article, we tried to explore the steps required to add a new shared disk to the DB Server and then in the next step add it to the Windows Server Failover Cluster (WSFC). When we add the new shared disk to the Windows cluster, we need to assign it to the SQL Role so that the SQL instance associated with that particular role starts using the newly added disk. In this article, we assigned the new shared disk to the SQL role associated with the SQL failover cluster instance and performed the necessary steps to make the new disk ready for use.
