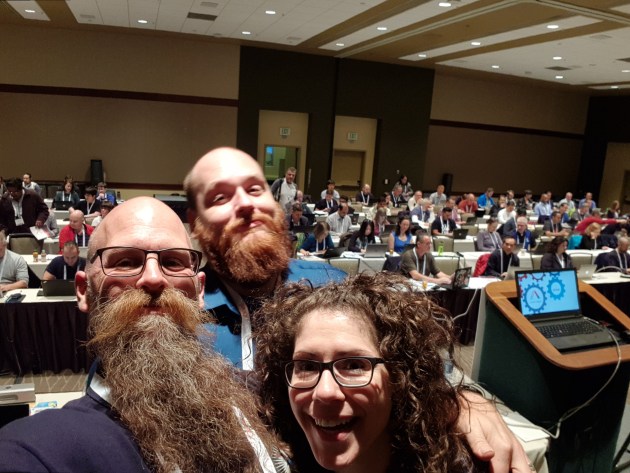
Chrissy, CK and I presented a pre-con at PASS Summit in Seattle last week

Tracey Boggiano T | B came along to our pre-con and afterwards we were talking about creating PowerShell modules. In her blog post she explains how she creates modules by copying the code from another module (dbatools in this case!) and altering it to fit her needs. This is an absolutely perfect way to do things, in our pre-con we mentioned that there is no use in re-inventing the wheel, if someone else has already written the code then make use of it.
I suggested however that she used the PowerShell module Plaster to do this. We didnt have enough time to really talk about Plaster, so Tracy, this is for you (and I am looking forward to your blog about using it to  )
)
What is Plaster?
Plaster is a template-based file and project generator written in PowerShell. Its purpose is to streamline the creation of PowerShell module projects, Pester tests, DSC configurations, and more. File generation is performed using crafted templates which allow the user to fill in details and choose from options to get their desired output.
How Do I Get Plaster?
The best way to get Plaster is also the best way to get any PowerShell module, from the PowerShell Gallery
You can just run
Install-Module Plaster
If you get a prompt about the repository not being trusted, don’t worry you can say yes.
Following PowerShell’s Security Guiding Principles, Microsoft doesn’t trust its own repository by default. The advice as always is never trust anything from the internet even if a bearded fellow from the UK recommends it!!
The PowerShell Gallery is a centralised repository where anyone can upload code to share and whilst all uploads are analyzed for viruses and malicious code by Microsoft, user discretion is always advised. If you do not want to be prompted every time that you install a module then you can run
Set-PSRepository -Name PSGallery -InstallationPolicy Trusted
if you and/or your organisation think that that is the correct way forward.
What Can We Do With Plaster?
Now that we have installed the module we can get to the nitty gritty. You can (and should) use Plaster to automate the creation of your module structure. If you are going to something more than once then automate it!
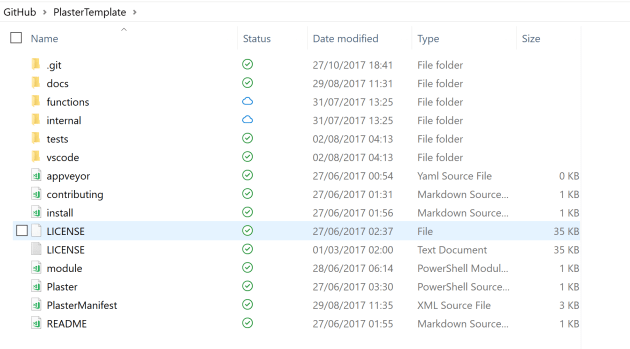
I created a repository for my Plaster Template You are welcome to take it and modify it for your own needs. I created a folder structure and some default files that I always want to have in my module folder

So in my template I have created all of the folders to organise the files in the way that I want to for my modules. I have also included the license file and some markdown documents for readme, contributing and installation. If we look in the tests folder

There are some default test files included as well.
But Plaster is more than just a file and folder template repository, if we look in the installation markdown file, it looks like this
# Installing <%= $PLASTER_PARAM_ModuleName %>
# You can install <%= $PLASTER_PARAM_ModuleName %> from the Powershell Gallery using
Find-Module <%= $PLASTER_PARAM_ModuleName %> | Install-Module
Import-Module <%= $PLASTER_PARAM_ModuleName %>
The Manifest XML file
The magic happens in the manifest file You can create one with the New-PlasterManifest command in the template directory
$manifestProperties = @{
Path = "PlasterManifest.xml"
Title = "Full Module Template"
TemplateName = 'FullModuleTemplate'
TemplateVersion = '0.0.1'
Author = 'Rob Sewell'
}
New-Item -Path FullModuleTemplate -ItemType Directory
New-PlasterManifest @manifestProperties<?xml version="1.0" encoding="utf-8"?> <plasterManifest schemaVersion="1.1" templateType="Project" xmlns="http://www.microsoft.com/schemas/PowerShell/Plaster/v1"> <metadata> <name>FullModuleTemplate</name> <id>220fba73-bf86-49e3-9ec5-c4bc2719d196</id> <version>0.0.1</version> <title>FullModuleTemplate</title> <description>My PLaster Template for PowerShell Modules</description> <author>Rob Sewell</author> <tags></tags> </metadata> <parameters></parameters> <content></content> </plasterManifest>
Plaster Parameters
<parameters>
<parameter name="FullName" type="text" prompt="Module author's name" />
<parameter name="ModuleName" type="text" prompt="Name of your module" />
<parameter name="ModuleDesc" type="text" prompt="Brief description on this module" />
<parameter name="Version" type="text" prompt="Initial module version" default="0.0.1" />
<parameter name="GitHubUserName" type="text" prompt="GitHub username" default="${PLASTER_PARAM_FullName}"/>
<parameter name="GitHubRepo" type="text" prompt="Github repo name for this module" default="${PLASTER_PARAM_ModuleName}"/>
</parameters><%= $PLASTER_PARAM_WHATEVERTHEPAREMETERNAMEIS %>
Plaster Content
The other part of the manifest file to create is the content. This tells Plaster what to do when it runs.
Mine is split into 3 parts
<message>
Creating folder structure
</message>
<file source='' destination='docs'/>
<file source='' destination='functions'/>
<file source='' destination='internal'/>
<file source='' destination='tests'/>
<message>
Deploying common files
</message>
<file source='appveyor.yml' destination=''/>
<file source='contributing.md' destination=''/>
<file source='LICENSE.txt' destination=''/>
<templateFile source='install.md' destination=''/>
<templateFile source='readme.md' destination=''/>
<templateFile source='tests\Project.Tests.ps1' destination=''/>
<templateFile source='tests\Help.Tests.ps1' destination=''/>
<templateFile source='tests\Feature.Tests.ps1' destination=''/>
<templateFile source='tests\Regression.Tests.ps1' destination=''/>
<templateFile source='tests\Unit.Tests.ps1' destination=''/>
<templateFile source='tests\Help.Exceptions.ps1' destination=''/>
<templateFile source='docs\ReleaseNotes.txt' destination=''/>
<file source='module.psm1' destination='${PLASTER_PARAM_ModuleName}.psm1'/><message>
Creating Module Manifest
</message>
<newModuleManifest
destination='${PLASTER_PARAM_ModuleName}.psd1'
moduleVersion='$PLASTER_PARAM_Version'
rootModule='${PLASTER_PARAM_ModuleName}.psm1'
author='$PLASTER_PARAM_FullName'
description='$PLASTER_PARAM_ModuleDesc'
encoding='UTF8-NoBOM'/>Creating a new module at the command line
Now you can easily create a module with all of the required folders and files that you want by creating a directory and running
Invoke-Plaster -TemplatePath TEMPLATEDIRECTORY -DestinationPath DESTINATIONDIRECTORY
which looks like this
Its that easy 
Create a module without prompts
$plaster = @{
TemplatePath ="GIT:\PlasterTemplate"
DestinationPath = "GIT:\NewModule"
FullName = "Rob Sewell"
ModuleName = "NewModule"
ModuleDesc = "Here is a module description"
Version = "0.9.0"
GitHubUserName = "SQLDBAWithABeard"
GitHubRepo = "NewModule"
}
If (!(Test-Path $plaster.DestinationPath)) {
New-Item-ItemType Directory -Path $plaster.DestinationPath
}
Invoke-Plaster @plasterMake Your Own
Further Reading
Kevin Marquettes blog post is an excellent and detailed post on using Plaster which you should also read for reference as well as David Christians post which has some great content on adding user choice to the parameters enabling one plaster template to fulfill multiple requirements.


