Introduction
Sometimes we need to deploy many SQL Servers on Azure in the enterprise environment. Wwe can do this manually, but it is not a good solution as there are too many manual tasks and repetitive tasks. Today I will give you a showcase to deploy SQL Servers on Azure using Azure Data Studio, which can improve deployment efficiency. Reusable templates and Azure Data Studio provide an easy way to deploy SQL Server (not only on Azure) for beginners with an interactive notebook based on Jupyter and easy to understand Python code.
What is Azure Data Studio?
Azure Data Studio is a cross-platform database tool for data professionals using on-premises and cloud data platforms on Windows, macOS, and Linux. Azure Data Studio offers a modern editor experience with IntelliSense, code snippets, source control integration, and an integrated terminal. It's engineered with the data platform user in mind, with the built-in charting of query result sets and customizable dashboards.
Here is the reference link from Microsoft: What is Azure Data Studio - Azure Data Studio | Microsoft Learn
Process
There are a few prerequisites and then a procedure to follow. These are described below.
Prerequisites
- Your PC or server must be able to connect to your Azure account.
- Installed Azure Data Studio.
- Installed Azure CLI and the latest Python, if not your PC or server must be able to connect to the Internet to download them.
Operation Procedures
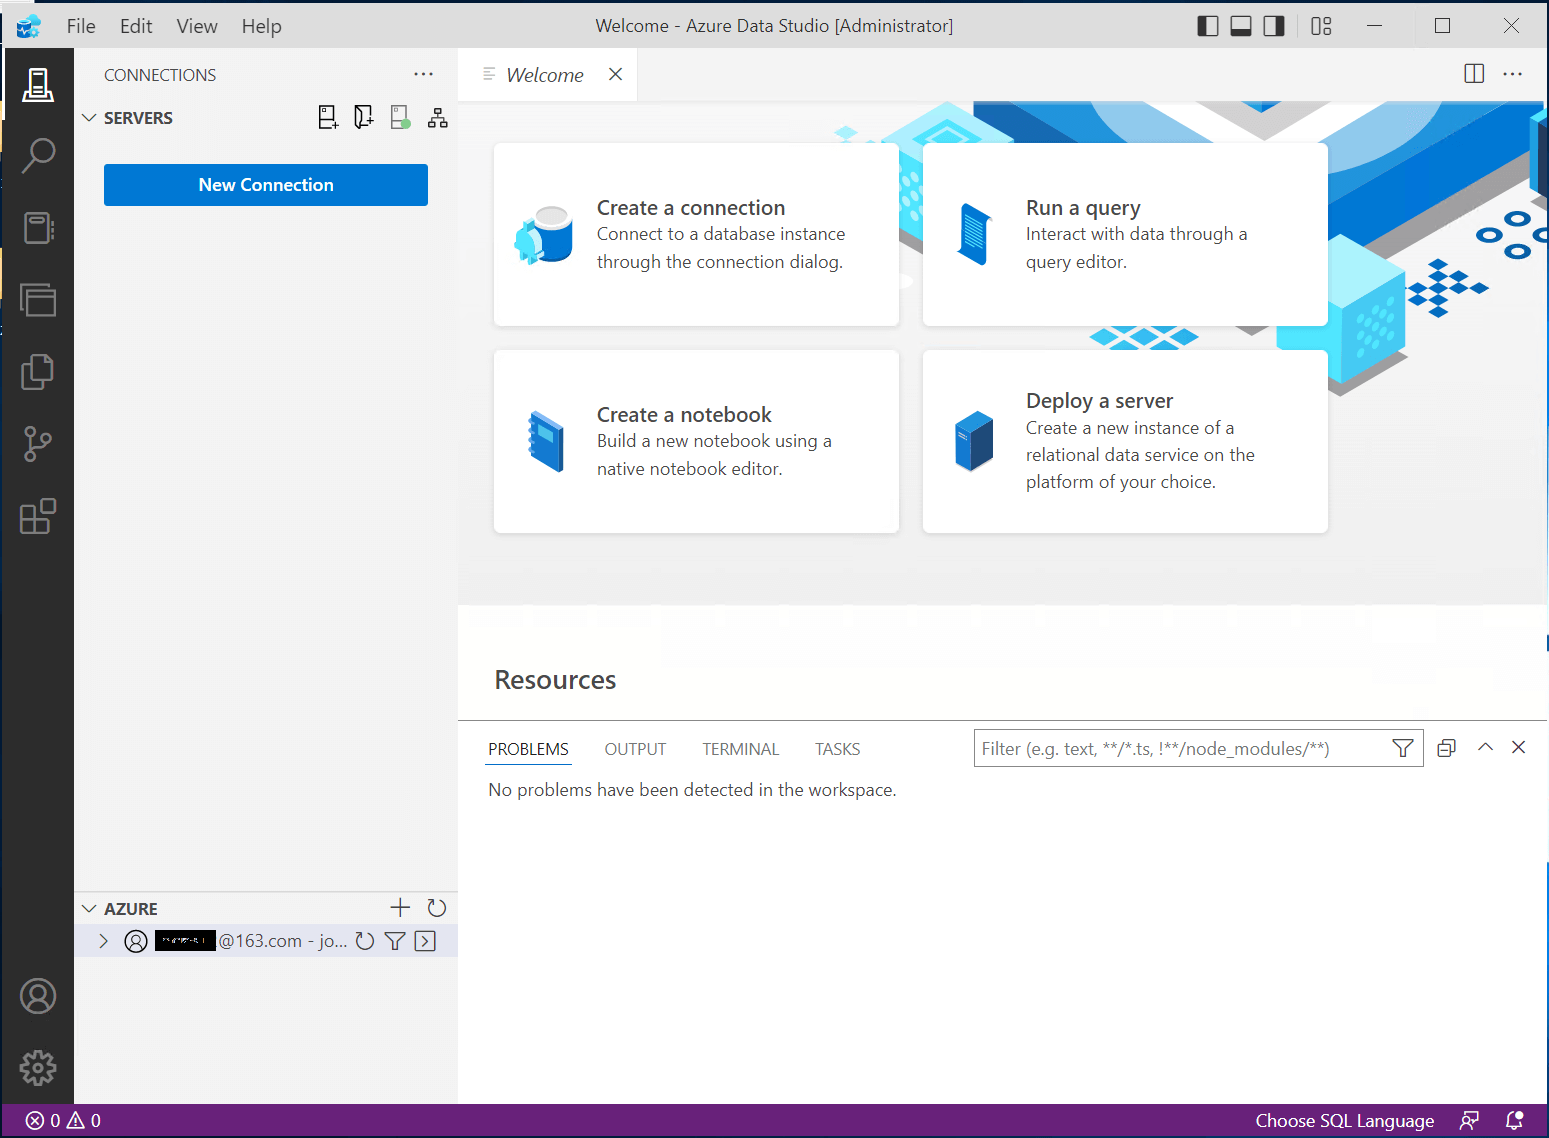
Step 1:Open the Azure Data Studio and log into your Azure account, go to the "Azure" tab under Connections.
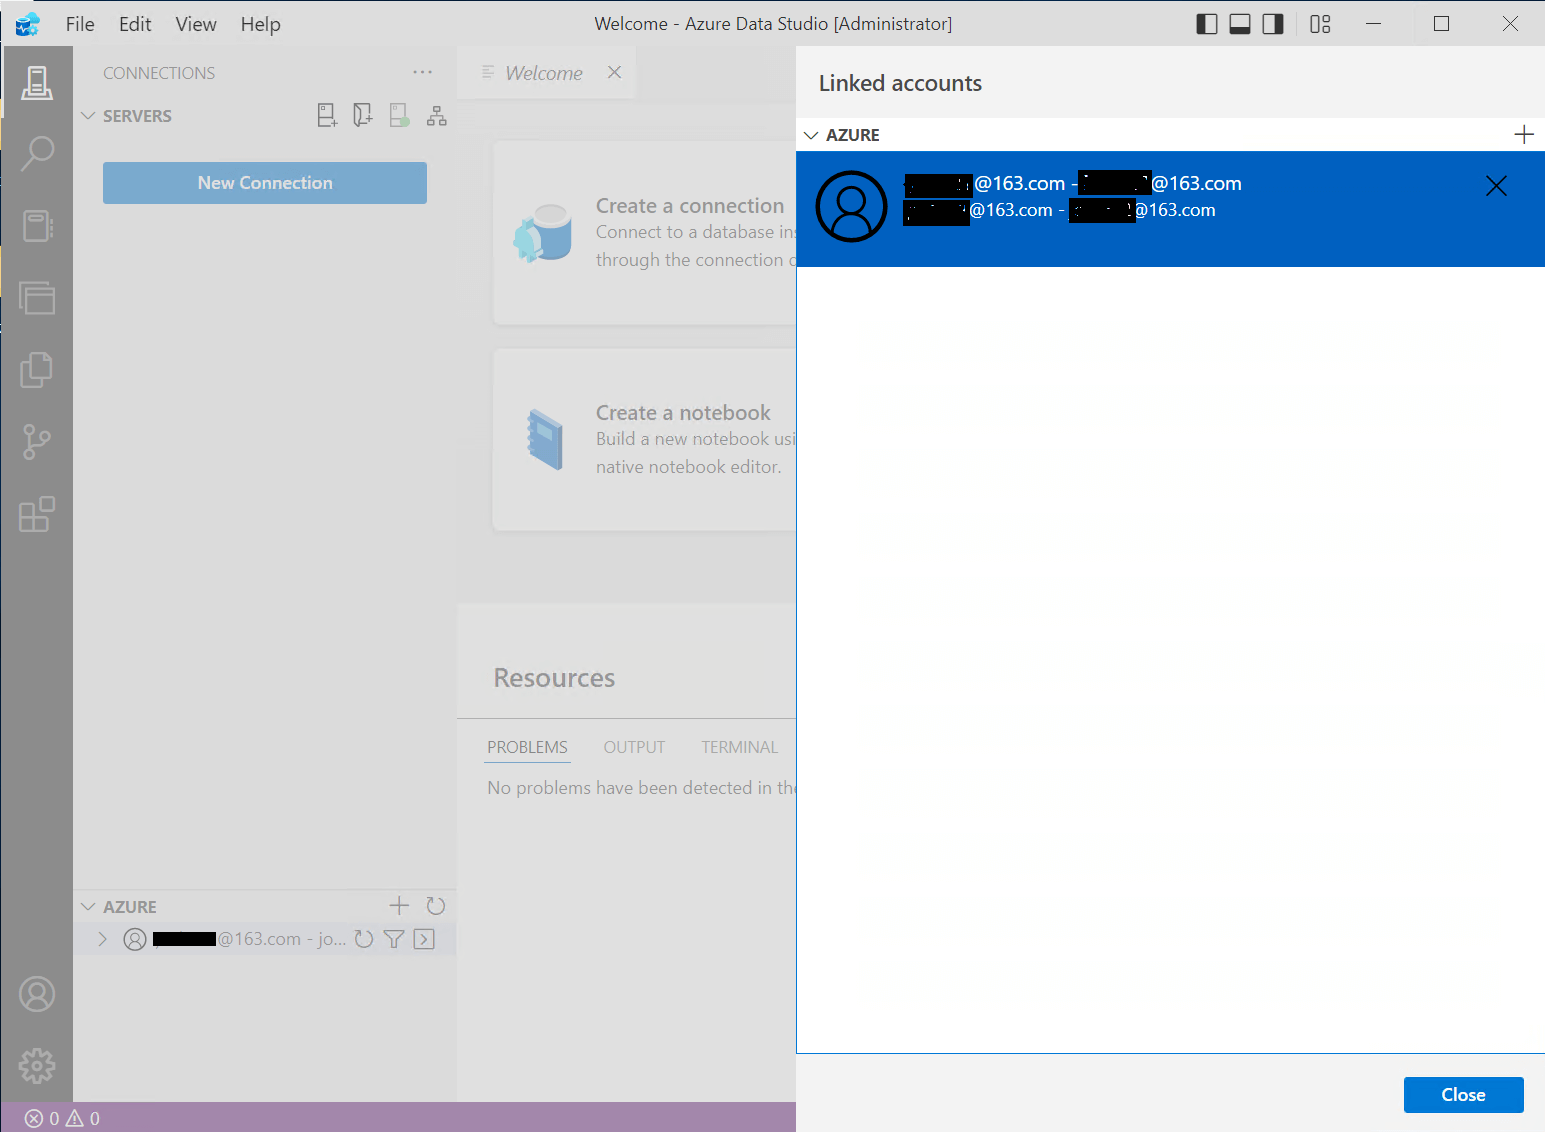
This will bring up a list of linked accounts in Azure. You can select one, or click the + to add a new one.
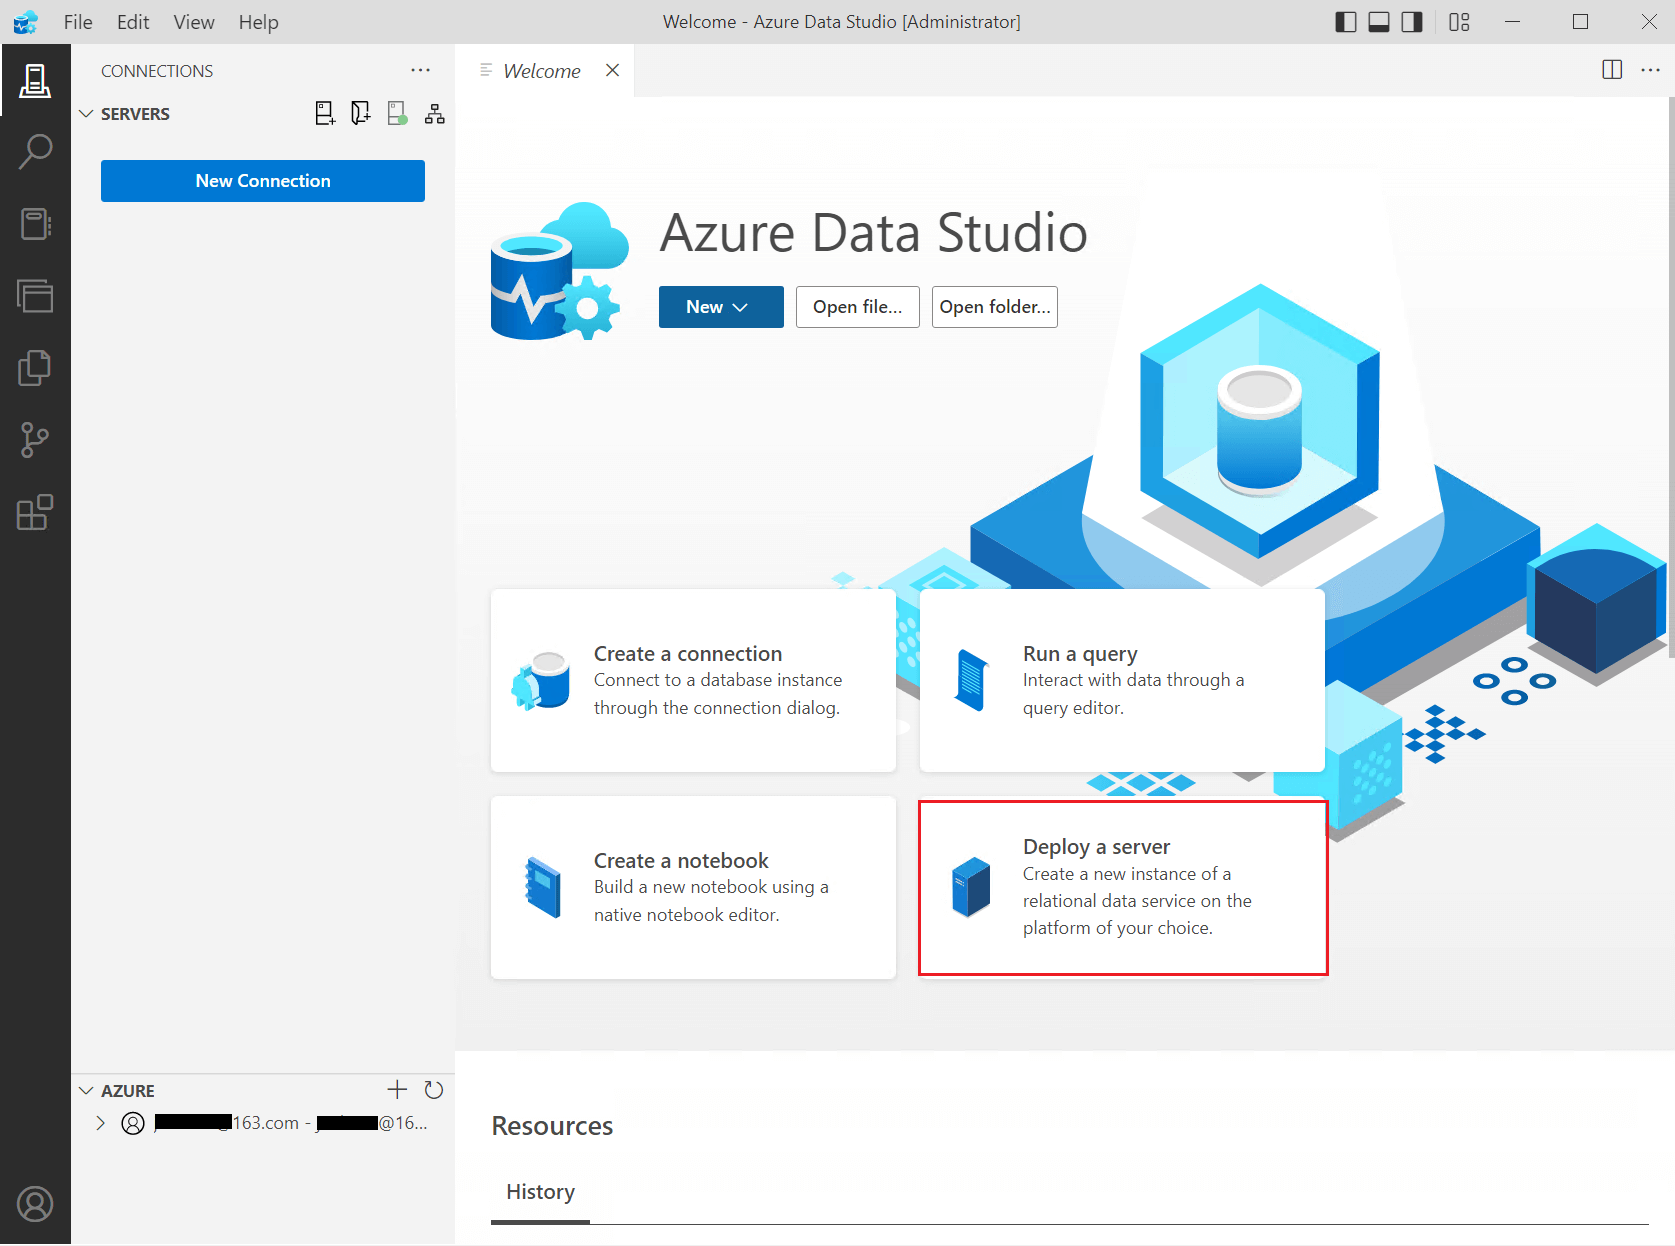
Step 2: Click on "Deploy a server":
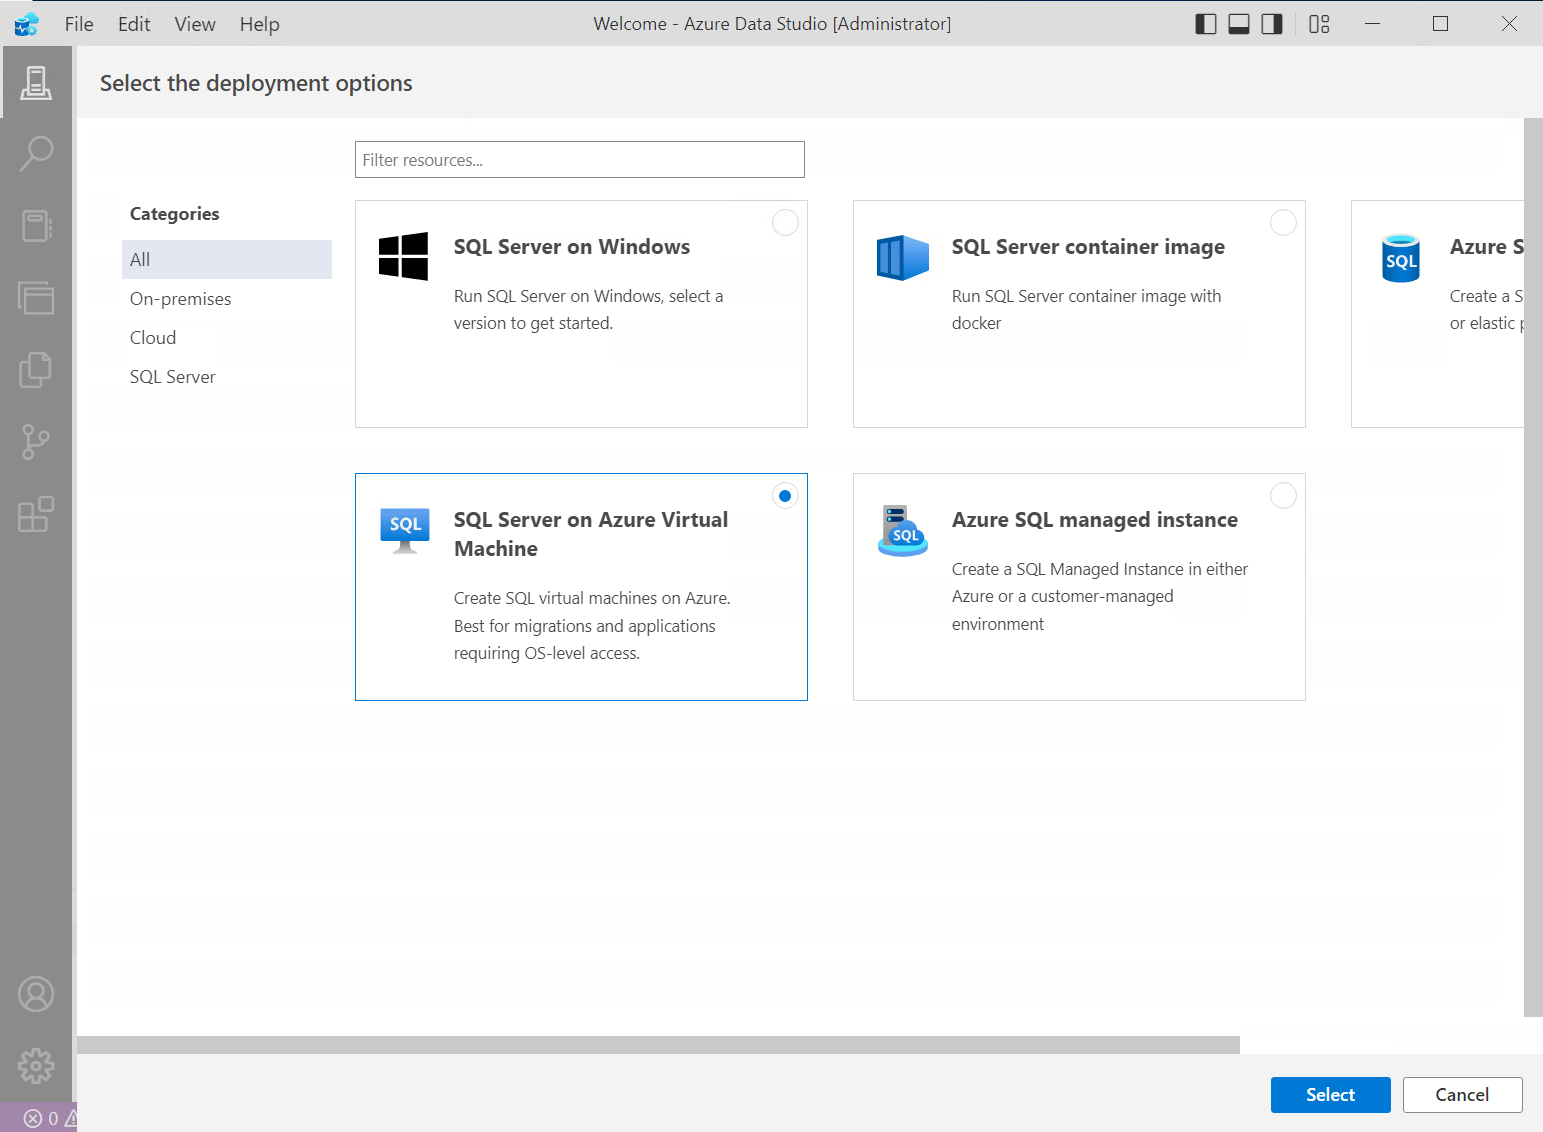
Step 3: Choose the option "SQL Server on Azure Virtual Machine":
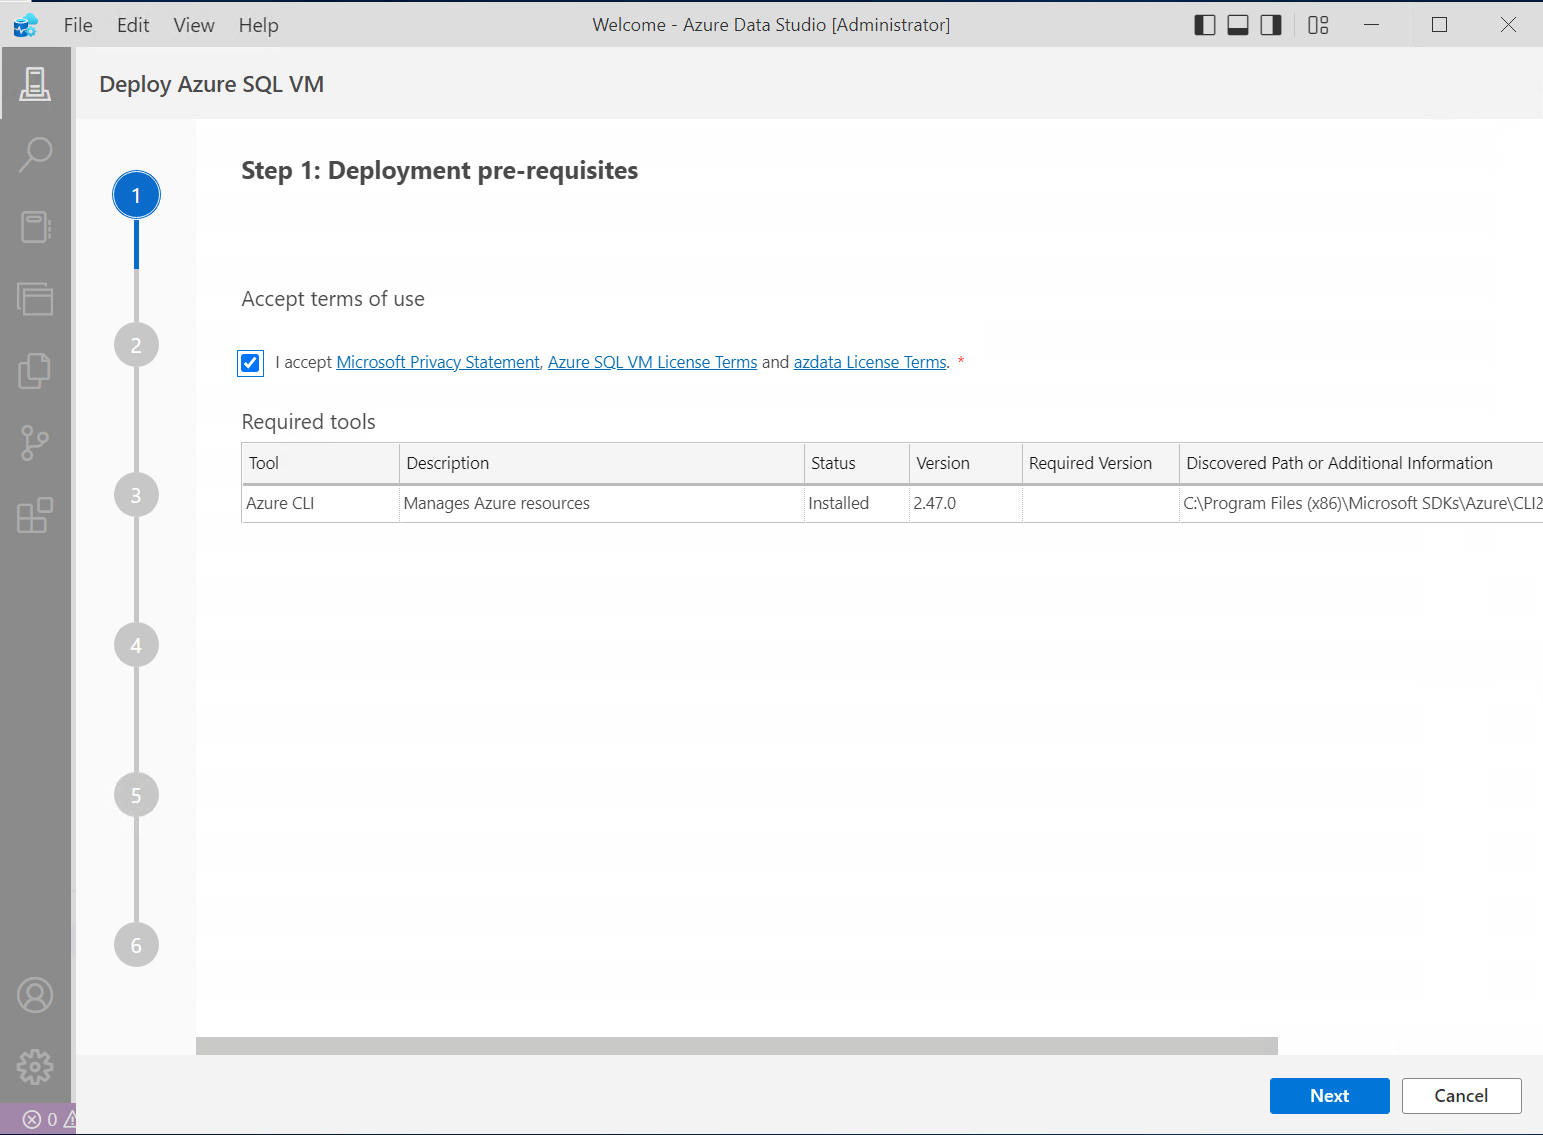
Step 4: Configure "Deployment pre-requisites" is the next step. Here you accept the terms.
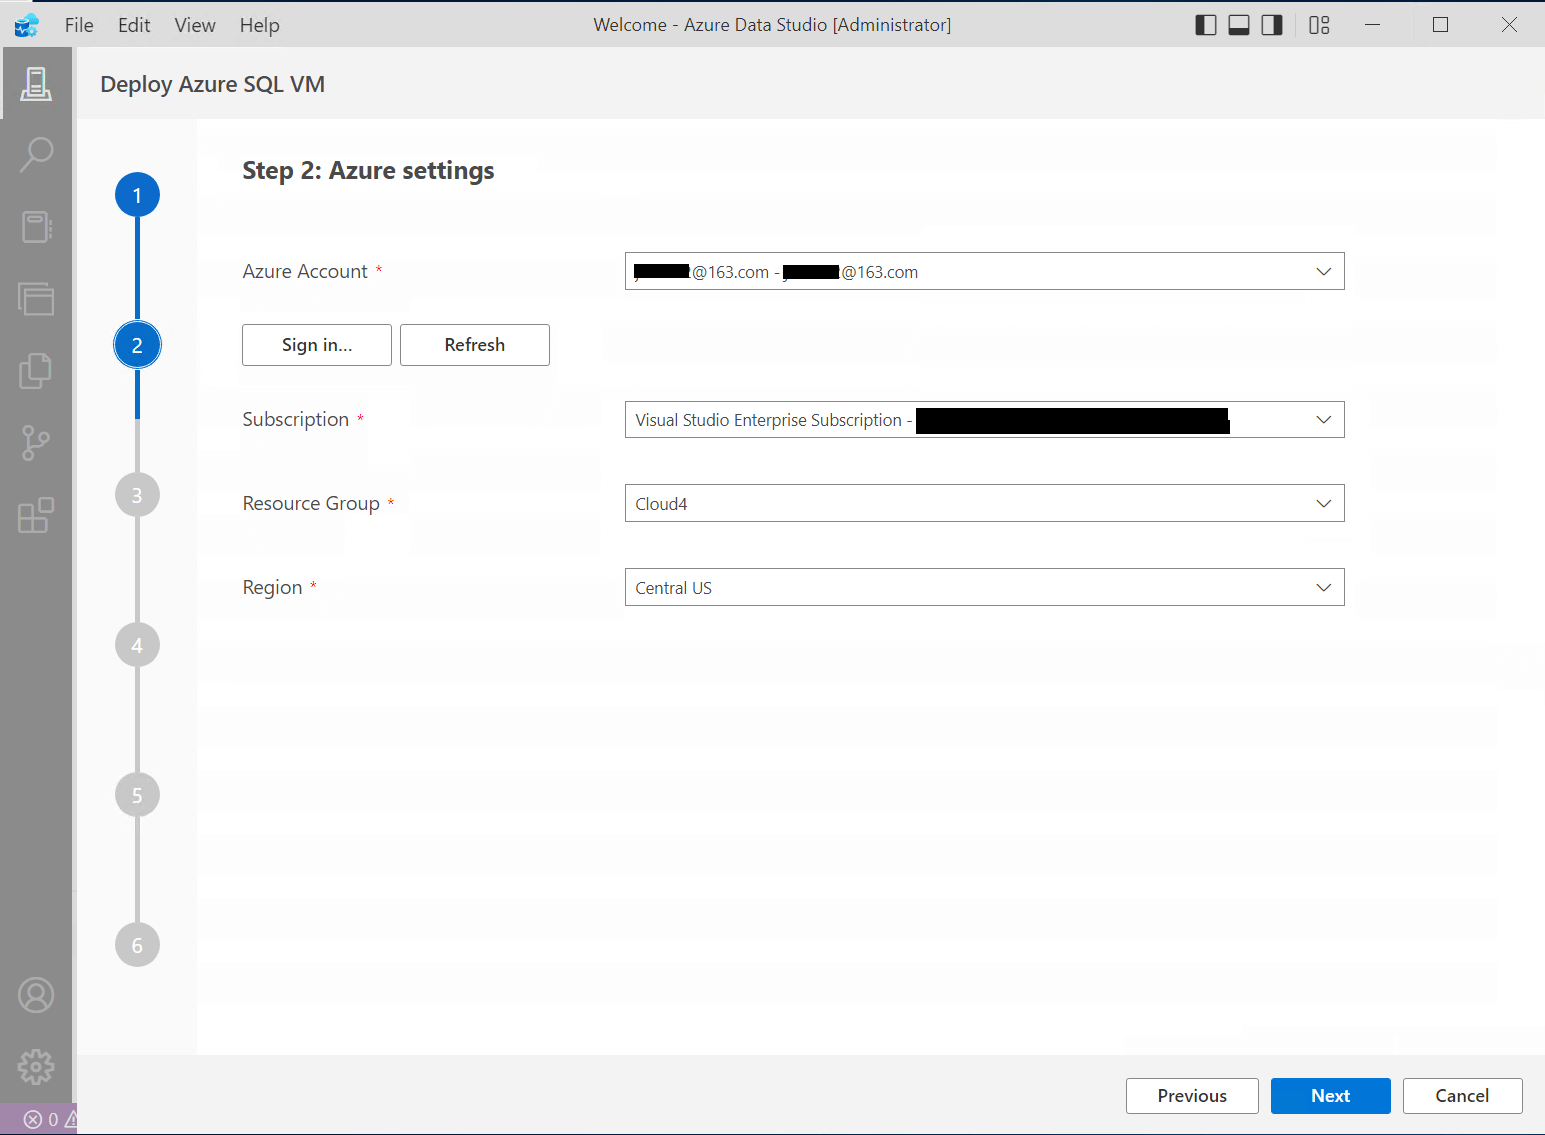
Step 5: Configure "Azure settings". Choose the subscription, resource group, and region.
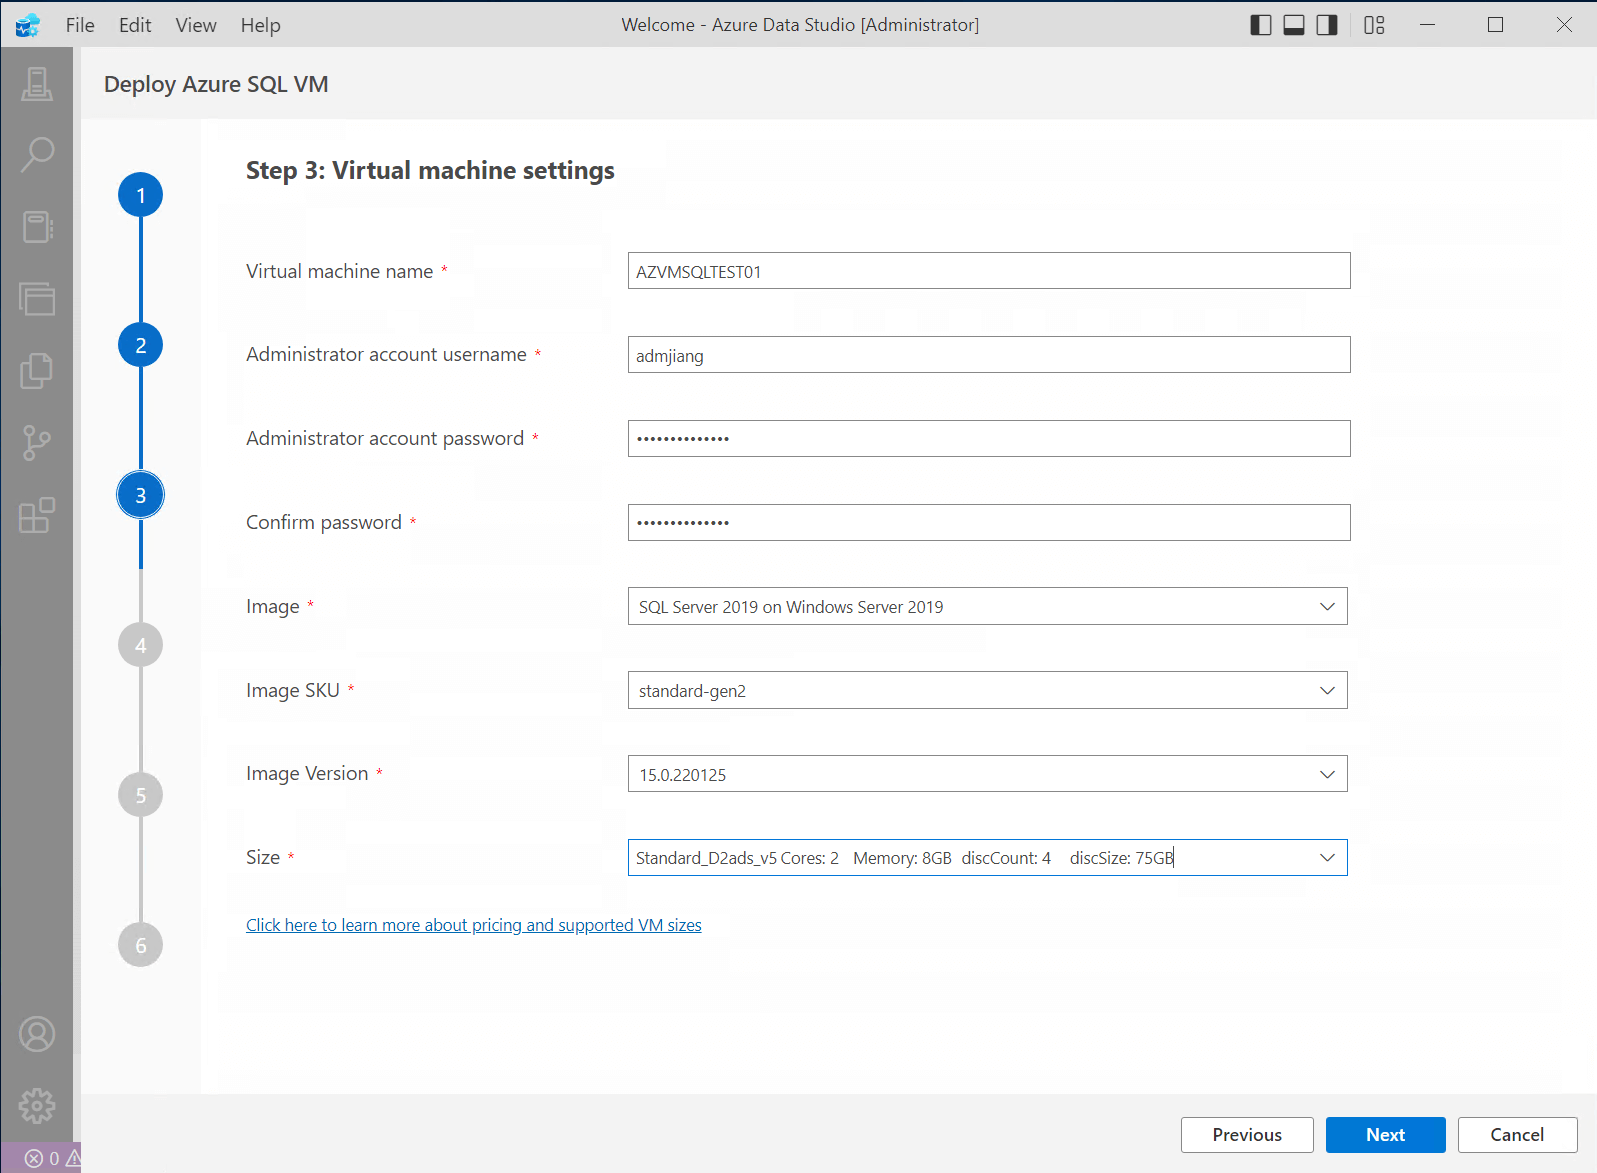
Step 6: Configure "Virtual machine settings", here you can configure the Windows server version and SQL Server version and edition:
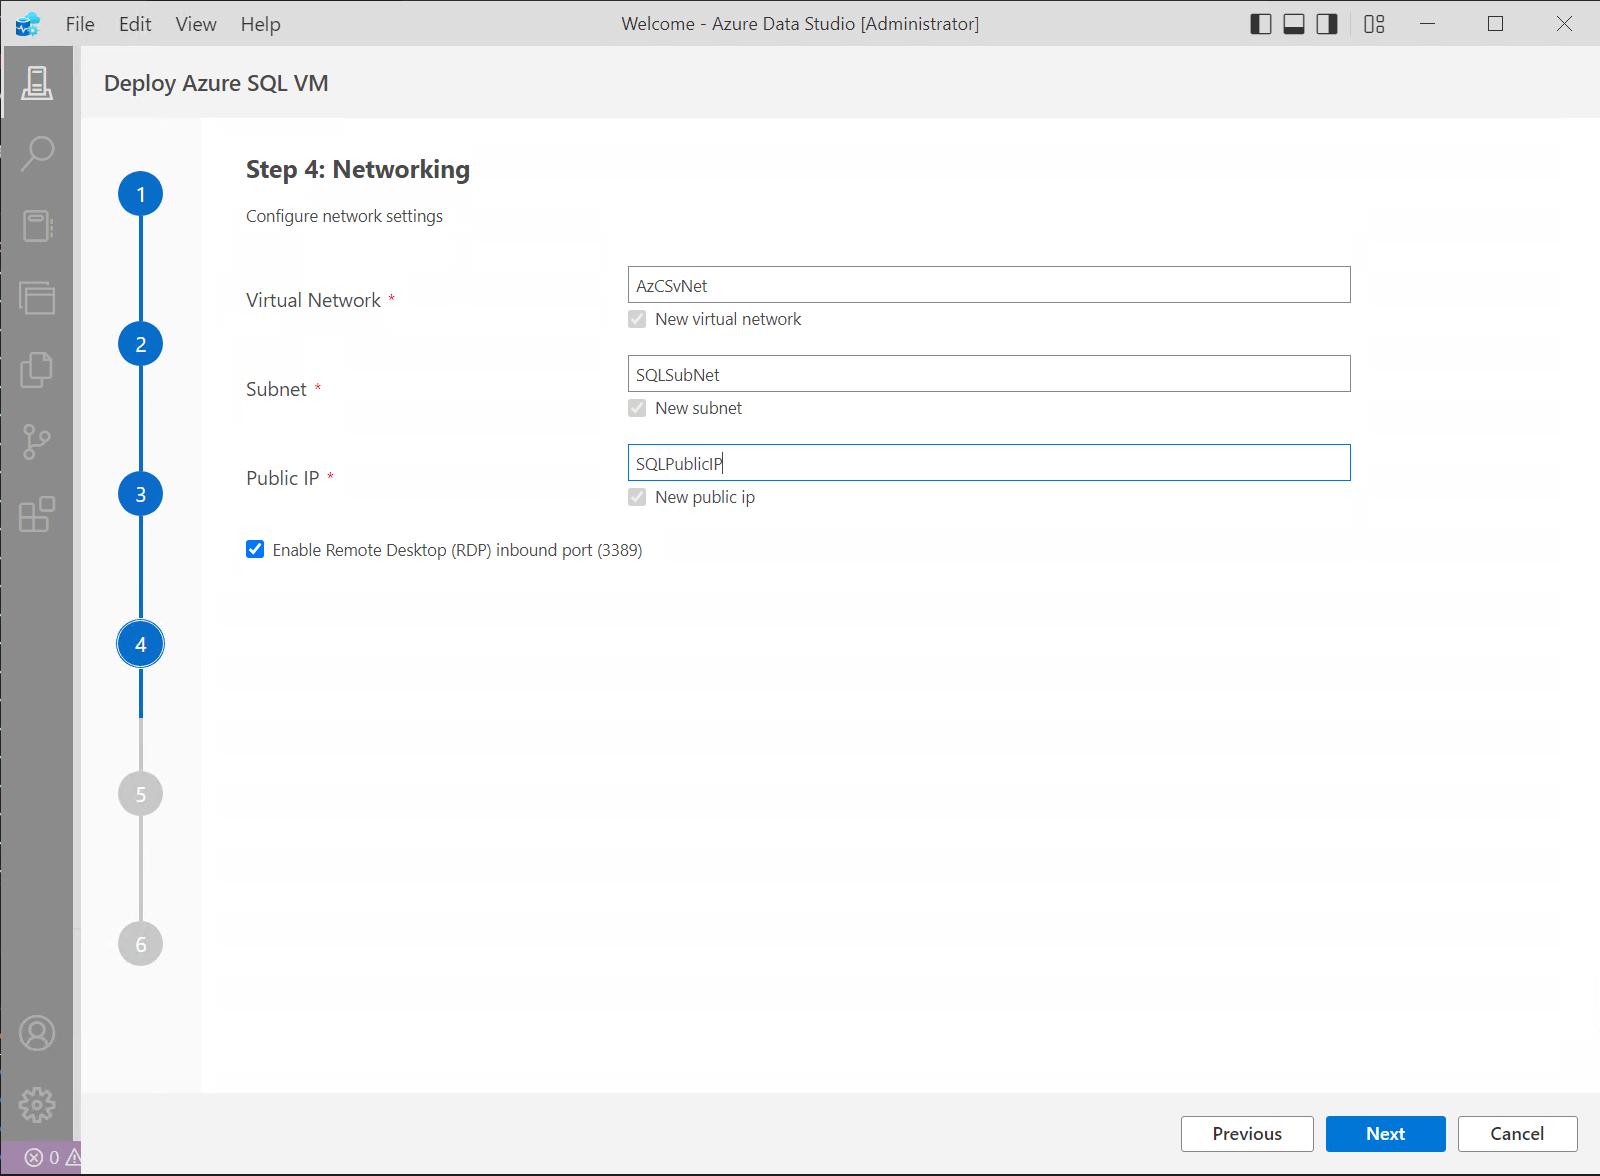
Step 7: Configure "Networking" according to your needs. You can enter a VPN, subnet and the public IP name.
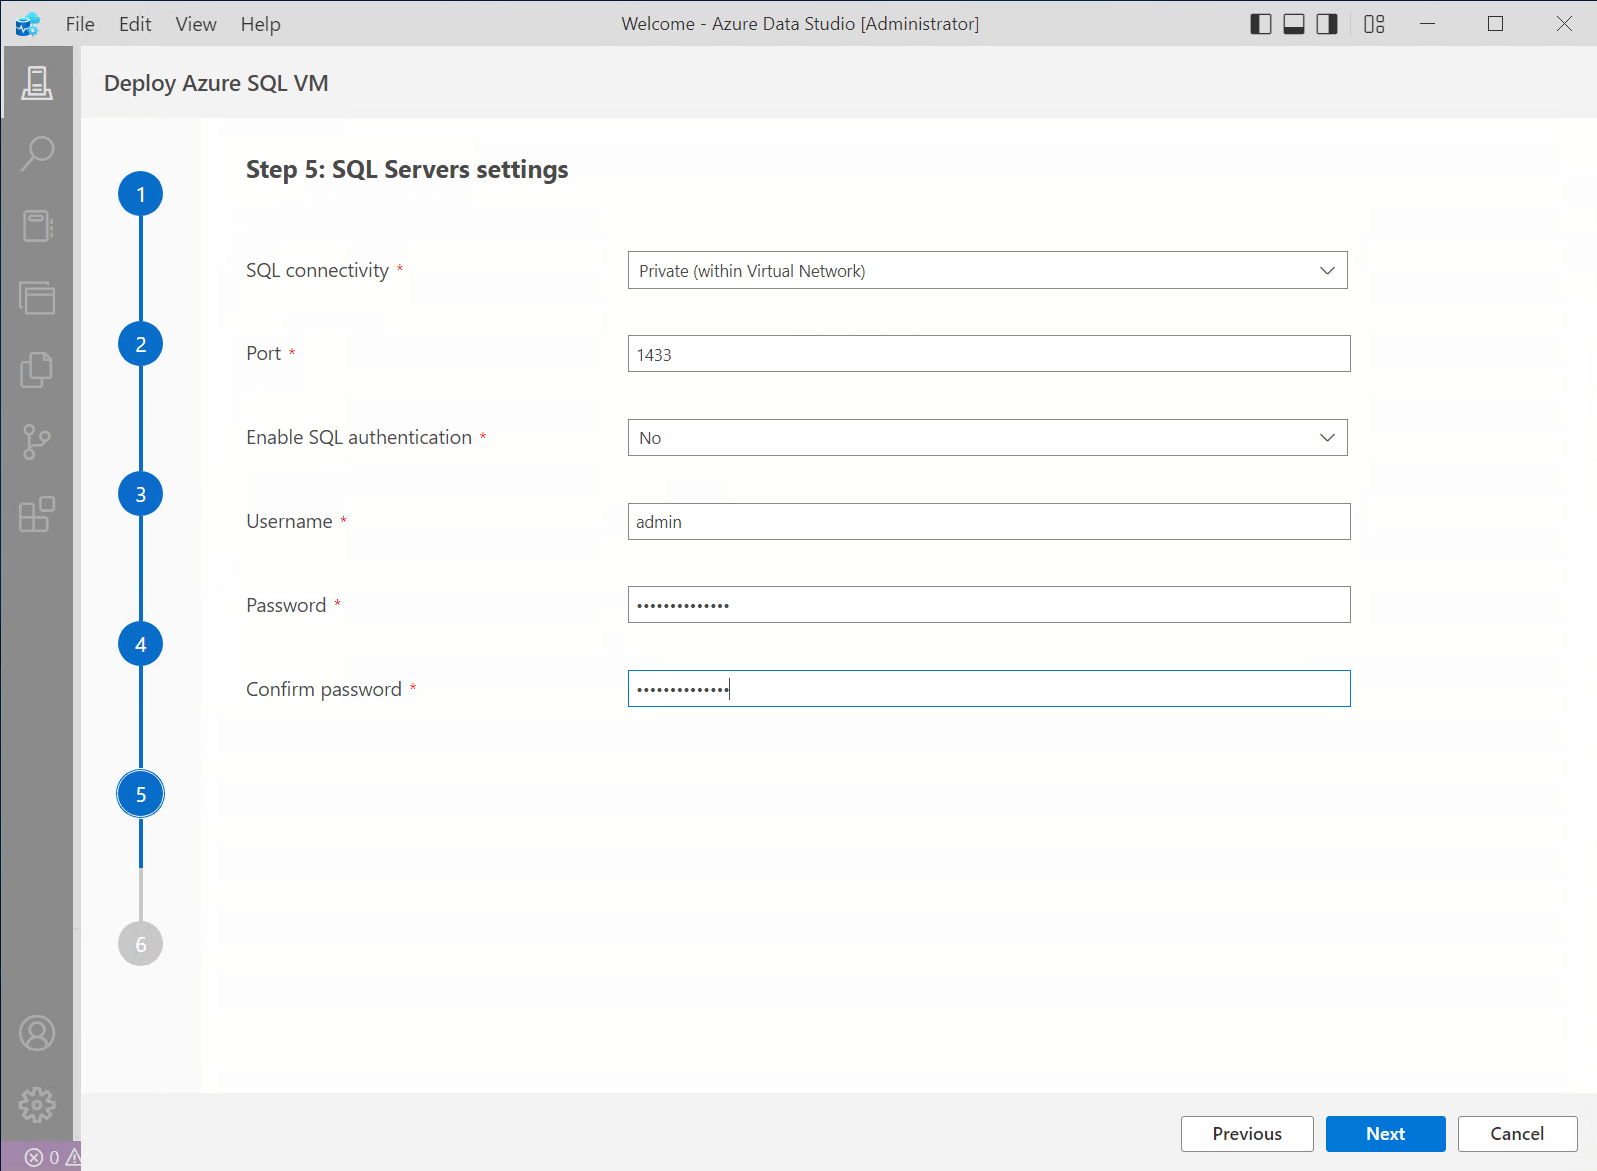
Step 8:Configure "SQL Servers settings" is the step where you set the instance settings and pick the admin account. Make sure you save the password somewhere secure.
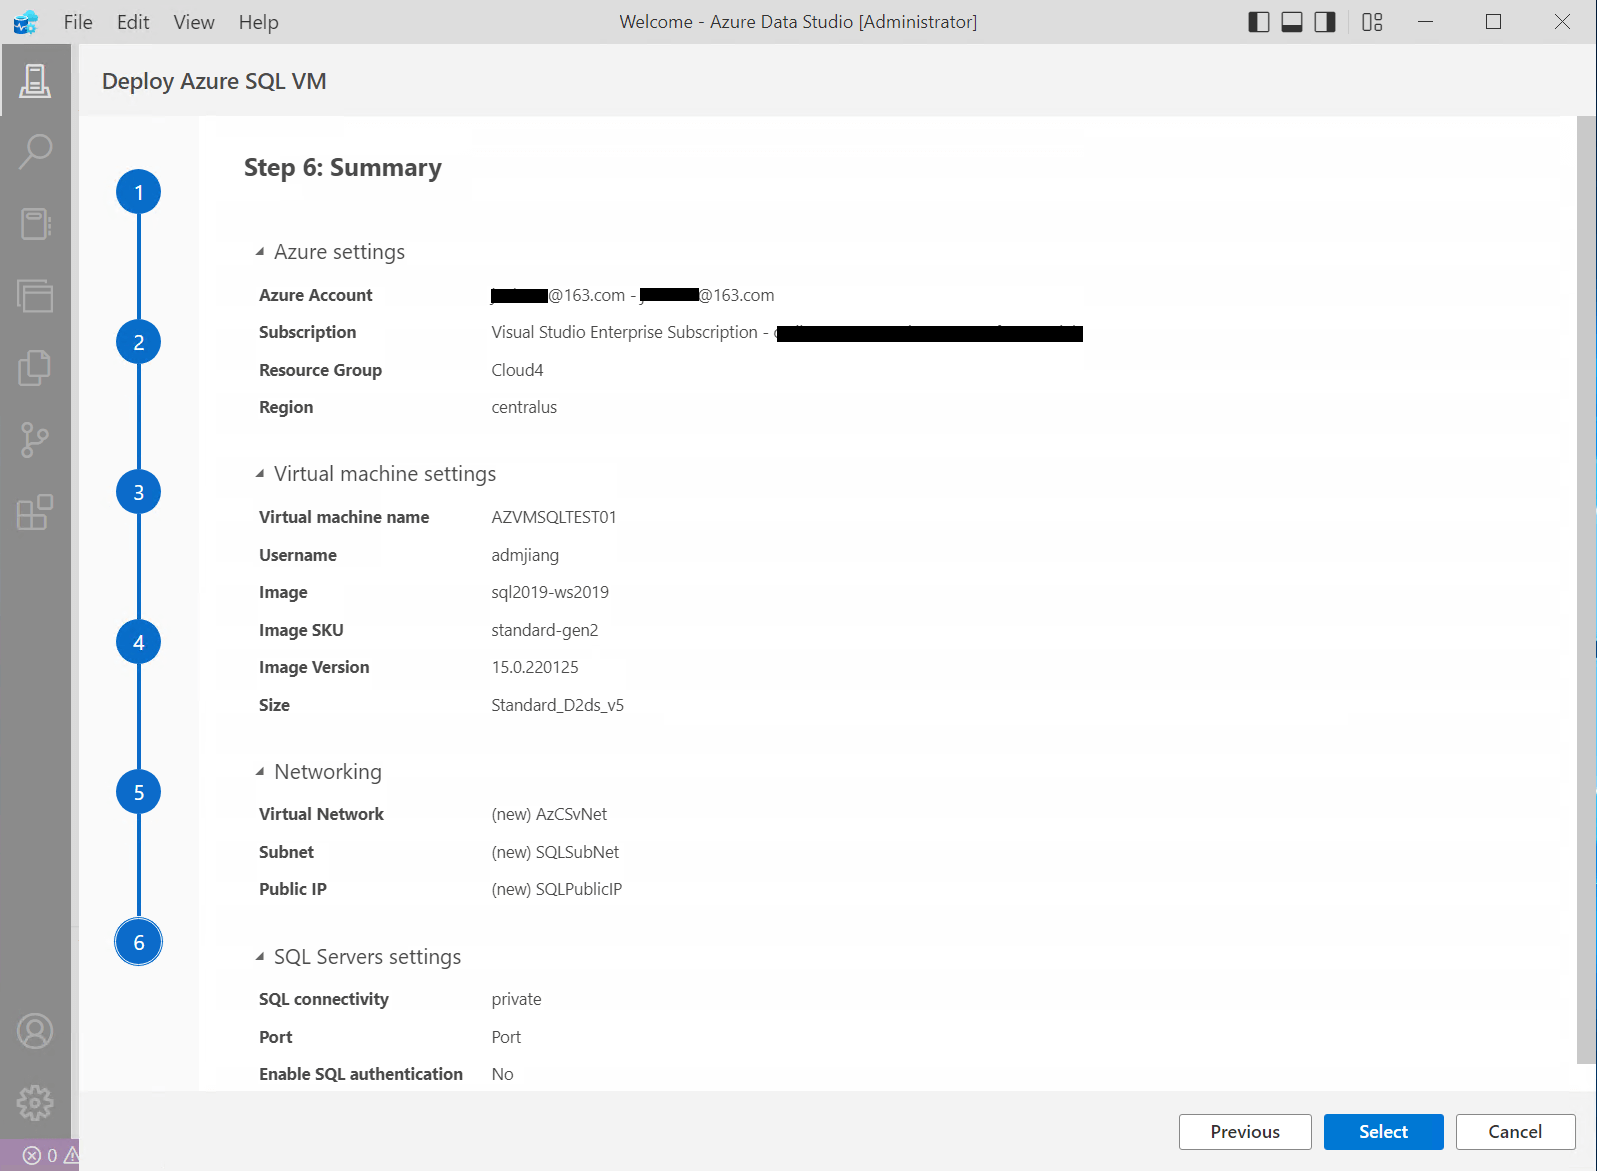
Step 9: Click on the "Select" button to generate the Jupyter notebook file:
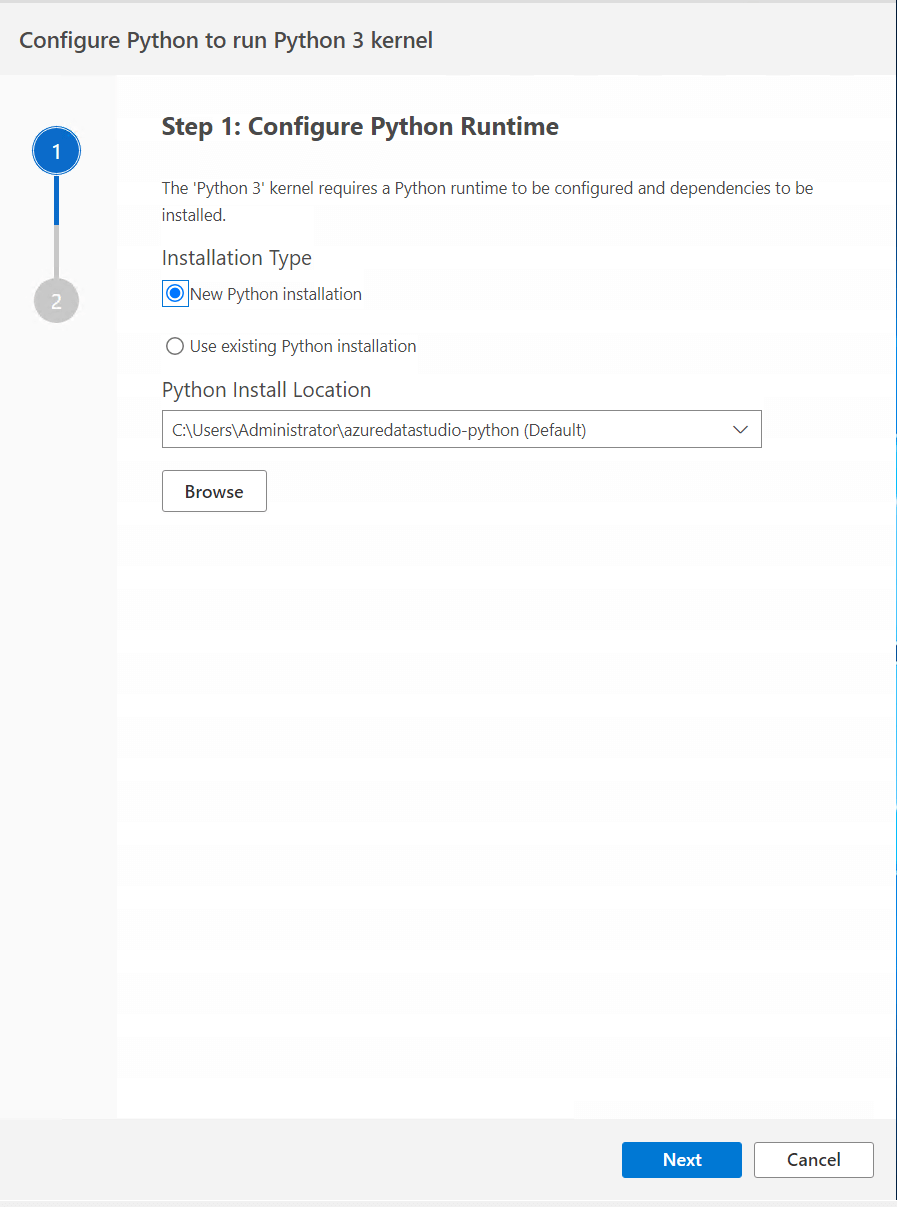
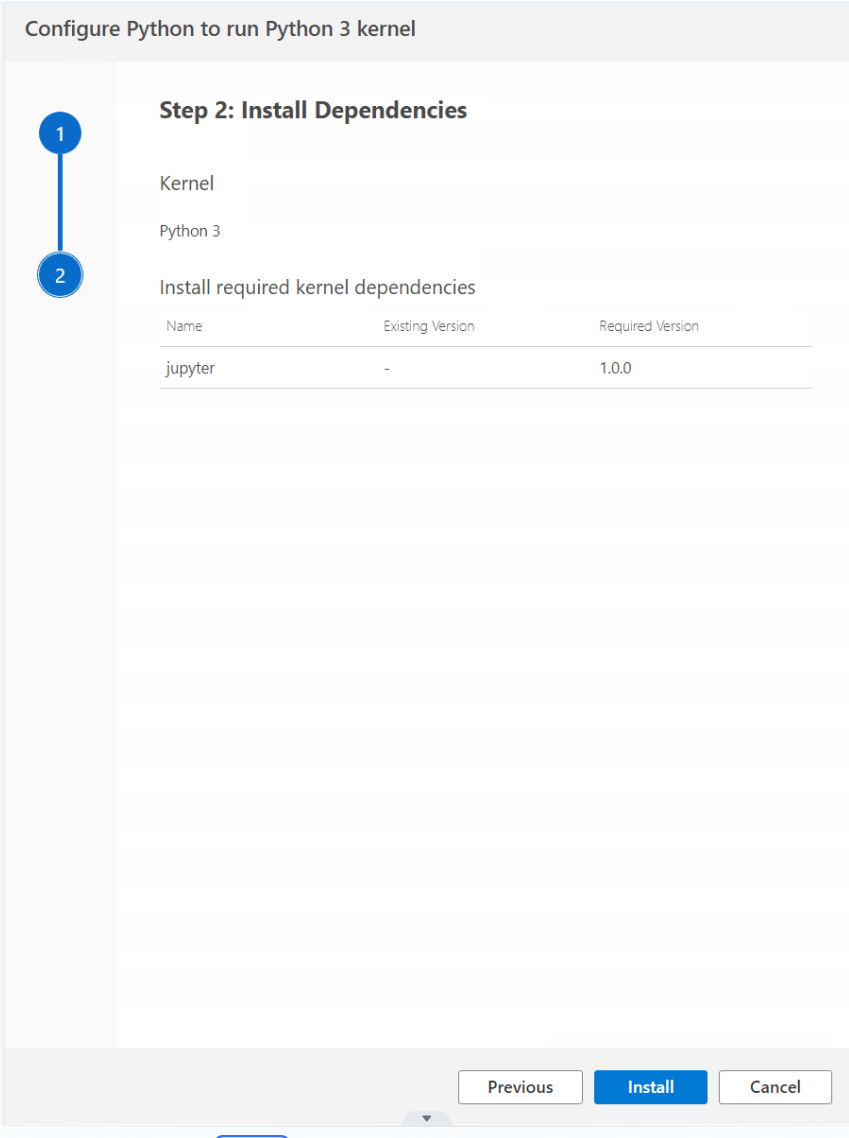
Step 10: Install the Python and Kernel dependencies of Jupyter if this is the first time you to use Azure Data Studio to deploy SQL Server:
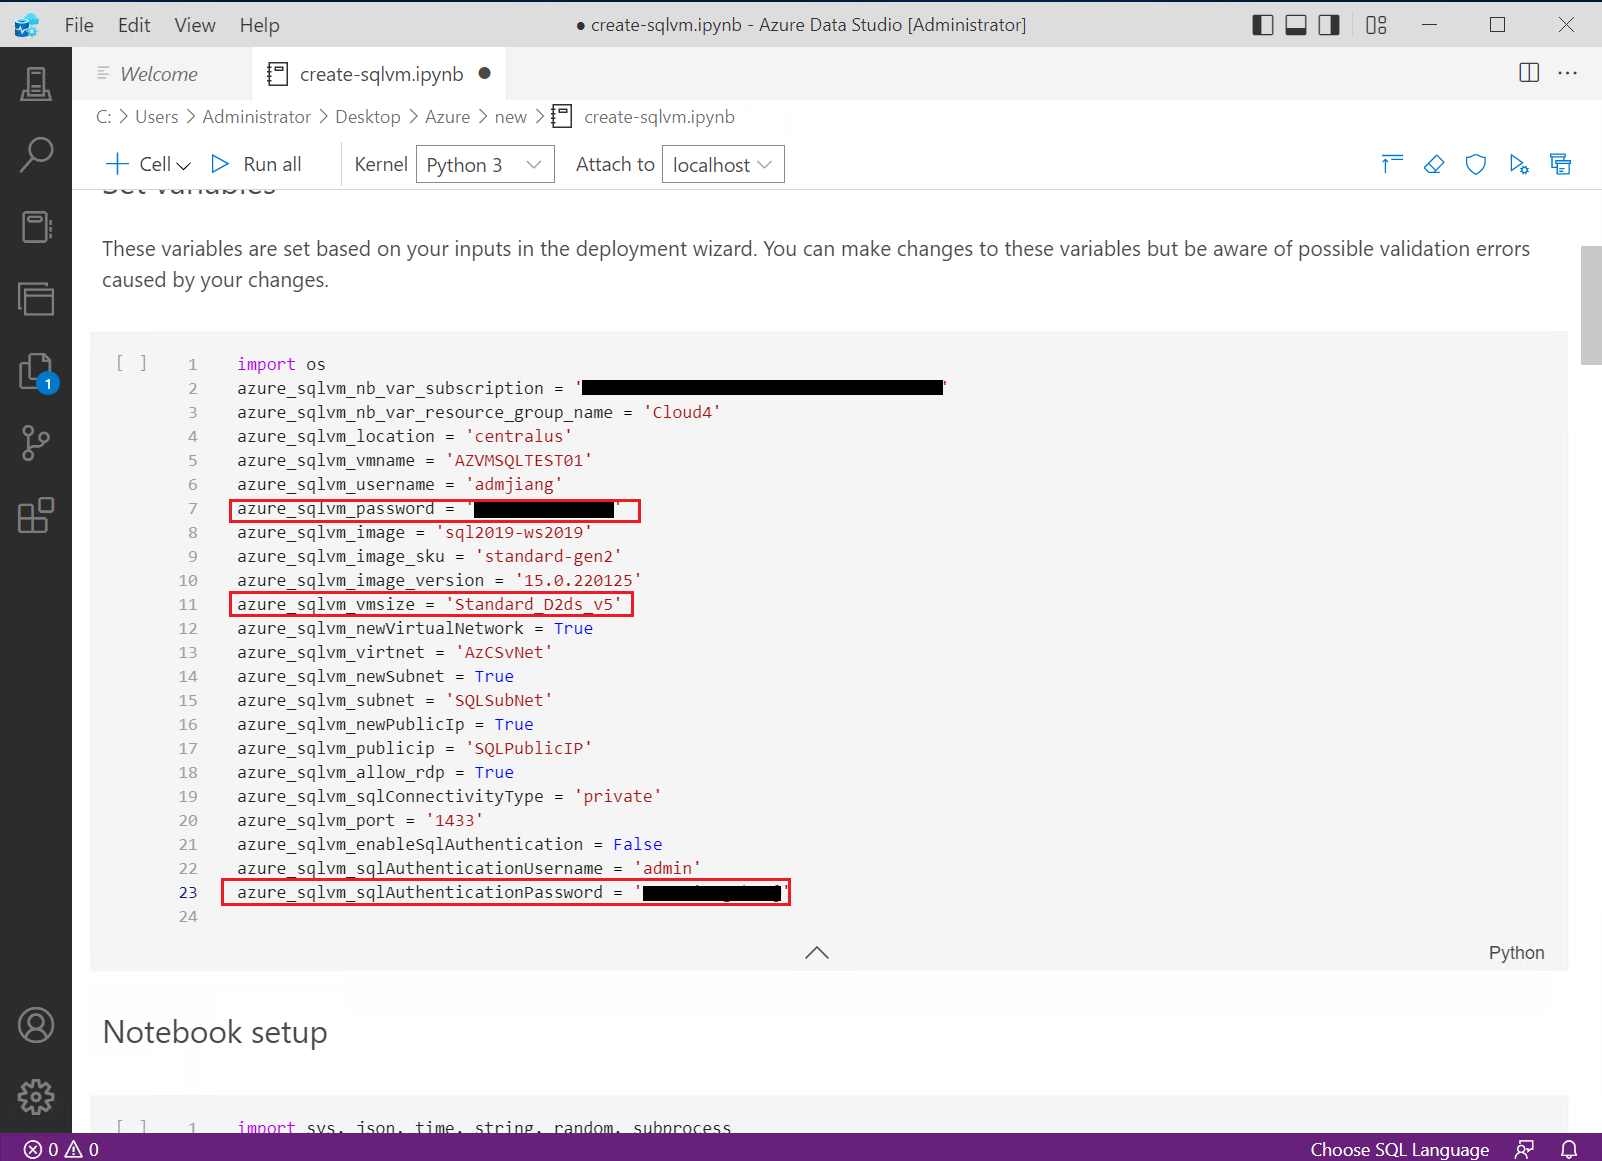
Step 11: For this deployment template, you need to update the notebook file:
- Add "azure_sqlvm_password" in the "Set variables" section.
- Add "azure_sqlvm_sqlAuthenticationPassword" in the "Set variables" section.
- Change the value of variable azure_sqlvm_vmsize to "Standard_D2as_v5" because "Standard_D2ds_v5" is not supported in central-us region.
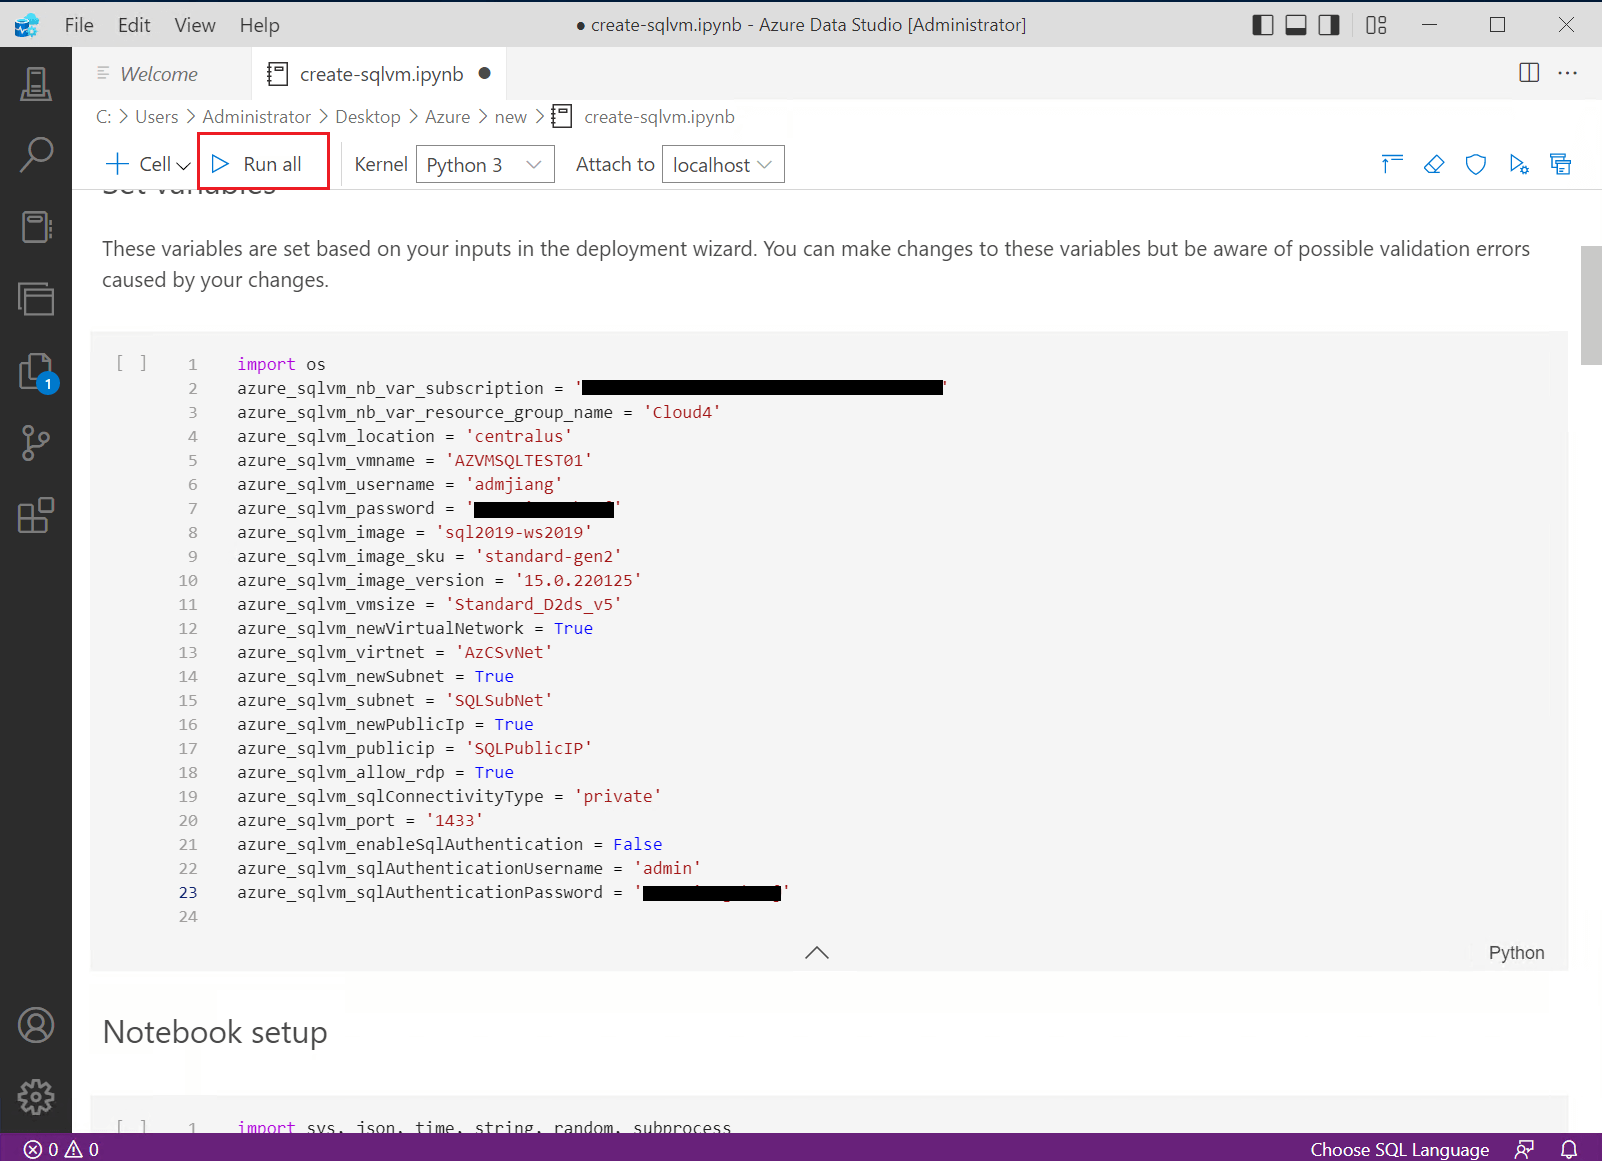
Step 12; Click on the "Run all" button to deploy this VM. You can save the file to a notebook file with the extended file name "ipynb" for reuse. The next you run this, you just need to update the variables:
Validation
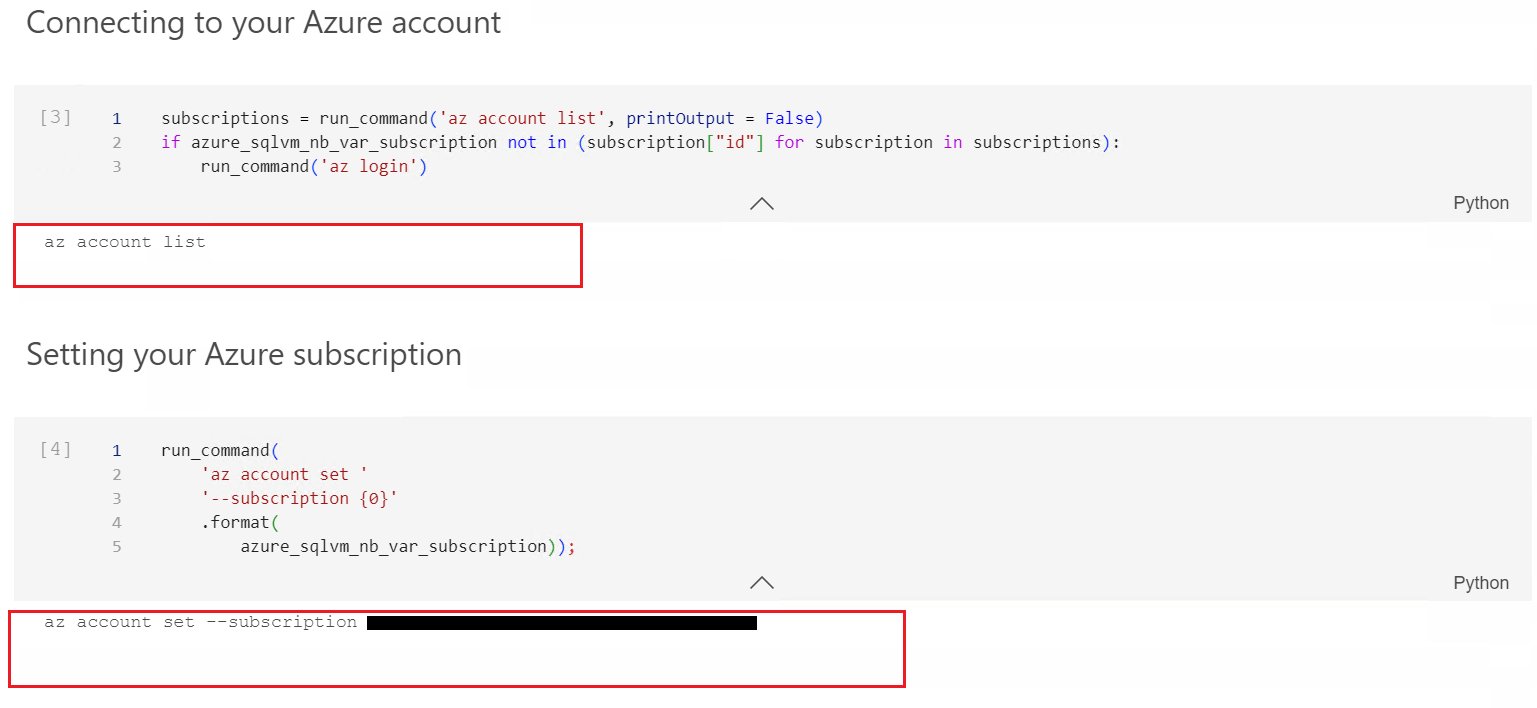
After all codes cell finish running, you can find the outputs under each code cell. If there were not any errors, this means the deployment succeeded. Below I show each cell in the notebook with the results outlined.
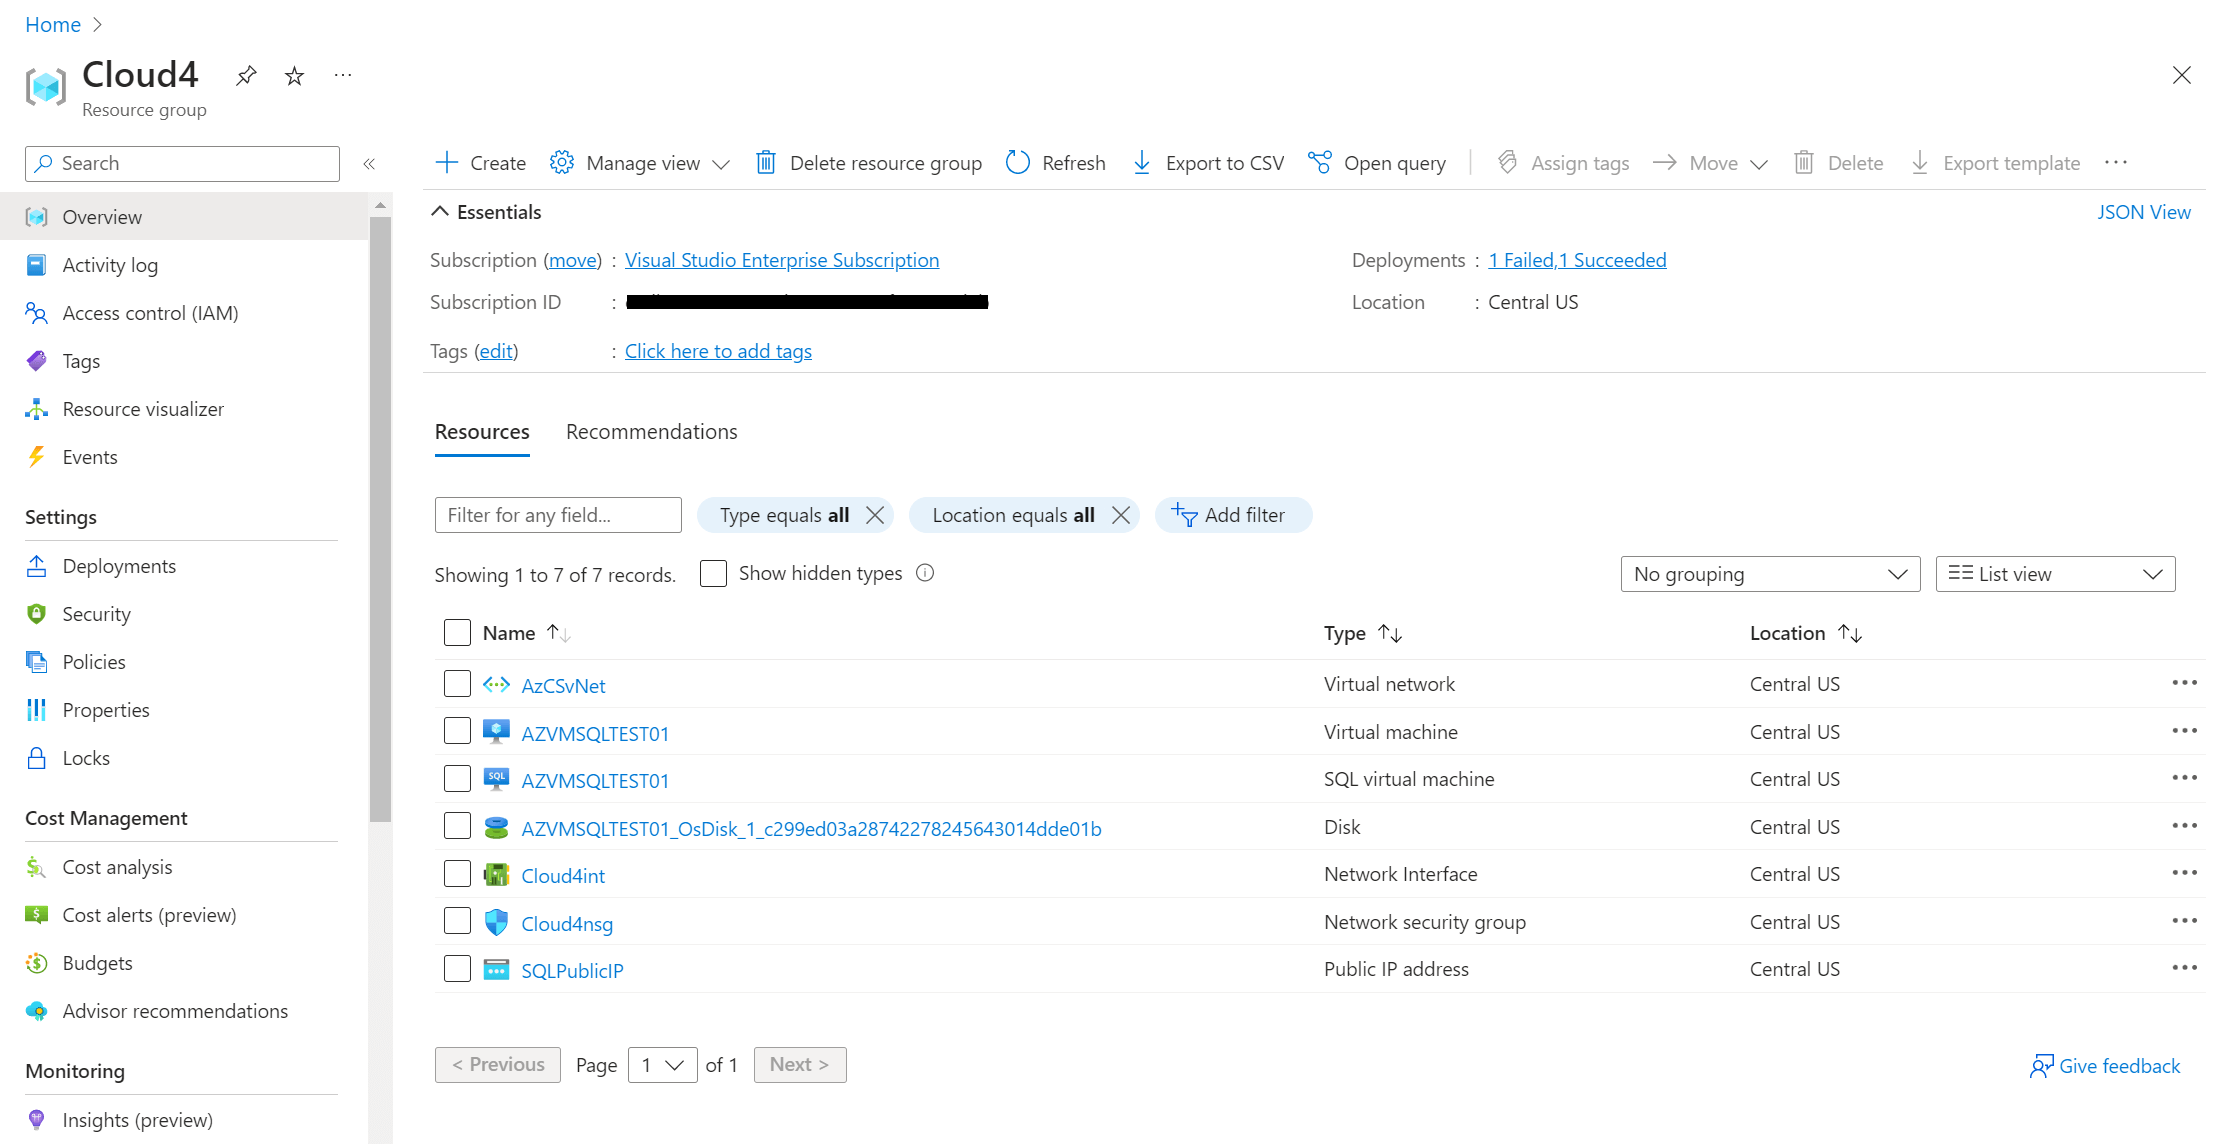
You can go to the Azure portal to check the new Azure resources we deployed:
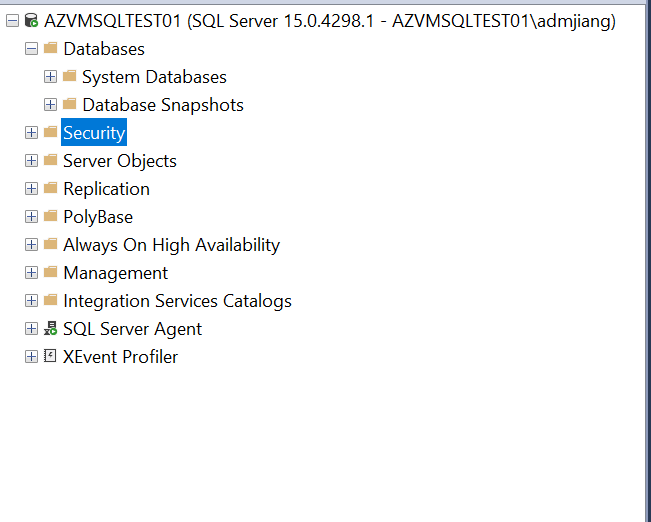
Then you can connect to the newly built Azure SQL VM and connect to the instance using SSMS:
Summary
With the popularization of cloud technology, databases in the cloud are going to be a trend. Learning how to manage them in an efficient way is very important. Azure Data Studio is a good choice for beginners who still have not mastered complex Azure auto-deployment tools or platforms, such as Azure Resource Manager or Terraform. ADS is beginner friendly, easy to use, and can create a template that can be reused.


