Introduction
This article will teach you how to use images in Power BI Report Builder. Previously, we show how to work with Power BI Report Builder. In this article, we will show how to add images to the report. We will work with simple embedded images and database images in the table.
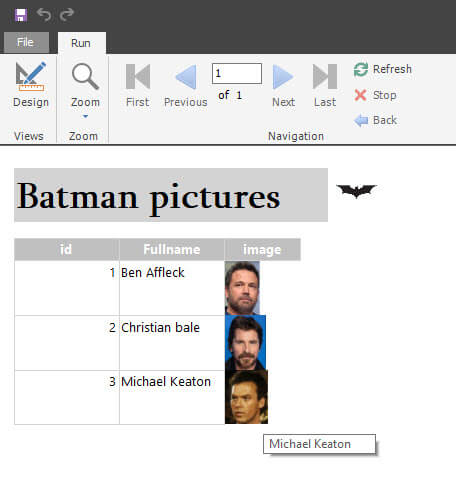
Requirements to learn how to use images in Power BI Report Builder
- First of all, we need images of the actors and a logo. You can find them here.
- Secondly, make sure that Power BI Report Builder is installed.
- Finally, check if SQL Server is installed.
Creating a table with images
First, we will create a table. The following T-SQL code creates a table, named batmanimages, that can store images in SQL Server. We will use the varbinary(max) data type to store images.
CREATE TABLE [dbo].[batmanimages](

[id] [smallint] IDENTITY(1,1) NOT NULL,

[Fullname] [nchar](20) NULL,

[image] [varbinary](max) NULL,

CONSTRAINT [PK_batmanimages] PRIMARY KEY CLUSTERED

(

[id] ASC

)

) ON [PRIMARY] TEXTIMAGE_ON [PRIMARY]

GO
Secondly, we will add data and images to the table.
USE [AdventureWorks2019]

GO

INSERT INTO [dbo].[batmanimages]

([Fullname]

,[image])

select 'Christian bale',BulkColumn FROM OPENROWSET(BULK N'c:\batman\bale.jpg', SINGLE_BLOB) image

union

select 'Michael Keaton',BulkColumn FROM OPENROWSET(BULK N'c:\batman\keaton.jpg', SINGLE_BLOB) image

union

select 'Ben Affleck',BulkColumn FROM OPENROWSET(BULK N'c:\batman\affleck.jpg', SINGLE_BLOB) image
The T-SQL code is adding the Full name of the batman actors. We have 3 actors. Also, we will need the images. In this example, the images are in the c:\ drive and the batman folder.
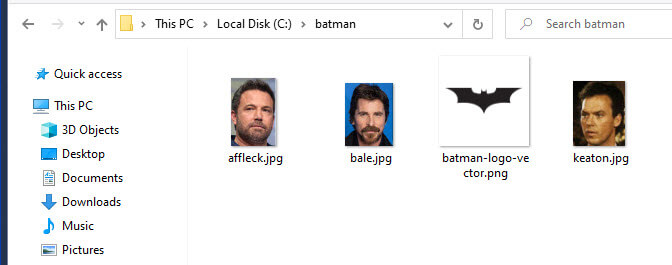
In addition, to add images, we use the OPENROWSET with the BULK and specify the path and image files with the extension. We are using the jpg extension for the Batman pictures.
How to use images in Power BI Report Builder
First, Open the Power BI Report Builder and select a blank report.

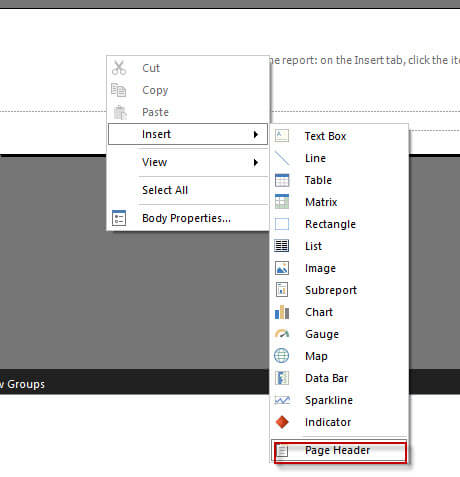
Secondly, in the blank report right-click and select Insert >Page Header. Usually, I have a Page Header and a Page Footer.
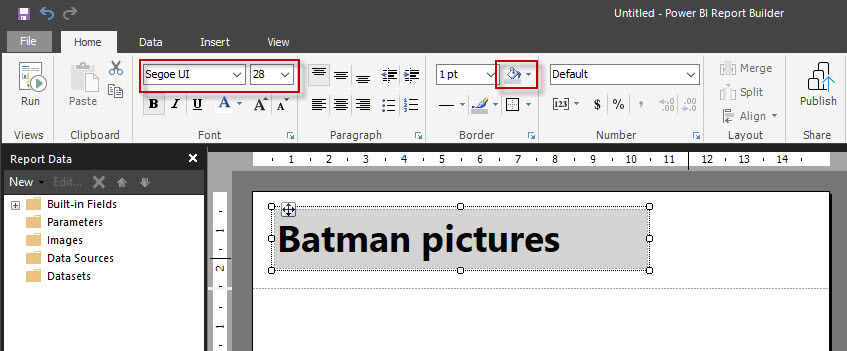
Thirdly, move the title to the header and change the font, background color, and font size.
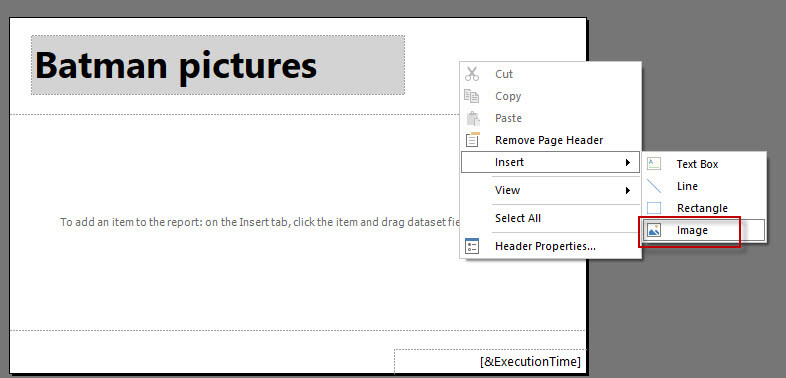
Also, at the left of the title, right-click and select Insert>Image.
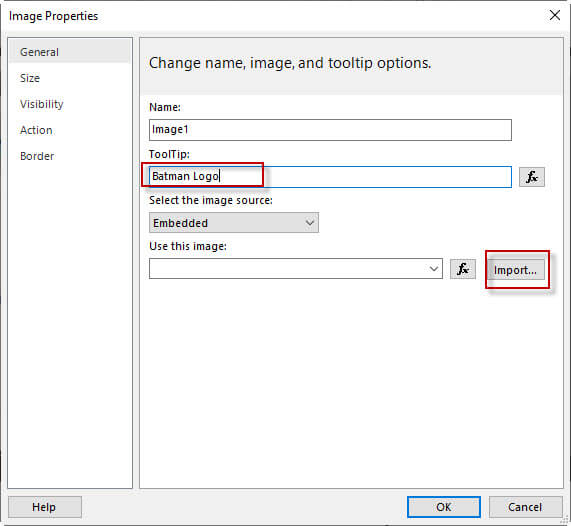
We will add a tooltip and then press the Import button to select the batman-logo-vector image.
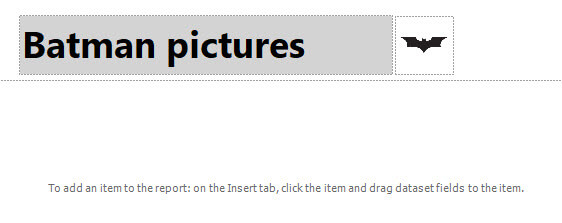
Finally, check that and alight your image to look like this one (or enhance it to look better).
Add a table, dataset, and data source
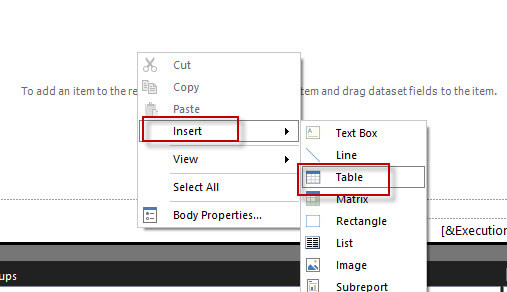
First, in the report body, right-click and select insert>table
Secondly, it may prompt you to create a data source. If not, in the Report Data pane, right-click on Data Source to create a new data source. Write a data source name and press New to create a connection. Press the new button.
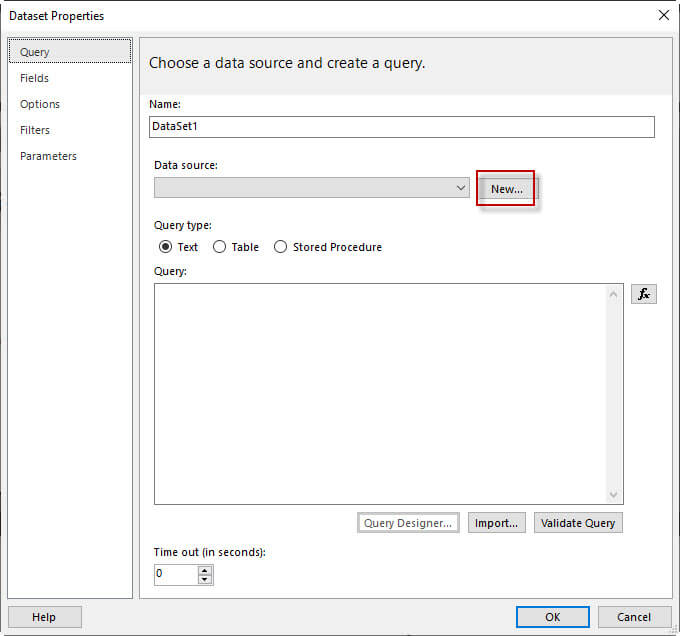
Thirdly, write a name for the connection and press the Build button.
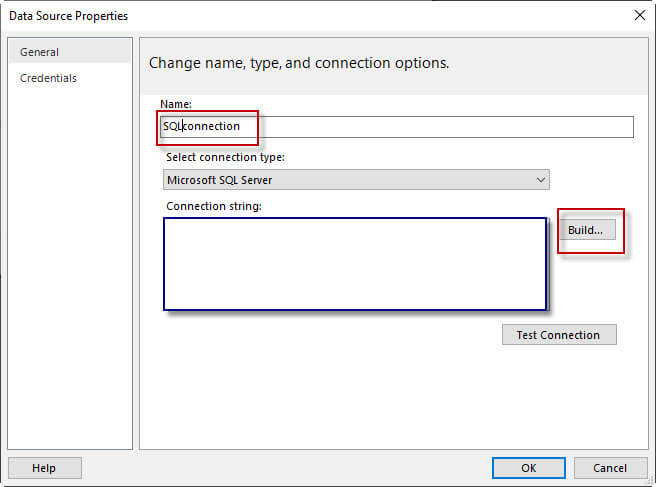
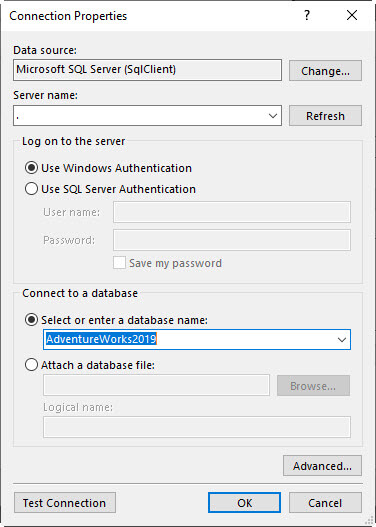
Select Microsoft SQL Server Data Source and write the SQL Server name. The period means to use the local server. We are connection with the current Windows Account (Use Windows Authentication) and we will connect to any database. In my case, I am using Adventurewors2019, but you can use any database, where you created the table, batmanimages.
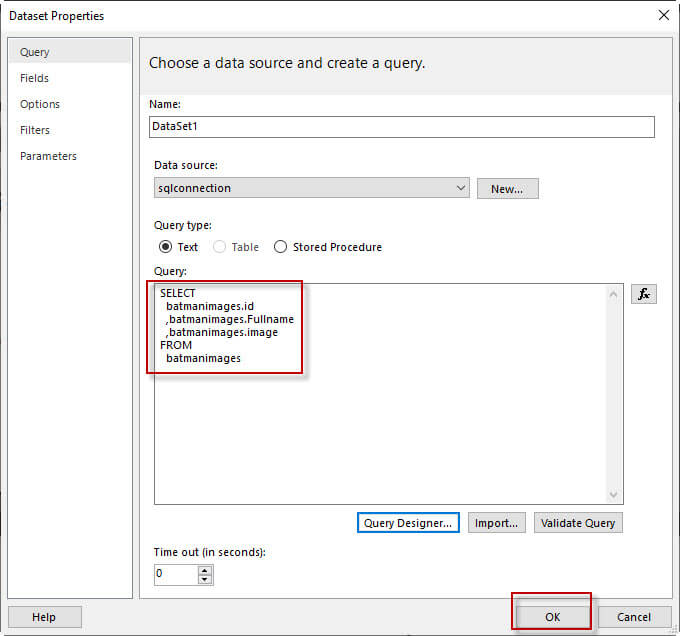
Add the name of the dataset and then select the Data Source previously created. In the Query, you can write the SQL query directly. You could for example create the query in SSMS and copy-paste there or you can press the Query Designer button to generate your query. Try this option.
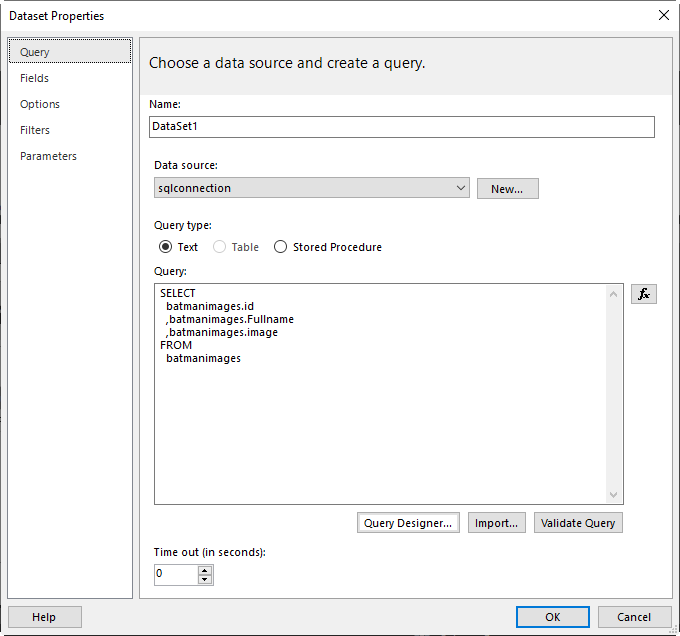
Next, select the batmanimages table that we created and select all its columns.
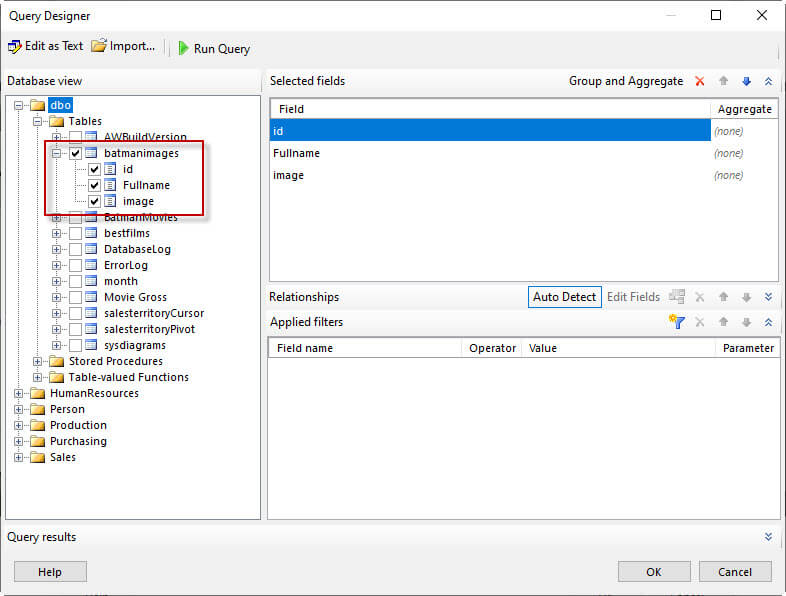
Finally, check the query generated and press OK.
How to use images in Power BI Report Builder linked to the database
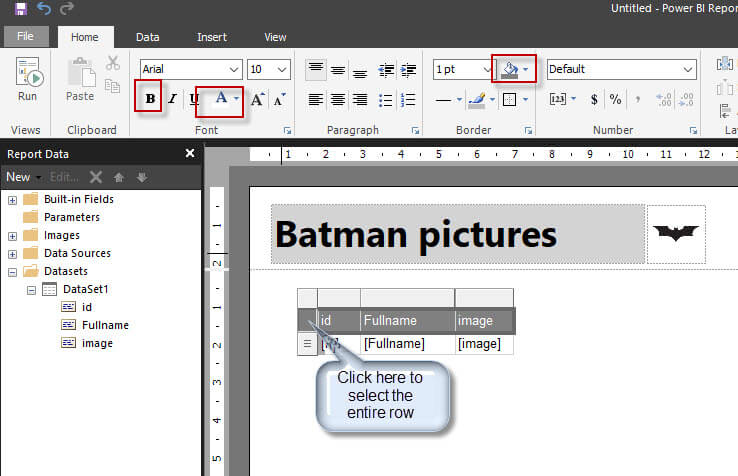
First, drag and drop the columns from the Dataset into the table.

Secondly, click at the left of the column header to select all columns and change the background colors, bold the header and change the color of the columns.
Thirdly, right click-click the image and select Insert>Image
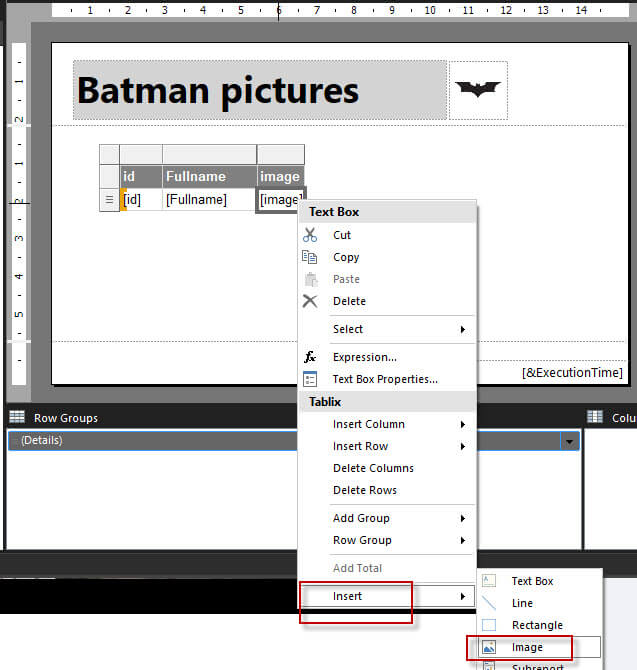
This is the most important part of the article, in the Select the image source combo box, select Database to get data from the SQL Server database and in the Use this field combo box, select the image column. Also, for the option Use this MIME type select image\jpeg because our image has jpg format. We will also add a dynamic tooltip. Press the Fx button for Tooltip.
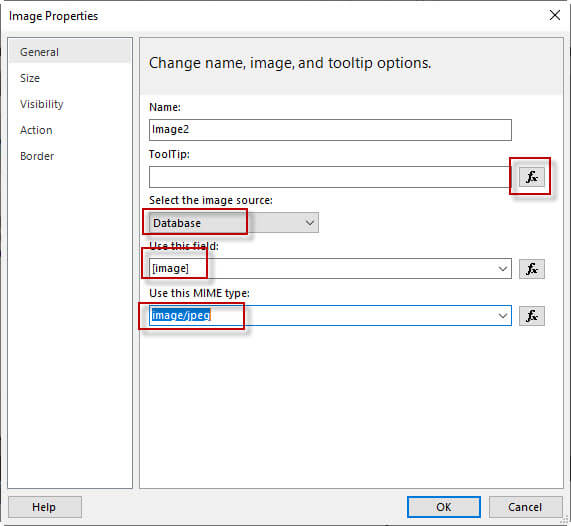 How to use images in Power BI Report - database configuration
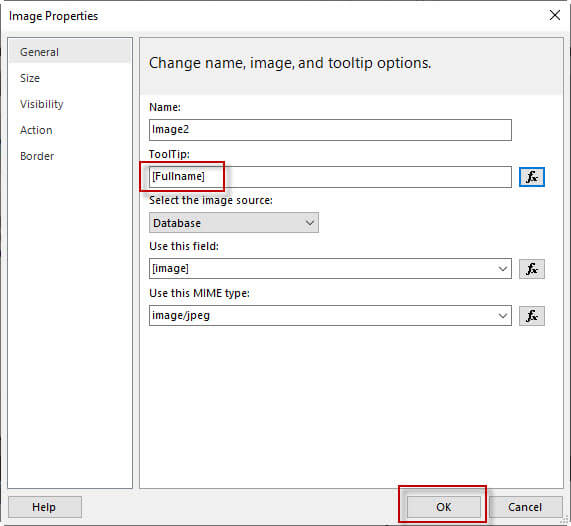
Also, in the Expression window, go to Fields (Dataset1) and select the Full name. That way, we show the Actor's Full name as a Tooltip for the images. So, we have a dynamic tooltip for the images.
The expression is this one:
=Fields!Fullname.Value
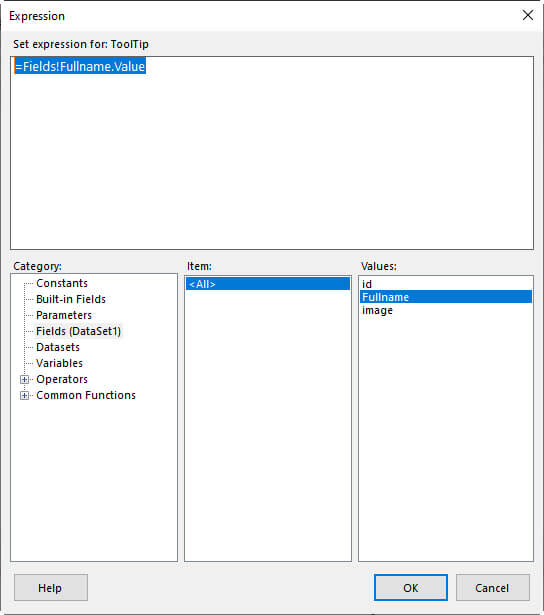 How to use images in Power BI Report - Tooltip expression
If everything is OK, you should see the Full name field in the tooltips.
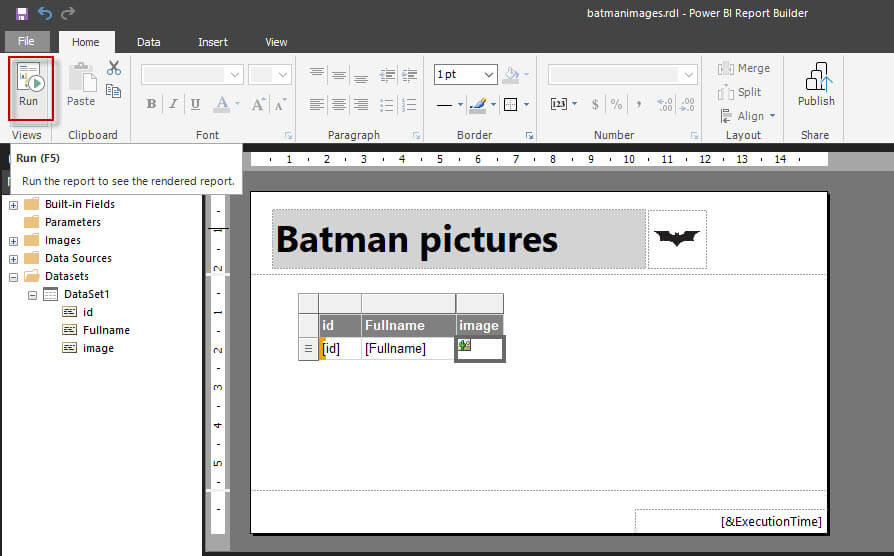
In addition, press run to see the report.
Finally, check that the report works. Make sure that you can see the images and when you move the mouse over the picture you see the actors´ names as tooltips.
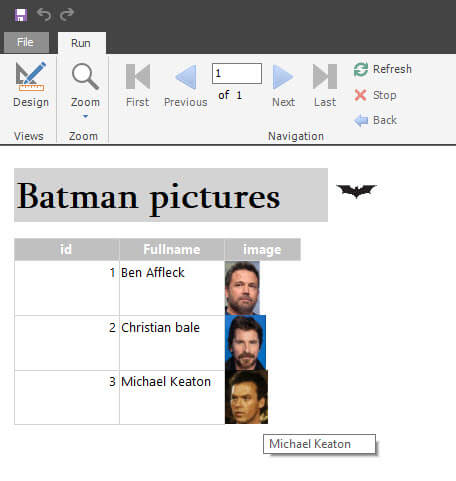 How to use images in Power BI Report - Images result
Conclusion
In this article, we learn How to use images in Power BI Report Builder. We learn how to include simple embedded images and later, we learned how to show images from the database. Also, we learned how to include a dynamic tooltip based on the database information.

