Introduction
Real-time data has never been more critical as it is today to understand customer needs for the business in a digital world where everything happens at a fast pace. Many organizations have realized in recent days that business reports generated by some of their legacy analytical frameworks, which mostly gets populated by overnight batch jobs adds a lag of almost 10 to 24 hrs. There are many use cases where static data do not add much value to the businesses especially in today’s dynamically changing needs of a customer’s product interest, where it becomes a necessity to understand point in time data requirements.
Real-time data becomes the necessity, which refers to anything that creates useful insights a user can immediately process and deploy, based on data collected as they occur in the real world. The result is more efficient, more accurate information that can be used to make informed decisions. It was very important to collect, ingest and analyze the dynamic data coming from various sources in a more near real time manner to target the customers at a specific point of time to achieve better results for this specific use case.
How can we achieve real-time data from relational SQL Data sources?
In order to create a framework to source real-time data, there are 3 basic components we need as follows,
- Data source that can enable change tracking or change data capture (CDC)
- Streaming or messaging brokers
- Data Consumers or Processors
In this use case as we will be using SQL Server as our transactional data source, which supports both change tracking as well as Change Data Capture. SQL Server supports this feature on their Developer, Enterprise and Standard edition. For more details on how to enable this feature, please refer to Microsoft’s online CDC documentation here. Process of enabling CDC still stays same on administrative levels, even though instances of SQL Server are running in cloud preferably on Iaas platform, which can be on any cloud such as AWS, Azure or Google Cloud.
Kafka will be a recommended messaging broker in terms of efficient data streaming. For Cloud enabled distributed applications Kafka is very easy to scale and provides parallelism using its partition structure. Kafka is available on Apache and Confluent. Confluent provides various open-source plugins in order to work with Kafka and utilize its set of features. Kafka-Connect is the popular plugin used to achieve real-time data sourcing capability for every record update in your database. It provides you connector API that gives you readily available configuration to establish JDBC connection pools with your database directly and keep long running operations in terms of consistent data reads. At this point, Kafka-connectors are available for SQL Server, Postgres and MySQL.
Data consumers can vary based on the use case and it can be data consuming applications or another data storage. For example, if real-time streaming data contains lengthy raw data that needs to be processed or filtered using server-side programming algorithms such as Java JVM’s then it can be a java-based consumer service. This service can process the data and pass it to another data source. Another data source can be a flat file storage or data ware house that usually stores data for analytical purpose.
Required Framework Components
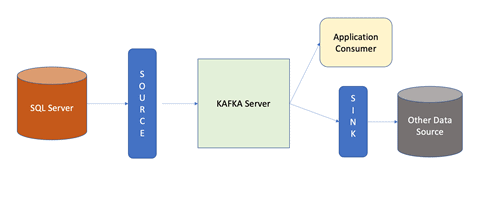
In the diagram below, the SQL Server represents your application data source, which is CDC enabled. Here it will be referred as a Kafka-Connect source that connects to Kafka using Confluent Connector API. The Kafka server then starts publishing all the change events in SQL Server (such as CREATE, INSERT, UPDATE and DELETE) and streams those events into the topic. From this point any of the application consumer interested in those real-time events consumes it. Confluent also provides a way to use another data-source which can consume this real-time data and store it through its sink API.
Setup Instructions
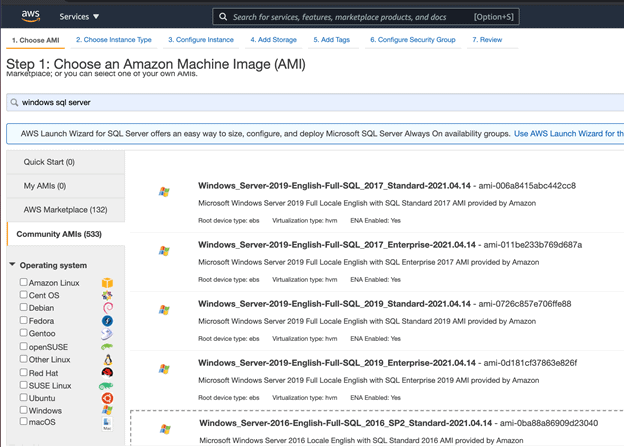
If you are looking to setup this framework on cloud, I will recommend using any IaaS cloud service as we will need some custom configurations in order to tune our DB to support creating change events. SQL Server is readily available with the popular cloud providers on Iaas platforms, such as Amazon AWS, Microsoft Azure and so on. For this demo, I will go with AWS as an example. You can see below that AWS provides multiple AMI’s (Amazon Machine Image) with different SQL Server versions supporting different OS versions.
Make sure you choose either Standard, Enterprise, or the Developer edition to support your Kafka connectors to work.
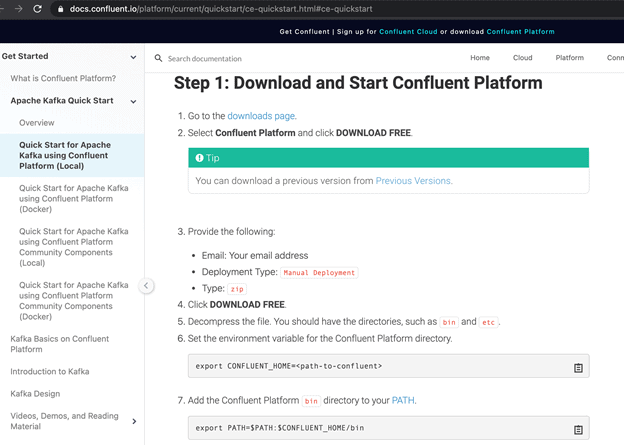
The Kafka installation is available on either Apache’s website or you can go with the Confluent version. I personally recommend going with Confluent, as it wraps around some of the additional API’s and features around Kafka. Please follow the instructions here if you are looking to install it from Confluent’s website.
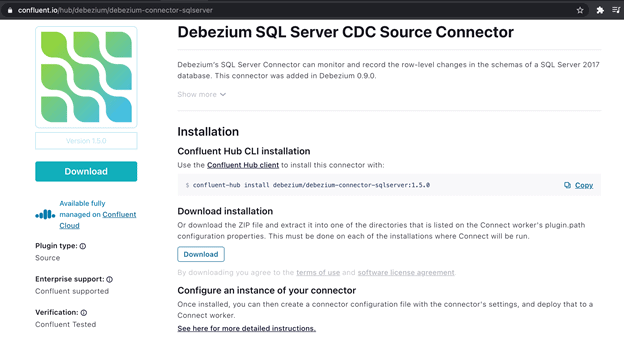
Next is the most important component of our design, Kafka Connectors. They will be available on the Confluent hub as well. You can browse here for different Kafka connectors available as per your specific database. As you see below, here I am looking for SQL Server.
The search results will open SQL Server connector installation panel as shown below. You can download and configure your DB instance, as indicated here.
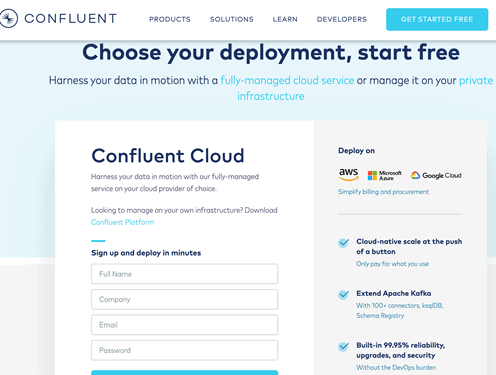
Apart from the local setup, if you have any special requirements in terms of scale and cloud deployments, the Confluent platform provides the ability to support that on various cloud platforms such as AWS, Google, Azure, etc.
One quick note while installing Connectors, you will be prompted for making a change in your connector configurations.
As you see in below screen shot, these property files can be modified based on your Kafka server instance setup. If you select "y", it will prompt you to choose file order number that needs to be edited.
For example, if I am looking to modify 'connect-distributed.properties', I will key in "1" and enter to open it in edit mode.
For local or standalone framework setup usually this modification is not required so I will key in "n" and proceed, but in distributed mode there are certain properties we need to modify based on cluster setup.
For example below properties may vary and needs to edit based on your instance setup for Kafka clusters.
# A list of host/port pairs to use for establishing the initial connection to the Kafka cluster.
bootstrap.servers=localhost:9092

# unique name for the cluster, used in forming the Connect cluster group. Note that this must not conflict with consumer group IDs
group.id=connect-cluster
Once, all above setup is done, you can start all of your Confluent services.
confluent local services start
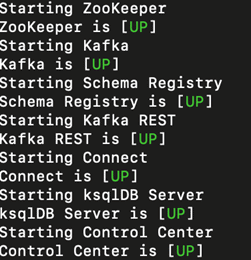
With this single command, confluent will start all of your local services required in order to get your required streaming components up and running. In the screen shot below, you will see the services and the run status for the required components that needs to be up in order to our framework run successfully, such as Kafka server, Zookeeper, Schema Registry, Connector plugins etc.
Then you should be able to open up browser to verify server instance if running. Port 8083 will be used as your default port for connectors console and can be configured if needed to change using config files which reside in confluent’s installation folder. You should get a JSON document back, as shown here, which shows general info such as Kafka-Connect version, cluster-id etc.
In order to check connector status '/connectors/ path in the URL should give that info. As you see, "[]" empty array below shows that currently there are no connectors available yet, which we will start configuring now.
The quickest way to configure your SQL Server connector is by using REST API with a JSON body to point out all your connection details, as you see below.
The config json is shown here:
{
"name": "mssql-connector",
"config": {
"connector.class": "io.debezium.connector.sqlserver.SqlServerConnector", "database.hostname": "<local IP>",
"database.port": "1433",
"database.user": "sa",
 "database.password": "sql-db-password",
"database.dbname": "Users",
"database.server.name": "localhost",
"table.whitelist": "dbo.employees",
"database.history.kafka.bootstrap.servers": "localhost:9092",
"database.history.kafka.topic": "employees_topic"
}
}
You can post this to the REST API to apply your config with the curl program:
curl -i -X POST -H "Accept:application/json" -H "Content-Type:application/json" localhost:8083/connectors/ -d '{ <your-config-json-body>}Your result after running the command should look like this:
If, you now refresh your browser, you should see your newly created connectors listed. “test-connector” is the name of the connector we assigned in our JSON configuration used in our POST call.
Enabling the CDC in SQL Server is an important part of this setup and needs some admin level configurations. More details are documented here on Microsoft's website. Below are quick commands used for this demo to enable Change Events.
USE Users;
EXEC sys.sp_cdc_enable_db;

ALTER DATABASE Users
SET CHANGE_TRACKING = ON
(CHANGE_RETENTION = 3 DAYS, AUTO_CLEANUP = ON)

EXEC sys.sp_cdc_enable_table
@source_schema = 'dbo',
@source_name = 'employees',
@role_name = ‘sa’
;
Demo: Testing your Kafka-connectors for real-time data updates
Finally, let’s see how all of this coming together with a working demo. In this demo I will be using Azure Data Studio, which is a free open-source SQL IDE supporting multiple OS/platforms. Especially if you are dealing with cloud DB instances or non-windows OS such as Linux OR may be a SQL Server running in Docker image, this will be a recommended tool for you.
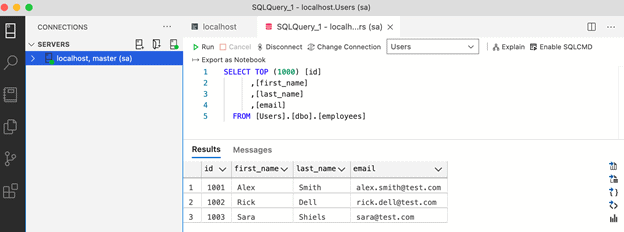
Below is my data setup, where I have created a simple DB called ‘Users’ that contains a table called ‘Employees’.
I will start my Kafka consumer with the below command.
./bin/kafka-console-consumer --topic employees_topic \
             --bootstrap-server localhost:9092 \
             --from-beginning
Once I execute above command in my command line console, our consumer should be ready to listen for change events for every record change to our ‘Employee’ table. You should be able to see change events in the same command line console from the beginning as below.
Conclusion
I hope this framework and proof of concept demonstrated above can get you started with creating real-time data pipelines from your applications transactional data source, which is not just limited to SQL Server but any other DB’s such as MySQL or Postgres etc. Confluent plays a major role here in terms of providing all open-source API’s to utilize Kafka and its distributed messaging features that makes developer’s life easy. In general publishing real-time data is not just limited to our transactional data sources, but the software applications themselves can act as data producers if they follow event based architecture concepts.


