Introduction
The Azure Synapse workspace is in preview mode as of July 2020. The workspace brings together enterprise data warehousing and big data analytics. This workspace has the best of the SQL technologies used in enterprise data warehousing, Spark technologies used in big data analytics, and pipelines to orchestrate activities and data movement.
Here, I explain the step-by-step process to create a Synapse workspace through the Azure portal and how to use some of its components and features.
Step 1: I create a Storage Account
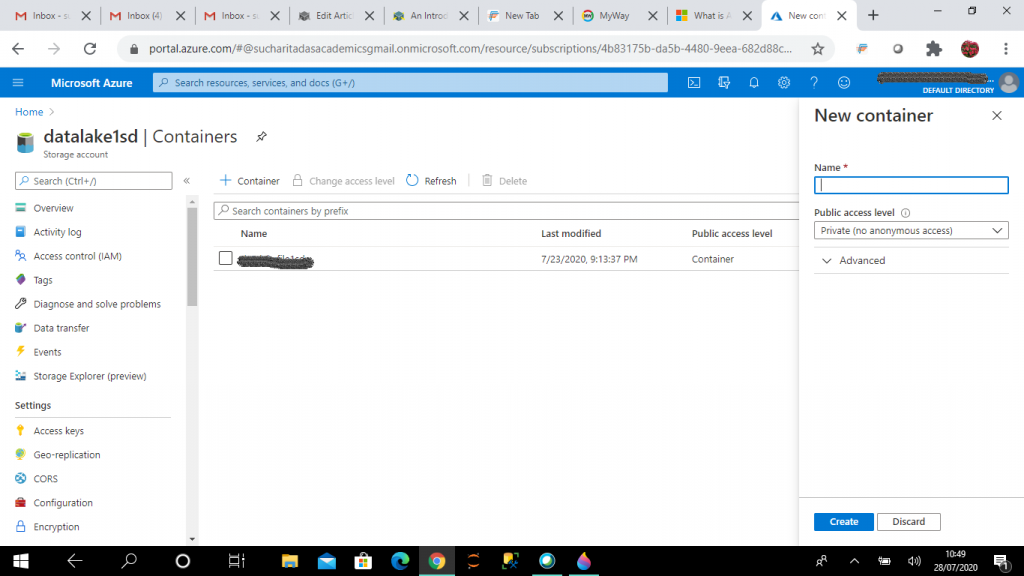
I create a general purpose V2 storage account, datalake1sd. I create a new container, datalakefile1sd and upload the file, LS.csv in the container. This StorageV2 account and the container are the prerequisites for Synapse workspace creation.
The general purpose v2 storage account provides a unique namespace within the subscription for storing data. This is accessible from anywhere over HTTP or HTTPS. This is a next generation data lake solution for big data analytics. This account is used for storing blobs, files, queues and tables. Data is highly available, durable, secure and scalable.
Step 2: I create the Workspace resource
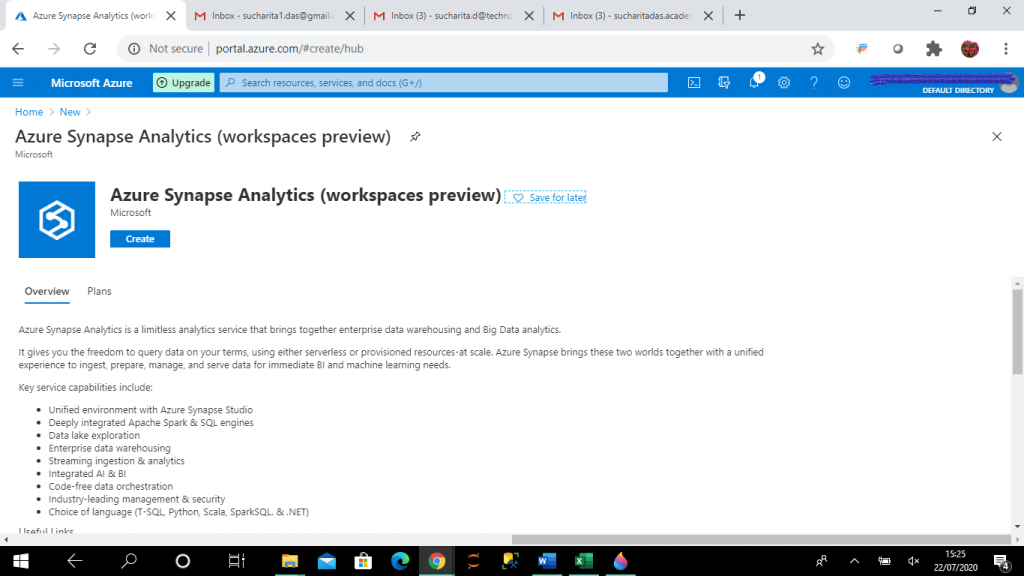
In the portal, I go to the "Create a resource" link in the Home page where I search for "Azure Synapse Analytics (workspaces preview)". When I get the result, I choose it. On the page shown below, I press the Create button to create the resource.
Step 3: I create the Synapse workspace
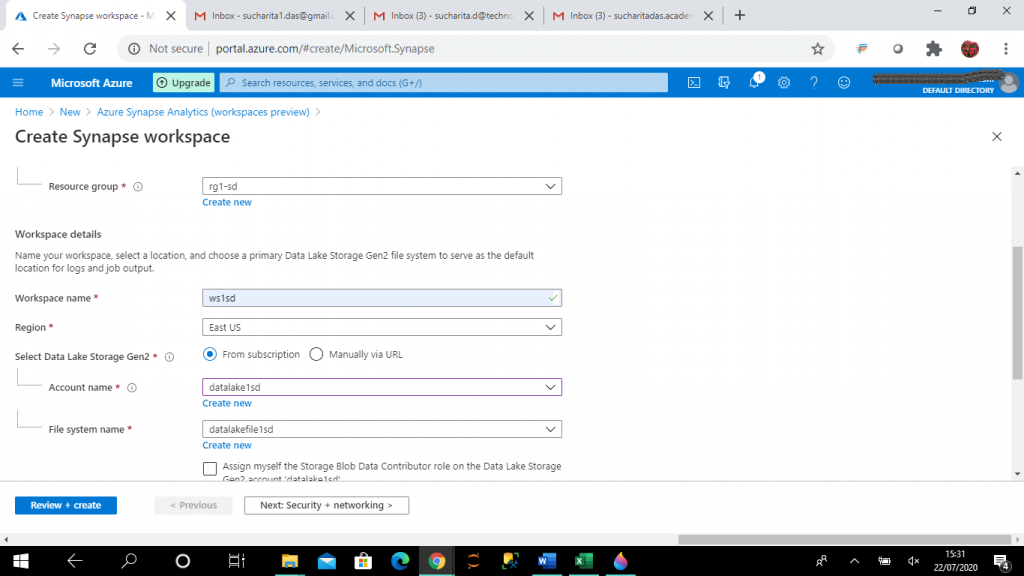
I provide the required details and create the Synapse workspace, ws5sd. I select an already existing resource group and provide a workspace name unique within the subscription. I provide the Data lake storage Gen2 account name and file system name that I created in Step 1. I may also create a new account and file system here. Data lake storage Gen2 account is the default storage for Synapse workspace.
I press the "Next" button and go to the "Security + networking" tab.
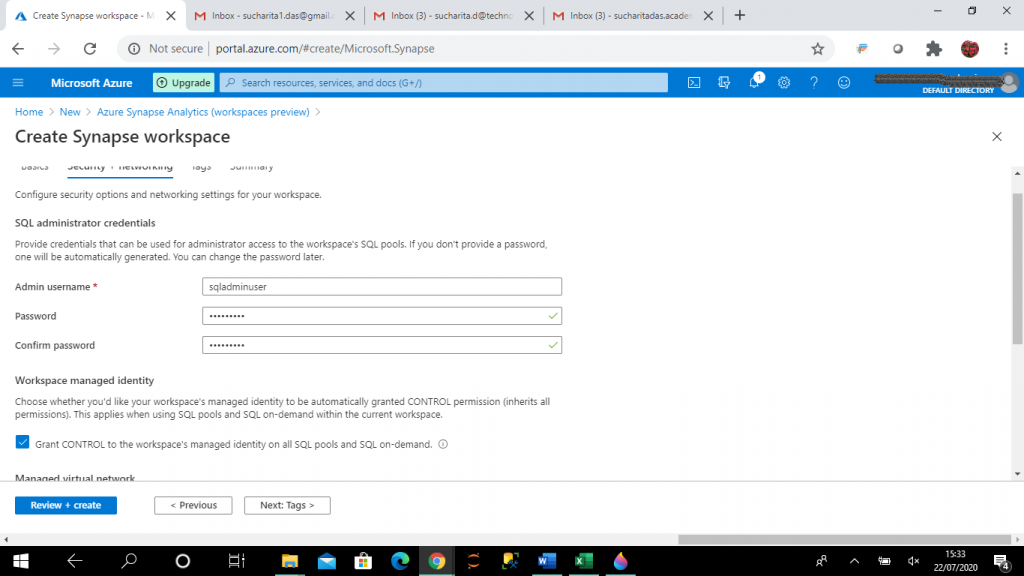
Here, I provide the admin username and password. This information is used as authentication details for the SQL pools created in the workspace. Creation and use of SQL pool are discussed in the consequent steps.
I press the "Review + create" button to create the workspace.
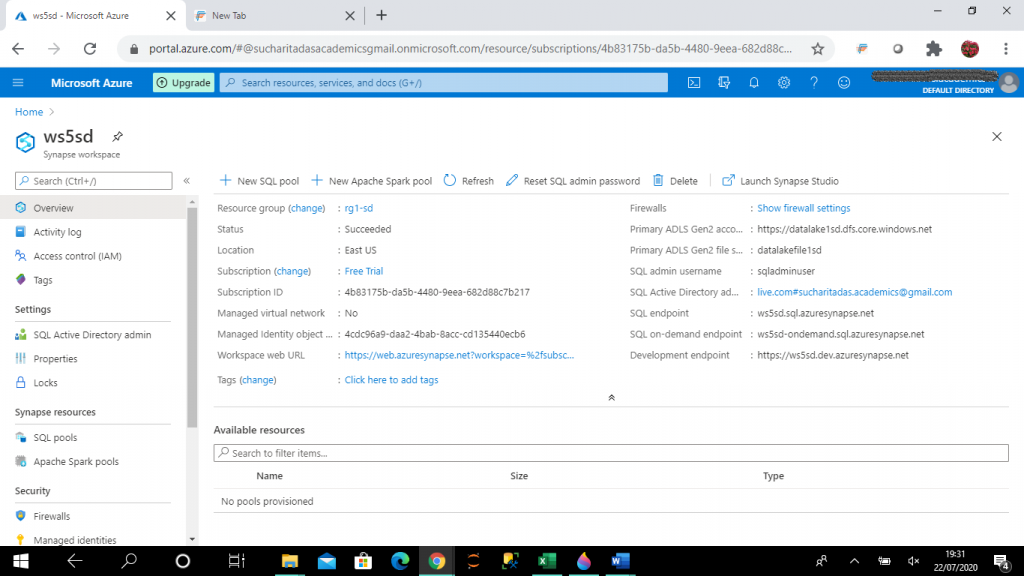
Step 4: I go to the Overview Section
Once the workspace creation is complete, I click on the resource. Synapse workspace has the options for creating a new SQL pool and new Apache Spark pool. Also, I can launch Synapse studio.
SQL pool
A SQL pool offers T-SQL based compute and storage capabilities. Data can be loaded, modeled, processed and delivered for faster analytic insight.
Apache Spark pool
It provides open-source big data compute capabilities. Data can be loaded, modeled, processed and distributed for faster analytic insight.
Synapse studio
It provides a unified workspace for data preparation, data management, data warehousing and big data analytics. Code free visual environment is available for creating and managing data pipelines. Power BI can be used from here to build dashboards.
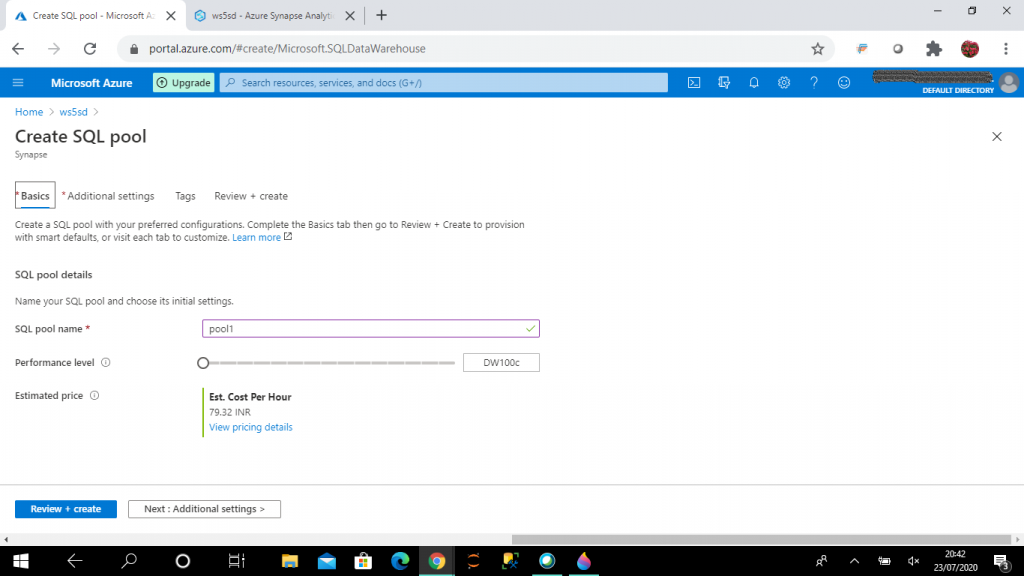
Step 5: I create a new SQL pool
I provide the SQL pool name, pool1 and select the performance level, DW100c. The Performance level is the number of Data Warehouse Units (DWU), which decides the number of compute nodes for data analytics. As the compute power increases with more compute nodes, cost also increases. I select the minimum possible performance level to minimize the cost. I keep other options as the default values.
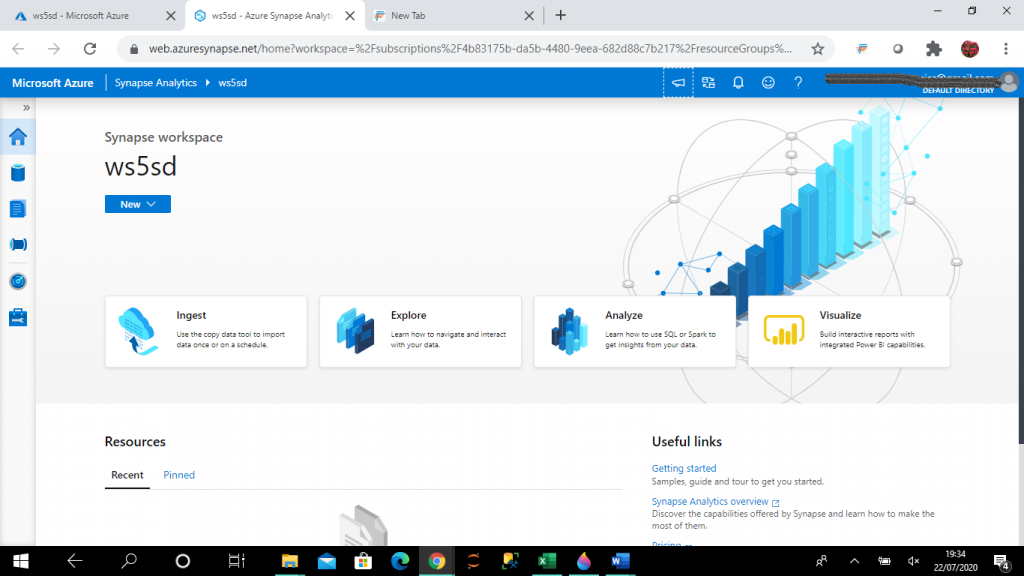
Step 6: I launch the Synapse Studio
In the Home screen of Synapse studio, four tabs are available.
Ingest
This link goes to the Copy data tool for importing data from a source to destination data store. This is similar to the Copy data tool of Azure Data Factory (ADF).
Explore
This link goes to the Data page of the Synapse studio. Here, I can access and query the SQL pool databases under the Workspace tab. I may access the existing Azure storage accounts for the workspace under the Linked tab.
Analyze
This link goes to the Develop page. Here, I can write SQL or Spark code to get insights from the data available for the Synapse workspace.
Visualize
This link goes to the Connect to Power BI workspace to build interactive reports from the Synapse workspace data with integrated Power BI capabilities.
New drop-down
There are options available to create SQL script, Spark code, dataflow tasks and pipelines.
At the left toolbar, other pages are available.
Orchestrate page
Here, I can create new Copy data task or data pipeline.
Monitor page
Here, I can monitor the SQL script, Spark code, dataflow tasks and pipelines from the graphical interface.
Manage page
Here, I can create and manage SQL pool, Apache Spark pool, linked services, data pipeline triggeres.
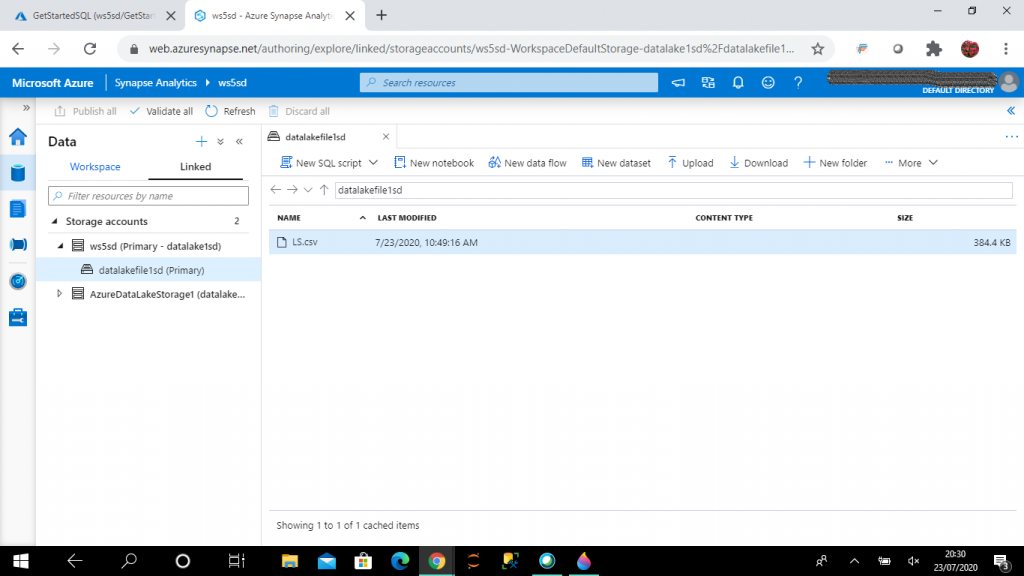
Step 7: I go to the Data lake file system
I go to the Data lake file system, datalakefile1sd under the Linked tab of the Data page. The file, LS.csv is available in the file system. There are few options available.
New SQL script
I may select to bulk load data in the file to a new or existing table in any existing SQL pool of the Synapse workspace.
New notebook
I may select to write Spark code in any existing Spark pool of the Synapse workspace to analyze the data in the file.
New data flow
This option helps to create the source as the selected data file in a data flow task. To transfer the data, I need to define the destination data store and transformations in the data flow task.
I select New SQL script to bulk load the file, LS.csv to the SQL pool, pool1.
Step 8: I generate the SQL script
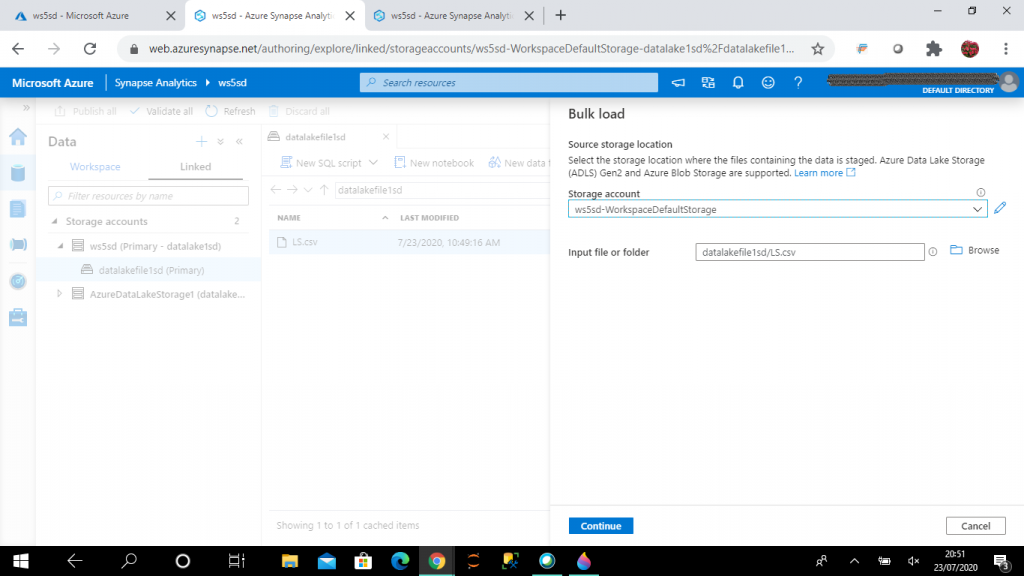
As a first stage for bulk load, I select the default storage account and the input file, LS.csv.
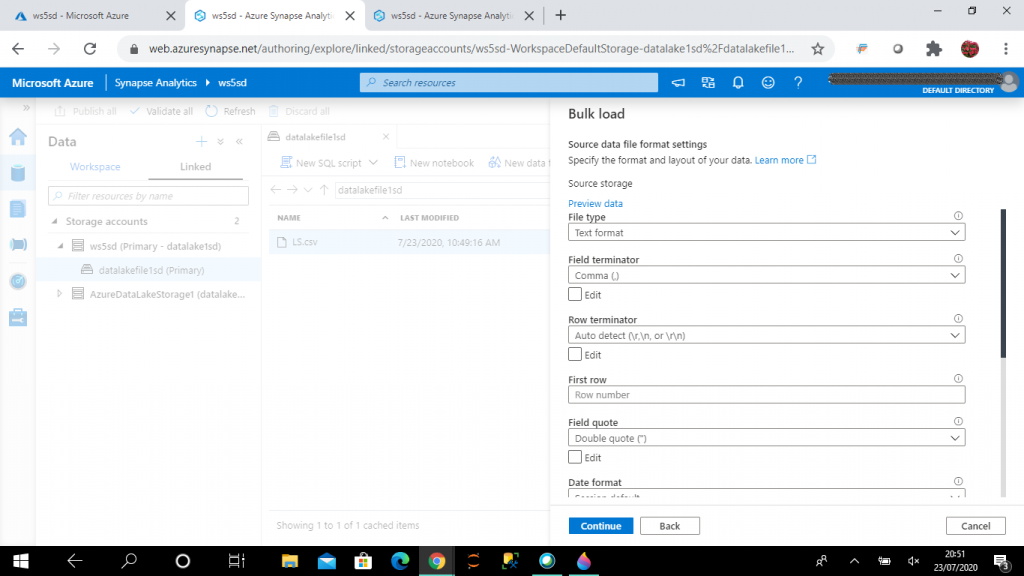
In the next stage, I need to specify the file format for the source file. I keep the default values.
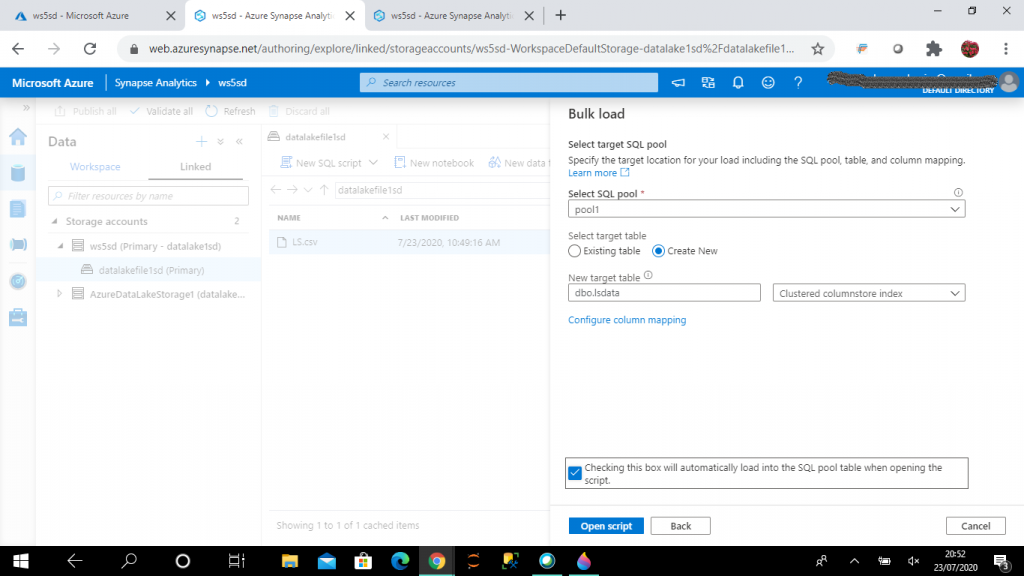
Next, I need to select the SQL pool and the table. I create a new table for data loading. I can select an existing table also for data loading. I press the "Configure column mapping" link to do the mapping between the source file columns and target table columns.
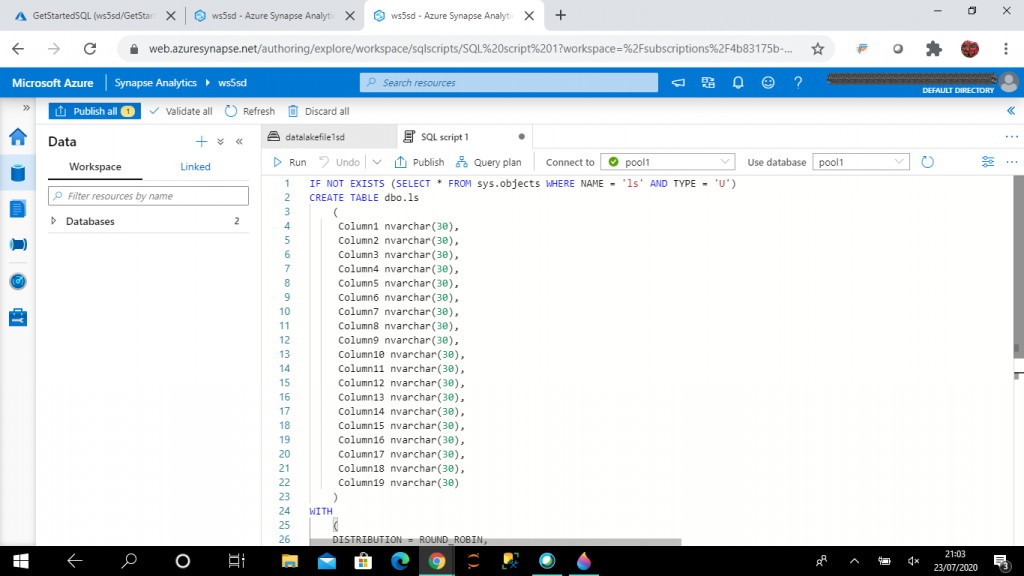
Then, I select the "Open Script" button. It generates the script for new target table creation and data loading.
The script is open under the data page. I may connect to the existing SQL pools or SQL on-demand to run the scripts to copy data in the pool1 table.
SQL on-demand
This is a serverless query service that enables to run SQL queries on files placed in Azure storage. It is a distributed data processing system built for large scale of data and compute. No infrastructure setup is required and it is available for query processing once the workspace is created. This is a pay-per-use model.
Step 9: I execute the script
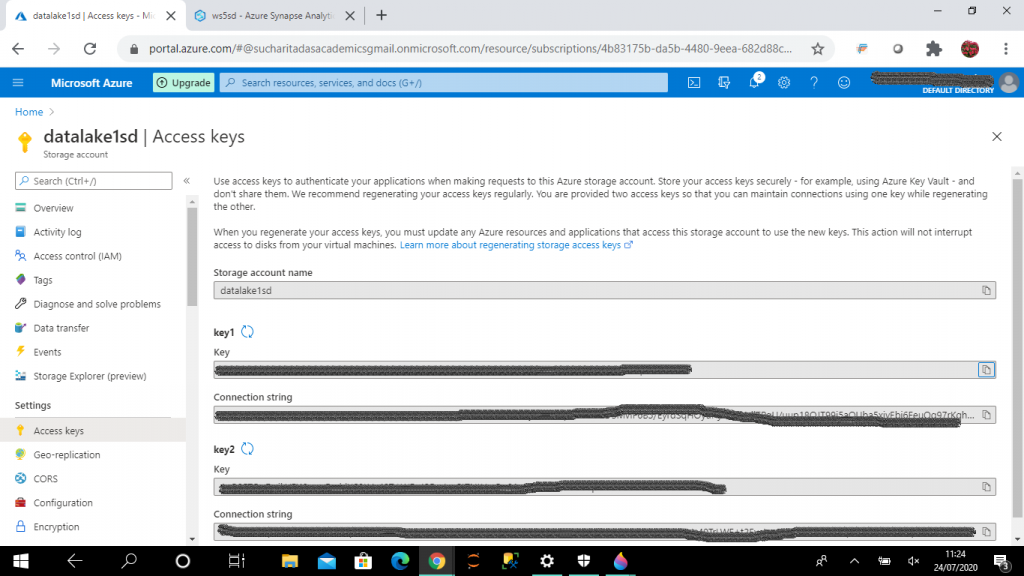
I go to the storage account, datalake1sd and copy the Key value (key1) from the "Access keys" page.
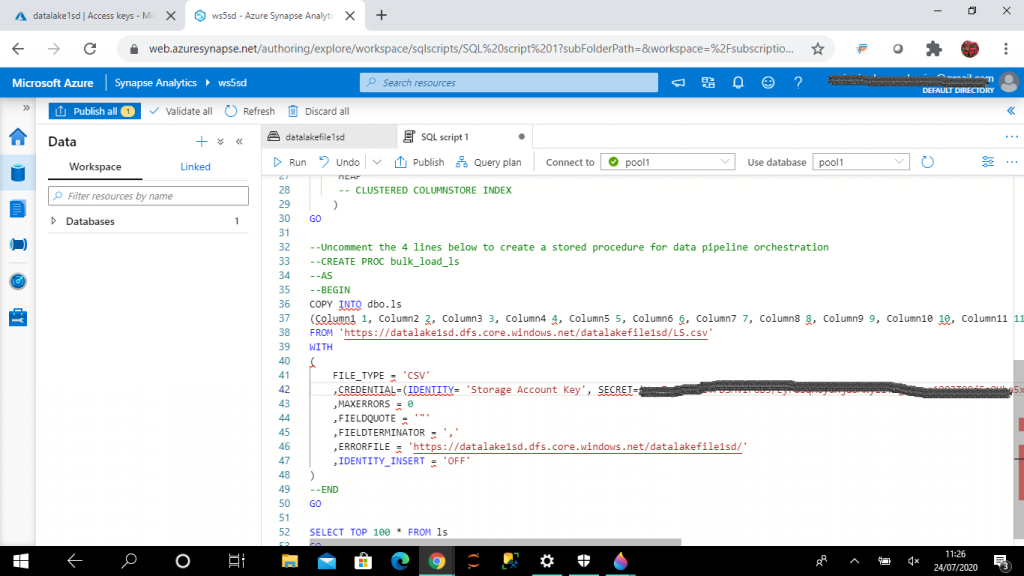
I add the credential argument for Copy statement in the script. For credential argument, SECRET is the access key of the storage account, datalake1sd. I remove the Errorfile argument as it is not mandatory. I press the "Run" button to execute the script.
Step 10: I select records from the new table
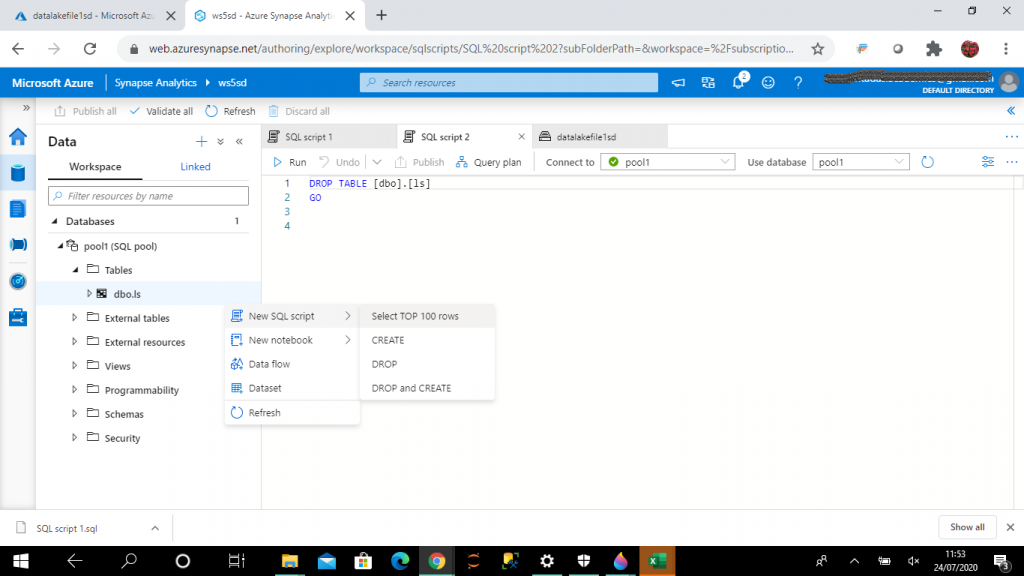
I select records from the new table dbo.ls available under the Workspace tab in the Data page. Then, I publish the script. All the published scripts are available in the Develop page.
Step 11: I export the script
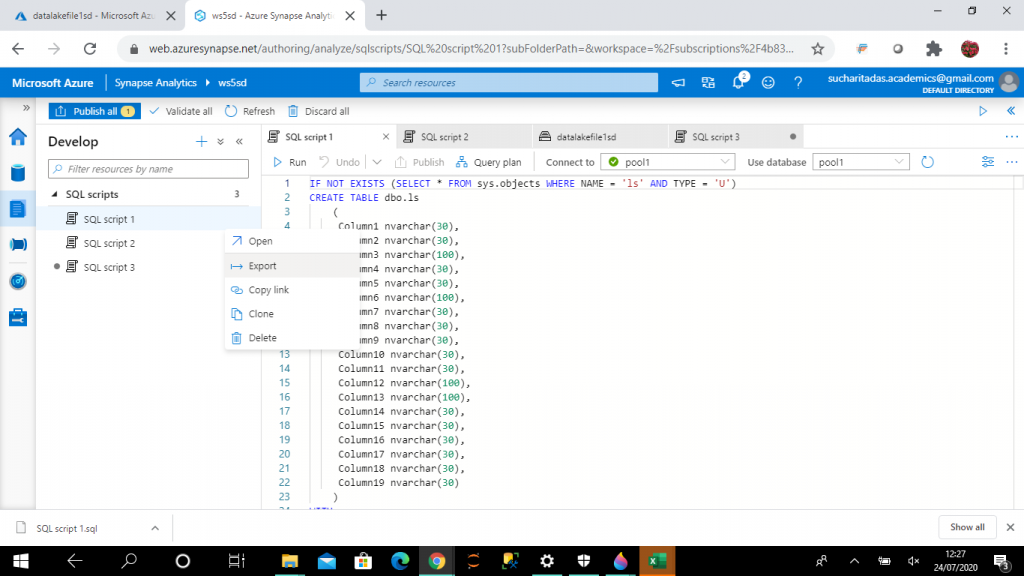
I export the script to local hard drive from the list of published SQL scripts in the Develop page.
I open the script from the local hard drive in SQL Server Management Studio (SSMS).
IF NOT EXISTS (SELECT * FROM sys.objects WHERE NAME = 'ls' AND TYPE = 'U')
CREATE TABLE dbo.ls
(
 Column1 nvarchar(30),
 Column2 nvarchar(30),
 Column3 nvarchar(100),
 Column4 nvarchar(30),
 Column5 nvarchar(30),
 Column6 nvarchar(100),
 Column7 nvarchar(30),
 Column8 nvarchar(30),
 Column9 nvarchar(30),
 Column10 nvarchar(30),
 Column11 nvarchar(30),
 Column12 nvarchar(100),
 Column13 nvarchar(100),
 Column14 nvarchar(30),
 Column15 nvarchar(30),
 Column16 nvarchar(30),
 Column17 nvarchar(30),
 Column18 nvarchar(30),
 Column19 nvarchar(30)
)
WITH
(
DISTRIBUTION = ROUND_ROBIN,
 HEAP
 -- CLUSTERED COLUMNSTORE INDEX
)
GO
COPY INTO dbo.ls
(Column1 1, Column2 2, Column3 3, Column4 4, Column5 5, Column6 6, Column7 7, Column8 8, Column9 9, Column10 10, Column11 11, Column12 12, Column13 13, Column14 14, Column15 15, Column16 16, Column17 17, Column18 18, Column19 19)
FROM 'https://datalake1sd.dfs.core.windows.net/datalakefile1sd/LS.csv'
WITH
(
FILE_TYPE = 'CSV'
,CREDENTIAL=(IDENTITY= 'Storage Account Key', SECRET='<Data lake key>')
,MAXERRORS = 0
,FIELDQUOTE = '"'
,FIELDTERMINATOR = ','
,IDENTITY_INSERT = 'OFF'
)
--END
GO
SELECT TOP 100 * FROM ls
GO
Conclusion
Azure Synapse Workspaace provides the simplest and fastest way for an enterprise to connect and store various data sources and gather insights from the data. SQL and Spark coding are done for big data analytics. Built-in support for AzureML helps in predictive model building and advanced analytics. Also, it integrates deeply with Power BI. Here, I have discussed about the main features of workspace and the steps required to copy data from data lake file to SQL table in the SQL pool.

