This blog post will be a series on the Azure Platform and some things we can use it for.
Background:
I run a consultancy company – and sometimes I have to build stuff for clients using their Azure subscriptions. Which means I get to help them setup their Azure platform.
I’ll write about the first thing you need to do when working with Azure – setup Azure Cloud Shell. I love the Azure Cloud Shell as it means I can stuff from anywhere, no matter what O/S, machine or location I’m in – I’ve been known to build data centres in Azure using my mobile phone whilst watching rugby on a field in Akaroa (seriously – Akaroa is a wonderful part of New Zealand).
But yeah – the best part of Azure Cloud Shell is that I have zero software to install or maintain – and I like that…
#MakeStuffGo with Azure Cloud Shell
First up we need to go to https://portal.azure.com and login.
We now click the Azure Cloud Shell icon:

We can choose Bash or PowerShell – that doesn’t matter too much right now – we can always change it later.
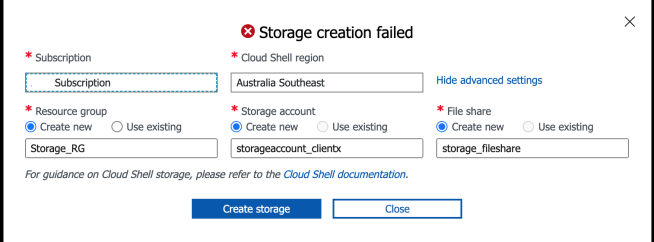
And if this is the first time we’ve used it we fill out the form below – but be careful with your naming as you can get this:

The reason is has failed is:

So fir the Storage Account – just uses numbers and lower case letters only. No special characters.
But you also have to have a unique name for your storage account – not just your storage account but ALL storage accounts:

So make it something unique.
Oh and that File share name isn’t great either:

We settled on this:

And now we have:
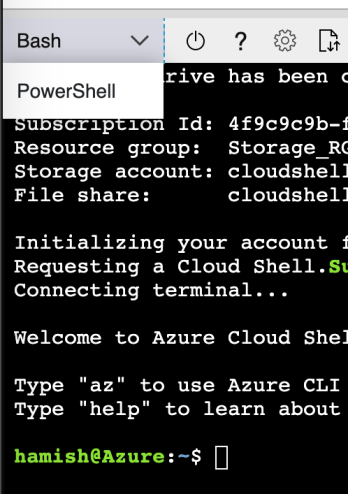
 If after creating our Azure Cloud Shell session we want to change to PowerShell from bash or vice versa – it’s really easy:
And there we have it – we have Azure Cloud Shell configured.
Now let’s go build some stuff in Azure!!
Yip.

