Introduction
MicroStrategy is one of the leaders in BI tools in the world and it has a nice desktop version that is completely free. This tool can connect with Azure SQL Data Warehouse and create nice reports.
In this article, we will show a step by step tutorial to connect from MicroStrategy to Azure SQL Data Warehouse and create simple reports.
Requirements
- MicroStrategy Desktop installed
- An Azure SQL Datawarehouse database installed (AdventureWorks). If you do not have it, you can check the part 1 of these series.
Getting Started
If you check our article related to PowerBI, you will notice that both tools have several common features. However, MicroStrategy is working in BI for a longer time. It is one of the leaders of the BI Reporting. Now we will do a step by step tutorial to connect to ASDW using Microstrategy Desktop.
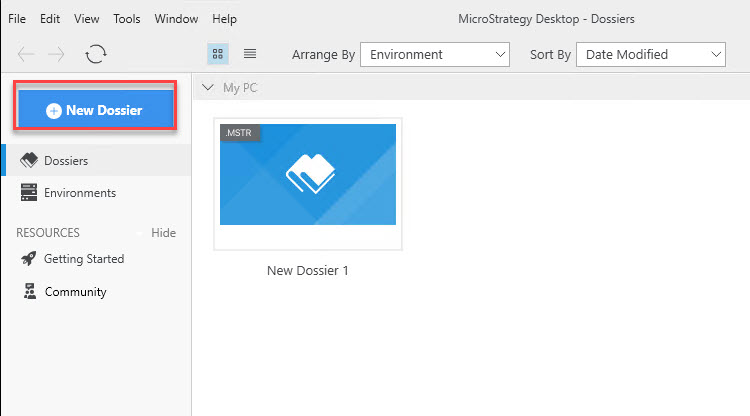
- First of all, open MicroStrategy Desktop. Press the New Dossier: button.

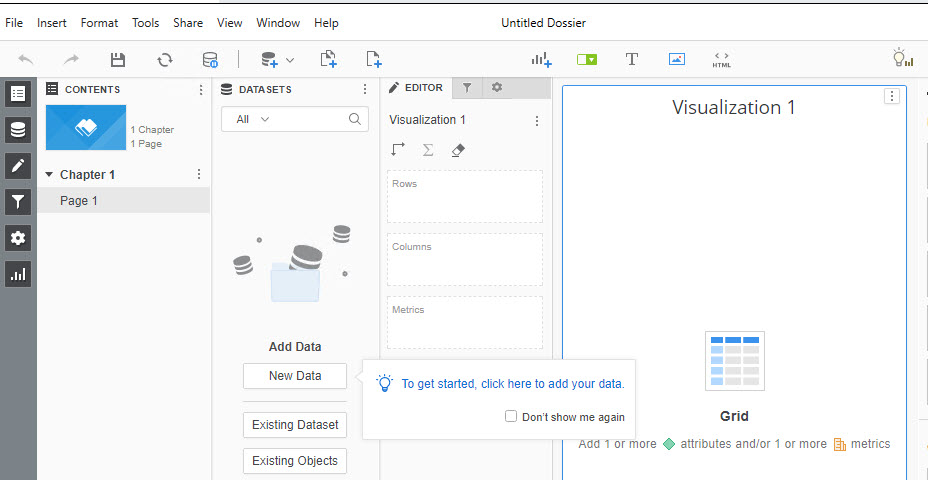
- Press the New Data button to create new data in MicroStrategy:

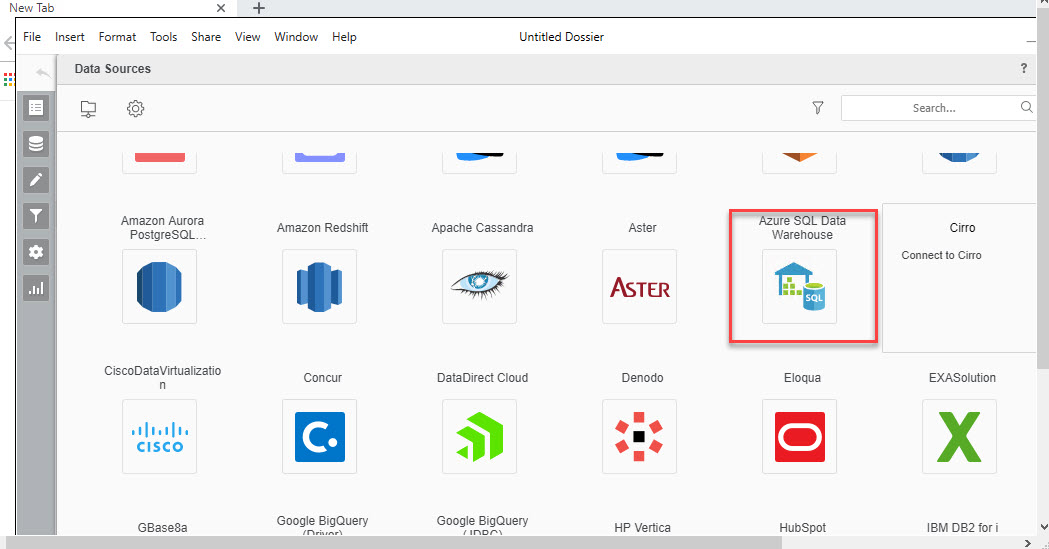
- In Data Sources, select Azure SQL Data Warehouse. Azure SQL Data Warehouse is easily supported in MicroStrategy and you can connect to it using this option:

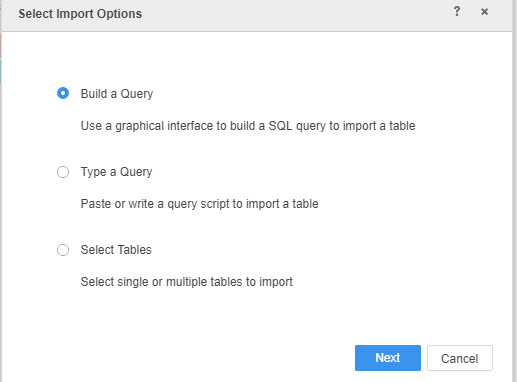
- You have 3 options: build a query, type a query, or select tables to import. The Build a Query option is a nice option if you do not have SQL experience to create a Query. Type a Query is the best option if you have the query already written and you only need to copy and paste the query. It is also a great option if you are familiar with using SQL to query databases. Select tables is used to import one or more tables:

- Press the + icon to create a New Data Source this option will let you create the Data Source:

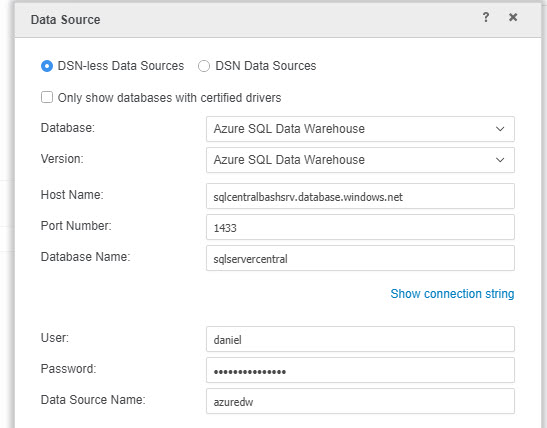
- In the Data Source select Azure SQL Data Warehouse as the database and the version. The Port number is usually 1433 and the Host Name and Database Name will be explained later. The User and Password are credentials created when you create your Azure SQL Server:

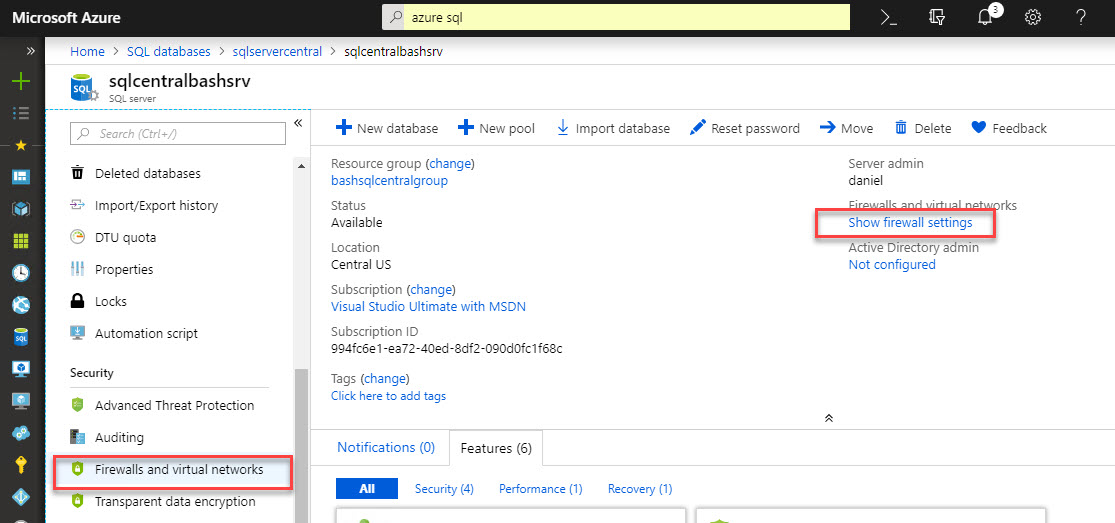
- To get the ASDW name, go to the Azure Portal and go to SQL Databases and check the Server name, database name. In the server name, you can check the login and reset the password:

- Also, you will need to configure the firewall to enable your IP with MicroStrategy to connect to ASDW:

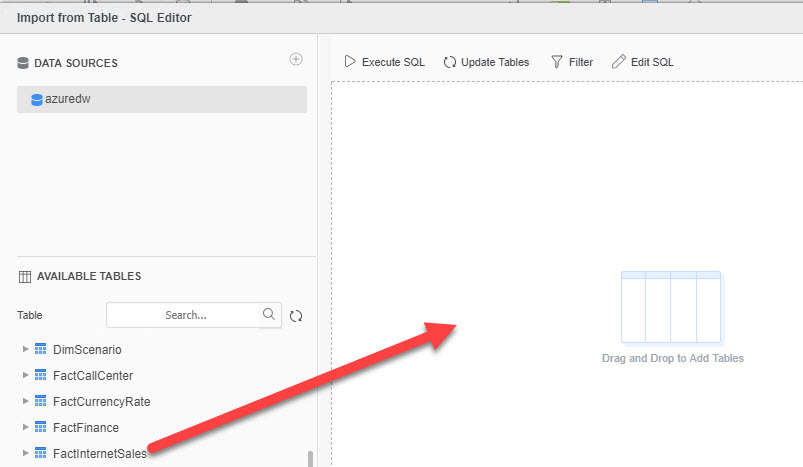
- Drag and drop the FactInternetSales onto the right surface. This table contains sales information of the virtual company AdventureWorks:

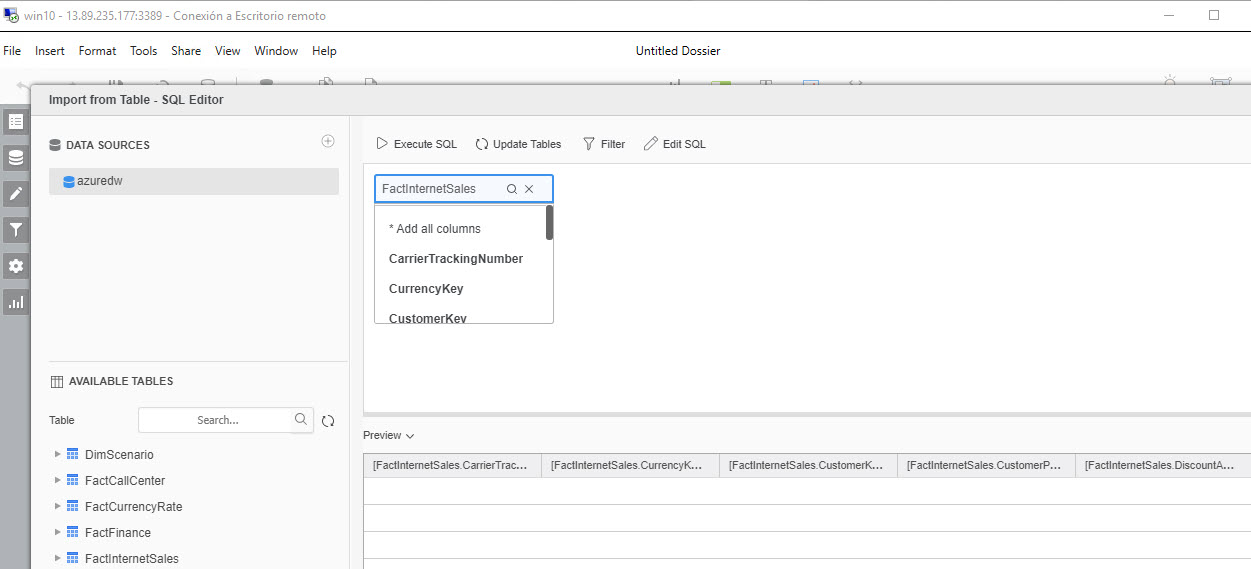
- Select the columns of the table that you want to add:

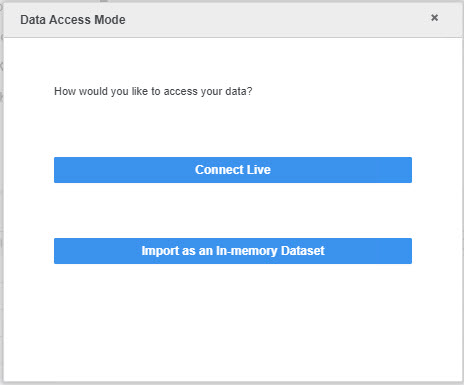
- There are two options here. Connect Live is a connection online to ASWD. This option is recommended if you know that the data is frequently updated. The Import as In-memory Dataset will import all the data in a local Dataset in-memory. This option is to have the data locally:

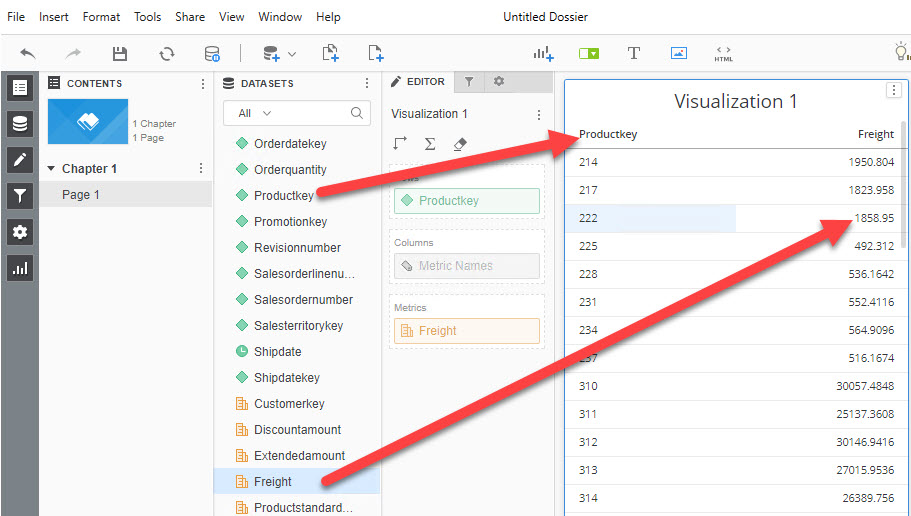
- Drag and drop the Productkey and the Freight. You will be able to see the Freight by product:

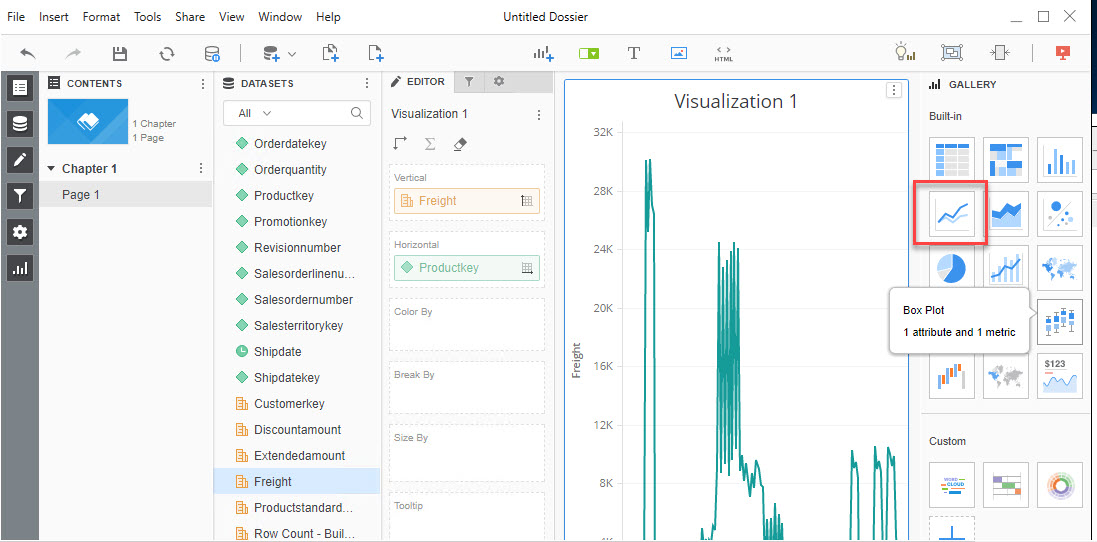
- You can now select the the line chart to select a graph for the data:

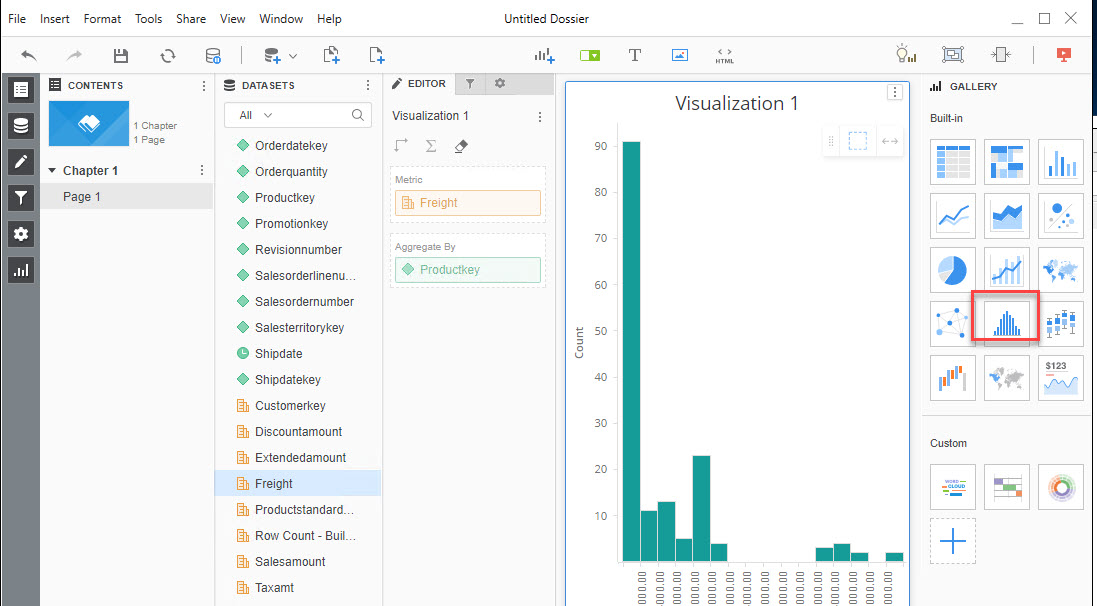
- As you can see, you have multiple types of charts like histograms, chart lines, pie charts, network, etc:
Conclusion
In this article, we learned how to connect to ASDW using MicroStrategy. We need to know the Azure SQL Server name, Azure SQL Login, password. Also, it is necessary to configure the IP of the machine in the Azure firewall using a rule.
Once that it is configured, creating reports is a straightforward process. You can easily create charts and generate your customized reports.
References
For more information, refer to the following links:


