Welcome to Part 3 of my article detailing Windows Server Failover Clusters, SQL Server Failover Cluster Instances and Always On Availability Groups. Following on from Part 2, we'll get the SQL Server FCI installed and configured on Node 1 and Node 2 and the stand alone instances deployed to Node 3 and Node 4.
For the purposes of this article the following apply
| AO | Always On |
| FCI | Failover Cluster Instance |
| iSCSI | Internet Small Computer System Interface |
| SAN | Storage area network |
| Replica | An instance of SQL Server that is part of an Always On group |
| WSFC | Windows Server Failover Cluster |
| vNIC | Virtual network card |
| vCPU | a proportionate share of a physical host CPU (no one to one representation) |
| OS | Windows Operating System |
At this point in the article, you should now have a very good understanding of the cluster topology, the Windows 2012 Operating System and the associated infrastructure (disks, IP addresses, computer\network names, etc). You should also have readily available, your 4 node cluster and domain controller\SAN. Before going any further in the guide, I would urge that if you have any knowledge gaps or uncertainties in the above, that you revisit the previous Parts and fully familiarise yourself with all the steps. Don't be afraid to play with the quorum and the clustered Application Role which contains your shared disks. Understand what happens when the objects failover to a partner node. Once we have the FCI installed we'll look at how to test a typical failover after a simulated hardware outage on the FCIs active node.
Firstly, before we start the SQL Server deployments, let's take a minute or two to discuss the creation of Active Directory Computer Name Objects and Virtual Computer Objects.
During this guide you have deployed your own domain controller and 4 Windows server cluster nodes, you have likely run as the domain administrator and you won't have encountered any permission issues. However, in reality, before you the DBA receive your nice new shiny Windows Server Cluster, the core deployments would likely have been carried out by the infrastructure team. All server builds and storage provisioning would have been covered for you, you likely have a low privilege domain user account too. When attempting to install the failover cluster instance (or indeed the Always On listener) as a low privilege user , you will almost certainly encounter an error where the computer object creations fail. Due to changes in the way failover clustering works, it is necessary to pre stage the relevant computer objects if the user carrying out the install has insufficient privileges in the Active Directory domain catalog. For the most part, you only need to complete step 3 of the KB below.
Pre Stage Cluster Computer Objects: http://technet.microsoft.com/en-us/library/dn466519.aspx
If you would like to deploy the Windows Server Failover Cluster (deployed in Part 2) as a low privilege user you would also need to complete the first steps of the link above to Pre stage the Cluster Name Object. This computer account then requires privileges assigned to allow it to automatically create the Virtual Computer Objects in step 3 of the KB. The VCOs are required for the FCI networkname and the Always On listener networkname.
Deploying A SQL Server Failover Cluster Instance
The instance deployment is launched from the SQL Server installation center. Executing SETUP.EXE will open the installation center and on the left hand menu under "Installation", you may deploy either a New Standalone instance (the first option) or a New Failover Clustered Instance (the second option). The third option is used to add a cluster node to an existing Failover Cluster Instance of SQL Server.
I'll be starting the installation from Node 1, the first task is to ensure that the pre staged cluster role and its disks are online on Node 1. If they're not, move the role now. As we wish to deploy a new clustered instance we need to select the second option from the installation center, select this now to start the installation.
The first few screens of the wizard are fairly simple, the first dialog checks the setup rules. Ensure there are no issues and click "OK" through this dialog. On the next dialog you will be required to provide a licence key or select a free edition to install, Click "Next" through this dialog too after making your selection. Accept the End user Licence Agreement terms and click "Next" to continue.
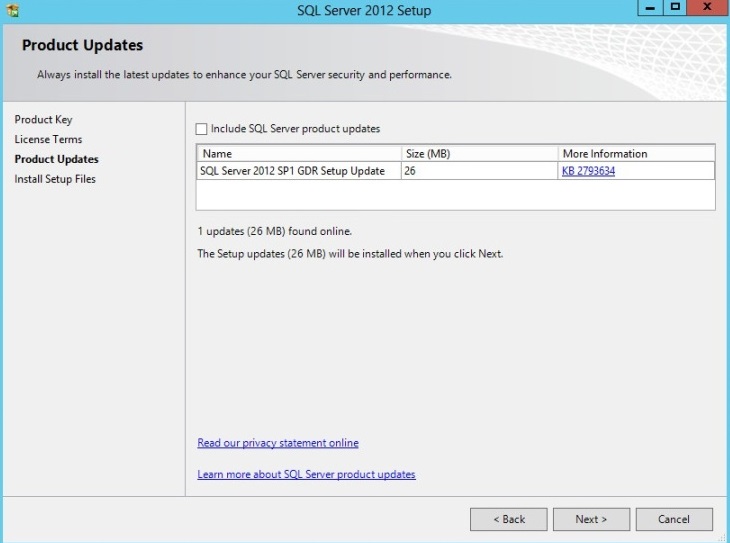
At the Product Updates dialog, either check or uncheck the option to download SQL Server updates and click "Next". This new feature allows the installer to slipstream any updates it receives from the Microsoft Update site.
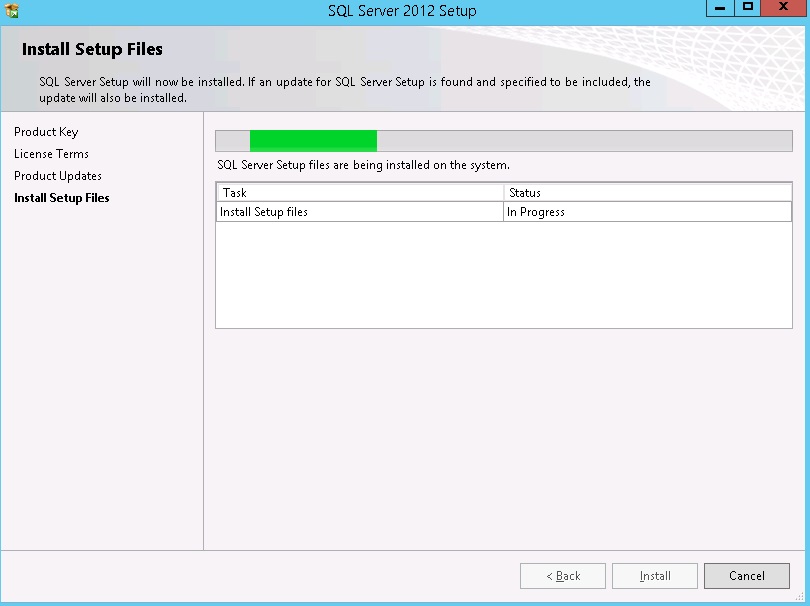
To install the setup support files click "Install" to continue.
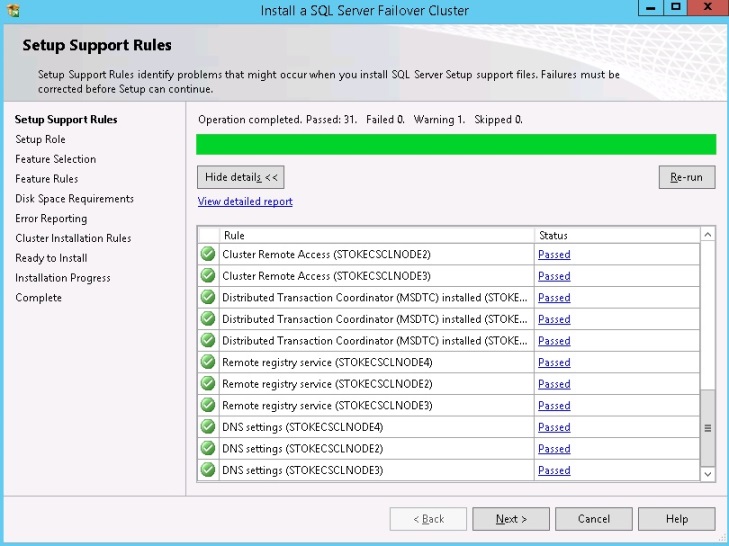
On the setup support rules, review and click "Next" to continue.
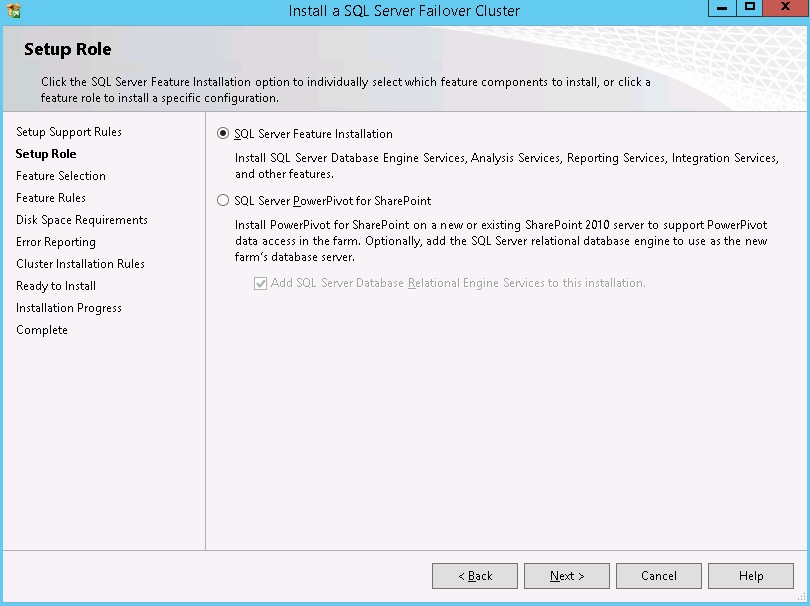
On the setup role screen, select "SQL Server feature installation" and click "Next" to continue
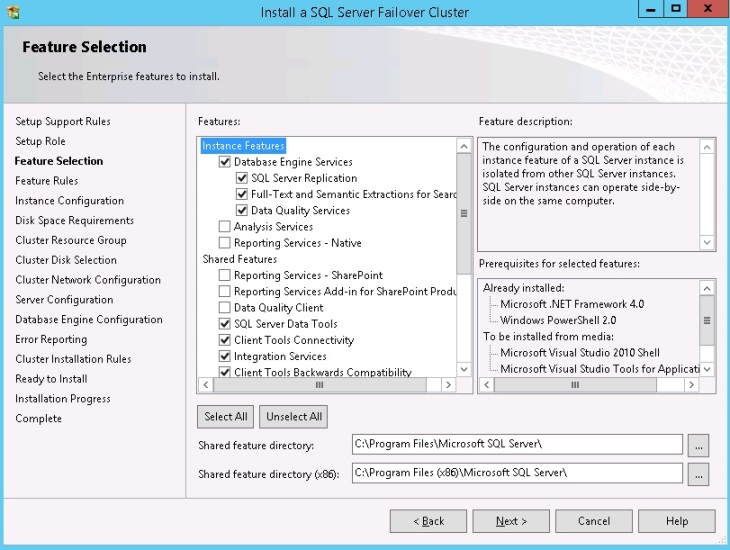
Here, on the next dialog, we select the features we wish to install, and also set the shared feature installation directory. Click "Next" to continue
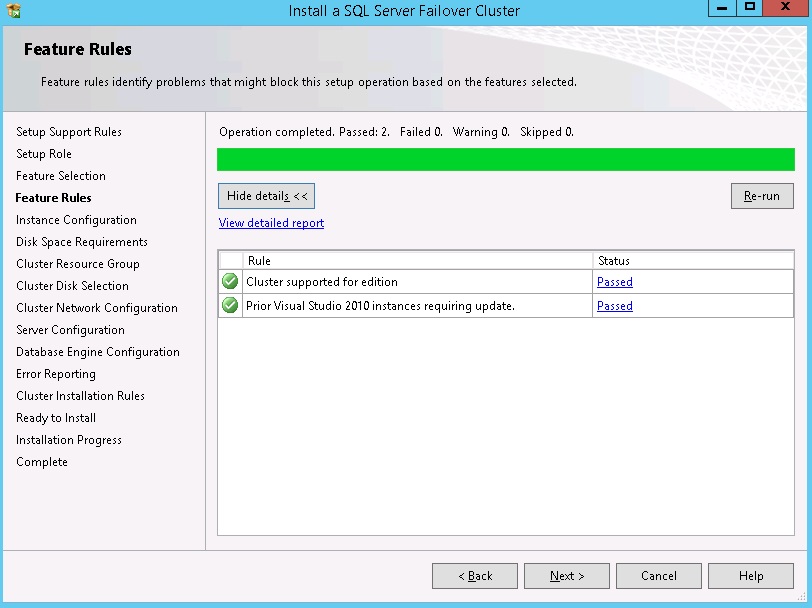
Review the feature rules and click "Next" to continue
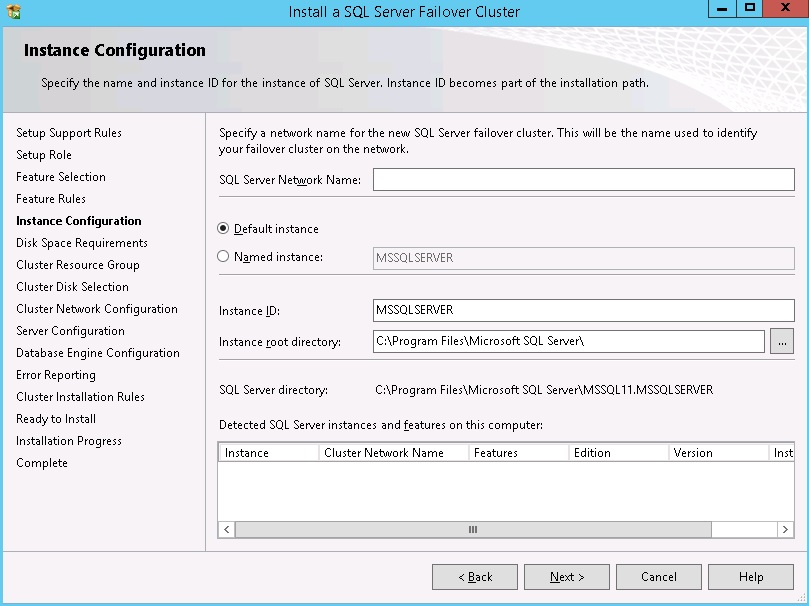
Supply a unique virtual network name and an instance name, and then click "Next" to continue. In this case I am installing a default instance.
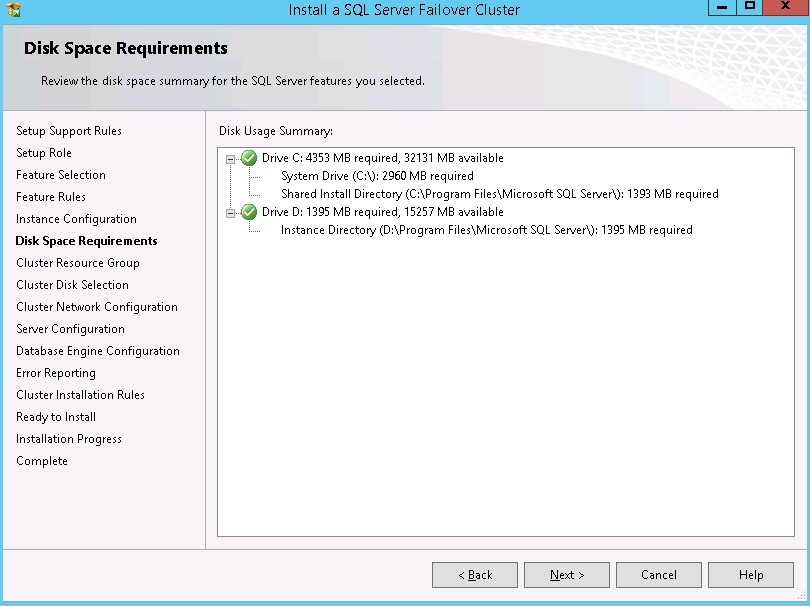
Click "Next" through the disk space requirements screen.
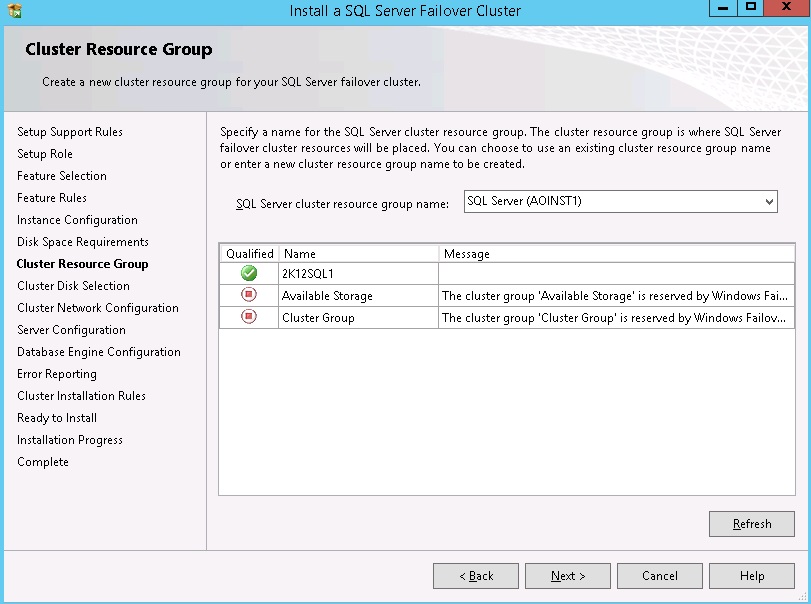
Select the cluster resource group, if you have pre staged a clustered role and shared disks, use the DDL box to select the role name.
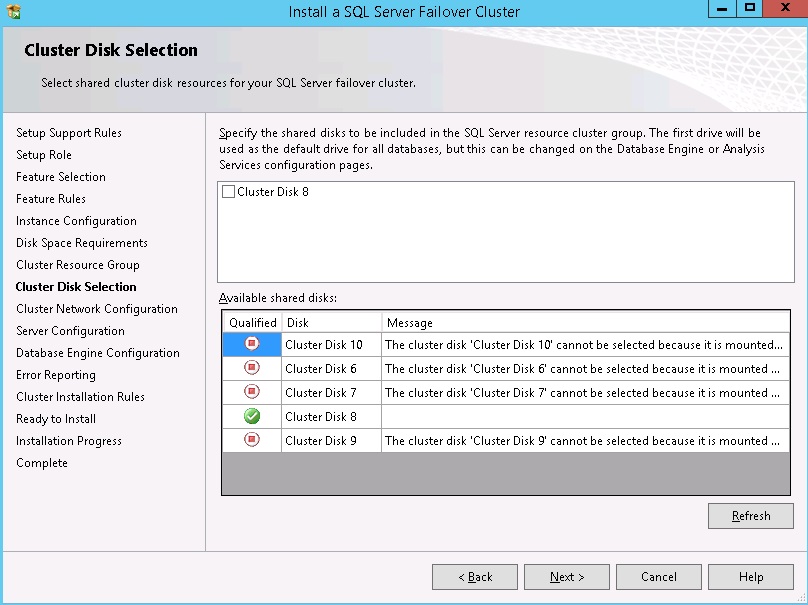
On the cluster disk selection, select any disks that are required.
Note: When using mounted volumes it is usual to only select the root drive for installation. One root drive per installation is permitted. The same root drive cannot be used for multiple clustered instances.
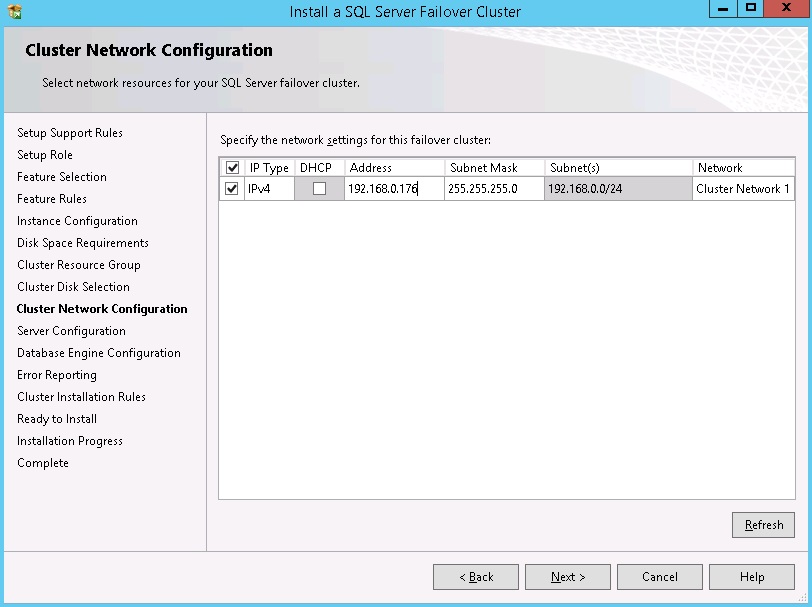
On the cluster network configuration screen, specify the network settings to be used. It is usual to see only one network here. All networks that are not configured for Public access will be excluded from this section of the installer. Click "Next" to continue.
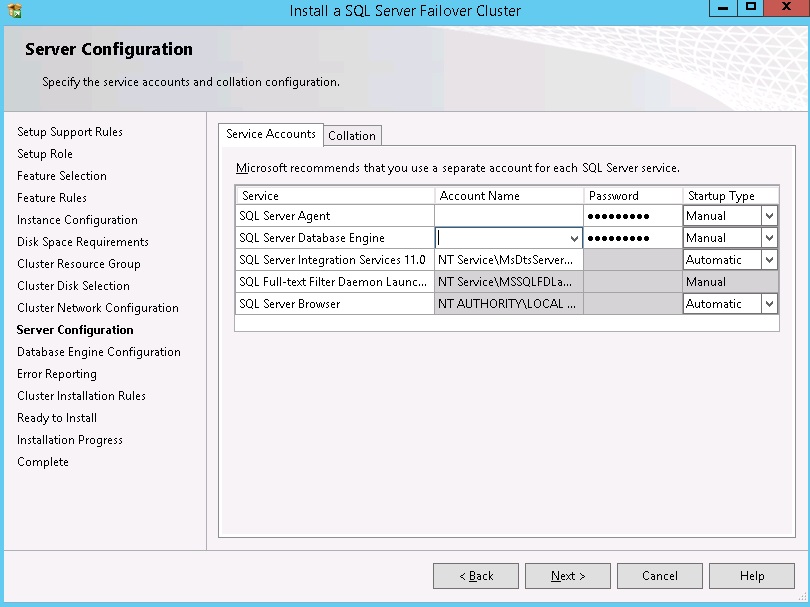
On the server configuration screen, supply any service accounts and also set the collation. Notice, you do not get the option to set the SQL Server service and agent service startup types, they must be set to manual as the cluster service controls the starting and stopping of the services.
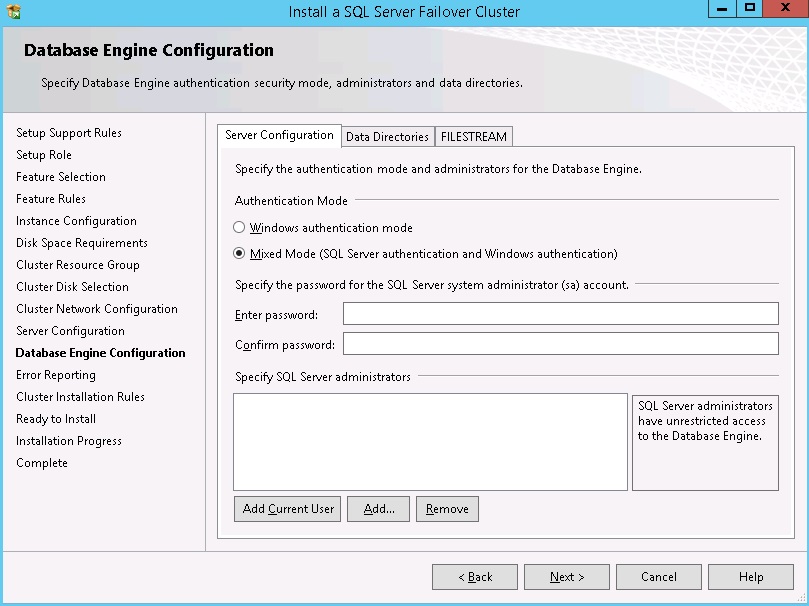
On the database engine configuration screen, firstly set the account provisioning. Choose between Windows or Mixed authentication, also select a user or group to provision to the SYSADMIN group. This should be at least yourself or, if you have an AD group for DBAs, a specific AD group.
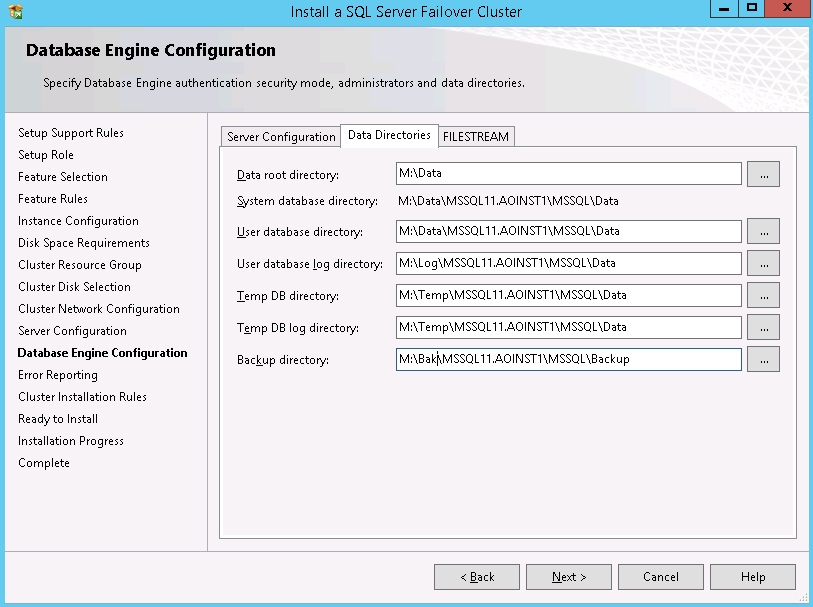
On the data directories tab, set the locations for the shared instance database files. When using mounted volumes, ensure you install to a subfolder, an example is shown below
Enable filestream if required and click "Next" to continue. Also select the error usage and reporting options and click "Next" to continue.
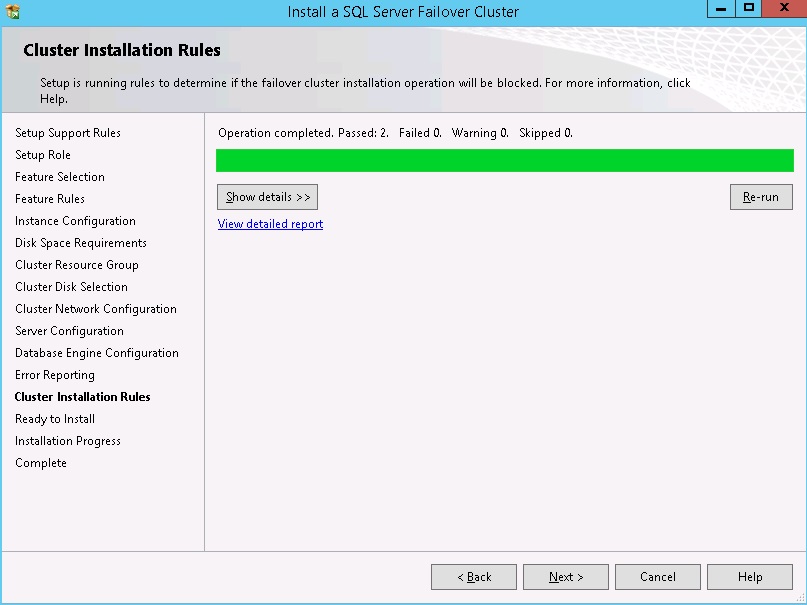
Review the detail for the cluster installation rules and click "Next" to continue
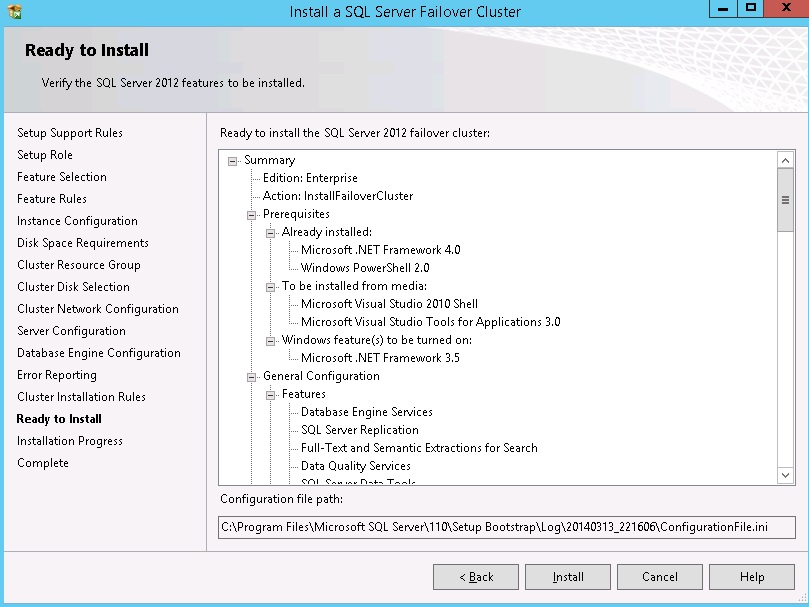
At the ready to install dialog, click "Install" to continue
Once the installation completes click "Close". This completes the install of the cluster SQL Server instance, all we need to do now is to join Cluster Node2 to the new instance.
To join Node 2 to the new instance, logon to node 2 and launch the SQL Server installer. From the Installation menu in the installation center, select the third option to add a node to a SQL Server failover cluster. The wizard has fewer steps as the instance configuration has already been completed, all that is left is to update the binaries onto the new node and update the cluster configuration, this is all performed by the installer.
You will see the setup support rules dialog, review and click "OK" to continue. You will be required to provide a licence key or specify a free edition to install, click "Next"
Accept the licence terms and click "Next" to continue. On the product updates page check or uncheck the option to check for SQL Server product updates and click "Next". Once the setup support files have been installed you should see the setup support rules dialog. Check the results and click "Next" to continue

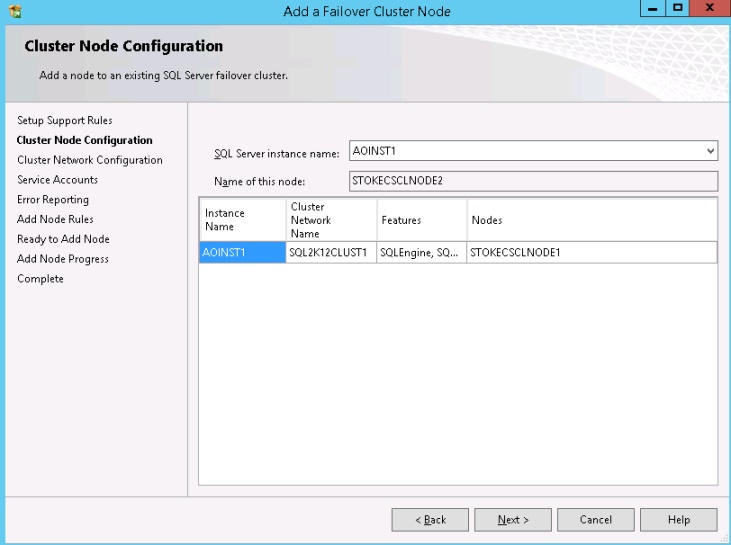
On the cluster node configuration dialog, select the instance you wish to join and click "Next" to continue
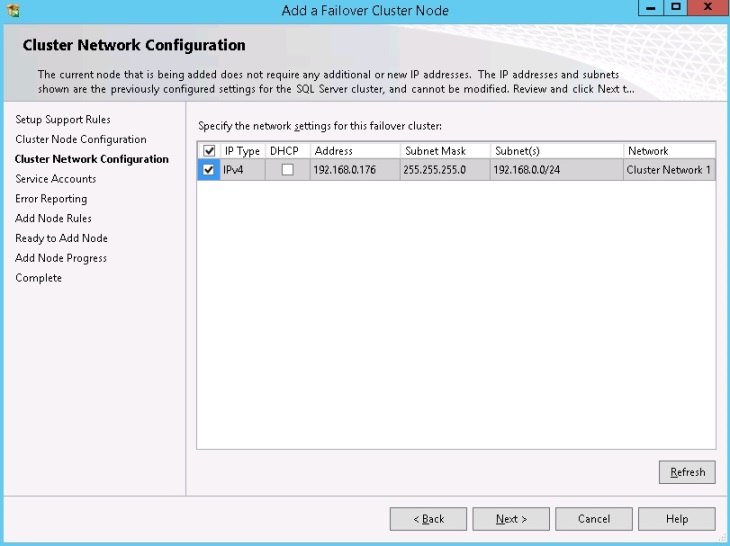
On the cluster network configuration dialog, review the IP address details and click "Next".
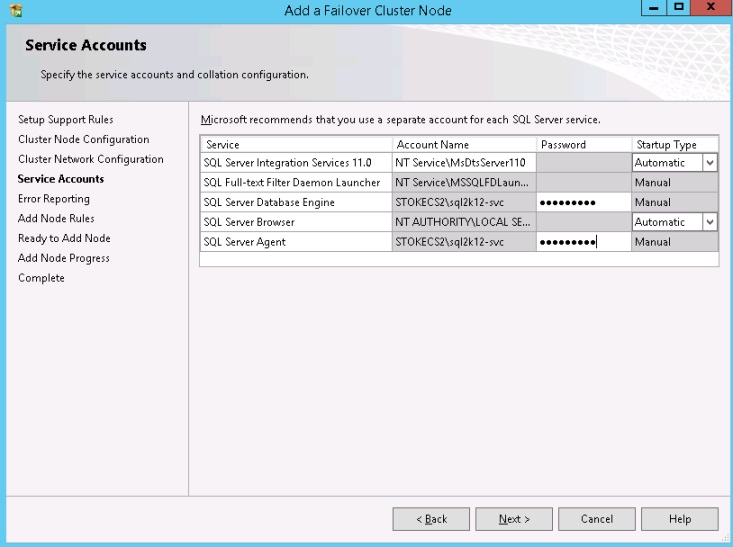
On the service accounts tab, verify the account details used during the previous instance installation and confirm the password(s).
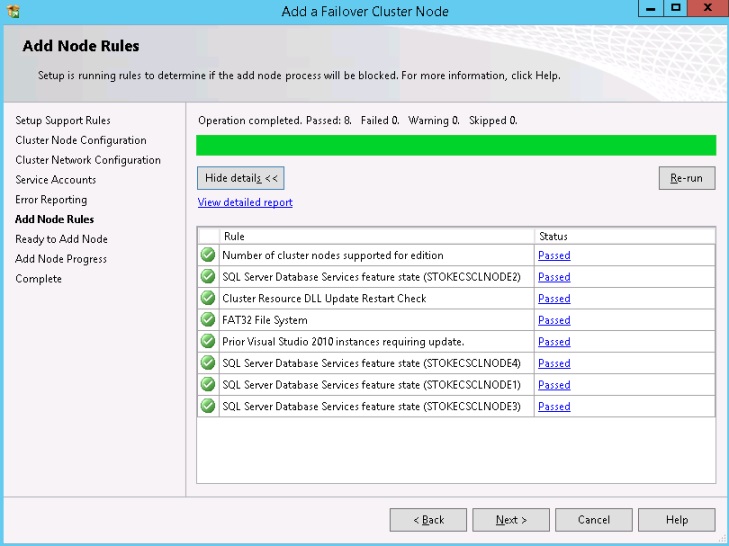
Configure error and usage reporting and click "Next" to continue. On the add node rules dialog review and click "Next"
On the ready to add node dialog, review and click "Install" to continue.
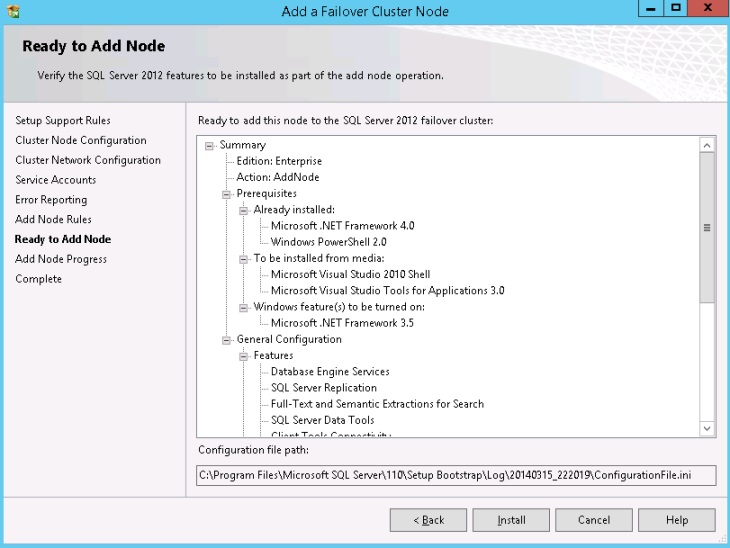
Once the installation completes, review the details and click "Close". That completes the add node wizard, at this point the Failover Cluster Instance has been installed to both Node1 and Node2. Now let's have a look at the failover of this clustered role to get an idea of what happens during various outage scenarios.
We'll test the failover of the instance by
- disconnecting the public NIC on the active node
- terminate the SQL Server exe process on the active node
- manually failover the clustered role via the Failover Cluster Manager
Disconnect Public NIC on Node2
This action will failover the instance to Node1. Simply, when an outage on the NIC that has been identified as the Public client connection interface, the system will automatically move the clustered role to a partner node, in this case Node1. The network connection configuration may be viewed in the Failover Cluster Manager console.
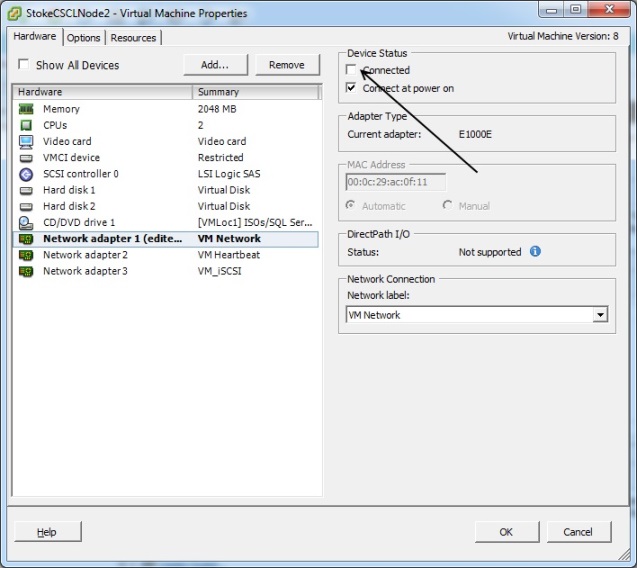
With the clustered role owned by Node2, I simply edit the Node2 virtual machine settings and clear the vNIC connected checkbox as shown below. Click "OK" to save the changes
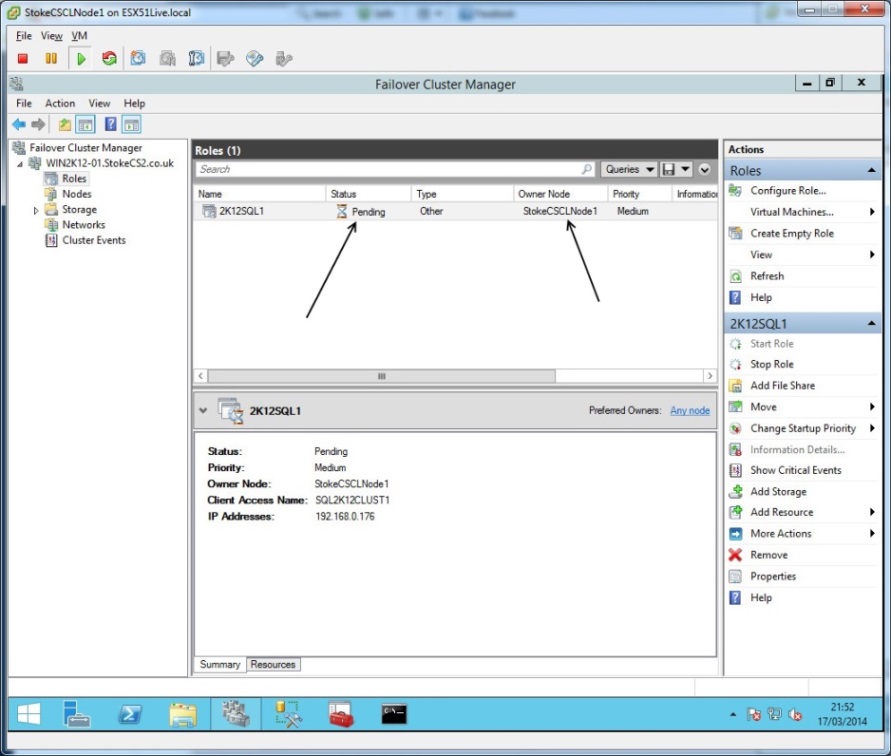
Switching to Node1, I get a quick response. Failover Cluster Manager already shows the group has moved to Node1 and has entered the pending state. Once all resources have moved and been brought online the role will enter the running state. This concludes the hardware failover test.
Terminate SQLSERVR.EXE on Node1
If the previous failover test was carried out successfully, the role will restart on Node1.
Now we're going to test a software failover, do this on Node1 by opening Task Manager and killing the SQLSERVR.exe process. After this is done, nothing happens. Ah, here you were, expecting a failover to Node2? But why didn't a failover occur?
Let's check the properties for the SQL Server Service resource in Failover Cluster Manager to see why. As you can see, by the resource defaults below, the policy response to a resource failure will attempt to restart on the current node first, this is the default for every resource.
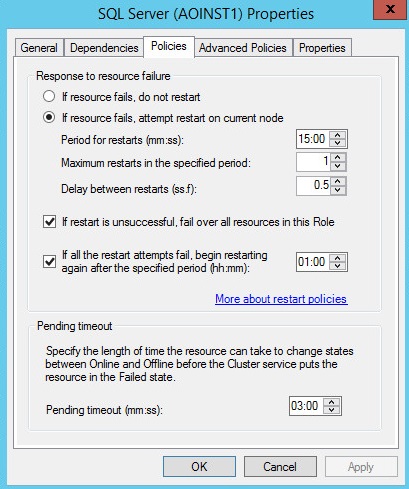
An unexpected outage of the SQL Server service, for instance terminating the process, will initiate an automated restart attempt based on the resource policy above. Process terminations typically happen as a result of a bug check crash, but can occur for any number of reasons.
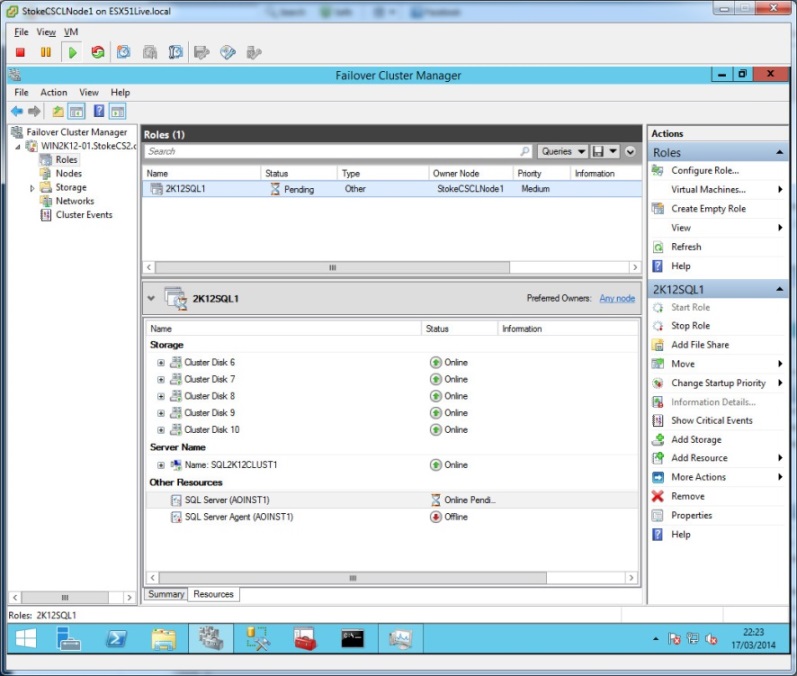
Manual Role Failover on Node1
A manual failover of the clustered role will initiate a controlled failover to a partner node. During manual failover you may select from "Best possible node" or "Select node". The best option will make a choice for you, the selected will offer a list of nodes and allow you to choose.
So, the difference between the NIC disconnection and the EXE termination equates to the difference between a hardware failure and a software failure respectively. A hardware failure is an instant failover to a partner node. A software failover, assumes the failover was not catastrophic and attempts to restart on the same node. However, a series of software failures in quick succession, or at least within the constraints laid out in the resource failure policy, will result in a failover to a partner node.
This concludes the failover tests, have a good look at these and ensure that you fully understand what is happening before proceeding any further.
Deploy The Standalone SQL Server Instances
Now that you have grasped the FCI install and failover scenarios it's time to install the 2 stand alone instances to Node3 and Node4, as part of our pre requisites for the Always On group we will be creating in Part 4 of this guide. I'll not cover the installer for the standalone instances here, once you select Option 1 in the SQL Server installation center, the wizard screens are pretty much similar to the clustered install. The only thing to note are the standalone file locations which I have chosen below.
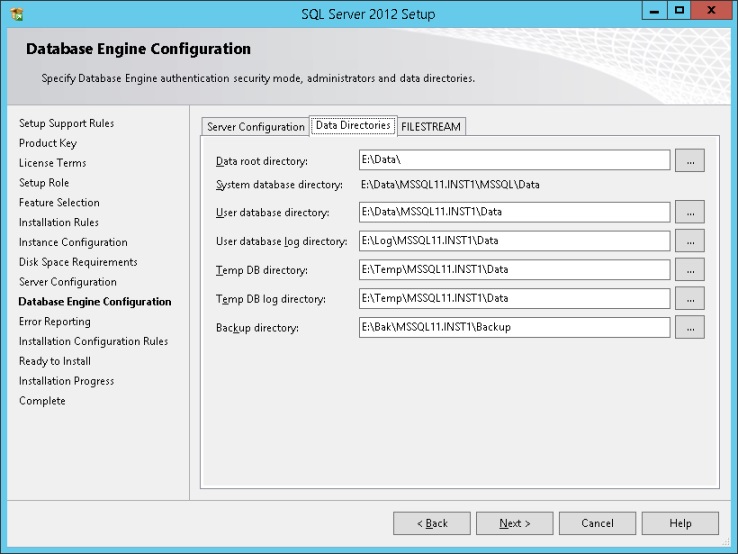
That's it, the standalone installs are straight forward, I'm sure you've already performed these installs many times already. So, once the instances have been installed and you are confident with all of the above, move to Part 4 where we deploy the AO group and look at failover scenarios and general Always On group properties.
As always, if you have any questions on the above, post in the topic discussion for this part and I'll help all I can.


